Zucchini Raisin Bread Fresh and Flavorful Recipe

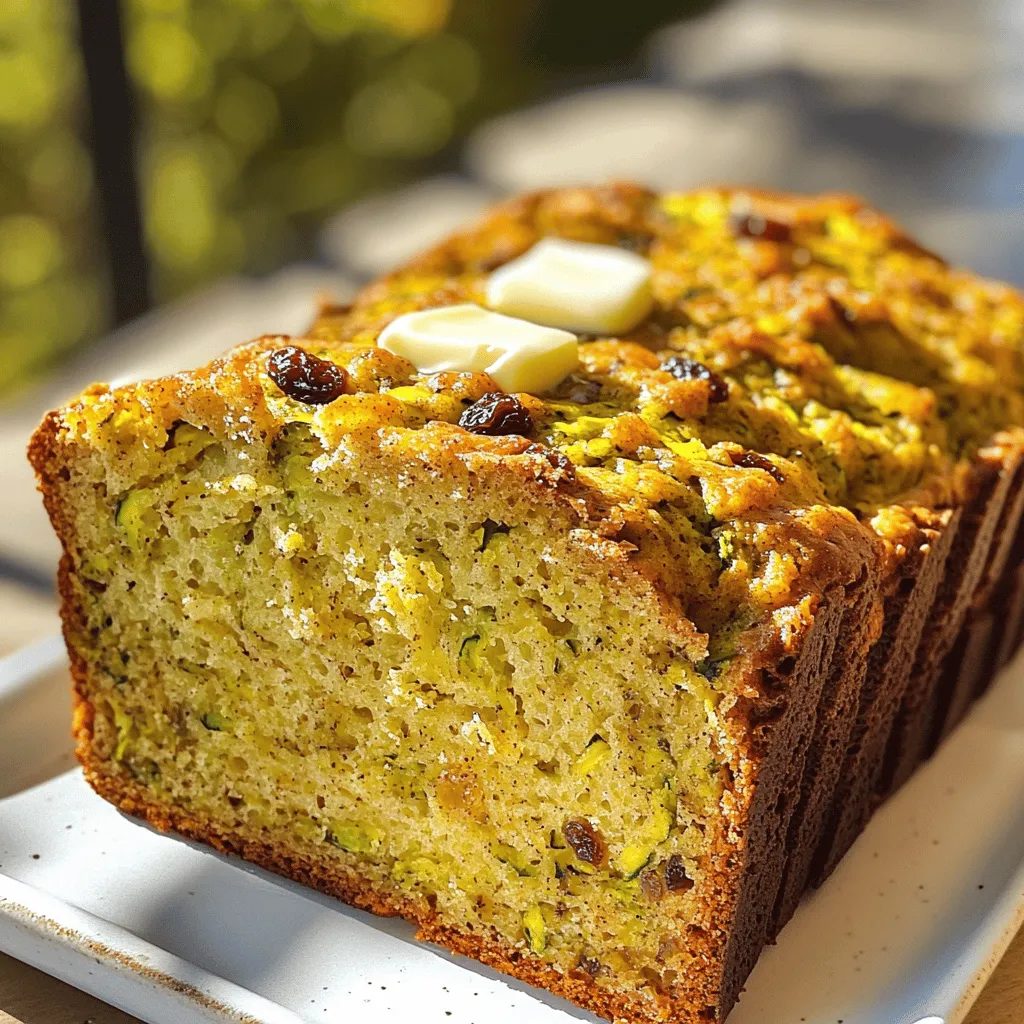
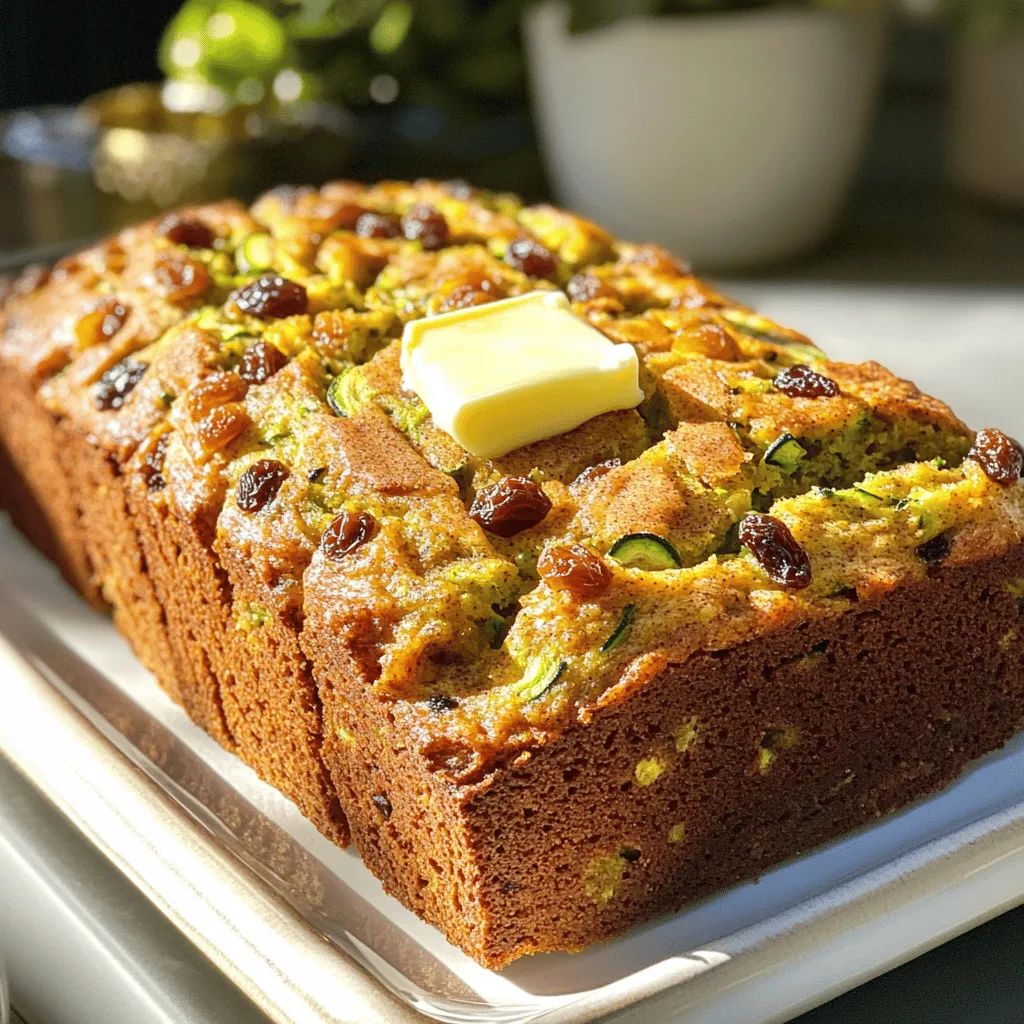
Looking to bake something delicious and unique? Let me introduce you to my Zucchini Raisin Bread, a fresh and flavorful treat you won’t be able to resist! This delightful recipe combines sweet raisins, moist zucchini, and warm spices, creating a delightful balance in every slice. Whether for breakfast, a snack, or dessert, this bread is sure to please. Grab your ingredients, and let’s get started with this easy, step-by-step guide!
Ingredients
List of Ingredients
To make delicious zucchini raisin bread, gather these key items:
- 2 cups finely grated zucchini (about 2 medium zucchinis)
- 1 cup granulated sugar
- 1/2 cup packed light brown sugar
- 1/2 cup vegetable oil (or melted coconut oil for added flavor)
- 3 large eggs, at room temperature
- 2 teaspoons pure vanilla extract
Next, let’s look at the dry ingredients:
- 2 cups all-purpose flour
- 1 teaspoon baking soda
- 1/2 teaspoon baking powder
- 1 teaspoon ground cinnamon
- 1/2 teaspoon ground nutmeg
- 1/4 teaspoon fine sea salt
For some extra texture and flavor, you can add:
- 1 cup raisins (or substitute with dried cranberries for a twist)
- 1/2 cup chopped walnuts or pecans (optional, for added crunch)
These ingredients come together to create a moist and flavorful bread. The zucchini adds moisture, while the sugars provide sweetness. The spices give warmth and depth. You can choose nuts or dried fruits based on your taste. This recipe is versatile and fun to make.
Step-by-Step Instructions
Preparation
1. Preheat your oven to 350°F (175°C). This step is key for even baking.
2. Prepare the loaf pan by greasing and flouring it. You can also line it with parchment paper for easy removal.
3. Combine wet ingredients. In a large mixing bowl, add the grated zucchini, granulated sugar, brown sugar, vegetable oil, eggs, and vanilla extract. Whisk until smooth.
4. Mix dry ingredients in a separate bowl. Combine the flour, baking soda, baking powder, ground cinnamon, ground nutmeg, and sea salt. Whisk these together to blend evenly.
Combining Ingredients
1. Gradually add dry to wet ingredients. Slowly stir the dry mix into the wet mixture. Use a spatula and fold gently until just combined.
2. Tips on mixing: Avoid overworking the batter. A few lumps are fine. This keeps the bread light and fluffy.
Baking the Bread
1. Pour and smooth the batter into the prepared loaf pan. Use a spatula to ensure the top is even.
2. Baking time is important. Bake for 50 to 60 minutes. Check for doneness by inserting a toothpick in the center. It should come out clean or with a few moist crumbs.
Tips & Tricks
Perfecting the Recipe
To make the best zucchini raisin bread, use fresh ingredients. Fresh zucchinis give your bread a great taste and moisture. Always check for firmness and bright color when choosing zucchinis.
Egg temperature matters too. Using eggs at room temperature helps them mix better. This creates a smoother batter. For best results, take your eggs out of the fridge 30 minutes before you bake.
Zucchini has a lot of water, so you need to drain it well. Grate the zucchini, then squeeze it in a clean towel to remove excess moisture. This ensures your bread isn’t soggy. The right moisture level keeps the bread soft and fluffy.
Serving Suggestions
Zucchini raisin bread is great on its own, but you can add toppings for more flavor. Spread a thin layer of butter or cream cheese on warm slices. A sprinkle of cinnamon on top adds a nice touch.
Pair your bread with fresh sides like fruit or yogurt. This makes a lovely breakfast or snack. For gatherings, slice the bread into thick pieces and arrange them on a beautiful platter.
To elevate the presentation, garnish with fresh zucchini slices or a dusting of powdered sugar. This adds color and makes your dish pop at any event. For a fun twist, serve with a side of honey for dipping.

Variations
Flavor Adjustments
You can change the flavors in your zucchini raisin bread easily. If you do not like raisins, try dried cranberries. They add a nice tartness. You can also use chopped dates or even chocolate chips for a sweet twist.
For nuts, walnuts are popular, but pecans work well too. You can skip nuts if you prefer a nut-free option.
To spice things up, think about adding different spices. Try ginger or allspice for a warm flavor. A little lemon zest can brighten up the taste. Even a dash of cocoa powder can give it a rich flavor.
Dietary Considerations
If you need a gluten-free option, use almond flour or a gluten-free blend. Make sure to check that all your other ingredients are also gluten-free.
For a vegan version, swap the eggs for flaxseed meal. Mix one tablespoon of flaxseed with three tablespoons of water. Let it sit for a few minutes to thicken. For dairy, you can use almond milk or coconut yogurt instead of regular yogurt.
These simple tweaks will help you make zucchini raisin bread fit your taste and dietary needs.
Storage Info
Short-term Storage
To keep your zucchini raisin bread fresh, let it cool completely. This step is key. If you wrap it too soon, steam builds up, making the bread soggy. Once cool, wrap the bread tightly in plastic wrap or foil. You can also place it in an airtight container.
You can store it at room temperature for about three days. If you live in a hot, humid area, the fridge is better. In the fridge, it stays good for up to a week. Just remember, the cold can make it a bit dry. So, eat it quickly!
Long-term Storage
Freezing works well if you want to save some for later. Slice the bread before freezing. Wrap each slice tightly in plastic wrap, then place them in a freezer bag. This method keeps out air and moisture.
When you want to enjoy it again, remove a slice from the freezer. Let it thaw at room temperature or pop it in the microwave for a few seconds. If you reheat in the oven, wrap it in foil to avoid drying out.
Zucchini raisin bread lasts three months in the freezer. For the best taste, eat it within two months. Enjoy every bite of this delicious bread!
FAQs
Common Questions
How to tell if my zucchini is fresh for baking?
Look for zucchini that is firm and has shiny skin. A fresh zucchini should feel heavy for its size. It should not have any soft spots or wrinkles. These signs show that the zucchini is ripe and ready for baking.
Can I make zucchini raisin bread without eggs?
Yes, you can make zucchini raisin bread without eggs. For each egg, you can use 1/4 cup of unsweetened applesauce. You can also use flaxseed meal mixed with water. Mix one tablespoon of flaxseed meal with three tablespoons of water and let it sit for a few minutes.
What other recipes can I use zucchini in besides bread?
You can use zucchini in many recipes. Try making zucchini muffins, stir-fries, or zucchini fritters. You can also add zucchini to soups, salads, or even pasta dishes. The options are endless!
Baking Concerns
What to do if my bread is too dense?
If your bread is too dense, it may be due to overmixing the batter. Next time, mix just until the ingredients blend. Also, check your baking powder and baking soda for freshness. If they are old, they may not work as well.
How long can I store baked zucchini raisin bread?
You can store baked zucchini raisin bread for about 3 to 5 days at room temperature. Keep it in an airtight container. If you want to keep it longer, freeze it for up to three months. Just wrap it well to avoid freezer burn.
This blog post covered all the essential steps to make delicious zucchini raisin bread. We discussed ingredients, from zucchinis to spices, and how to mix them correctly. I shared tips for baking, serving, and even variations to try. Lastly, I included the best ways to store your bread. Remember, with fresh ingredients and care, you can create a treat that everyone loves. Happy baking, and enjoy your tasty creation!


![- 1 cup all-purpose flour - 2 tablespoons granulated sugar - 2 teaspoons baking powder - ½ teaspoon baking soda - ¼ teaspoon salt - 1 cup buttermilk - 1 large egg, lightly beaten - 2 tablespoons unsalted butter, melted - 2 teaspoons pure vanilla extract - 1 tablespoon ground cinnamon - 3 tablespoons brown sugar, packed - 1 cup powdered sugar - 3 tablespoons cream cheese, softened to room temperature - 2-3 tablespoons milk (to achieve desired icing consistency) When I make these pancakes, I always start with the dry ingredients. This step is key. I mix the flour, sugar, baking powder, baking soda, and salt in a bowl. It’s important to whisk these well. This ensures even rising and sweetness. Next, I move to the wet ingredients. I pour the buttermilk into a separate bowl. Then, I add the beaten egg, melted butter, and vanilla extract. Whisk until smooth. This mixture is crucial for the pancake’s fluffiness. Now, let's talk about the cinnamon filling. In a small bowl, I combine ground cinnamon and brown sugar. This mix gives the pancakes their sweet, spicy swirl. Finally, for the icing, I beat together powdered sugar and softened cream cheese. I add milk slowly until I reach the right consistency. Drizzling this icing over the warm pancakes is pure bliss. For the full recipe, check out the complete guide. Enjoy your cooking adventure! 1. In a mixing bowl, combine the all-purpose flour, granulated sugar, baking powder, baking soda, and salt. Mix well until the dry ingredients are blended. 2. Take another bowl and whisk together the buttermilk, the lightly beaten egg, melted butter, and vanilla extract. Make sure this mixture is smooth. 1. Gradually pour the wet ingredients into the bowl with the dry ingredients. Stir gently until just combined. It’s okay if there are a few lumps; this helps keep your pancakes fluffy. 2. Be careful not to overmix. Overmixing can make the pancakes tough. 1. In a small bowl, combine the ground cinnamon and packed brown sugar. Mix them well to combine. This mixture will create a sweet swirl in your pancakes. 1. Preheat a non-stick skillet or griddle over medium heat. Pour about ¼ cup of pancake batter onto the skillet for each pancake. 2. When the batter starts bubbling on the surface (about 1-2 minutes), sprinkle about a teaspoon of the cinnamon filling mixture onto the pancake before flipping it. 3. Flip the pancake carefully and cook for another 1-2 minutes, until golden brown. Repeat this process with the remaining batter and filling. 1. In a small bowl, mix the powdered sugar, softened cream cheese, and enough milk to reach your desired icing consistency. Blend until the mixture is smooth. Now you're ready to enjoy your delicious cinnamon roll pancakes! For precise measurements and more tips, check the Full Recipe. To make fluffy pancakes, avoid overmixing the batter. When you mix too much, the pancakes can turn tough. You want a few lumps in the batter; that is okay! Use fresh baking powder and baking soda. Old leavening agents may not make your pancakes rise well. Check the expiration date on the package to be sure. Heat is key when cooking pancakes. Adjust the heat as needed to prevent burning. If your skillet is too hot, the pancakes may burn on the outside and stay raw inside. A non-stick skillet helps with easy flipping. It also allows you to use less oil. Always preheat the skillet before pouring your batter. The icing makes these pancakes special. To achieve your desired thickness, adjust the milk quantity. Start with 2 tablespoons and add more if needed. Drizzle icing over warm pancakes for best results. The warmth helps the icing melt into the pancakes, making each bite delightful. {{image_4}} Cinnamon roll pancakes are fun! You can change them up in many ways. Let’s explore some tasty options. You can add chopped walnuts or pecans to the batter. This nutty addition gives a lovely crunch. It also adds healthy fats and protein. Just mix in about ½ cup of nuts before cooking. You will love the extra texture and flavor. Want a fruity twist? Add diced apples or berries to the batter. They add sweetness and freshness. Try using about 1 cup of fruit. Blueberries or chopped strawberries work great. Apples give a nice cinnamon flavor when cooked. Your pancakes will be more colorful and tasty! Feel free to experiment with spices. Adding nutmeg or cardamom can change the taste. Start with ¼ teaspoon of each spice. You will enjoy the new flavors. These spices pair well with cinnamon and make your pancakes special. For the complete recipe, check out the [Full Recipe]. Enjoy your cooking adventure! You can store leftover cinnamon roll pancakes in an airtight container. They will stay fresh in the refrigerator for up to 3 days. This keeps them moist and ready for a quick breakfast or snack. To freeze your pancakes, lay them in a single layer on a baking sheet. Once frozen, transfer them to a freezer-safe bag. This method keeps them from sticking together. You can pull out as many as you need later. When you are ready to enjoy your pancakes again, simply microwave or toast them. If you want to make them even better, add extra icing on top while they warm up. This gives them a fresh taste and makes them feel special again. Yes, you can use whole wheat or gluten-free flour. However, this may change the texture of your pancakes. Whole wheat flour adds a nutty flavor and denser texture. Gluten-free flour can make them lighter but may need extra moisture. To make these pancakes dairy-free, swap buttermilk for almond milk. Use a dairy-free butter alternative in the recipe. This ensures you keep the great taste while avoiding dairy. Cinnamon roll pancakes are delicious on their own. However, they pair well with fresh fruits, like strawberries or bananas. Whipped cream can add a light and fluffy touch. You can also drizzle on more maple syrup for added sweetness. For the full recipe, check out the details above. Cinnamon Roll Pancakes are simple and fun to make. We combined dry and wet ingredients with cinnamon filling for a tasty treat. Use tips for fluffiness, cooking, and icing to ensure success. You can customize these pancakes by adding nuts or fruits. Remember to store leftovers well for future enjoyment. Try new variations each time for a delightful twist. These pancakes can impress anyone and become a family favorite. Enjoy your cooking adventure!](https://dishtreats.com/wp-content/uploads/2025/06/80f0c7ad-2155-4787-b1f4-2bdd3b819c66-768x768.webp)

![To make a true classic key lime pie, you need these key items: - 1 ½ cups graham cracker crumbs - ½ cup unsweetened coconut flakes - ⅓ cup granulated sugar - ½ cup unsalted butter, melted - 4 large egg yolks - 1 (14 oz) can sweetened condensed milk - ½ cup freshly squeezed key lime juice (approx. 12 key limes) - Zest of 2 key limes - 1 cup heavy whipping cream - 2 tablespoons powdered sugar - Lime slices and extra zest for garnish These ingredients work together to create a sweet, tangy pie that sings of sunshine. You can add some optional ingredients to enhance your pie: - Toasted coconut flakes for extra crunch - A pinch of salt to balance sweetness - Lime zest for a stronger lime flavor These add-ons can make your pie even more delightful. If you're missing an ingredient, here are some easy swaps: - Use regular lime juice instead of key lime juice. It will taste different but still good. - Swap graham cracker crumbs with crushed vanilla wafers for a unique flavor. - Replace heavy cream with whipped topping for a lighter version. These substitutions can help you prepare the pie with what you have. For the exact steps, check out the Full Recipe. First, preheat your oven to 350°F (175°C). This step is key for a great crust. In a medium bowl, mix the graham cracker crumbs, coconut flakes, and granulated sugar. Pour in the melted butter and stir until it feels like moist sand. Next, grab a 9-inch pie pan. Press the crumb mixture into the bottom and up the sides of the pan. Make sure it’s firm and even. Bake this crust for 8-10 minutes until the edges are golden. After baking, let it cool completely. Now, let’s make the filling. In a large bowl, whisk the egg yolks until they are pale yellow. Then, add the sweetened condensed milk, key lime juice, and lime zest. Whisk until everything is smooth. You want to have no lumps here! Carefully pour this lime mixture into your cooled crust. Spread it out evenly. Bake the pie for 15 minutes. The filling should be set but still a bit jiggly in the center. After baking, take it out and let it cool at room temperature. Once it’s cool, put the pie in the fridge for at least 2 hours. This chilling time makes it even tastier! For the full recipe, check out the details above! To get the best texture and flavor in your Key Lime Pie, follow a few simple tips: - Use Fresh Key Limes: Fresh key limes give a bright taste. They also add a nice zing. - Whisk Egg Yolks Well: Whisk the yolks until they are pale. This helps create a smooth filling. - Don’t Overbake: Bake the filling until it is just set. It should still jiggle a bit in the middle. - Chill Properly: Let the pie cool at room temp before refrigerating. This step enhances the flavor. Some mistakes can ruin your pie. Here are a few to watch out for: - Skipping the Zest: The zest adds flavor and aroma. Don’t skip it! - Using Cold Ingredients: Let your ingredients reach room temperature. This helps them mix better. - Overmixing the Filling: Whisk just until combined. Overmixing can create bubbles in the filling. - Not Cooling the Crust: Always cool the crust completely before adding the filling. A warm crust can make the filling runny. Having the right tools makes cooking easier and more fun: - 9-inch Pie Pan: This is the perfect size for your Key Lime Pie. - Mixing Bowls: Use medium and large bowls for mixing your crust and filling. - Electric Mixer: This helps you whip the cream to stiff peaks easily. - Zester or Grater: A good zester is key for getting the lime zest just right. These tips and tools will help you create a perfect Key Lime Pie every time. For the full recipe, check out the [Full Recipe]. {{image_4}} You can change up the crust for your Key Lime Pie. Here are some fun ideas: - Graham Cracker Crust: This is the classic choice. It’s sweet and crunchy. - Oreo Crust: Use crushed Oreos instead of graham crackers for a chocolate twist. - Nut Crust: Ground almonds or pecans add a nice nutty flavor. Mix them with butter and a bit of sugar. - Coconut Crust: Use shredded coconut for a tropical feel. It pairs well with the lime. Want to try something different? Here are some tasty twists: - Mango Key Lime Pie: Add pureed mango to the filling for a fruity kick. - Berry Key Lime Pie: Mix in fresh berries like strawberries or blueberries for color and flavor. - Coconut Key Lime Pie: Stir in coconut milk for a creamier texture and tropical taste. - Chocolate Key Lime Pie: Add melted chocolate to the filling for a rich, sweet layer. Making your pie look great can be fun. Here are some ideas: - Whipped Cream Topping: Spread whipped cream on top. Use a spatula to make swirls. - Garnish with Lime: Add lime slices or zest for a pop of color. - Serve in Mason Jars: For a fun twist, serve individual portions in jars. - Add Fresh Berries: Place berries around the pie for extra flair. For the full recipe, check out the Zesty Classic Key Lime Pie . To keep your key lime pie fresh, cover it tightly with plastic wrap or aluminum foil. This prevents the pie from absorbing fridge odors. Store it in the fridge for up to three days. Make sure to slice the pie before storing to make it easier to serve later. You can freeze key lime pie if you want to save some for later. First, let the pie cool completely after baking. Wrap the pie tightly in plastic wrap and then in aluminum foil. This double wrapping helps prevent freezer burn. You can freeze it for up to three months. Just remember to label it with the date. To enjoy your frozen key lime pie, move it from the freezer to the fridge. Let it thaw overnight. If you're in a hurry, you can leave it at room temperature for about two hours. Do not microwave it, as this can change the texture. Once thawed, you can add fresh whipped cream or lime zest for extra flavor before serving. Yes, you can use regular limes. Key limes are smaller and more fragrant. They have a tart flavor that makes the pie special. If you use regular limes, the pie will taste a bit different but still good. You might want to adjust the sugar to balance the flavor. You can keep key lime pie in the fridge for up to three days. Cover it well to prevent it from drying out. If the pie has whipped cream on top, eat it within two days. The cream can lose its texture after that. You can use coconut cream or a dairy-free option. If you need a lighter option, try using yogurt. For a richer flavor, you can also use mascarpone cheese. Each choice will change the taste and texture a bit, but they all work well in this recipe. Check the [Full Recipe] for more details. In this post, we explored the key ingredients for classic Key Lime Pie, from crust to filling. I shared step-by-step instructions for baking. We discussed tips to avoid common mistakes and explored variations for flavor and presentation. Additionally, we covered how to store and reheat leftovers effectively. Key Lime Pie is simple to make and delightful to share. Enjoy creating your version and savor each bite. When you follow these tips, your pie will shine!](https://dishtreats.com/wp-content/uploads/2025/07/bf504450-0d09-4d53-b035-55d87c168019-768x768.webp)


