Zucchini Breakfast Muffins Wholesome and Easy Recipe

If you’re looking for a healthy start to your day, these Zucchini Breakfast Muffins are perfect! They are easy to make and packed with nutrients. Whether you’re a busy parent or just want a quick breakfast, this wholesome recipe fits the bill. Using zucchini adds moisture and flavor, while spices give them a warm touch. Let’s dive into the simple ingredients and steps that will make your mornings brighter!
Ingredients
Main Ingredients
- 1 medium zucchini, finely grated
- 1 cup all-purpose flour
- 1 cup whole wheat flour
The main star of our muffins is zucchini. It adds moisture and a soft texture. Plus, it packs in vitamins and minerals. Using both all-purpose flour and whole wheat flour gives a nice balance. This mix adds flavor and a bit of fiber.
Spices and Leavening
- 1 teaspoon baking soda
- 1 teaspoon baking powder
- 1/2 teaspoon salt
- 1 teaspoon ground cinnamon
- 1/2 teaspoon nutmeg
Next, we need spices and leavening agents. Baking soda and baking powder help the muffins rise. Salt enhances the taste while ground cinnamon and nutmeg add warmth. These spices make your kitchen smell amazing as they bake.
Sweeteners
- 1/4 cup packed brown sugar
- 1/4 cup honey
For sweetness, we use brown sugar and honey. Brown sugar gives a deep flavor, while honey adds moisture. This combo makes our muffins perfectly sweet without being too sugary. You will love the taste, and they will be a hit!
Step-by-Step Instructions
Preparation
- Preheat your oven to 350°F (175°C).
- Line a muffin pan with paper liners or grease each cup lightly.
- Take one medium zucchini and grate it finely to prepare for mixing.
Mixing the Ingredients
- In a large bowl, combine the grated zucchini, brown sugar, honey, yogurt, eggs, and vegetable oil. Mix until smooth.
- In another bowl, sift together the all-purpose flour, whole wheat flour, baking soda, baking powder, salt, ground cinnamon, and nutmeg. This helps blend the dry ingredients evenly.
Baking
- Gradually fold the dry mixture into the wet ingredients using a spatula. Be gentle; over-mixing can make muffins dense.
- If you want extra flavor, fold in chopped walnuts and your choice of raisins or mini chocolate chips.
- Carefully fill each muffin cup about two-thirds full with batter. This allows room for the muffins to rise.
- Place the muffin tin in the preheated oven and bake for 18-20 minutes. Check doneness with a toothpick; it should come out clean or with a few moist crumbs.
- After baking, cool the muffins in the pan for 5 minutes. Then, transfer them to a wire rack to cool completely.Enjoy your delicious muffins!
Tips & Tricks
Perfecting Your Muffins
To make great muffins, avoid over-mixing the batter. When you mix flour too much, it makes muffins dense. You want to combine the wet and dry ingredients gently. Just fold them together until you see no more dry flour. This helps keep your muffins light and fluffy.
Next, ensure proper doneness. After 18 to 20 minutes, check your muffins. Insert a toothpick into the center of a muffin. If it comes out clean or with a few moist crumbs, your muffins are done. If it’s wet, give them more time.
Presentation Ideas
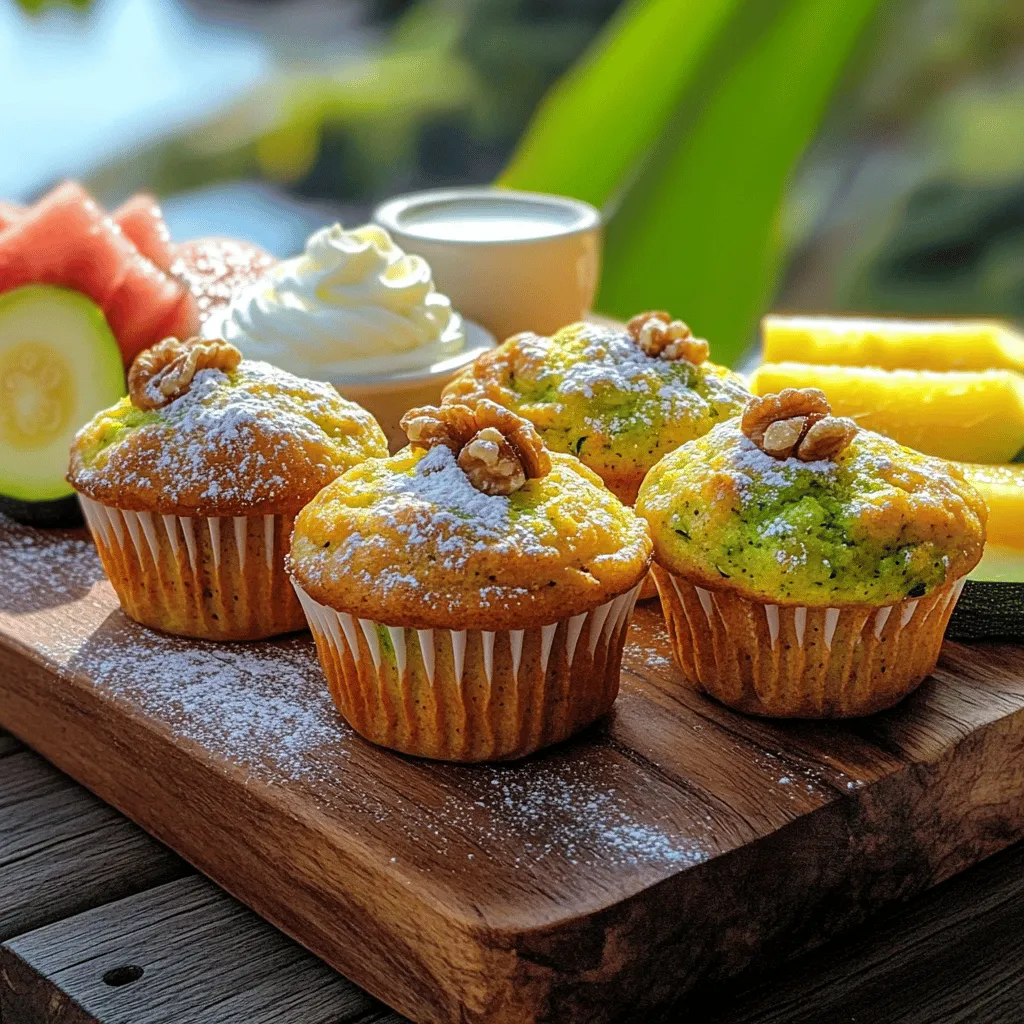
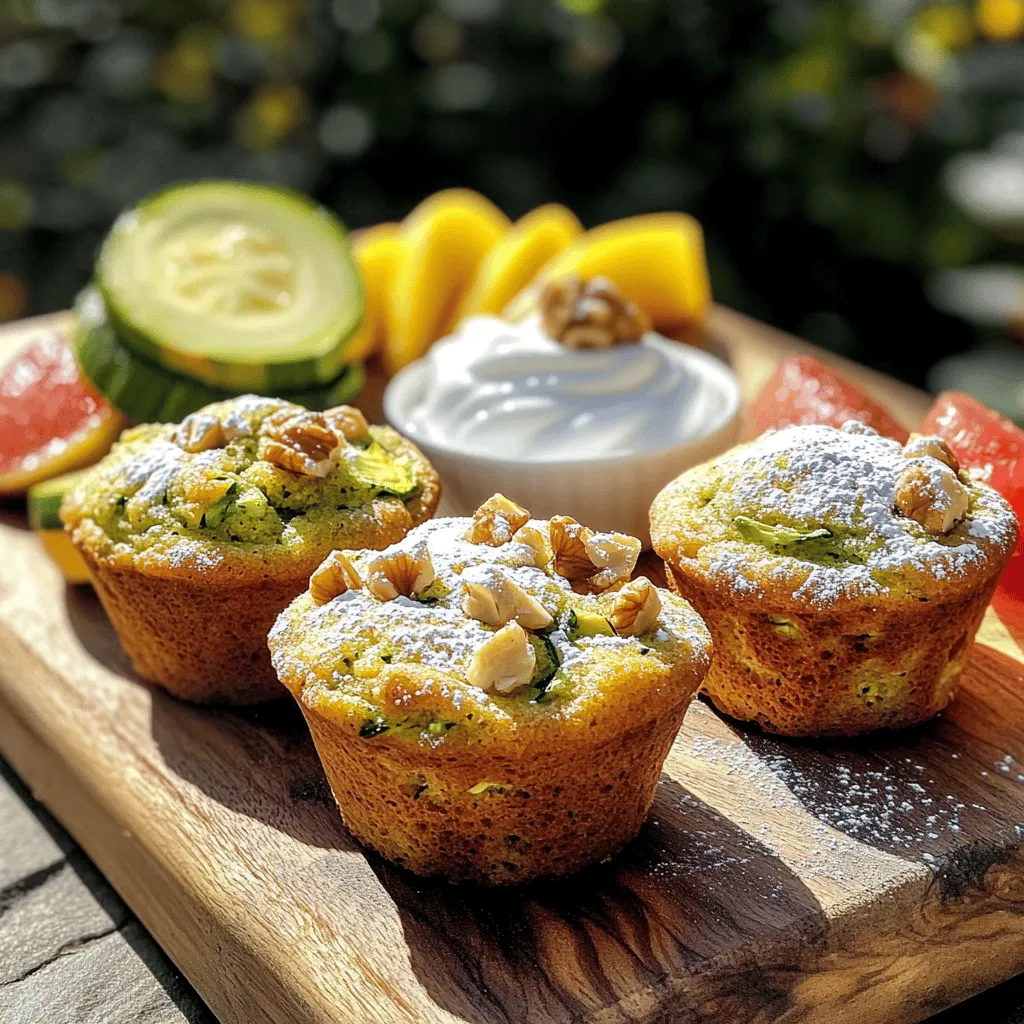
For serving, warm muffins taste best. Serve them with a light dusting of powdered sugar on top. You can also add a dollop of yogurt on the side. This adds creaminess and pairs well with the muffins.
Garnish your plate with slices of fresh fruit. Seasonal fruits like berries or sliced bananas add color and flavor. This makes your breakfast not only tasty but also beautiful.
Nutritional Benefits
Zucchini is a great ingredient for breakfast muffins. It is low in calories but high in vitamins. Eating zucchini helps support your vision and immune system.
Each muffin is packed with important nutrients. Zucchini provides fiber, helping with digestion. The whole wheat flour adds extra fiber and protein. This makes your muffins a smart choice for a healthy start to your day.Enjoy making these muffins!

Variations
Flavor Additions
You can make your zucchini breakfast muffins even better with some fun mix-ins. Here are two great options:
- Nuts and dried fruits: Adding nuts like walnuts or pecans gives a nice crunch. Dried fruits, such as raisins or cranberries, add sweetness. You can mix in half a cup of either for extra flavor.
- Chocolate chips: Who doesn’t love chocolate? Mini chocolate chips blend perfectly with the muffin batter. Just fold in half a cup for a sweet twist.
These additions make your muffins unique and add layers of taste.
Dietary Adjustments
If you have specific dietary needs, you can still enjoy these muffins. Here are two easy swaps:
- Gluten-free substitutions: To make these muffins gluten-free, use a gluten-free flour blend instead of all-purpose flour. You can also add a bit of xanthan gum to help with the texture. This way, everyone can enjoy them.
- Vegan options: For a vegan version, replace eggs with flax eggs. Mix one tablespoon of ground flaxseed with three tablespoons of water for each egg. You can also swap yogurt for a plant-based yogurt to keep the muffins moist.
With these variations, you can customize your zucchini breakfast muffins to suit your taste and dietary needs. Enjoy exploring new flavors and options!
Storage Info
Short-term Storage
You can store your zucchini muffins at room temperature for up to three days. Place them in an airtight container. This keeps them fresh and prevents them from drying out. If you want, you can also wrap each muffin in plastic wrap. This extra layer helps keep moisture in.
Long-term Storage
For longer storage, freezing muffins is a great option. First, let the muffins cool completely. Then, wrap each muffin tightly in plastic wrap. After that, place them in a freezer-safe bag or container. They can last up to three months in the freezer. When you’re ready to enjoy them, simply take out the muffins and let them thaw at room temperature. You can also microwave them for a quick snack.
Reheating Tips
To reheat your muffins, you have a few good options. You can use a microwave, which is fast and easy. Heat each muffin for about 15 to 20 seconds. If you prefer a crispier texture, use the oven. Preheat it to 350°F (175°C) and heat the muffins for about 10 minutes. Both methods work well, so choose what you like best!
FAQs
How do I prevent zucchini muffins from being soggy?
To keep your zucchini muffins from being soggy, moisture control is key. Here are some tips to help:
- Squeeze out excess water: After grating the zucchini, place it in a clean kitchen towel. Twist the towel to remove extra liquid.
- Use less liquid ingredients: Adjust your yogurt or oil if needed. Reducing these can help balance moisture.
- Add flour: If your batter looks too wet, you can mix in a little more flour. This helps absorb some of the moisture.
By following these steps, you can enjoy muffins that are perfectly moist without being soggy.
Can I use frozen zucchini?
Yes, you can use frozen zucchini in your muffins. Here’s how:
- Thaw it first: Let the zucchini thaw in the fridge overnight or for a few hours at room temperature.
- Drain excess liquid: After thawing, be sure to squeeze out any extra moisture just like you would with fresh zucchini.
- No need to chop: If the zucchini is already shredded, you can use it as is.
Using frozen zucchini is a great way to enjoy these muffins year-round.
What can I substitute for eggs?
If you need to replace eggs in your muffins, there are several great options:
- Applesauce: Use 1/4 cup of unsweetened applesauce for each egg. This adds moisture and sweetness.
- Mashed banana: Use 1/4 cup of mashed banana. This will also give your muffins a nice flavor.
- Flaxseed meal: Mix 1 tablespoon of flaxseed meal with 2.5 tablespoons of water. Let it sit for a few minutes until it thickens.
These substitutes work well and keep your muffins light and fluffy. Enjoy experimenting with your baking!
You learned a lot today about making delicious zucchini muffins. We covered the main ingredients, like zucchini and various flours. I shared steps for preparation and baking, plus tips to make your muffins perfect. You can even customize them with fun flavors.
Remember, these muffins are not just tasty; they’re also good for you. Store them well to enjoy later. With these insights, you can bake with confidence and impress everyone around you. Happy baking!


. Enjoy your delightful no bake lemon cheesecake! No Bake Lemon Cheesecake is simple and fun to make. We covered the ingredients, preparation, and storage tips. Remember to mix your filling gently for a light texture. Experiment with flavors or garnishes to make it your own. With this guide, you can impress your friends and family. Enjoy each slice and share this delightful dessert. It’s a tasty treat that everyone will love!](https://dishtreats.com/wp-content/uploads/2025/06/ce75718b-0697-4914-b5ee-7870880d7685-768x768.webp)

![To make the best pumpkin spice muffins, you need the following key ingredients: - 1 cup pumpkin puree - 1/2 cup brown sugar - 1/2 cup granulated sugar - 1/3 cup vegetable oil - 2 large eggs - 1 teaspoon vanilla extract - 1 1/2 cups all-purpose flour - 1 teaspoon baking soda - 1 teaspoon baking powder - 2 teaspoons pumpkin pie spice - 1/2 teaspoon salt These ingredients create a fluffy, moist muffin that bursts with autumn flavor. The pumpkin puree adds natural sweetness and moisture. Brown sugar gives a rich, caramel taste, while the spices bring warmth and comfort to each bite. You can make your muffins even better with these optional ingredients: - 1/2 cup chopped walnuts or pecans - 1/2 cup chocolate chips Adding nuts gives a nice crunch, while chocolate chips add sweetness. Feel free to mix and match based on your taste. You can even leave them out for a classic muffin. Accurate measurement is key to great baking. Here’s how to measure your ingredients correctly: - Flour: Use a spoon to fill your measuring cup, then level it off with a knife. - Brown Sugar: Pack it firmly into the cup for proper measurement. - Liquid Ingredients: Use a liquid measuring cup and check at eye level for accuracy. Following these tips ensures your muffins turn out perfectly every time. For the full recipe, check out the details above and get ready to bake your delicious pumpkin spice muffins! Start by preheating your oven to 350°F (175°C). This step is key for even baking. Next, prepare a standard muffin tin. You can use paper liners or spray each cup with non-stick spray. This will make it easy to remove the muffins later. In a large bowl, combine the pumpkin puree, brown sugar, granulated sugar, and vegetable oil. Add in the eggs and vanilla extract. Whisk these together until smooth. Make sure there are no lumps. This mix gives your muffins their rich flavor. In another bowl, sift together the all-purpose flour, baking soda, baking powder, pumpkin pie spice, and salt. Sifting helps to mix and aerate the flour. It makes for a lighter muffin. This mix is important for texture. If you want to add some extra texture, gently fold in chopped walnuts or pecans. You can also add chocolate chips for a sweet touch. Be careful not to overmix; just combine until they’re evenly spread in the batter. Now, spoon the muffin batter into the prepared tin. Fill each cup about 3/4 full. This allows room for the muffins to rise. Bake for 18-20 minutes. Check if they’re ready by inserting a toothpick in the center. If it comes out clean, they’re done! Let them cool in the tin for 5 minutes before moving them to a wire rack. This cooling step is essential for the best texture. For the complete recipe, check out the [Full Recipe]. To keep muffins light and fluffy, don’t overmix the batter. When you combine wet and dry ingredients, mix just until you see no dry flour. A few lumps are okay. Overmixing makes muffins tough. Also, ensure your baking powder and baking soda are fresh. Old leavening agents won't help the muffins rise. Store your pumpkin spice muffins in an airtight container. This keeps them soft and moist. You can keep them at room temperature for up to three days. For longer storage, place them in the fridge for a week. If you want to save them for later, freeze them. Wrap each muffin in plastic wrap before placing them in a freezer-safe bag. They can last for up to three months in the freezer. Presentation makes any dish more inviting. For a lovely touch, sprinkle powdered sugar on top of each muffin. Serve them on a pretty platter. You can also add a small bowl of softened butter for easy spreading. This makes your muffins look even more delicious and inviting. {{image_4}} You can make gluten-free pumpkin spice muffins easily. To do this, swap regular flour with gluten-free flour. Look for blends that work well in baking. These blends often include almond flour or coconut flour. Check the package to ensure it has a good flavor. The muffins will still taste great! The texture may vary slightly, but they will remain soft and delicious. If you want vegan muffins, you can make some simple changes. Replace eggs with flax eggs. To make a flax egg, mix 1 tablespoon of ground flaxseed with 2.5 tablespoons of water. Let it sit for about 5 minutes until it thickens. Use plant-based oil instead of vegetable oil. You can also use almond milk or another plant-based milk instead of regular milk. These muffins will be light and fluffy, just like the classic recipe. You can jazz up your pumpkin spice muffins with extra flavors. Try adding maple syrup for a sweet twist. Just reduce the sugar a little to balance it out. You can also add orange zest for a fresh, bright taste. A teaspoon of orange zest will give the muffins a nice citrus kick. Feel free to get creative! You can mix and match these flavors to find your favorite combination. These variations can make your pumpkin spice muffins even more special. Check out the full recipe to get started! To keep your pumpkin spice muffins fresh, store them in an airtight container. Place a paper towel in the container to absorb moisture. This helps prevent sogginess. Store them at room temperature for up to three days. If you want to keep them longer, consider freezing. Freezing is a great way to save your muffins. Start by letting them cool completely. Then, wrap each muffin in plastic wrap. Place the wrapped muffins in a freezer-safe bag. Label the bag with the date. You can freeze them for up to three months. To enjoy your muffins warm, reheat them in the oven. Preheat your oven to 350°F (175°C). Place the muffins on a baking sheet. Heat for 10 to 15 minutes. You can also use a microwave for quick reheating. Just warm them for 15 to 20 seconds. Enjoy your pumpkin spice muffins fresh! Yes, you can use canned pumpkin. It saves time and gives great flavor. Make sure to choose 100% pure pumpkin, not pumpkin pie filling. This keeps the taste just right. Canned pumpkin is often smoother, which helps in mixing. It also has a longer shelf life. So, if you have a can, use it! For eggs, you can use several substitutes. Common options include: - 1/4 cup unsweetened applesauce - 1/4 cup mashed banana - 1 tablespoon ground flaxseed mixed with 2.5 tablespoons water These options keep your muffins moist and fluffy. They also add a hint of flavor. Choose what fits your taste best! Check your muffins after 18 minutes. Insert a toothpick into the center. If it comes out clean or with a few crumbs, they are done. If the toothpick is wet, bake for 1-2 more minutes. Keep an eye on them to avoid overbaking. Perfect muffins should be soft and lightly golden. Absolutely! To make mini muffins, use a mini muffin tin. Fill each cup about halfway. Bake them for 10-12 minutes. Keep checking with a toothpick until they are done. Mini muffins are great for snacks and sharing. They are just as tasty and fun! For the full recipe, check out the details above. In this post, we explored how to make delicious pumpkin spice muffins. I covered the essential and optional ingredients, along with measuring them for great results. The step-by-step instructions guide you through prepping, mixing, and baking. I also shared tips for light muffins and ways to store them well. Finally, I offered tasty variations like gluten-free and vegan options. Now you’re ready to enjoy these warm, flavorful treats any time! Your perfect pumpkin spice muffin awaits.](https://dishtreats.com/wp-content/uploads/2025/06/e45c4b1d-a4d2-42b5-b442-a33a757785ba-768x768.webp)


![- 1 cup rolled oats - 2 cups almond milk (or your preferred milk) - 1 medium sweet apple, diced (suggestions: Fuji or Gala) - 1 teaspoon ground cinnamon - 2 tablespoons maple syrup (or honey if you prefer) - 1/2 teaspoon vanilla extract - 1/4 cup plain Greek yogurt (optional) - Pinch of salt - Chopped nuts for topping - Extra apple slices and cinnamon for garnish Apple cinnamon overnight oats are easy to make and full of flavor. The oats soak overnight, making them creamy and delicious. You can customize this recipe based on your taste. For the base, I use rolled oats and almond milk, but feel free to pick any milk you like. The diced apple brings sweetness and crunch. I suggest using Fuji or Gala apples since they are sweet and juicy. Ground cinnamon adds warmth and a cozy touch. Maple syrup gives the oats a natural sweetness. If you want a little creaminess, add Greek yogurt. Don’t forget the pinch of salt; it enhances all the flavors. Chopped nuts add a nice crunch on top. You can use walnuts, pecans, or any nuts you enjoy. Finally, garnish with extra apple slices and a dusting of cinnamon for a pretty finish. - Different types of milk (coconut, oat, etc.) - Sweeteners (agave syrup, stevia, etc.) - Additional fruit (berries, bananas, etc.) If you want to try something different, there are many options. Swap almond milk for coconut or oat milk if you prefer. You can change sweeteners too; agave syrup or stevia work well. Add in more fruits like berries or sliced bananas for extra flavor. This makes each serving unique and fun. The best part? You can make it just how you like it! For the full recipe, check out Apple Cinnamon Overnight Oats Delight. - Step 1: Combine rolled oats with milk and yogurt. In a large bowl, mix 1 cup of rolled oats with 2 cups of almond milk. If you like, add 1/4 cup of Greek yogurt for creaminess. Stir until mixed well. - Step 2: Add apples, cinnamon, sweetener, vanilla, and salt. Fold in 1 diced apple, 1 teaspoon of ground cinnamon, and 2 tablespoons of maple syrup. Add 1/2 teaspoon of vanilla extract and a pinch of salt. Mix until everything is evenly distributed. - Step 3: Transfer mixture into jars and refrigerate. Spoon the oat mix into jars. Make sure each jar has some apple pieces. Close the lids and place them in the fridge overnight. - Evenly distribute diced apples among jars. This ensures each jar has the same amount of apple flavor. - Layer ingredients for visual appeal. Create a pretty look by layering oats and apples. This makes your breakfast even more inviting. - Stir before serving and adjust consistency. When you take the jars out, give them a good stir. If they feel too thick, add a splash of milk. - Top with nuts and additional apple slices. Finish with a sprinkle of chopped nuts and a few apple slices for crunch. A dash of cinnamon adds warmth and flavor. For full details, check the [Full Recipe]. To get the best texture, always use rolled oats. They soak up the liquid well. Steel-cut oats take longer to soften. You might want to avoid them for overnight oats. Adjust the sweetness by adding more or less maple syrup. Taste as you mix to find your perfect balance. Make a big batch of oats for quick breakfasts. You can prepare up to five jars at once. Store them in the refrigerator for up to five days. This way, you’ll have a quick meal ready on busy mornings. Feel free to experiment with spices like nutmeg or cardamom. Just a pinch can add a warm kick. You can also add seeds like chia or flaxseed. These add fiber and make your oats even better for you. {{image_4}} You can easily make apple cinnamon overnight oats vegan. Just swap the Greek yogurt for a plant-based yogurt. Use almond, coconut, or oat milk for a creamy base. These changes keep the flavor rich and tasty while being dairy-free. If you need gluten-free options, choose certified gluten-free oats. Many brands offer oats that are safe for those with gluten sensitivities. This way, you can enjoy your oats without worry. You can mix in other fruits to change the taste. Try berries like strawberries or blueberries for a fresh twist. Bananas also work well, adding sweetness and creaminess. For toppings, nuts and seeds add crunch. Chopped almonds, walnuts, or sunflower seeds all taste great. You can also sprinkle chia seeds for extra fiber and health benefits. In fall, add pumpkin spice to your oats for a cozy taste. Just mix in a teaspoon or two for that warm, spiced flavor. It pairs perfectly with apples. In summer, think about fresh fruits like peaches or mangoes. These fruits add a bright, juicy flavor. You can mix them in or use them as a topping for a colorful and tasty breakfast. For the complete recipe, check out the [Full Recipe]. To keep your apple cinnamon overnight oats fresh, use jars or airtight containers. Glass jars work great. They seal well and let you see the yummy layers. Make sure to refrigerate them right after you prepare them. This keeps the oats safe to eat. You can freeze individual servings of overnight oats. First, pour the oats into freezer-safe containers or jars. Leave some space at the top, as they will expand. To enjoy later, thaw them in the fridge overnight. Once thawed, stir well. You might want to add a splash of milk to make them creamy again. Apple cinnamon overnight oats can stay fresh in the fridge for up to five days. Check for any signs of spoilage before eating. If the oats smell sour or have a strange color, throw them away. Always trust your nose and eyes! For the best taste, enjoy them within the first few days. Apple cinnamon overnight oats are a tasty breakfast. They combine oats, milk, apples, and cinnamon. The mixture sits in the fridge overnight. This soaking makes the oats soft and creamy. You get a nice blend of flavors. It’s a quick way to enjoy a healthy meal. Yes, you can use quick oats. However, they have a different texture. Quick oats cook faster and become mushy. If you use them, soak for less time. Rolled oats keep a firmer bite and work better for overnight oats. Overnight oats last about 5 days in the fridge. Store them in airtight jars or containers. Check for bad smells or changes in texture. If they look or smell off, toss them out. Yes, kids love apple cinnamon overnight oats! They are sweet and fun to eat. Serve in small jars for a cute look. You can also add toppings like nuts or more fruit for variety. This makes it a family-friendly dish everyone can enjoy. Apple cinnamon overnight oats offer a delightful and easy breakfast option. You can prepare them quickly with just a few simple steps. This meal not only fills you up but also lets you customize flavors to your taste. Experiment with different fruits, sweeteners, and spices to keep it fun. Remember to store your oats correctly for freshness. Enjoy this nutritious dish throughout the week! Your mornings can be bright and delicious with this recipe.](https://dishtreats.com/wp-content/uploads/2025/06/6eb7544b-1d16-4ecc-8a32-decb7f29ee21-768x768.webp)