
Are you ready to treat yourself to something sweet and delightful? White Chocolate Raspberry Scones are perfect for breakfast, brunch, or a cozy afternoon snack. These scones combine creamy chocolate and tart raspberries for a taste that’s hard to resist. In this guide, I’ll show you how to make these treats step by step, share tips for perfecting them, and explore fun variations. Let’s turn your kitchen into a bakery today!
Ingredients
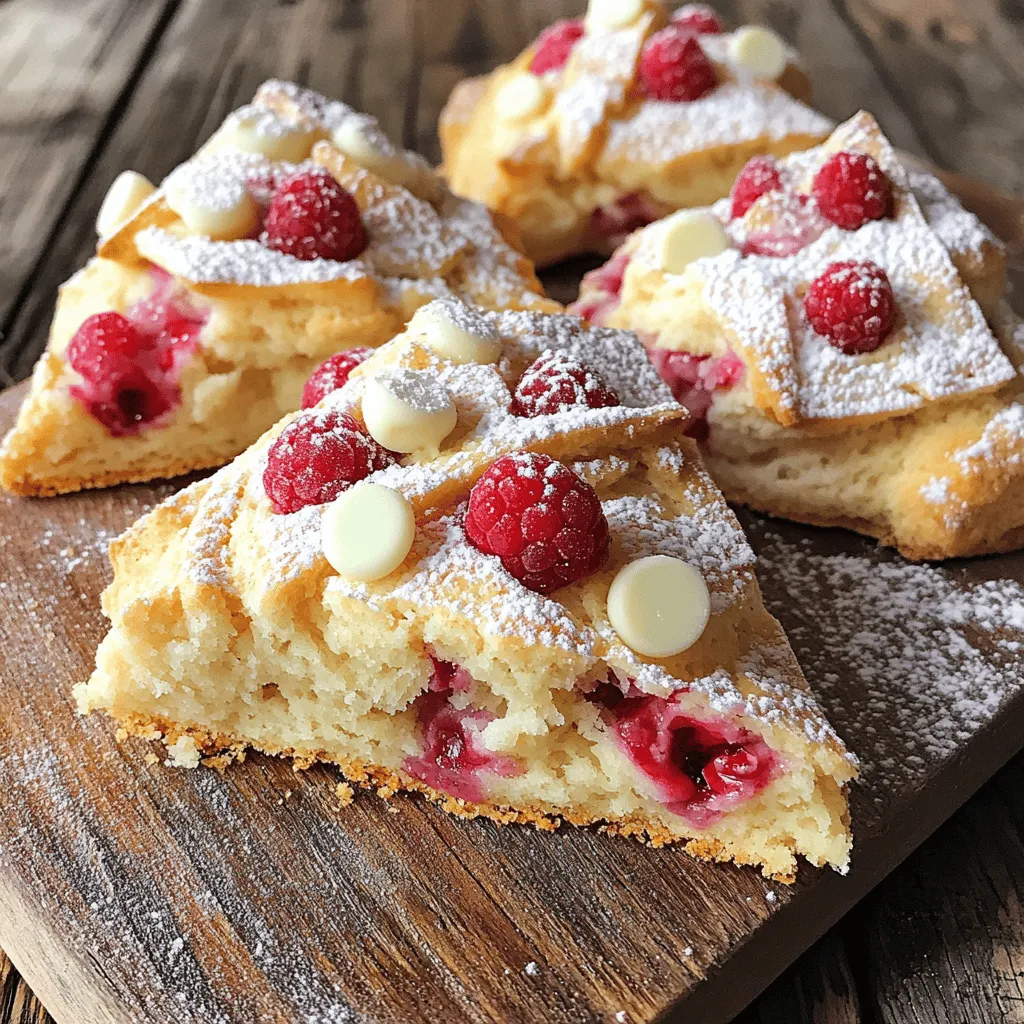
Key Ingredients for White Chocolate Raspberry Scones
To make these delightful scones, you need the following key ingredients:
– 2 cups all-purpose flour
– 1/4 cup granulated sugar
– 2 teaspoons baking powder
– 1/2 teaspoon baking soda
– 1/2 teaspoon salt
– 1/2 cup unsalted butter, cold and cut into small cubes
– 1/2 cup buttermilk
– 1 large egg
– 1 teaspoon pure vanilla extract
– 3/4 cup fresh raspberries (or frozen raspberries, thawed and drained)
– 1/2 cup white chocolate chips
– An extra pinch of granulated sugar for sprinkling
These ingredients blend together to create a rich, flavorful base for the scones. The combination of fresh raspberries and white chocolate gives a sweet and tangy taste that everyone loves.
Optional Ingredients for Flavor Enhancement
You can add a few optional ingredients to make your scones even better:
– Zest from 1 lemon or orange for a citrus kick
– 1/2 teaspoon almond extract for a deeper flavor
– Chopped nuts, like pecans or walnuts, for added crunch
These extras can give your scones a unique twist. Feel free to experiment and find your perfect combination!
Tools Needed for Preparation
Having the right tools makes baking easier and more fun. Here are the tools you will need:
– Mixing bowls
– Whisk
– Pastry cutter or your fingers for mixing
– Baking sheet
– Parchment paper
– Knife or pastry cutter for shaping
These tools will help you prepare the scones with ease. Don’t forget to gather everything before you start!
Step-by-Step Instructions
Preparation and Preheating
Start by preheating your oven to 400°F (200°C). This high heat helps the scones rise well. While the oven warms up, line a baking sheet with parchment paper. This step prevents the scones from sticking, making cleanup easier.
Mixing the Dry Ingredients
In a large bowl, whisk together the dry ingredients. Combine 2 cups of all-purpose flour, 1/4 cup of granulated sugar, 2 teaspoons of baking powder, 1/2 teaspoon of baking soda, and 1/2 teaspoon of salt. Make sure everything is well mixed and aerated. This helps the scones become light and fluffy.
Incorporating the Wet Ingredients
In a separate bowl, mix the wet ingredients. Combine 1/2 cup of buttermilk, 1 large egg, and 1 teaspoon of pure vanilla extract. Whisk them together until blended. Pour this mixture into the bowl with the dry ingredients. Use a fork to stir until just combined. Be careful not to overmix, as this can make the scones tough.
Folding in Raspberries and White Chocolate
Now, gently fold in the stars of the show: 3/4 cup of fresh raspberries and 1/2 cup of white chocolate chips. Use a spatula for this step. Take your time and be gentle. You want to keep the raspberries whole, as they add bursts of flavor.
Shaping and Baking the Scones
Turn the dough onto a lightly floured surface. Pat it into a rectangle about 1 inch thick. Use a knife or pastry cutter to cut the dough into triangles or circles. Place the scones on the prepared baking sheet, leaving space between them. Sprinkle a pinch of granulated sugar on top for a sweet crunch. Bake them for 15-20 minutes, until the edges are lightly golden. Enjoy the smell wafting through your kitchen as they bake!
Tips & Tricks
How to Achieve Flaky Scones
To make flaky scones, keep your butter cold. Cold butter creates steam while baking, which helps the scones rise. Cut the butter into small cubes and mix it into the flour gently. Use your fingertips or a pastry cutter. Stop mixing when the mixture looks like coarse crumbs. This step is key for texture.
Perfecting the Raspberry and Chocolate Balance
The right balance of raspberry and chocolate makes each bite special. Use fresh raspberries if possible. They add a burst of flavor. If using frozen raspberries, thaw and drain them first. This prevents excess moisture in the dough. Add white chocolate chips evenly throughout the mixture. This way, each scone has a sweet surprise.
Common Mistakes to Avoid
One common mistake is overmixing the dough. This can make your scones tough instead of tender. Mix just until the ingredients are combined. Another mistake is not using enough flour when shaping. Dust your surface lightly. This helps prevent sticking. Finally, avoid skipping the sprinkle of sugar on top. It adds a delightful crunch and sweetness.
Variations
Substitute Ingredients for Different Flavors
You can easily change the flavor of your white chocolate raspberry scones. Try using dark chocolate instead of white chocolate. It gives a richer taste. You can also swap out the raspberries for blueberries or strawberries. These berries work well and add a nice touch. If you like nuts, add some chopped pecans or walnuts for crunch. They bring a lovely flavor that pairs well with chocolate.
Making Mini Scones or Larger Sizes
Adjust the size of your scones to fit your needs. For mini scones, shape the dough into smaller pieces, about half the size of regular scones. Bake them for about 10-15 minutes. For larger scones, increase the thickness of the dough. Cut them into larger triangles or circles and bake for 20-25 minutes. This way, you can serve scones that fit any occasion, whether for a snack or a special treat.
Adding Spices or Zest for Extra Flavor
Spices and zest can elevate your scone game. Add a pinch of cinnamon or nutmeg to the dry ingredients for warmth. For a citrusy kick, incorporate lemon or orange zest into the dough. This brightens the flavor profile and adds a fresh twist. Feel free to experiment with your favorite spices and zest. This personal touch makes your scones unique and delightful.
Storage Info
How to Store Leftover Scones
To keep your scones fresh, store them in an airtight container. This helps prevent them from drying out. Make sure they cool completely before you seal them. I usually keep them at room temperature for up to two days. If you want to keep them longer, consider freezing.
Freezing for Later Use
Freezing is a great option for scones. To freeze, first, let them cool completely. Then, wrap each scone in plastic wrap. Place the wrapped scones in a freezer-safe bag or container. They can last up to three months in the freezer. When you want one, just take it out and thaw it.
Reheating Tips for Best Flavor
Reheating scones is easy. You can use an oven or microwave. For the oven, preheat it to 350°F (175°C). Place the scone on a baking sheet and warm for about 5-10 minutes. This keeps them crisp. If using a microwave, heat for about 15-20 seconds. Enjoy your warm, fresh-tasting scones!
FAQs
Can I use frozen raspberries instead of fresh?
Yes, you can use frozen raspberries. Just make sure to thaw and drain them first. This prevents excess moisture in your scones. Frozen raspberries work well and still provide great flavor. They may break apart more than fresh ones, but they will still taste delicious.
How do I know when the scones are done baking?
You can tell when the scones are done by checking their color. The edges should be lightly golden brown. You can also tap the top; it should sound hollow. Baking time is usually about 15-20 minutes. Keep an eye on them to avoid overbaking.
What can I serve with scones for a complete experience?
Scones pair well with clotted cream or whipped cream. A bit of jam can add sweetness, too. You can also serve them with fresh fruit or a nice cup of tea. This makes for a lovely and complete treat. Enjoy them warm for the best experience!
This blog post covers all you need to know about making white chocolate raspberry scones. You learned which key ingredients to gather and how to mix them for the best flavor. I shared step-by-step instructions to guide you from prep to bake. Plus, you got helpful tips for avoiding common mistakes and making tasty variations.
Enjoy your baking adventure! With these tips, fresh scones are just minutes away.


