Warm Caramel Apple Cinnamon Cobbler Cups Delight

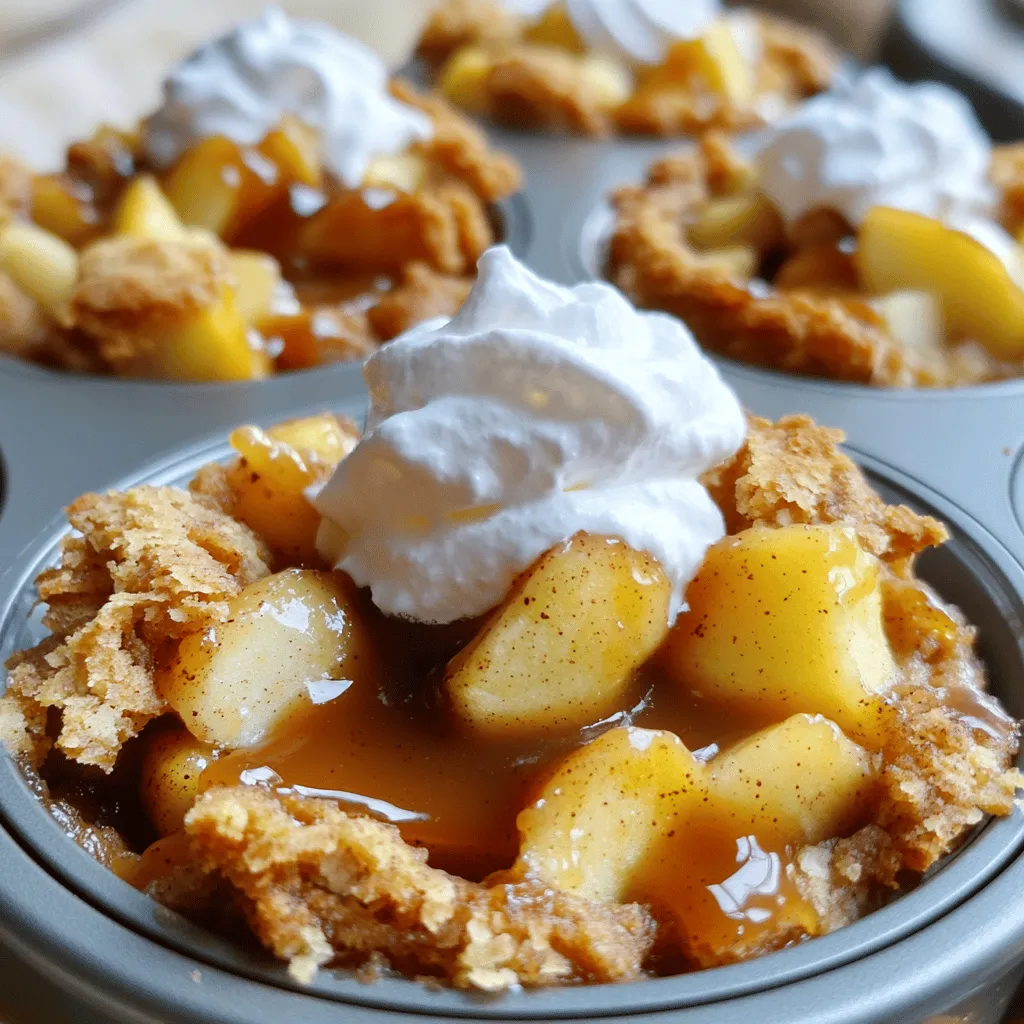
Are you ready to indulge in a warm, sweet treat? My Warm Caramel Apple Cinnamon Cobbler Cups are the perfect dessert for cozy nights. With a soft, buttery crust and a spiced filling of tart Granny Smith apples, each bite is pure bliss. You’ll love how easy they are to make. Grab your muffin tin, and let’s dive into this delicious recipe that will warm your heart and delight your taste buds!
Ingredients
List of Main Ingredients
- 2 large Granny Smith apples
- 1 tablespoon fresh lemon juice
- 1 teaspoon ground cinnamon
- ¼ cup packed brown sugar
- ½ teaspoon pure vanilla extract
- 1 tablespoon unsalted butter
- 1 cup all-purpose flour
- ½ cup granulated sugar
- 1 tablespoon baking powder
- ½ teaspoon salt
- 1 cup milk
- ¼ cup caramel sauce
- Optional: whipped cream for serving
These ingredients create a warm and sweet treat. The tartness of the Granny Smith apples pairs well with the rich caramel. Fresh lemon juice adds brightness, while ground cinnamon gives warmth. Brown sugar enhances the sweetness, and vanilla extract rounds out the flavors.
The flour and baking powder make the cobbler light and fluffy. Milk keeps it moist. Unsalted butter adds richness and depth. You can top your cobbler cups with warm caramel sauce and whipped cream for extra delight.
Feel free to personalize these ingredients. You can swap in different apple types or add nuts for crunch. Each choice can change the flavor and texture of your dessert. Let your taste guide you!
Step-by-Step Instructions
Preparation Steps
1. Preheat oven and prepare muffin tin
Set your oven to 350°F (175°C). Grease a muffin tin lightly with butter or non-stick spray. This helps the cups pop out easily after baking.
2. Mix diced apples with lemon juice and spices
In a bowl, mix 2 large diced Granny Smith apples with 1 tablespoon of fresh lemon juice, 1 teaspoon of ground cinnamon, ¼ cup of packed brown sugar, and ½ teaspoon of pure vanilla extract. Toss until the apples are well coated. Let them sit to absorb the flavors.
3. Combine dry ingredients in a separate bowl
In another bowl, whisk together 1 cup of all-purpose flour, ½ cup of granulated sugar, 1 tablespoon of baking powder, and ½ teaspoon of salt. This mix forms the base of our batter.
Assembling the Cobbler Cups
1. Layer batter and apple mixture in muffin tin
Spoon about 1 tablespoon of the batter into each muffin cup. This forms the base layer. Then add a generous spoonful of the apple mixture on top, dividing the apples evenly among the cups.
2. Cover apples with remaining batter
Use the leftover batter to completely cover the apple mixture in each cup. Make sure the apples are hidden well under the batter.
Baking and Cooling
1. Bake the cobbler cups
Place the muffin tin in the oven and bake for 20-25 minutes. Look for a golden brown top. You can check doneness with a toothpick; it should come out clean.
2. Cool before serving
Once baked, let the cobbler cups cool in the tin for about 5 minutes. Carefully remove them and place them on a wire rack or serving platter. This cooling helps them set and makes them easier to handle.
Tips & Tricks
Best Practices for Baking
- Avoid overmixing the batter. Mix just until combined. This keeps the cobbler light.
- To check doneness, insert a toothpick in the center. It should come out clean.
Serving Suggestions
- Garnish with a sprinkle of cinnamon for a warm touch.
- Serve with a scoop of vanilla ice cream or a cup of hot cider.
Customization Ideas
- Adjust sweetness by adding more or less brown sugar. Taste as you go!
- Try different toppings, like chopped nuts or a drizzle of chocolate sauce.
Variations
Fruit Alternatives
You can use other apple types for your cobbler cups. Fuji apples add a sweet touch. Honeycrisp apples bring a nice crunch. You can even mix different apples for depth.
Want to try something new? Add pears for a soft, juicy bite. Berries like blueberries or raspberries also work well. They add a tart flavor that pairs nicely with the caramel.
Dietary Substitutions
If you need a gluten-free option, use gluten-free flour. Almond or coconut flour also works great. Just remember that these might alter the texture slightly.
For those avoiding dairy, almond or oat milk can replace regular milk. These substitutes keep the recipe moist while making it suitable for everyone.
Flavor Enhancements
Looking to kick up the flavor? Add chopped nuts, like pecans or walnuts. They give a nice crunch and depth. You can also sprinkle in spices like nutmeg or cloves. These spices add warmth and complexity.
Consider using flavored extracts too. A splash of almond or maple extract can enhance the taste. Just a little goes a long way, so start small.
Storage Info
Short-term Storage
You can store cobbler cups at room temperature for a day. Keep them in a sealed container. If you want them to last longer, refrigerate them. Use an airtight container to keep them fresh.
Long-term Storage
For long-term storage, you can freeze the cobbler cups. Place them in a freezer-safe bag or container. Make sure to remove as much air as possible. To reheat, first thaw them in the fridge. Then, warm them in the oven at 350°F (175°C) for about 10 minutes. This keeps them soft and tasty.
Shelf Life
When stored properly, cobbler cups can last up to a week in the fridge. In the freezer, they stay good for about three months. Always check for any signs of spoilage before eating.
FAQs
How can I make the caramel sauce from scratch?
To make caramel sauce, you need just sugar, butter, and cream. Start by heating 1 cup of sugar in a pan over medium heat. Stir the sugar until it melts and turns golden brown. Then, add 6 tablespoons of butter and mix until melted. Finally, slowly pour in ½ cup of heavy cream while stirring. Let it cool before using. This sauce adds a rich touch to your cobbler cups.
Can I prepare the apple filling ahead of time?
Yes, you can prepare the apple filling in advance. Just mix the diced Granny Smith apples with lemon juice, cinnamon, brown sugar, and vanilla extract. Store it in an airtight container in the fridge for up to two days. This saves time on baking day and lets the flavors blend well.
What is the best way to reheat leftovers?
To reheat leftovers, place the cobbler cups in a preheated oven at 350°F (175°C) for about 10-15 minutes. This keeps the texture nice and warm. You can also use a microwave, but that may make them softer. Always drizzle a bit more caramel sauce on top before serving.
Can I use a different pan instead of a muffin tin?
You can use a baking dish if you don’t have a muffin tin. Just pour the batter and apple filling into the dish. Adjust the baking time to about 30-35 minutes, or until the top is golden brown. The cobbler will be a bit different in shape, but still tasty.
Is there a way to make this recipe without butter?
Yes, you can substitute butter with coconut oil or vegetable oil. Use the same amount of oil as butter. The flavor will change slightly, but it will still be delicious. This is a great option for dairy-free diets.
In this post, we explored how to make delicious apple cobbler cups using simple ingredients. You learned each step, from prepping the apples to baking and cooling the cups. I shared handy tips for baking and customizing your dish to suit your taste. Remember, these cups are quite versatile and can be enjoyed fresh or stored for later. Try different fruits and toppings to make them your own! Enjoy this fun and tasty treat with family or friends, and happy baking!



![To make a tasty and moist chocolate zucchini bread, gather these simple ingredients: - 1 medium zucchini, finely grated - 1 cup whole wheat flour - 1/2 cup unsweetened cocoa powder - 1/2 teaspoon baking soda - 1/2 teaspoon baking powder - 1/4 teaspoon salt - 1/2 cup pure maple syrup or honey - 1/4 cup unsweetened applesauce - 2 large eggs - 1 tablespoon vanilla extract - 1/2 cup dark chocolate chips (optional) - 1/4 cup chopped walnuts or pecans (optional) These ingredients help create a rich flavor and moist texture. The grated zucchini adds moisture without a strong taste. Whole wheat flour makes the bread hearty and healthy. Cocoa powder gives it that delicious chocolate flavor. Sweeteners like maple syrup or honey ensure the bread stays moist and sweet. Applesauce also adds moisture while cutting down on fat. The eggs help bind everything together. Optional items like dark chocolate chips can add extra richness. Walnuts or pecans bring a nice crunch. You can adjust the recipe to suit your taste. For the full recipe, refer to [Full Recipe]. 1. Preheat your oven to 350°F (175°C). Prepare a 9x5-inch loaf pan. You can grease it lightly or line it with parchment paper. This will help with easy removal once it’s baked. 2. In a large mixing bowl, combine the finely grated zucchini, maple syrup (or honey), unsweetened applesauce, eggs, and vanilla extract. Whisk them together until blended. 3. In a separate bowl, gently whisk the whole wheat flour, cocoa powder, baking soda, baking powder, and salt. Make sure they mix well to avoid clumps. 1. Gradually add the dry ingredients into the wet mixture. Stir just until combined. Avoid over mixing to keep the bread light and fluffy. 2. If you like, gently fold in dark chocolate chips and chopped walnuts or pecans. These add a nice crunch and rich flavor. 3. Carefully pour the batter into the prepared loaf pan. Use a spatula to smooth the top for an even bake. 1. Bake in the preheated oven for 45-50 minutes. Test doneness by inserting a toothpick into the center. It should come out clean or with a few moist crumbs. 2. Once baked, remove the bread from the oven. Let it cool in the pan for about 10 minutes. Then, transfer it to a wire rack to cool completely. For the full recipe, check out the details provided earlier. Enjoy your baking! To make your chocolate zucchini bread perfect, mix well but don’t overdo it. Overmixing can lead to a tough loaf. Stir the batter until just combined. This keeps the bread soft and moist. Accurate measurements matter too. Use a kitchen scale for the best results if you have one. If not, make sure to level off your measuring cups. If you want to switch up the flour, try using almond flour. It gives a nice flavor and works well in this recipe. For sweeteners, you can use agave syrup or coconut sugar. Both options keep the bread tasty and healthy. Just use the same amount as maple syrup or honey. Serve your zucchini bread warm for the best taste. Slice it and dust with powdered sugar for a pretty look. You can also spread nut butter on top for a yummy twist. Pair it with a glass of milk or a cup of tea. These drinks enhance the rich flavors of the bread. For the full recipe, check out the earlier section. {{image_4}} For those with dietary needs, you can easily adapt this recipe. - Gluten-free options: Use a gluten-free flour blend. It works well in this recipe. Just make sure it has a good mix of starch and protein. - Vegan alternatives: Replace the eggs with flax eggs. Mix one tablespoon of ground flaxseed with three tablespoons of water. Let it sit for five minutes until it thickens. You can also switch the honey with agave syrup or another plant-based sweetener. These changes keep the bread tasty while meeting different needs. You can enhance the flavor of your chocolate zucchini bread. - Adding spices like cinnamon or nutmeg: A teaspoon of cinnamon or nutmeg brings warmth. These spices pair well with chocolate and add depth to the flavor. - Incorporating other mix-ins like dried fruit: Try adding dried cherries, cranberries, or even raisins. They add sweetness and chewiness. Mix in about half a cup for the best results. These variations make your bread unique and fun! For the full recipe, check out the details above. To keep your chocolate zucchini bread fresh, store it correctly. Wrap the cooled bread tightly in plastic wrap or aluminum foil. This keeps moisture in and prevents it from drying out. Place it in an airtight container for extra protection. You can store it at room temperature for about three days. If you want to keep it longer, freezing works great. To freeze chocolate zucchini bread, slice it first. Wrap each slice in plastic wrap. Then, place the wrapped slices in a freezer-safe bag. This way, you can grab a slice whenever you want a treat. It can stay fresh in the freezer for up to three months. When you’re ready to enjoy your chocolate zucchini bread, warming it up adds to the taste. The best way to heat it is in the microwave. Place a slice on a microwave-safe plate, cover it with a paper towel, and heat for 15-20 seconds. This keeps the bread moist. You can also reheat it in the oven. Preheat the oven to 350°F (175°C). Wrap the bread in foil to prevent it from getting dry. Heat for about 10-15 minutes. This method helps keep the texture soft and warm. For the best taste, enjoy your chocolate zucchini bread within three days if stored at room temperature. If frozen, try to eat it within three months for the best flavor. To keep zucchini bread moist, use fresh zucchini. Grate it finely to release its juice. Adding unsweetened applesauce or pure maple syrup also helps boost moisture. - Bake at the right temperature. Too high can dry it out. - Don’t overmix the batter. This keeps the bread tender. - Cover the bread with foil if it browns too fast. Yes, you can use frozen zucchini. Just let it thaw and drain excess water first. Frozen zucchini works well but may change the texture slightly. - Fresh zucchini offers the best flavor and moisture. - If you have frozen, make sure to squeeze out the water. - Using frozen is a great way to reduce waste. Check for doneness with a toothpick. Insert it into the center of the bread. If it comes out clean or with a few moist crumbs, it’s done. - The edges will pull away from the pan slightly. - The top should look set and spring back when you touch it. - Baking time is usually 45-50 minutes, but ovens vary. For the complete method to make this treat, check out the Full Recipe! You’ve learned how to make delicious chocolate zucchini bread. We covered the main ingredients, step-by-step instructions, and helpful tips. Remember, precise measurements and mixing are key to success. You can also explore variations to match your tastes and dietary needs. Store your bread properly for long-lasting freshness. With these insights, you’ll enjoy baking and sharing this treat. Dive in and enjoy the process!](https://dishtreats.com/wp-content/uploads/2025/06/124341aa-b5ba-4a17-ada7-3bb78900324d-768x768.webp)


![To make a true classic key lime pie, you need these key items: - 1 ½ cups graham cracker crumbs - ½ cup unsweetened coconut flakes - ⅓ cup granulated sugar - ½ cup unsalted butter, melted - 4 large egg yolks - 1 (14 oz) can sweetened condensed milk - ½ cup freshly squeezed key lime juice (approx. 12 key limes) - Zest of 2 key limes - 1 cup heavy whipping cream - 2 tablespoons powdered sugar - Lime slices and extra zest for garnish These ingredients work together to create a sweet, tangy pie that sings of sunshine. You can add some optional ingredients to enhance your pie: - Toasted coconut flakes for extra crunch - A pinch of salt to balance sweetness - Lime zest for a stronger lime flavor These add-ons can make your pie even more delightful. If you're missing an ingredient, here are some easy swaps: - Use regular lime juice instead of key lime juice. It will taste different but still good. - Swap graham cracker crumbs with crushed vanilla wafers for a unique flavor. - Replace heavy cream with whipped topping for a lighter version. These substitutions can help you prepare the pie with what you have. For the exact steps, check out the Full Recipe. First, preheat your oven to 350°F (175°C). This step is key for a great crust. In a medium bowl, mix the graham cracker crumbs, coconut flakes, and granulated sugar. Pour in the melted butter and stir until it feels like moist sand. Next, grab a 9-inch pie pan. Press the crumb mixture into the bottom and up the sides of the pan. Make sure it’s firm and even. Bake this crust for 8-10 minutes until the edges are golden. After baking, let it cool completely. Now, let’s make the filling. In a large bowl, whisk the egg yolks until they are pale yellow. Then, add the sweetened condensed milk, key lime juice, and lime zest. Whisk until everything is smooth. You want to have no lumps here! Carefully pour this lime mixture into your cooled crust. Spread it out evenly. Bake the pie for 15 minutes. The filling should be set but still a bit jiggly in the center. After baking, take it out and let it cool at room temperature. Once it’s cool, put the pie in the fridge for at least 2 hours. This chilling time makes it even tastier! For the full recipe, check out the details above! To get the best texture and flavor in your Key Lime Pie, follow a few simple tips: - Use Fresh Key Limes: Fresh key limes give a bright taste. They also add a nice zing. - Whisk Egg Yolks Well: Whisk the yolks until they are pale. This helps create a smooth filling. - Don’t Overbake: Bake the filling until it is just set. It should still jiggle a bit in the middle. - Chill Properly: Let the pie cool at room temp before refrigerating. This step enhances the flavor. Some mistakes can ruin your pie. Here are a few to watch out for: - Skipping the Zest: The zest adds flavor and aroma. Don’t skip it! - Using Cold Ingredients: Let your ingredients reach room temperature. This helps them mix better. - Overmixing the Filling: Whisk just until combined. Overmixing can create bubbles in the filling. - Not Cooling the Crust: Always cool the crust completely before adding the filling. A warm crust can make the filling runny. Having the right tools makes cooking easier and more fun: - 9-inch Pie Pan: This is the perfect size for your Key Lime Pie. - Mixing Bowls: Use medium and large bowls for mixing your crust and filling. - Electric Mixer: This helps you whip the cream to stiff peaks easily. - Zester or Grater: A good zester is key for getting the lime zest just right. These tips and tools will help you create a perfect Key Lime Pie every time. For the full recipe, check out the [Full Recipe]. {{image_4}} You can change up the crust for your Key Lime Pie. Here are some fun ideas: - Graham Cracker Crust: This is the classic choice. It’s sweet and crunchy. - Oreo Crust: Use crushed Oreos instead of graham crackers for a chocolate twist. - Nut Crust: Ground almonds or pecans add a nice nutty flavor. Mix them with butter and a bit of sugar. - Coconut Crust: Use shredded coconut for a tropical feel. It pairs well with the lime. Want to try something different? Here are some tasty twists: - Mango Key Lime Pie: Add pureed mango to the filling for a fruity kick. - Berry Key Lime Pie: Mix in fresh berries like strawberries or blueberries for color and flavor. - Coconut Key Lime Pie: Stir in coconut milk for a creamier texture and tropical taste. - Chocolate Key Lime Pie: Add melted chocolate to the filling for a rich, sweet layer. Making your pie look great can be fun. Here are some ideas: - Whipped Cream Topping: Spread whipped cream on top. Use a spatula to make swirls. - Garnish with Lime: Add lime slices or zest for a pop of color. - Serve in Mason Jars: For a fun twist, serve individual portions in jars. - Add Fresh Berries: Place berries around the pie for extra flair. For the full recipe, check out the Zesty Classic Key Lime Pie . To keep your key lime pie fresh, cover it tightly with plastic wrap or aluminum foil. This prevents the pie from absorbing fridge odors. Store it in the fridge for up to three days. Make sure to slice the pie before storing to make it easier to serve later. You can freeze key lime pie if you want to save some for later. First, let the pie cool completely after baking. Wrap the pie tightly in plastic wrap and then in aluminum foil. This double wrapping helps prevent freezer burn. You can freeze it for up to three months. Just remember to label it with the date. To enjoy your frozen key lime pie, move it from the freezer to the fridge. Let it thaw overnight. If you're in a hurry, you can leave it at room temperature for about two hours. Do not microwave it, as this can change the texture. Once thawed, you can add fresh whipped cream or lime zest for extra flavor before serving. Yes, you can use regular limes. Key limes are smaller and more fragrant. They have a tart flavor that makes the pie special. If you use regular limes, the pie will taste a bit different but still good. You might want to adjust the sugar to balance the flavor. You can keep key lime pie in the fridge for up to three days. Cover it well to prevent it from drying out. If the pie has whipped cream on top, eat it within two days. The cream can lose its texture after that. You can use coconut cream or a dairy-free option. If you need a lighter option, try using yogurt. For a richer flavor, you can also use mascarpone cheese. Each choice will change the taste and texture a bit, but they all work well in this recipe. Check the [Full Recipe] for more details. In this post, we explored the key ingredients for classic Key Lime Pie, from crust to filling. I shared step-by-step instructions for baking. We discussed tips to avoid common mistakes and explored variations for flavor and presentation. Additionally, we covered how to store and reheat leftovers effectively. Key Lime Pie is simple to make and delightful to share. Enjoy creating your version and savor each bite. When you follow these tips, your pie will shine!](https://dishtreats.com/wp-content/uploads/2025/07/bf504450-0d09-4d53-b035-55d87c168019-768x768.webp)