Vegan Chocolate Chip Pumpkin Cookies Delicious Treat

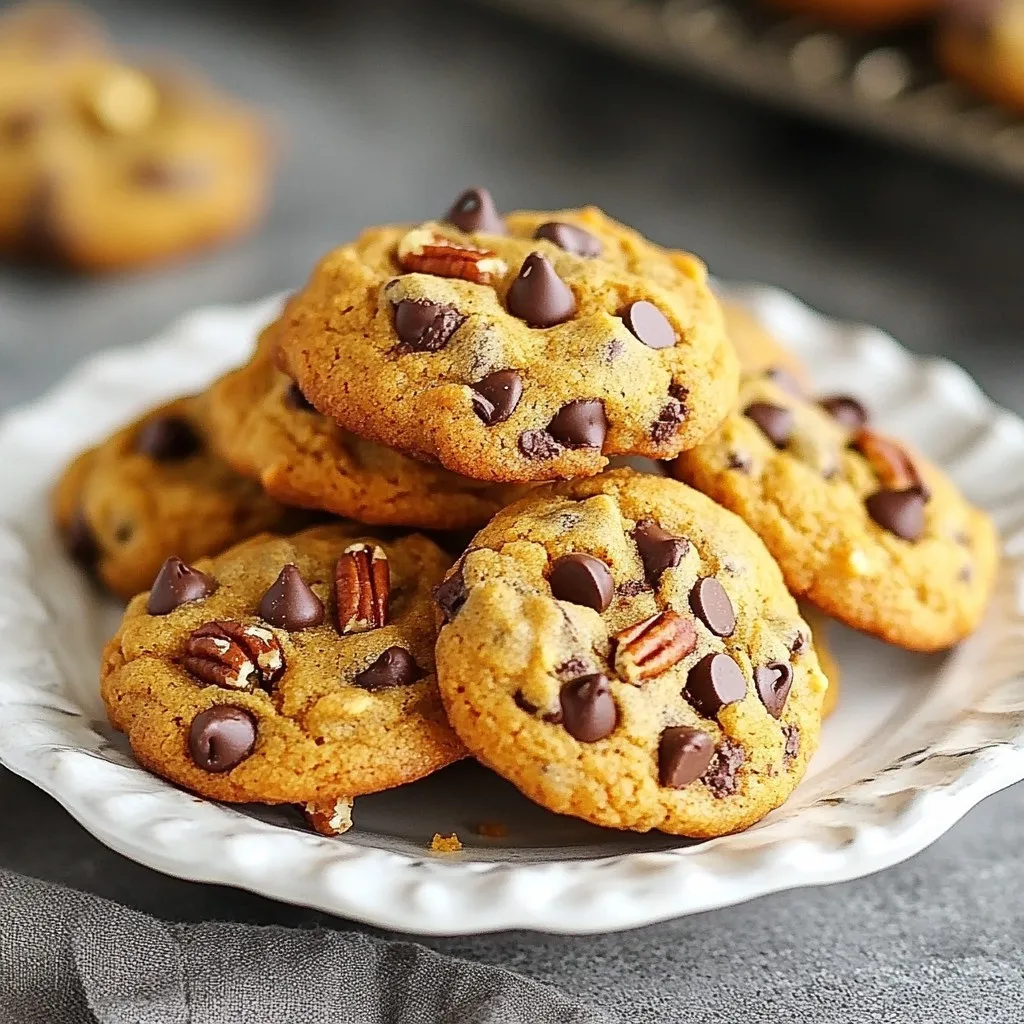
If you love cookies and crave fall flavors, you’re in for a treat! These Vegan Chocolate Chip Pumpkin Cookies blend warm spices with rich chocolate for a delightful bite. Made with simple, wholesome ingredients like pumpkin puree and coconut sugar, they’re perfect for any occasion. Plus, you can tweak them based on your pantry or diet. Let’s dive into this easy, yummy recipe that you’ll want to make again and again!
Why I Love This Recipe
- Delicious Flavor Combination: The rich chocolate pairs perfectly with the warm, spiced pumpkin, making each bite a delightful treat.
- Easy to Make: This recipe requires minimal effort, making it perfect for both baking novices and seasoned chefs alike.
- Healthier Indulgence: With ingredients like pumpkin puree and coconut sugar, these cookies offer a guilt-free way to satisfy your sweet tooth.
- Vegan-Friendly: These cookies are completely plant-based, making them suitable for vegans and those with dairy allergies.
Ingredients
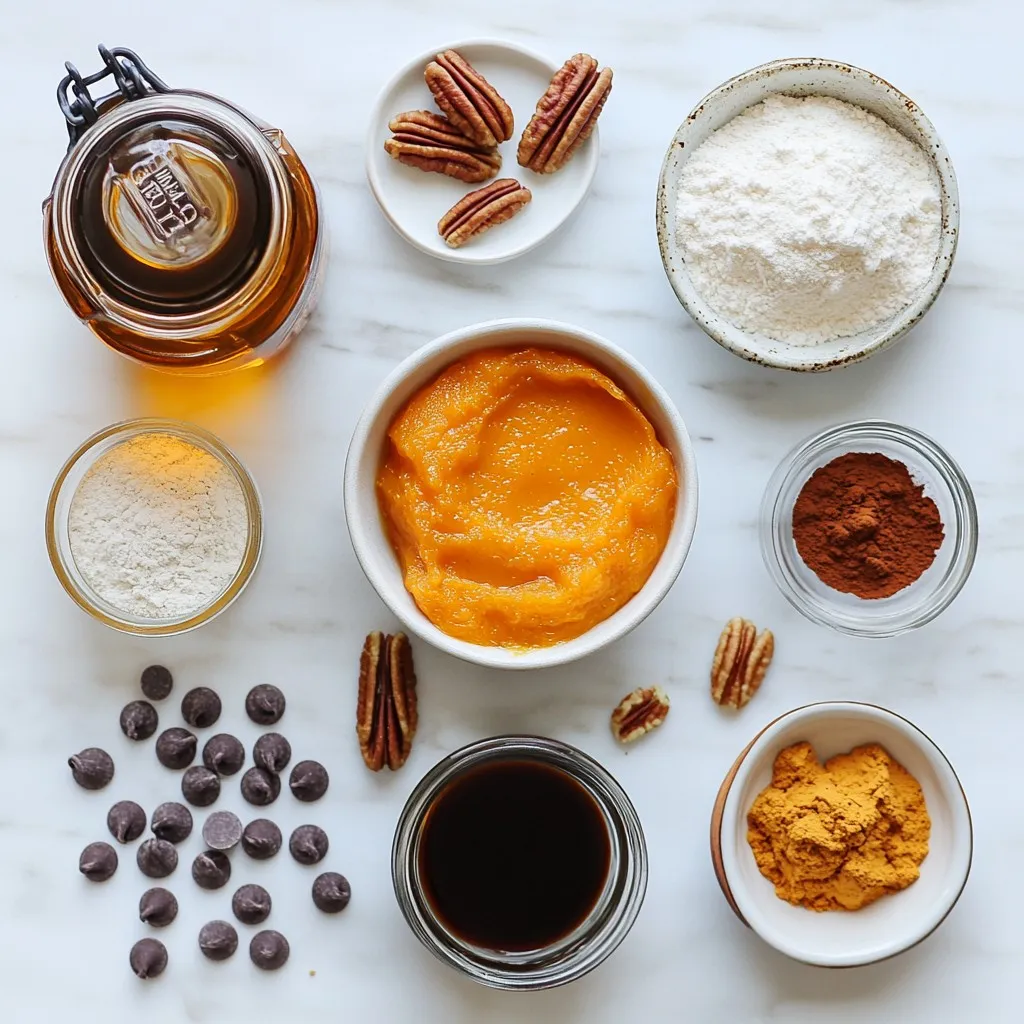
Full List of Ingredients
- 1 cup pumpkin puree
- 1/2 cup coconut sugar
- 1/4 cup pure maple syrup
- 1/2 cup melted coconut oil
- 1 teaspoon pure vanilla extract
- 1 1/2 cups all-purpose flour
- 1 teaspoon baking soda
- 1/2 teaspoon baking powder
- 1/2 teaspoon sea salt
- 1 teaspoon pumpkin pie spice
- 1/2 cup dairy-free chocolate chips
- 1/4 cup chopped pecans (optional)
Each ingredient plays a key role in making these cookies delicious.
Pumpkin puree adds moisture and a rich flavor. It gives the cookies a soft texture.
Coconut sugar provides sweetness and a hint of caramel taste. It also has nutrients compared to white sugar.
Pure maple syrup adds a lovely flavor while boosting the cookie’s sweetness.
Melted coconut oil replaces butter and keeps cookies moist. It also adds a light coconut taste.
Pure vanilla extract enhances all flavors. It adds warmth and depth to the cookies.
All-purpose flour gives structure to the cookies. It is essential for holding the other ingredients together.
Baking soda and baking powder help the cookies rise. They create a light, fluffy texture.
Sea salt balances the sweetness. It enhances the overall flavor of the cookies.
Pumpkin pie spice brings warmth and a cozy aroma. It includes cinnamon, nutmeg, and ginger.
Dairy-free chocolate chips provide sweetness and richness. They are perfect for chocolate lovers.
Chopped pecans add crunch and a nutty flavor. They are optional but highly recommended.
Mix these ingredients together, and you create a tasty treat perfect for any occasion.

Step-by-Step Instructions
Preparation Steps
- Preheating the Oven: Start by preheating your oven to 350°F (175°C). This step is vital for even baking.
- Preparing the Baking Sheet: Line a baking sheet with parchment paper. This helps the cookies come off easily once baked.
- Mixing Wet Ingredients: In a large bowl, mix the pumpkin puree, coconut sugar, pure maple syrup, melted coconut oil, and pure vanilla extract. Whisk them until smooth and creamy. This mix forms the base of your cookies.
Combining Dry Ingredients
- Sifting the Flour and Spices: In another bowl, sift the all-purpose flour, baking soda, baking powder, sea salt, and pumpkin pie spice. Sifting helps mix ingredients evenly and removes lumps.
- Incorporating Dry into Wet Mixture: Gradually add the dry mix to the wet mix. Stir gently until combined. It’s okay if there are a few lumps; they help keep the cookies soft.
Forming the Cookies
- Folding in Chocolate Chips and Pecans: Gently fold in the dairy-free chocolate chips and optional chopped pecans. This adds flavor and texture to your cookies.
- Dropping Dough onto Baking Sheet: Use a tablespoon or cookie scoop to drop dough balls on the prepared sheet. Space them at least 2 inches apart so they can spread.
- Baking Time and Temperature: Bake the cookies for 10-12 minutes. Look for golden edges and soft centers. This gives you the perfect cookie texture.
These steps guide you in making delicious vegan chocolate chip pumpkin cookies. Enjoy the process and the yummy results!
Tips & Tricks
Baking Tips for Perfect Cookies
Avoiding Over-Mixing
Mixing too much can ruin your cookies. When you add dry ingredients, stir gently. It’s okay to have some lumps. This helps keep your cookies soft and chewy.
Checking for Doneness
Look for golden edges and soft centers. Your cookies should look slightly underbaked in the middle. They will continue to cook as they cool. Don’t worry; this gives you that perfect texture.
Ingredient Substitutions
Alternatives to Coconut Sugar
If you don’t have coconut sugar, you can use brown sugar or regular sugar. Both options will work well. Just remember, brown sugar may add a slight molasses flavor.
Options for Oil and Sweeteners
You can swap coconut oil with vegetable oil or applesauce. For sweeteners, agave syrup or honey can replace pure maple syrup. Each will lend a unique taste to your cookies.
Enhancing Flavor and Texture
Adding Spices
Want to spice things up? Add a pinch of cinnamon or nutmeg. These spices add warmth and depth to your cookies. You can also try cardamom for a unique twist.
Serving Suggestions
Serve warm cookies with a scoop of dairy-free ice cream. They also taste great with a drizzle of melted chocolate. For a crunchy touch, top them with chopped pecans. Enjoy experimenting!
Pro Tips
- Use Fresh Pumpkin Puree: For the best flavor and texture, use homemade pumpkin puree instead of canned. Simply roast or steam fresh pumpkin, then blend until smooth.
- Perfect Storage: Store your cookies in an airtight container at room temperature for up to a week, or freeze them for longer storage. Just make sure to separate layers with parchment paper!
- Experiment with Add-ins: Feel free to customize your cookies by adding other mix-ins like dried cranberries, walnuts, or even a sprinkle of sea salt on top before baking for an extra flavor boost.
- Check for Doneness: Keep an eye on your cookies as they bake. They should be golden around the edges and still soft in the center—this ensures they stay chewy and delicious!

Variations
Gluten-Free Options
Swapping All-Purpose Flour
To make gluten-free cookies, swap all-purpose flour with a gluten-free blend. Look for blends that contain rice flour, potato starch, and tapioca flour. These mixes usually work well in cookies.
Other Gluten-Free Flours to Consider
You can also use almond flour or coconut flour. Almond flour adds a nutty taste, while coconut flour absorbs moisture. If using coconut flour, reduce the amount to about one-fourth of the all-purpose flour. This adjustment helps keep your cookies soft.
Flavor Variations
Adding Nut Butter
Want creamier cookies? Try adding nut butter, like almond or cashew butter. This makes the dough richer and adds a lovely flavor. Just replace a bit of the melted coconut oil with nut butter for the best results.
Experimenting with Different Mix-ins
Feel free to switch up the mix-ins! Try adding dried fruit, like raisins or cherries. You could also use different nuts, such as walnuts or hazelnuts. Each mix-in offers a new taste and texture to your cookies.
Seasonal Additions
Incorporating Cranberries
Cranberries bring a tart flavor that pairs well with pumpkin. Add about a half cup of dried cranberries to the dough. They add color and a nice contrast to the sweetness of the cookies.
Using Other Fall Spices
You can spice things up! Try adding cinnamon or ginger to the dough. These spices enhance the fall flavors and make your cookies even more inviting. Just a pinch can make a big difference!
Storage Info
Best Storage Practices
Room Temperature Storage
Store your cookies at room temperature. Use an airtight container to keep them fresh. They will stay soft for about 3 days.
Refrigeration Tips
If you want to keep them longer, place the cookies in the fridge. They can last up to a week when chilled. Just let them warm up to room temp before enjoying.
Freezing Cookies
How to Freeze Dough
To freeze the dough, scoop it out into balls. Place the balls on a baking sheet, and freeze them until firm. Then, transfer the dough balls to a freezer bag. They will last for up to 3 months.
Best Methods for Storing Baked Cookies
After baking, let the cookies cool completely. Place them in a freezer-safe container or bag. They can stay fresh for about 3 months in the freezer.
Shelf Life
How Long Cookies Last
These cookies last about 3 days at room temp and a week in the fridge. If frozen, they can last up to 3 months.
Signs of Spoilage to Look For
Look for any mold or off smells. If the cookies feel dry or hard, they may not taste good anymore. Always trust your senses!
FAQs
Common Questions About Vegan Chocolate Chip Pumpkin Cookies
Can I use pumpkin pie filling instead of pumpkin puree?
No, I do not recommend using pumpkin pie filling. It has added sugars and spices. Use pure pumpkin puree for the best results.
How can I make these cookies less sweet?
To reduce sweetness, cut back on the coconut sugar. You can also use less maple syrup. Start with a 1/4 cup of each and taste the dough.
What can I substitute for coconut oil?
You can use vegetable oil or melted vegan butter. Both will work well in this recipe. They help keep the cookies moist and tender.
Baking and Recipe Tips
What if my dough is too sticky?
If your dough feels sticky, add a little more flour. Start with one tablespoon at a time. Mix well after each addition until it reaches a good consistency.
How can I make my cookies crispier?
To get crispier cookies, bake them a minute longer. You can also use less pumpkin puree. This will help create less moisture in the cookie.
Ingredient-Specific Inquiries
Are there any substitutes for dairy-free chocolate chips?
Yes, you can use carob chips or chopped nuts. These will add flavor and texture to your cookies. Another option is to chop dark chocolate bars.
Can I use fresh pumpkin instead of canned?
Yes, fresh pumpkin works well. Just make sure to cook and puree it first. Remove excess water to get the right texture for your cookie dough.
This blog post covered how to make tasty vegan chocolate chip pumpkin cookies. We explored the ingredients, step-by-step instructions, baking tips, and fun variations. Remember to mix carefully and check for doneness to craft ideal cookies. You can also experiment with flavors and storage methods to enjoy them longer. Baking should be fun and tasty. Embrace your creativity and enjoy every bit

Vegan Chocolate Chip Pumpkin Cookies
Ingredients
- 1 cup pumpkin puree
- 0.5 cup coconut sugar
- 0.25 cup pure maple syrup
- 0.5 cup melted coconut oil
- 1 teaspoon pure vanilla extract
- 1.5 cups all-purpose flour
- 1 teaspoon baking soda
- 0.5 teaspoon baking powder
- 0.5 teaspoon sea salt
- 1 teaspoon pumpkin pie spice
- 0.5 cup dairy-free chocolate chips
- 0.25 cup chopped pecans (optional)
Instructions
- Preheat your oven to 350°F (175°C). Prepare a baking sheet by lining it with parchment paper for easy cookie removal.
- In a large mixing bowl, combine the pumpkin puree, coconut sugar, pure maple syrup, melted coconut oil, and pure vanilla extract. Use a whisk to mix the ingredients thoroughly until you achieve a smooth and creamy consistency.
- In a separate bowl, sift together the all-purpose flour, baking soda, baking powder, sea salt, and pumpkin pie spice. This step ensures there are no lumps and that the leavening agents are evenly distributed.
- Gradually incorporate the dry ingredients into the wet mixture. Stir gently until just combined. Be careful not to over-mix; a few lumps are perfectly fine to maintain a tender cookie texture.
- Gently fold in the dairy-free chocolate chips and the optional chopped pecans, ensuring an even distribution throughout the dough.
- With the help of a tablespoon or a cookie scoop, drop generous dollops of cookie dough onto the prepared baking sheet, spacing them at least 2 inches apart to allow for spreading during baking.
- Place the cookies in the oven and bake for 10-12 minutes. Look for the edges to turn a lovely golden brown while the centers remain soft and slightly underbaked for the best texture.
- Once baked, remove the cookies from the oven and allow them to cool on the baking sheet for about 5 minutes. This helps them set before transferring them to a wire rack to cool completely.


![- 1 package (15.35 oz) Oreo cookies - 8 oz cream cheese, softened to room temperature - 1 cup semisweet chocolate chips - 1 tablespoon coconut oil (optional, for smoother melting) - Sprinkles or crushed Oreos for decoration I love using classic Oreo cookies for this recipe. They add rich flavor and crunch. The cream cheese makes the truffles creamy and smooth. When mixed with crushed Oreos, it creates a perfect dough. Next, I melt semisweet chocolate chips for coating. This chocolate is rich and adds sweetness. If you want a smoother coat, add coconut oil. It helps the chocolate melt better. Finally, I enjoy decorating the truffles. You can use colorful sprinkles or crushed Oreos. This adds a fun look and extra flavor. You can find the complete recipe [Full Recipe]. - Using flavored cream cheese (e.g., vanilla or chocolate) - Alternative chocolate types (dark chocolate, white chocolate) - Various toppings (nuts, colorful candy sprinkles) Feel free to get creative with your ingredients. Flavored cream cheese can add a twist. Imagine using chocolate cream cheese for an even richer taste. You can also play with chocolate types. Dark chocolate gives a bold flavor. White chocolate adds sweetness and a nice contrast. For toppings, you can use nuts or different sprinkles. This makes your truffles unique and fun! To start, you need to crush the Oreos. You can use a food processor for this task. Just place the cookies in and pulse until they are fine crumbs. If you want a more hands-on method, put the Oreos in a zip-lock bag. Then, use a rolling pin to crush them until they are finely broken. Either way works great! Next, mix the crushed Oreos with cream cheese. In a large bowl, add the Oreo crumbs to softened cream cheese. Use a spatula or your hands to mix it well. You want it to be uniform and dough-like. This will be the base of your truffles. Now, let’s shape the truffles. Take a tablespoon-sized portion of the Oreo mixture. Roll it into a smooth ball with your hands. Place each ball on a baking sheet lined with parchment paper. This makes it easy to lift them later. After shaping, it's time to chill them. Put the baking sheet with the truffles in the refrigerator for about 30 minutes. This step helps the truffles firm up, making them easier to dip in chocolate later. Next, let's melt the chocolate. In a microwave-safe bowl, combine semisweet chocolate chips with coconut oil if you want a smoother mix. Heat the mixture in the microwave in 30-second intervals. Stir between each interval until the chocolate is fully melted and smooth. After the chocolate is ready, it's time to dip the truffles. Take each chilled truffle and use a fork to dip it into the melted chocolate. Make sure it is fully coated. Then, gently tap the fork against the bowl to remove any extra chocolate. While the chocolate coating is still wet, you can decorate the truffles. Add some crushed Oreos or colorful sprinkles on top. This makes your truffles look festive and fun. Get creative! You can also use different toppings for special occasions. For more detailed steps, check out the Full Recipe. To make your chocolate smooth, add a tablespoon of coconut oil when melting. This small addition keeps the chocolate creamy and easy to dip. Mixing the crushed Oreos with cream cheese is key. Make sure to blend them well, so you get a nice, even dough. You want every bite to be rich and flavorful. Yes, you can prepare these truffles in advance. This makes them a great treat for parties. Once you form the truffles, chill them for about 30 minutes. After that, store them in the fridge or freezer. If you freeze them, let them sit out for a few minutes before serving. This helps bring back that perfect texture. When serving your truffles, presentation counts. Arrange them on a stylish platter or in a decorative box. You can also use colorful cupcake liners for a fun touch. Pair these treats with beverages like coffee or a glass of cold milk. The flavors blend nicely and make each bite even more enjoyable. For more ideas, check out the Full Recipe. {{image_4}} You can easily change the flavor of your truffles. Adding flavor extracts gives a nice twist. A drop of mint, vanilla, or almond extract can boost the taste. You can also try different Oreo flavors. Peanut butter or red velvet Oreos add a fun spin. Each flavor brings a new experience to your truffles. If you need gluten-free treats, use gluten-free Oreos. They work just like regular Oreos. For vegan options, switch to dairy-free cream cheese and chocolate. This way, everyone can enjoy these tasty treats without worry. Decorating can make your truffles stand out. Use white chocolate or colored melts for a fun look. You can also create themed truffles for holidays. Think about red and green for Christmas or pastel colors for Easter. The right decorations can make your truffles fit any occasion. To keep your chocolate covered Oreo truffles fresh, store them in the fridge. Place them in an airtight container. This helps to prevent them from drying out. If you plan to eat them soon, this method is best. For longer storage, you can freeze the truffles. First, place them in a single layer on a baking sheet. Freeze them for about one hour until they are firm. Then, transfer them to a freezer-safe bag or container. This will help them last longer without losing flavor. In the fridge, these truffles can last about one week. They taste best within the first few days. In the freezer, they can last up to three months. The flavor and texture stay good if stored properly. Always label your containers with the date to track how long they have been stored. To keep your truffles fresh, use airtight containers. This stops moisture from getting in. Moisture can make the chocolate lose its nice shine and texture. If you freeze your truffles, let them thaw in the fridge. This helps them regain their creamy texture. Avoid thawing them at room temperature, which can make them too soft. Once they are thawed, enjoy them cold or let them sit out for a few minutes for a softer bite. For the full recipe, check the previous section. Yes, you can use low-fat cream cheese. However, it may change the flavor and texture. Low-fat cream cheese can make truffles less rich and creamy. The truffles might be a bit drier too. For the best taste, I recommend using regular cream cheese. These truffles take about 30 minutes to set in the fridge. This chilling time helps the truffles hold their shape. After you dip them in chocolate, place them back on the baking sheet. Leave them in the fridge until the chocolate hardens. You can use store-bought truffles, but homemade ones are better. Homemade truffles taste fresher and let you pick flavors. You can customize them to your liking. Plus, making them yourself is a fun activity! You can use many cookies for truffles. Some great options include: - Chocolate chip cookies - Peanut butter cookies - Vanilla wafers - Graham crackers Feel free to mix and match flavors! This allows for fun and unique treats. For the full recipe, check out the details above. You can make delicious chocolate-covered Oreo truffles at home. This blog showed you the key ingredients and easy steps needed to prepare, shape, dip, and decorate them. Remember, the fun lies in customizing flavors and toppings to your taste. Use the tips provided for great texture and storage. These bites are perfect for parties or a sweet treat at home. Enjoy making these truffles, and delight in sharing them with friends and family!](https://dishtreats.com/wp-content/uploads/2025/07/b12a751c-54f3-4358-8f8e-2195b80955c3-768x768.webp)
![- 1 cup rolled oats - 2 cups almond milk (or your preferred milk) - 1 medium sweet apple, diced (suggestions: Fuji or Gala) - 1 teaspoon ground cinnamon - 2 tablespoons maple syrup (or honey if you prefer) - 1/2 teaspoon vanilla extract - 1/4 cup plain Greek yogurt (optional) - Pinch of salt - Chopped nuts for topping - Extra apple slices and cinnamon for garnish Apple cinnamon overnight oats are easy to make and full of flavor. The oats soak overnight, making them creamy and delicious. You can customize this recipe based on your taste. For the base, I use rolled oats and almond milk, but feel free to pick any milk you like. The diced apple brings sweetness and crunch. I suggest using Fuji or Gala apples since they are sweet and juicy. Ground cinnamon adds warmth and a cozy touch. Maple syrup gives the oats a natural sweetness. If you want a little creaminess, add Greek yogurt. Don’t forget the pinch of salt; it enhances all the flavors. Chopped nuts add a nice crunch on top. You can use walnuts, pecans, or any nuts you enjoy. Finally, garnish with extra apple slices and a dusting of cinnamon for a pretty finish. - Different types of milk (coconut, oat, etc.) - Sweeteners (agave syrup, stevia, etc.) - Additional fruit (berries, bananas, etc.) If you want to try something different, there are many options. Swap almond milk for coconut or oat milk if you prefer. You can change sweeteners too; agave syrup or stevia work well. Add in more fruits like berries or sliced bananas for extra flavor. This makes each serving unique and fun. The best part? You can make it just how you like it! For the full recipe, check out Apple Cinnamon Overnight Oats Delight. - Step 1: Combine rolled oats with milk and yogurt. In a large bowl, mix 1 cup of rolled oats with 2 cups of almond milk. If you like, add 1/4 cup of Greek yogurt for creaminess. Stir until mixed well. - Step 2: Add apples, cinnamon, sweetener, vanilla, and salt. Fold in 1 diced apple, 1 teaspoon of ground cinnamon, and 2 tablespoons of maple syrup. Add 1/2 teaspoon of vanilla extract and a pinch of salt. Mix until everything is evenly distributed. - Step 3: Transfer mixture into jars and refrigerate. Spoon the oat mix into jars. Make sure each jar has some apple pieces. Close the lids and place them in the fridge overnight. - Evenly distribute diced apples among jars. This ensures each jar has the same amount of apple flavor. - Layer ingredients for visual appeal. Create a pretty look by layering oats and apples. This makes your breakfast even more inviting. - Stir before serving and adjust consistency. When you take the jars out, give them a good stir. If they feel too thick, add a splash of milk. - Top with nuts and additional apple slices. Finish with a sprinkle of chopped nuts and a few apple slices for crunch. A dash of cinnamon adds warmth and flavor. For full details, check the [Full Recipe]. To get the best texture, always use rolled oats. They soak up the liquid well. Steel-cut oats take longer to soften. You might want to avoid them for overnight oats. Adjust the sweetness by adding more or less maple syrup. Taste as you mix to find your perfect balance. Make a big batch of oats for quick breakfasts. You can prepare up to five jars at once. Store them in the refrigerator for up to five days. This way, you’ll have a quick meal ready on busy mornings. Feel free to experiment with spices like nutmeg or cardamom. Just a pinch can add a warm kick. You can also add seeds like chia or flaxseed. These add fiber and make your oats even better for you. {{image_4}} You can easily make apple cinnamon overnight oats vegan. Just swap the Greek yogurt for a plant-based yogurt. Use almond, coconut, or oat milk for a creamy base. These changes keep the flavor rich and tasty while being dairy-free. If you need gluten-free options, choose certified gluten-free oats. Many brands offer oats that are safe for those with gluten sensitivities. This way, you can enjoy your oats without worry. You can mix in other fruits to change the taste. Try berries like strawberries or blueberries for a fresh twist. Bananas also work well, adding sweetness and creaminess. For toppings, nuts and seeds add crunch. Chopped almonds, walnuts, or sunflower seeds all taste great. You can also sprinkle chia seeds for extra fiber and health benefits. In fall, add pumpkin spice to your oats for a cozy taste. Just mix in a teaspoon or two for that warm, spiced flavor. It pairs perfectly with apples. In summer, think about fresh fruits like peaches or mangoes. These fruits add a bright, juicy flavor. You can mix them in or use them as a topping for a colorful and tasty breakfast. For the complete recipe, check out the [Full Recipe]. To keep your apple cinnamon overnight oats fresh, use jars or airtight containers. Glass jars work great. They seal well and let you see the yummy layers. Make sure to refrigerate them right after you prepare them. This keeps the oats safe to eat. You can freeze individual servings of overnight oats. First, pour the oats into freezer-safe containers or jars. Leave some space at the top, as they will expand. To enjoy later, thaw them in the fridge overnight. Once thawed, stir well. You might want to add a splash of milk to make them creamy again. Apple cinnamon overnight oats can stay fresh in the fridge for up to five days. Check for any signs of spoilage before eating. If the oats smell sour or have a strange color, throw them away. Always trust your nose and eyes! For the best taste, enjoy them within the first few days. Apple cinnamon overnight oats are a tasty breakfast. They combine oats, milk, apples, and cinnamon. The mixture sits in the fridge overnight. This soaking makes the oats soft and creamy. You get a nice blend of flavors. It’s a quick way to enjoy a healthy meal. Yes, you can use quick oats. However, they have a different texture. Quick oats cook faster and become mushy. If you use them, soak for less time. Rolled oats keep a firmer bite and work better for overnight oats. Overnight oats last about 5 days in the fridge. Store them in airtight jars or containers. Check for bad smells or changes in texture. If they look or smell off, toss them out. Yes, kids love apple cinnamon overnight oats! They are sweet and fun to eat. Serve in small jars for a cute look. You can also add toppings like nuts or more fruit for variety. This makes it a family-friendly dish everyone can enjoy. Apple cinnamon overnight oats offer a delightful and easy breakfast option. You can prepare them quickly with just a few simple steps. This meal not only fills you up but also lets you customize flavors to your taste. Experiment with different fruits, sweeteners, and spices to keep it fun. Remember to store your oats correctly for freshness. Enjoy this nutritious dish throughout the week! Your mornings can be bright and delicious with this recipe.](https://dishtreats.com/wp-content/uploads/2025/06/6eb7544b-1d16-4ecc-8a32-decb7f29ee21-768x768.webp)
