Tropical Mango Coconut Popsicles Refreshing Summer Treat

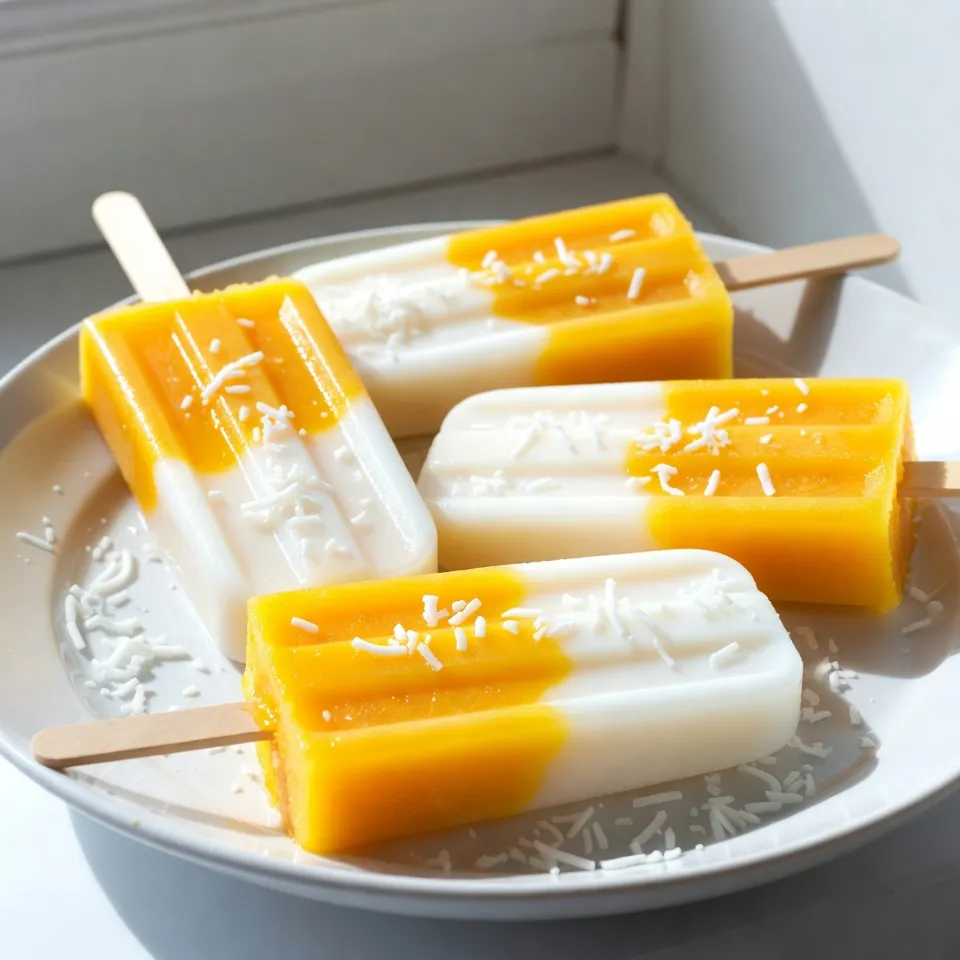
Craving a cool treat this summer? Tropical Mango Coconut Popsicles are not just delicious; they’re a burst of sunshine in every bite! With just a few fresh ingredients like ripe mangoes and creamy coconut milk, you can whip up these refreshing popsicles in no time. Perfect for hot days, these homemade treats are easy to make and full of flavor. Let’s dive into the simple steps to create your perfect summer delight!
Why I Love This Recipe
- Refreshing Flavor: This popsicle combines the sweetness of ripe mangoes with the creamy texture of coconut milk, creating a refreshing tropical treat perfect for hot days.
- Easy to Make: With just a few simple ingredients and minimal prep time, these popsicles can be whipped up quickly, making them an ideal last-minute dessert.
- Customizable: You can adjust the sweetness and add flavors like lime or even mix in other fruits, allowing you to personalize each batch to your liking.
- Healthier Alternative: These popsicles are made with natural ingredients, offering a healthier alternative to store-bought options filled with additives and preservatives.
Ingredients
Fresh Ingredients
- 2 ripe mangoes
- 1 cup coconut milk
- 1/2 cup coconut water
Sweetening Agents
- 2 tablespoons honey or agave syrup
- Freshly squeezed lime juice
Additional Flavorings
- A pinch of sea salt
- Optional: shredded coconut for garnish
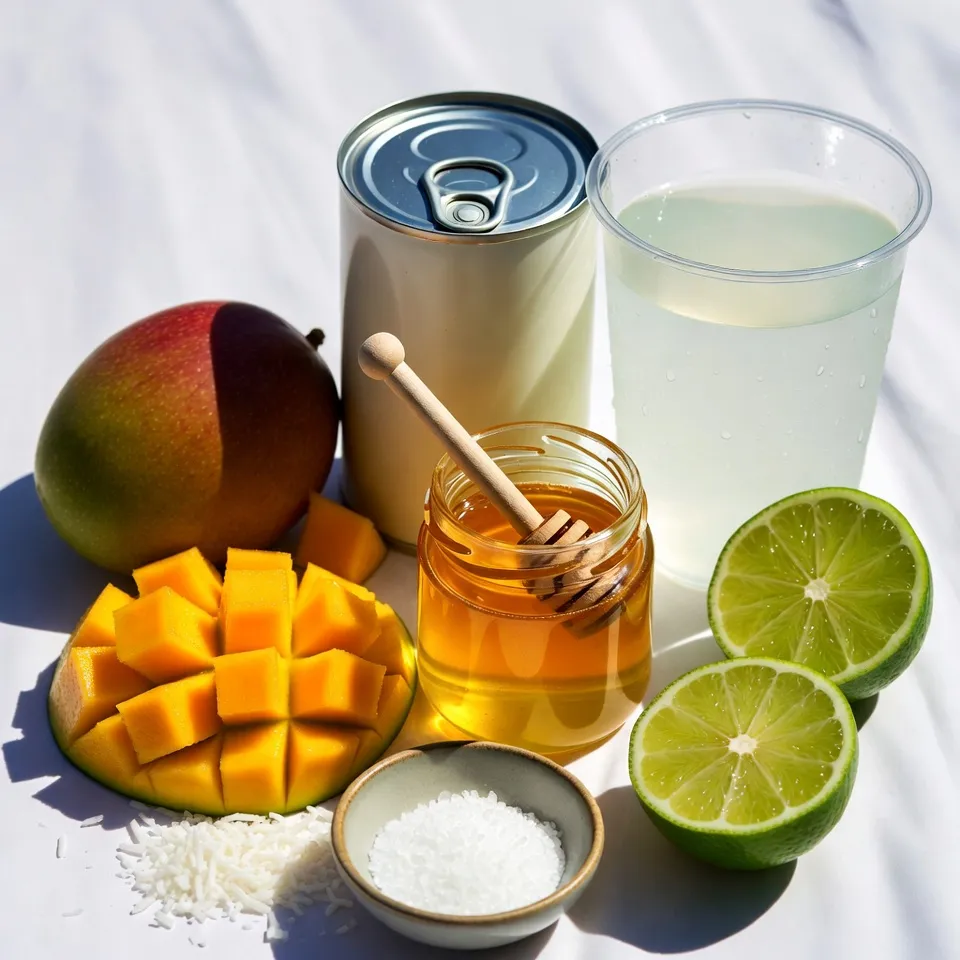
To create Tropical Mango Coconut Popsicles, you need fresh and flavorful ingredients. Start with 2 ripe mangoes. Choose mangoes that feel soft when you press them lightly. Their sweetness adds a perfect base. Next, grab 1 cup of coconut milk. This gives a creamy texture. For extra hydration, use 1/2 cup of coconut water. It brings a refreshing taste.
For sweetness, mix in 2 tablespoons of honey or agave syrup. You can adjust this based on your taste. A squeeze of fresh lime juice brightens the flavor. It adds a nice tartness that balances the sweetness.
Don’t forget a pinch of sea salt! It enhances all the flavors. If you want more texture, add shredded coconut as a garnish. It adds a fun crunch to your popsicles.
Gather these ingredients to make a delightful summer treat that everyone will love!

Step-by-Step Instructions
Preparation of Ingredients
- Peel and dice the mangoes.
- Measure out 1 cup of coconut milk and 1/2 cup of coconut water.
Start by peeling the mangoes. Use a sharp knife to cut off the skin. Then, cut the mango flesh into small cubes. Make sure to remove the pit. Set the diced mangoes aside. Next, grab a measuring cup. Pour in the coconut milk. Also, measure out the coconut water.
Blending the Mixture
- Combine ingredients in a blender.
- Blend until smooth and creamy.
Place the diced mangoes in the blender. Add the coconut milk and coconut water. Then, add 2 tablespoons of honey or agave syrup, 1 tablespoon of lime juice, and a pinch of sea salt. Blend the mixture on high speed. Keep blending until it looks smooth and creamy. This should take about 30 seconds.
Freezing Process
- Pour into molds and insert sticks.
- Freeze for a minimum of 6 hours.
Carefully pour the blended mixture into the popsicle molds. Fill them almost to the top. Leave a small gap for the popsicles to expand while freezing. Next, insert the popsicle sticks. Make sure they are centered in each mold. Place the molds in the freezer. Let them freeze for at least 6 hours. They need to be completely solid before you can enjoy them.
Tips & Tricks
Achieving the Perfect Texture
To make smooth and creamy popsicles, blending is key. Start by chopping the mangoes into small pieces. Then, add all the ingredients to your blender. Blend on high speed until there are no chunks left. If you find some mango bits, keep blending until smooth.
For sweetness, taste your mixture before pouring it into molds. If it isn’t sweet enough, add a bit more honey or agave syrup. Blend again to mix everything well. This small step makes a big difference in flavor.
Serving Suggestions
Garnishing adds fun and flair. Before serving, roll your popsicles in shredded coconut for a tropical touch. It gives a nice texture and flavor. You can also place them on a colorful platter. Add some lime wedges around the popsicles for a pop of color and extra zest.
Mold & Stick Methods
Choosing the right popsicle molds matters for the best results. Look for molds made of silicone. They make it easy to remove the popsicles later. When pouring your mixture, fill the molds nearly to the top. Leave a small gap to allow for expansion as they freeze.
Inserting the sticks is simple. Make sure each stick is centered in the mold. This helps your popsicles freeze evenly and stay together. Enjoy the fun of making your own popsicles!
Pro Tips
- Use Ripe Mangoes: Make sure your mangoes are fully ripe for the best flavor and sweetness. A perfectly ripe mango should yield slightly to pressure and have a sweet aroma.
- Chill Your Ingredients: For creamier popsicles, chill the coconut milk and coconut water before blending. This helps create a smoother texture in your popsicles.
- Experiment with Sweeteners: Feel free to substitute honey or agave syrup with other sweeteners like maple syrup or stevia according to your dietary preferences.
- Customize with Add-ins: Consider adding fresh fruit chunks or even a splash of rum for an adult version. These additions can enhance the flavor and texture of your popsicles.

Variations
Flavor Combinations
You can mix up the flavor of your popsicles in fun ways. Adding pineapple brings a bright twist. Just blend in one cup of fresh pineapple chunks with the mango. This combo tastes like a tropical paradise! You can also try other fruits. Bananas add creaminess, while kiwi brings a tangy kick. Feel free to experiment!
Dairy-Free Alternatives
If you want a dairy-free option, swap the coconut milk for almond milk or oat milk. Both choices work well and keep the popsicles creamy. Sweeteners are also easy to switch. Instead of honey, you can use maple syrup. It gives a nice flavor and is great for vegans.
Kid-Friendly Options
Making popsicles for kids? Try smaller molds! This way, they can enjoy a perfect portion. You can also use natural colors from fruits or veggies. For example, beet juice makes a bright pink color. Kids love the fun visuals, and you’ll love the healthy ingredients!
Storage Information
Storing Leftover Popsicles
To keep your Tropical Mango Coconut Popsicles fresh, wrap them well. Use plastic wrap or place them in an airtight container. This will help avoid freezer burn. Store them in the freezer for up to two months for the best taste.
Re-freezing Guidelines
You can re-freeze popsicles, but there are some tips. If they melt, refreeze them quickly. Avoid letting them sit at room temperature too long. This helps keep the texture smooth and creamy. Re-freezing too often can change the taste and texture, so limit it if you can.
Signs of Spoilage
Check your popsicles before serving. If they feel icy or have a strange smell, they may not be good. Look for any signs of freezer burn, like white spots. If you see these, it’s best to toss them out. Always ensure quality for a tasty treat!
FAQs
How long do Tropical Mango Coconut Popsicles last in the freezer?
Tropical Mango Coconut Popsicles can last up to three months in the freezer. For the best flavor, enjoy them within the first month. After that, they may lose some taste and texture. Store them in an airtight container or tightly wrap them in plastic. This keeps them fresh and avoids freezer burn.
Can I make these popsicles vegan?
Yes, you can make these popsicles vegan! Simply replace honey with agave syrup. Agave is a great sweetener that works well in this recipe. You can also try maple syrup if you want a different flavor. Both options keep the popsicles sweet and delicious.
What equipment do I need to make popsicles?
To make these popsicles, you need a few kitchen tools:
- A blender for mixing the ingredients
- Popsicle molds to shape the popsicles
- Popsicle sticks for easy handling
- A measuring cup for accuracy
- A spatula for scraping the blender
These tools help you create the perfect refreshment with ease.
You can now create delicious Tropical Mango Coconut Popsicles at home. We covered the fresh ingredients, including ripe mangoes and coconut milk. I shared detailed steps, from preparation to freezing. With tips for perfect texture and fun variations, you can tailor these pops to your taste. Remember to store them correctly to keep them fresh. Enjoy these treats as a tasty and healthy snack for you and your family. You now have all the tools to make your popsicles a hi

Tropical Mango Coconut Popsicles
Ingredients
- 2 whole ripe mangoes, peeled and diced
- 1 cup coconut milk
- 1/2 cup coconut water
- 2 tablespoons honey or agave syrup
- 1 tablespoon freshly squeezed lime juice
- a pinch sea salt
- optional shredded coconut for garnish
Instructions
- Begin by preparing your ingredients: peel and dice the mangoes, then set them aside.
- In a blender, combine the diced mangoes, coconut milk, coconut water, honey or agave syrup, lime juice, and a pinch of sea salt.
- Blend the mixture on high speed until it is completely smooth and creamy, ensuring that no chunks of mango remain.
- Taste the blended mixture and, if needed, adjust the sweetness to your liking by adding more honey or agave syrup. Blend briefly to combine any adjustments.
- Carefully pour the blended mixture into popsicle molds, filling them nearly to the top but leaving a small gap to allow for expansion during freezing.
- Insert popsicle sticks into each mold, making sure they are centered, and place the molds in the freezer. Allow them to freeze for a minimum of 6 hours, or until they are completely solid.
- When ready to enjoy, remove the popsicles from the molds by running warm water over the outside of the molds for a few seconds. This will help the popsicles slide out effortlessly.
- For an extra tropical touch, if desired, roll the popsicles in shredded coconut before serving.


![- 1/2 cup rolled oats - 1 tablespoon cocoa powder - 1 tablespoon peanut butter - 1 cup almond milk - 1 tablespoon maple syrup - 1/2 teaspoon vanilla extract - A pinch of salt To create a bowl of chocolate peanut butter overnight oats, you need simple ingredients. Start with rolled oats; they act as the base. Cocoa powder adds rich chocolate flavor. Peanut butter gives a smooth, nutty taste. Use almond milk as a creamy liquid. Maple syrup sweetens the dish naturally. A touch of vanilla extract enhances the flavors. Finally, a pinch of salt brings everything together. - Sliced bananas - Chocolate chips - Crushed peanuts - Assorted fresh berries You can elevate your oats with fun toppings. Sliced bananas add sweetness and texture. Chocolate chips bring extra chocolate goodness. Crushed peanuts offer a nice crunch. Fresh berries brighten the dish with color and flavor. Choose your favorites or mix them up for a tasty treat. For the complete recipe, check out the [Full Recipe]. - Step 1: Combine dry ingredients in a bowl. In a medium mixing bowl, add 1/2 cup rolled oats and 1 tablespoon cocoa powder. Stir these together. This mix gives your oats a deep chocolate flavor. - Step 2: Whisk together wet ingredients separately. In another bowl, mix 1 cup almond milk, 1 tablespoon peanut butter, 1 tablespoon maple syrup, 1/2 teaspoon vanilla extract, and a pinch of salt. Make sure the peanut butter blends in well. - Step 3: Mix dry and wet ingredients thoroughly. Pour the wet mix over the dry oats. Stir with a spoon until every oat is coated. This step ensures creamy and rich oats. - Step 4: Transfer mixture to a jar or container. Carefully spoon the mixed oats into a clean jar. Choose a jar with a lid for best results. - Step 5: Seal and refrigerate overnight. Close the lid tightly. Place the jar in the fridge. Let it chill overnight or for at least 4 hours. The oats will soak up the flavors and soften. - Step 6: Stir before serving. When you’re ready to eat, take the jar out of the fridge. Stir the oats well. If they seem thick, add a little more milk to loosen them up. - Step 7: Add your choice of toppings. Top your oats with sliced bananas, chocolate chips, crushed peanuts, or fresh berries. These toppings add fun flavors and textures to your dish. Enjoy your creamy, chocolatey breakfast! For the full recipe, check out the complete guide. - For creamier oats, use whole milk or a milk alternative. - Allow oats to soak longer for a softer texture. Using whole milk adds richness. If you prefer a lighter option, almond or oat milk works well too. The key is to find what you love. Soaking longer lets the oats absorb more liquid. This makes them softer and more enjoyable to eat. - Try different nut butters like almond or cashew. - Experiment with sweeteners like agave or stevia. Feel free to swap peanut butter with almond or cashew butter for new flavors. Each nut butter brings its own taste. Use different sweeteners to find your perfect balance. Agave has a light flavor, while stevia is sugar-free. - Serve in a clear jar for visual appeal. - Drizzle extra peanut butter on top. Serving in a clear jar lets everyone see those delicious layers. It makes your dish look fancy! A drizzle of peanut butter on top adds a nice touch. It makes it more inviting and tasty. For an added twist, include colorful toppings like fresh berries or chocolate chips. Enjoy crafting your perfect chocolate peanut butter overnight oats! For the complete recipe, check the Full Recipe section. {{image_4}} You can switch up your chocolate peanut butter overnight oats with fun flavors. - Chocolate Banana Overnight Oats: Mash a ripe banana into the mix. The banana adds natural sweetness and a creamy texture. - Mocha Peanut Butter Overnight Oats: Add a teaspoon of instant coffee or espresso powder. This gives your oats a rich coffee flavor. Got dietary needs? No problem! You can easily modify this recipe. - Gluten-free option: Use certified gluten-free oats. This way, everyone can enjoy a tasty breakfast. - Vegan alternative: Swap regular milk for almond milk or oat milk. Use maple syrup or agave for sweetness. Change your oats with the seasons for exciting new tastes. - Adding pumpkin spice for fall: Mix in a teaspoon of pumpkin spice. This brings warmth and a cozy flavor to your oats. - Incorporating fresh berries in summer: Toss in some strawberries or blueberries. Fresh fruit brightens up your oats and adds nutrients. These variations keep your breakfast fun and exciting! You can find the full recipe here to make your own delicious creation. To keep your chocolate peanut butter overnight oats fresh, use an airtight container. This helps prevent moisture and odors from mixing in. Store the container in the refrigerator. Your oats will stay good for up to 5 days. This means you can make a batch and enjoy it throughout the week. Can you freeze overnight oats? Yes, you can freeze them! Freezing is a great way to save extra servings. Just make sure to use a freezer-safe container. How to thaw overnight oats for future use: To thaw, move the container to the fridge the night before you want to eat them. This will help them thaw slowly and evenly. You can also use the microwave if you’re in a hurry. Just heat it in short bursts, stirring in between. Best methods to reheat if desired: If you prefer warm oats, reheat them in the microwave. Place your oats in a microwave-safe bowl and cover it. Heat for 30 seconds, then stir. Repeat until warm enough. You can also reheat on the stove. Just add a splash of milk to a saucepan and warm it over low heat, stirring often. Enjoy your delicious oats however you like! What is the texture of overnight oats supposed to be? Overnight oats should be creamy and thick. They absorb the liquid overnight. This makes them soft but not mushy. You want a nice balance. If they seem too watery, add less milk next time. Can I use steel-cut oats instead of rolled oats? Yes, but steel-cut oats will need more time to soak. They take longer to soften. I recommend soaking them overnight to get a good texture. You may need to adjust the liquid and soaking time. How can I make my overnight oats thicker or creamier? To make your oats thicker, use less milk. You can also add chia seeds. They help absorb liquid and add fiber. Another tip is to let them sit longer in the fridge. Are overnight oats healthy? Yes, overnight oats are very healthy. They offer fiber and protein. This can help keep you full. They also provide vitamins and minerals. Plus, they are low in sugar if you control the toppings. What are the nutritional benefits of using peanut butter? Peanut butter adds healthy fats and protein. It helps keep your energy up. It also has vitamins like E and B. Just make sure to choose a natural peanut butter with no added sugar. What to pair with chocolate peanut butter overnight oats? You can pair them with fresh fruit. Bananas and berries taste great. Nuts or seeds also add a nice crunch. For extra sweetness, consider a drizzle of honey or maple syrup. Can overnight oats be eaten warm? Yes, you can eat them warm if you like. Just heat them gently in the microwave. Add a splash of milk to keep them creamy. Enjoy your warm treat any time of the day! You can create tasty and healthy overnight oats with simple ingredients. We discussed the main ingredients, preparation steps, and optional toppings. You learned tips for customization, serving, and storing your oats. Remember, you can adjust flavors and textures to suit your taste. Try different ingredients and enjoy your meals. Keep experimenting with toppings and variations. This way, overnight oats will always feel new and exciting. Enjoy every delicious bite and make it your own!](https://dishtreats.com/wp-content/uploads/2025/07/90d151b9-6d0c-4c1c-ba31-37512e57091e-768x768.webp)


