Three Cheese Stuffed Shells Delicious and Easy Recipe

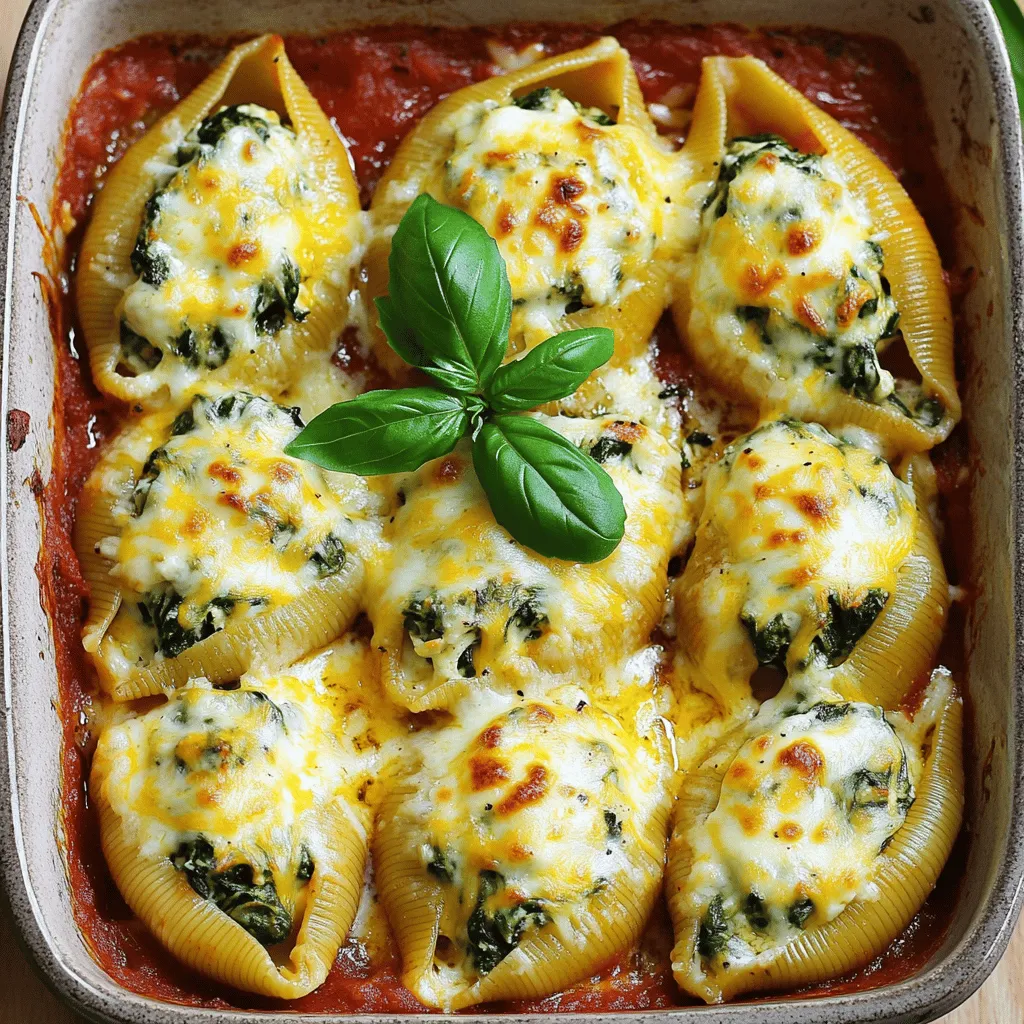
Craving a comforting dish that’s both delicious and easy to make? You’ve found it! My Three Cheese Stuffed Shells are quick to prepare and packed with flavor. In this recipe, I’ll guide you step-by-step, so you can impress anyone at your table. From creating a smooth cheese filling to baking the perfect dish, you’ll master each part. Get ready to dive into this cheesy delight!You only need a few key ingredients to create a dish that is rich in flavor and satisfying. This recipe serves four and takes about 60 minutes from start to finish.
List of Required Ingredients
Here are the ingredients you will need:
- 12 large pasta shells
- 1 cup ricotta cheese
- 1 cup shredded mozzarella cheese
- ½ cup grated Parmesan cheese
- 1 cup fresh spinach, finely chopped
- 1 large egg, beaten
- 2 cups marinara sauce (store-bought or homemade)
- 1 teaspoon garlic powder
- 1 teaspoon dried Italian herbs (a blend of basil and oregano)
- Salt and pepper to taste
- Fresh basil leaves for garnish
Recommended Quality for Best Results
To get the best flavor, choose high-quality ingredients. Look for fresh ricotta and mozzarella. Fresh spinach adds a nice touch too. When it comes to marinara, homemade is great, but store-bought works well too. Always check the labels for no added sugars or preservatives. Using good ingredients makes a big difference in taste.
Step-by-Step Instructions
Prepping the Oven
Start by preheating your oven to 375°F (190°C). This step is key for even cooking. A hot oven ensures the cheese melts perfectly and the shells cook just right.
Cooking the Pasta Shells
Next, grab a large pot and fill it with salted water. Bring it to a boil. Carefully add the pasta shells. Cook them according to the package instructions, usually about 9-11 minutes. You want them al dente, so they hold their shape. Once done, drain the shells and set them aside. Make sure they don’t stick together.
Creating the Cheese Filling
In a big bowl, mix the filling. Combine 1 cup of ricotta cheese, 1 cup of shredded mozzarella, and ½ cup of grated Parmesan. Add 1 cup of finely chopped spinach, 1 beaten egg, 1 teaspoon of garlic powder, and 1 teaspoon of dried Italian herbs. Season with salt and pepper. Stir everything until smooth and creamy.
Stuffing the Shells
Now, it’s time to stuff the shells. Take each cooled pasta shell and fill it up with the cheese mixture. Use a spoon to pack it in well. Arrange the filled shells side by side in a greased baking dish. This keeps them from sliding around.
Adding the Marinara Sauce
Pour half of the marinara sauce over the stuffed shells. Make sure they are nicely coated. This adds flavor and moisture while baking.
Baking the Dish
Cover the baking dish with aluminum foil. This keeps the shells moist. Place it in the oven and bake for 25 minutes. After that, remove the foil. Let the cheese brown lightly for another 10-15 minutes. Look for that bubbly, golden cheese!
Once baked, take the dish out and let it rest for about 5 minutes. This helps the flavors settle. Enjoy your delicious three cheese stuffed shells!
Tips & Tricks
Perfecting Cheese Filling Consistency
To make a great filling, mix the cheeses well. Use a large bowl for this. The ricotta, mozzarella, and Parmesan should blend into a creamy mix. Add the beaten egg to help hold it all together. The spinach adds color and nutrition. If the mix feels too dry, add a splash of milk. If too wet, sprinkle in more cheese. A good filling should be thick, but still easy to spoon into the shells.
Preventing Shells from Sticking
Cook the pasta shells carefully. Do not overcook them, or they may break. After cooking, drain and rinse them with cold water. This helps cool them down and stops the cooking process. To keep them from sticking, toss the shells with a little olive oil. This simple step makes it easier to stuff and bake them later.
Serving Suggestions for Presentation
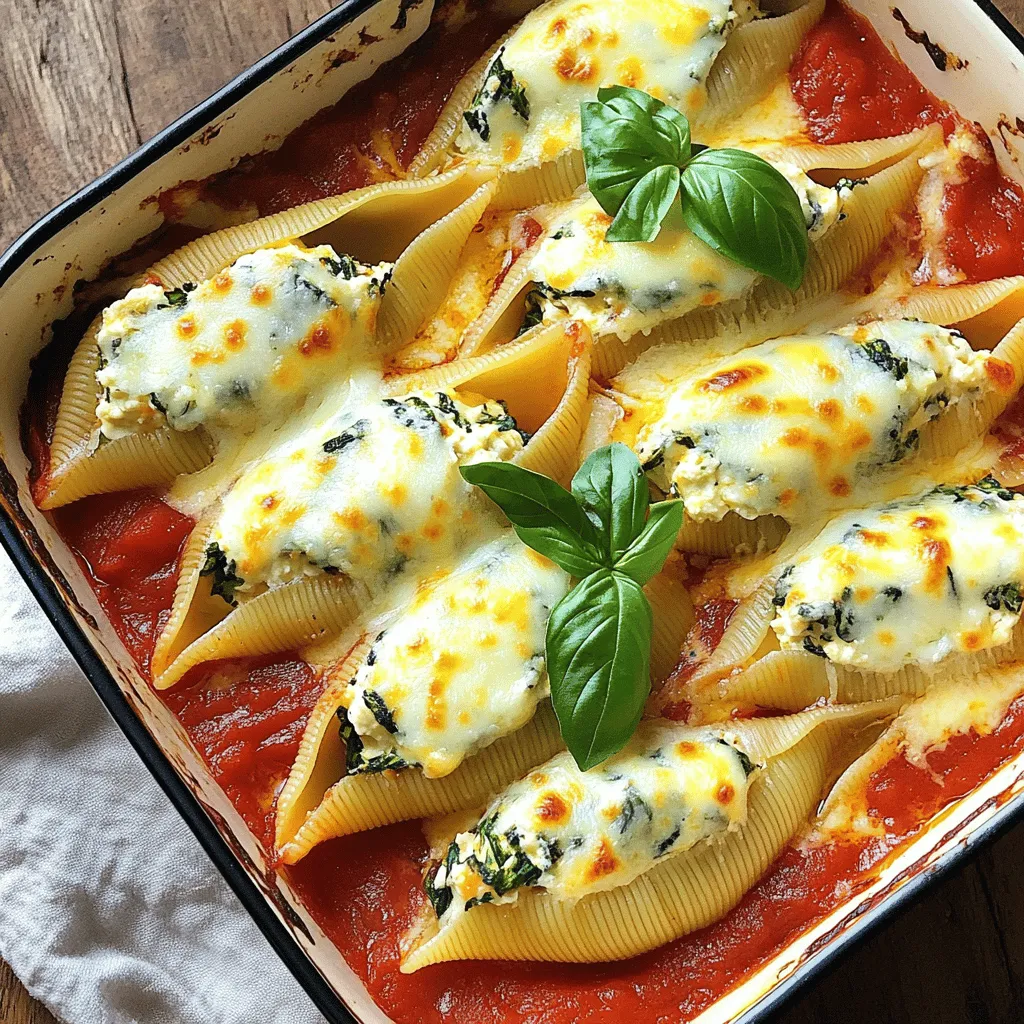
When serving, make it look nice! Use a large plate or shallow bowl. Pour some marinara sauce on the bottom first. Then, place the stuffed shells on top. Drizzle a bit more sauce over them. For extra flair, sprinkle more cheese or fresh herbs on top. A few basil leaves can really brighten the dish. This makes your three cheese stuffed shells not just tasty, but beautiful too.

Variations
Adding Vegetables or Proteins
You can boost the flavor and nutrition of your three cheese stuffed shells by adding vegetables or proteins. Fresh spinach is a great start, but you can also use:
- Zucchini, finely chopped
- Mushrooms, diced
- Bell peppers, diced
- Ground turkey or beef
Just sauté the veggies or brown the meat before mixing them with the cheese filling. This extra step adds depth and variety to each bite. You can also swap in cooked lentils or beans for a plant-based protein option.
Different Cheese Combinations
While ricotta, mozzarella, and Parmesan are classic choices, experimenting with different cheeses can elevate your dish. Try using:
- Goat cheese for a tangy twist
- Fontina cheese for a creamy texture
- Cheddar cheese for a sharper flavor
Mix and match these cheeses to create unique filling blends. Each combination will change the taste and richness of your stuffed shells.
Gluten-Free or Vegan Adaptations
If you need a gluten-free option, use gluten-free pasta shells. They cook similarly, so you won’t lose out on flavor. For a vegan adaptation, substitute the cheese with plant-based alternatives. Use:
- Vegan ricotta made from nuts
- Nutritional yeast for a cheesy flavor
- A flax egg instead of a regular egg
These swaps keep your dish delicious while meeting dietary needs. You can find many good vegan cheese brands today that melt well, ensuring your stuffed shells remain creamy and satisfying.
Storage Info
How to Store Leftovers
To keep your leftover three cheese stuffed shells fresh, place them in an airtight container. Make sure to let them cool to room temperature first. This helps prevent moisture from building up. Store the container in the fridge. They will stay good for about 3 to 5 days.
Reheating Instructions
Reheating is simple. Preheat your oven to 350°F (175°C). Place the stuffed shells in a baking dish. Add a little marinara sauce on top to keep them moist. Cover the dish with foil to avoid drying out. Bake for about 20 minutes, or until heated through. You can also reheat them in the microwave. Just place a few shells on a plate, cover them, and heat for 1 to 2 minutes.
Freezing for Future Meals
You can freeze the stuffed shells for later. First, let them cool completely. Then, arrange them in a single layer on a baking sheet. Freeze them for about an hour, until solid. Transfer the shells to a freezer-safe bag or container. They can last for up to 3 months in the freezer. When ready to eat, thaw them overnight in the fridge before reheating. You can enjoy delicious three cheese stuffed shells whenever you wish!
FAQs
Can I use different types of pasta shells?
Yes, you can use other types of pasta shells. Jumbo shells work best, but you can also try cannelloni or conchiglie. Just make sure they are big enough to hold the cheese filling. Cooking time may change based on the pasta you choose, so watch them closely.
What can I substitute for ricotta cheese?
If you don’t have ricotta, you can use cottage cheese. Drain it well and mash it a bit for a smoother texture. You could also use cream cheese for a richer taste. Both options work well in this recipe.
How can I make the dish spicier?
To add some heat, try mixing in red pepper flakes or chopped jalapeños into the cheese filling. You could also use a spicy marinara sauce. This will give your stuffed shells a nice kick without overwhelming the other flavors.
Can I prepare it ahead of time?
Yes, you can prepare stuffed shells in advance! Assemble the dish and cover it with foil. Store it in the fridge for up to a day before baking. If you want to freeze them, wrap each shell tightly in plastic wrap, then place them in a freezer bag. When ready, just bake from frozen, but add extra time.
What’s the best way to reheat stuffed shells?
Reheat stuffed shells in the oven for the best results. Preheat it to 350°F (175°C) and place the shells in a baking dish. Cover with foil to keep them moist. Heat for about 20 minutes or until warm. You can also use the microwave, but they may dry out.
This blog covered how to make stuffed pasta shells. We explored the key ingredients and steps. Prepping the oven and cooking the pasta shells are crucial. Perfecting the cheese filling truly enhances the dish. Don’t forget our tips for better results, like preventing sticking. You can even try fun variations, like adding veggies or proteins.
In the end, stuffed shells are easy and satisfying. Enjoy every bite, and share your tasty creations!


![When you make cheesy sheet pan chicken quesadillas, you need the right ingredients for the best taste. Here’s what you will need: - Shredded chicken options - 2 cups cooked chicken, shredded (rotisserie chicken works wonderfully) - Cheese varieties - 1 cup shredded cheddar cheese - 1 cup shredded Monterey Jack cheese - 1/2 cup cream cheese, softened - 1/4 cup sour cream - Vegetables and other mix-ins - 1 medium red bell pepper, diced - 1 medium green bell pepper, diced - 1 small red onion, finely chopped - 1 tablespoon taco seasoning - 8 large flour tortillas - 1 tablespoon olive oil - Fresh cilantro, chopped (for garnish) - Salsa, for serving - Avocado or guacamole, for serving These ingredients blend together to create a flavor-packed meal. Using rotisserie chicken saves time and adds great taste. The mix of cheddar and Monterey Jack gives a creamy, melty texture. Adding bell peppers and onions adds crunch and freshness. The taco seasoning gives it that extra kick. Feel free to experiment with your favorite veggies and cheese. This recipe is versatile and allows you to customize it to your liking. For the full recipe, check out the details above. Set your oven to 400°F (200°C). This heat helps the quesadillas cook evenly. Grab a large baking sheet and line it with parchment paper. This step is key because it keeps the quesadillas from sticking. Plus, it makes clean-up a breeze. In a big bowl, mix your ingredients well. You will need cooked chicken, cheddar cheese, Monterey Jack cheese, cream cheese, sour cream, diced red and green bell peppers, chopped red onion, and taco seasoning. The mixture should be smooth and creamy. Look for a texture that is spreadable but not runny. This helps keep the filling inside the tortillas. On a flat surface, lay down four tortillas. Spread the chicken mixture evenly on each one. Make sure to reach the edges so every bite is tasty. Then, place another tortilla on top of each filled one. Press down gently. This helps them stick together and hold the filling in. Once your quesadillas are ready, move them to the baking sheet. Brush the tops with olive oil. This adds flavor and helps them turn golden brown. Bake in your preheated oven for 15-20 minutes. Look for a nice golden color and melted cheese inside. These signs tell you they are done. After baking, take the quesadillas out and let them cool for a few minutes. This makes slicing easier. Cut each quesadilla into quarters for serving. Aim for about 4-6 servings, depending on your crowd. These quesadilla wedges are perfect for sharing! Avoiding Soggy Tortillas To keep your tortillas crisp, avoid overfilling them. Less is more! Also, use the right amount of olive oil on top. This will help them brown nicely. Always make sure to bake them until they are golden brown. Best Types of Tortillas to Use For the best texture, I recommend using large flour tortillas. They hold the filling well and become soft when baked. Corn tortillas can work too, but they may crack more easily. Pairing with Dipping Sauces Serve your quesadillas with a variety of dips. Salsa is a classic choice. You can also offer guacamole and sour cream. These add creaminess and flavor. Garnishes for Presentation To make your dish look great, sprinkle fresh cilantro on top. You can also add sliced jalapeños for a pop of color. This makes your quesadillas look fancy and appetizing. Adjusting the Recipe If you have a big group, you can easily double the recipe. Just make sure to use a larger baking sheet. This way, you can cook more quesadillas at once. Time-Saving Tips Use rotisserie chicken for quick prep. It saves time and adds great flavor. You can also chop your veggies ahead of time. This keeps the cooking quick and easy. To see the full recipe, check out the [Full Recipe]. {{image_4}} Alternative Proteins You can switch the chicken for other proteins. Try shredded beef or cooked shrimp. For a lighter option, use turkey. If you prefer plant-based meals, chickpeas or tofu work well too. Different Cheese Combos Cheese is key to quesadillas. You can mix different cheeses for fun flavors. Pepper Jack adds spice, while gouda gives a smoky touch. Experiment with cream cheese and feta for creamy bites. Adding Spices or Herbs Spice up your quesadillas! Add chili powder or cumin for warmth. Fresh herbs like cilantro or parsley brighten flavors. A squeeze of lime gives a fresh zing. Incorporating Beans or Corn Beans and corn boost nutrition and flavor. Black beans add protein, while corn brings sweetness. Mix them into your filling for a hearty twist. Gluten-Free Options To make this dish gluten-free, swap flour tortillas for corn ones. Always check labels to ensure they meet your needs. You can also serve the filling on lettuce wraps. Vegetarian Adjustments For a vegetarian version, skip the chicken. Use mushrooms or zucchini for a meaty texture. Add more beans and veggies to keep it filling. For the full recipe, check the [Full Recipe]. To store your cheesy sheet pan chicken quesadillas, let them cool first. Wrap them tightly in plastic wrap or foil. You can also place them in an airtight container. This keeps them fresh and tasty. - Shelf Life: When stored properly, quesadillas last up to 3 days in the fridge. After that, they may lose flavor and freshness. If you want to save some for later, freezing is great! - How to Freeze Quesadillas: First, cool them completely. Then, wrap each quesadilla in plastic wrap. Place them in a freezer-safe bag or container. This helps prevent freezer burn. - Reheating Tips for Best Results: To reheat, thaw overnight in the fridge. Then, bake them at 350°F (175°C) for about 10 minutes. This makes them warm and crispy again. Don't let any filling go to waste! - Creative Ways to Use Leftovers: You can add leftover filling to salads or burritos. Mix it with scrambled eggs for a tasty breakfast. - Recipes Using Leftover Filling: Try using the filling in omelets or as a topping for nachos. You can also use it in stuffed peppers for a fun twist. For more details on making this dish, check out the [Full Recipe]. To make this dish gluten-free, swap out regular flour tortillas for gluten-free ones. Many brands offer great taste and texture. You can also check for taco seasoning that is gluten-free. This way, you keep all the flavor without the gluten. Yes, you can use raw chicken. Just make sure to cook it first. You can bake or grill the chicken until it reaches 165°F (75°C). Shred the cooked chicken before mixing it with the other ingredients. This keeps your quesadillas safe and tasty. To reheat quesadillas, use the oven or a skillet. Preheat the oven to 350°F (175°C) and bake for about 10 minutes. If using a skillet, heat it over medium heat. Cook for 2-3 minutes on each side until warm and crispy. This way, you keep the texture nice. Look for a golden brown color on the outside. You should also see melted cheese oozing out from the edges. A crispy texture means they are ready to enjoy. Let them cool for a few minutes after baking before slicing. Quesadillas pair well with many sides. You can serve them with salsa or guacamole for dipping. A fresh salad or some Mexican rice adds a nice touch too. Black beans are another great side option. These sides enhance your meal and make it even more fun to eat. You now have all the tools to make great chicken quesadillas. We covered essential ingredients and step-by-step instructions. Use the tips to avoid soggy tortillas and serve with tasty dips. Don’t forget to explore variations to suit your taste. Store any leftovers properly for future meals. Whether for a quiet dinner or a crowd, you’re ready to impress. Enjoy your cooking and have fun creating delicious quesadillas!](https://dishtreats.com/wp-content/uploads/2025/07/9e515845-1856-4bb5-82ee-80ca33afd87d-768x768.webp)

![To make Classic Sloppy Joes, you need some simple, fresh ingredients. Here’s what you will need: - 1 lb ground beef (or turkey) - 1 small onion, finely chopped - 1/2 green bell pepper, finely chopped - 2 cloves garlic, minced - 1 cup tomato sauce - 2 tablespoons ketchup - 1 tablespoon brown sugar - 1 tablespoon Worcestershire sauce - 1 teaspoon mustard - Salt and pepper to taste - 4 hamburger buns - 1 cup shredded cheddar cheese (optional) - Fresh parsley for garnish These ingredients come together to create a rich and tasty filling. The ground beef or turkey serves as a hearty base. The onion and bell pepper add a nice crunch and sweetness. Garlic gives it a punch of flavor. You can also adjust the recipe. If you want a lighter dish, use turkey. For a cheesy twist, add cheddar on top. Fresh parsley adds color and a hint of freshness. This Classic Sloppy Joes recipe is quick and easy. You can find the full recipe [Full Recipe]. Enjoy cooking! First, heat a large skillet over medium heat. This step is key to getting a nice sear. Once the skillet is hot, add 1 lb ground beef or turkey. Use a wooden spoon to break the meat apart as it cooks. This helps it brown evenly. Cook until the meat is browned throughout. Be sure to drain any excess fat from the pan. This keeps your Sloppy Joes from being greasy. Next, add 1 small finely chopped onion, 1/2 green bell pepper, and 2 cloves minced garlic to the skillet. Stir the mixture well. Cook for about 5 minutes or until the veggies soften and smell great. They add a nice flavor to your dish. Now it’s time to make the sauce. Stir in 1 cup tomato sauce, 2 tablespoons ketchup, 1 tablespoon brown sugar, 1 tablespoon Worcestershire sauce, and 1 teaspoon mustard. Mix everything well until the sauce blends with the meat and veggies. Bring the mixture to a gentle simmer. This step helps all the flavors meld together. Lower the heat to maintain a gentle simmer. Let the mixture cook for about 10 minutes, stirring occasionally. If it gets too thick, add a splash of water. This keeps it from becoming dry. Stirring helps prevent sticking and keeps the mixture smooth. Taste the mixture and season it with salt and pepper to your liking. This is your chance to adjust the flavors. While the sloppy joe filling simmers, toast 4 hamburger buns. You can use a hot skillet or toaster. Toast them until they are golden brown and slightly crisp. This adds a nice crunch to your meal. To serve, take a toasted bun and spoon the savory filling onto it. For a cheesy twist, add 1 cup shredded cheddar cheese on top. Finish with a sprinkle of chopped parsley for a pop of color and flavor. This makes your Sloppy Joes look and taste amazing. Enjoy this delightful dish with your family! For the full recipe, check the recipe section above. To enhance flavor, try adjusting the ketchup or brown sugar. If you like it sweeter, add more brown sugar. For a tangy kick, a splash of vinegar works wonders. The sauce should be rich but not too thick. If it gets too thick, add a little water or extra tomato sauce. This keeps it juicy and fun to eat. You can cook Sloppy Joes on the stovetop or in a slow cooker. The stovetop is quick and easy. Sauté the meat and veggies, then let it simmer. In a slow cooker, mix everything and let it cook for hours. This method deepens the flavor. You can also swap the meat. Ground turkey or chicken are great lighter options. For a twist, try lentils for a vegetarian dish. Sloppy Joes pair well with crispy fries or a fresh coleslaw. The crunch of the coleslaw balances the softness of the sandwich. For drinks, a cold soda or iced tea is perfect. You can also enjoy them with a light beer if you prefer. These pairings make your meal fun and complete. {{image_4}} You can spice up your Sloppy Joes with fun twists. For a veggie option, try lentils or black beans instead of meat. They give a hearty texture and soak up the sauce well. Another twist is BBQ Sloppy Joes. Just add your favorite BBQ sauce to the meat mixture for a sweet and tangy flavor. Toppings can make your Sloppy Joes even more amazing. You might want to add different types of cheese. Try provolone or pepper jack for a kick. You can also mix in various sauces. A drizzle of ranch or hot sauce adds a nice touch. Different places have their own takes on Sloppy Joes. In Mexico, they use spices and jalapeños for a spicy version. In the Philippines, they might add sweet sauce and serve it with rice. Exploring these options shows how versatile this dish can be. To keep your Sloppy Joes fresh, store them in an airtight container. Place the cooled mixture in the fridge. Make sure to separate any extra buns to avoid sogginess. You can keep the leftovers for up to three days. If you want to keep them longer, freezing is a great option. When you reheat Sloppy Joes, the stovetop is best. Place the mixture in a skillet over low heat. Stir often to keep it juicy. If using the microwave, cover it with a damp paper towel to keep moisture in. For buns, you can toast them lightly on a skillet or wrap them in foil and warm them in the oven. This way, they stay soft and tasty. To freeze the Sloppy Joe mixture, let it cool first. Then, transfer it to a freezer-safe bag. Remove as much air as possible before sealing. This helps prevent freezer burn. You can freeze it for up to three months. When ready to eat, thaw it in the fridge overnight. Reheat on the stove until hot. Enjoy your Sloppy Joes just like the first time! Making Classic Sloppy Joes is quick and easy. You need about 10 minutes for prep. Cooking takes another 15 minutes. In total, you can have dinner ready in just 25 minutes. Yes, you can use ground turkey as a lighter choice. Turkey has fewer calories and less fat than beef. The flavor will be milder, so you might want to adjust your spices. It’s a great way to make a healthier Sloppy Joe. Sloppy Joes pair well with many sides. Here are some tasty options: - French fries - Coleslaw - Potato chips - Corn on the cob - Salad These sides add nice crunch and freshness to your meal. You can definitely make Sloppy Joes ahead of time. Just cook the meat and sauce, then store it in the fridge. It will last for three days. When you’re ready to eat, heat it up and serve on toasted buns. This makes meal prep easy and saves time. For longer storage, you can freeze the mixture. Just thaw and reheat when ready. You’ll still enjoy great flavor! In this blog post, we covered how to make Classic Sloppy Joes. We explored the ingredients, cooking steps, and tips for flavoring. I also shared variations and storage methods. Sloppy Joes are simple to make, versatile, and fun to eat. Don't hesitate to explore your options by trying new ingredients or toppings. Enjoy your meal and share it with friends for a delicious time!](https://dishtreats.com/wp-content/uploads/2025/06/3a095a95-3efb-4397-8f70-4189d4d50cab-768x768.webp)


