Tex-Mex Quinoa Stuffed Peppers Flavorful and Satisfying

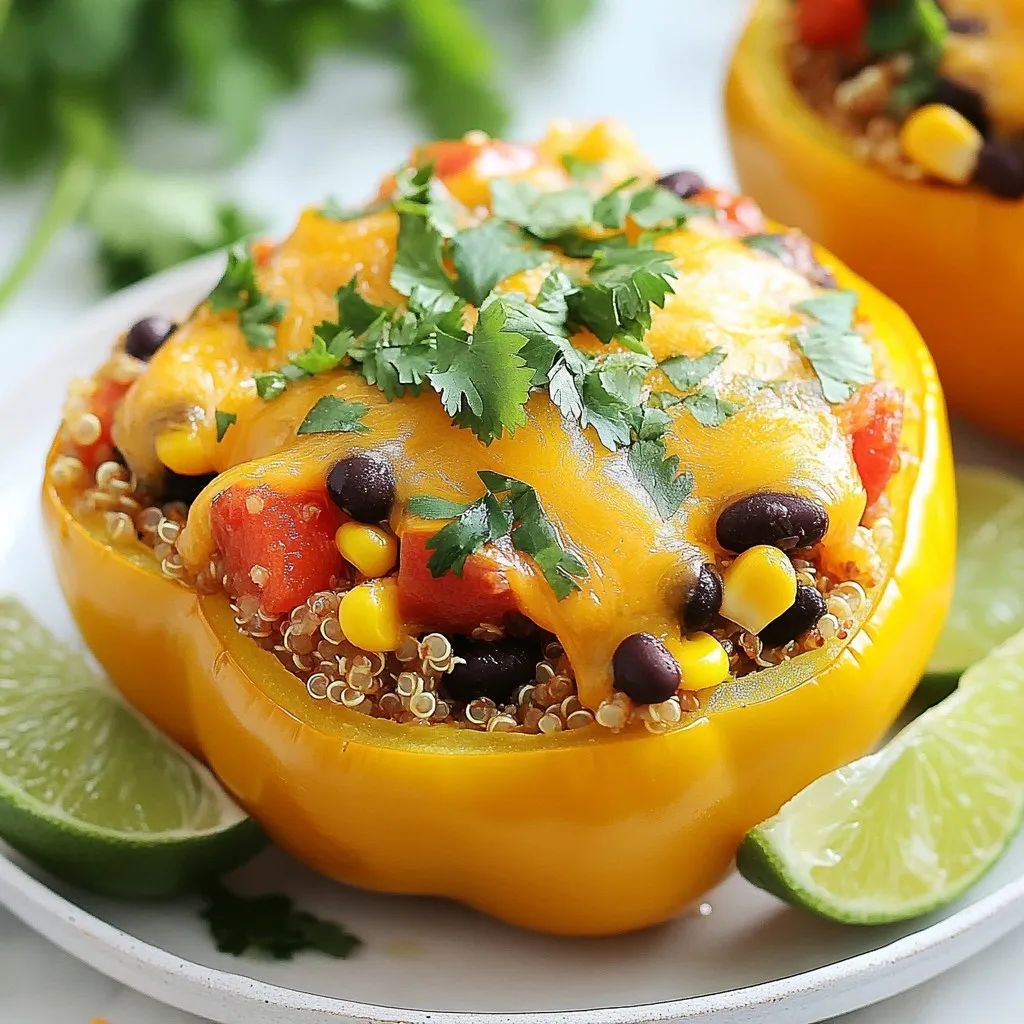
Get ready to spice up dinner with my Tex-Mex Quinoa Stuffed Peppers! This dish is fun to make and packed with flavor. You’ll enjoy tender bell peppers stuffed with a tasty mix of quinoa, black beans, corn, and spices. Plus, they’re healthy and customizable for any taste. Follow me step-by-step, and soon you’ll impress everyone with your delicious creation! Let’s dive into the ingredients and get cooking!
Why I Love This Recipe
- Colorful Presentation: The vibrant colors of the bell peppers and filling create an eye-catching dish that’s as pleasing to the eye as it is to the palate.
- Nutritious Ingredients: This recipe is packed with wholesome ingredients like quinoa, black beans, and fresh vegetables, making it a healthy option for any meal.
- Customizable: You can easily modify the filling based on your preferences or what you have on hand, making it versatile for different tastes.
- Quick and Easy: With a total prep and cook time of just 50 minutes, this dish is perfect for busy weeknights or casual gatherings.
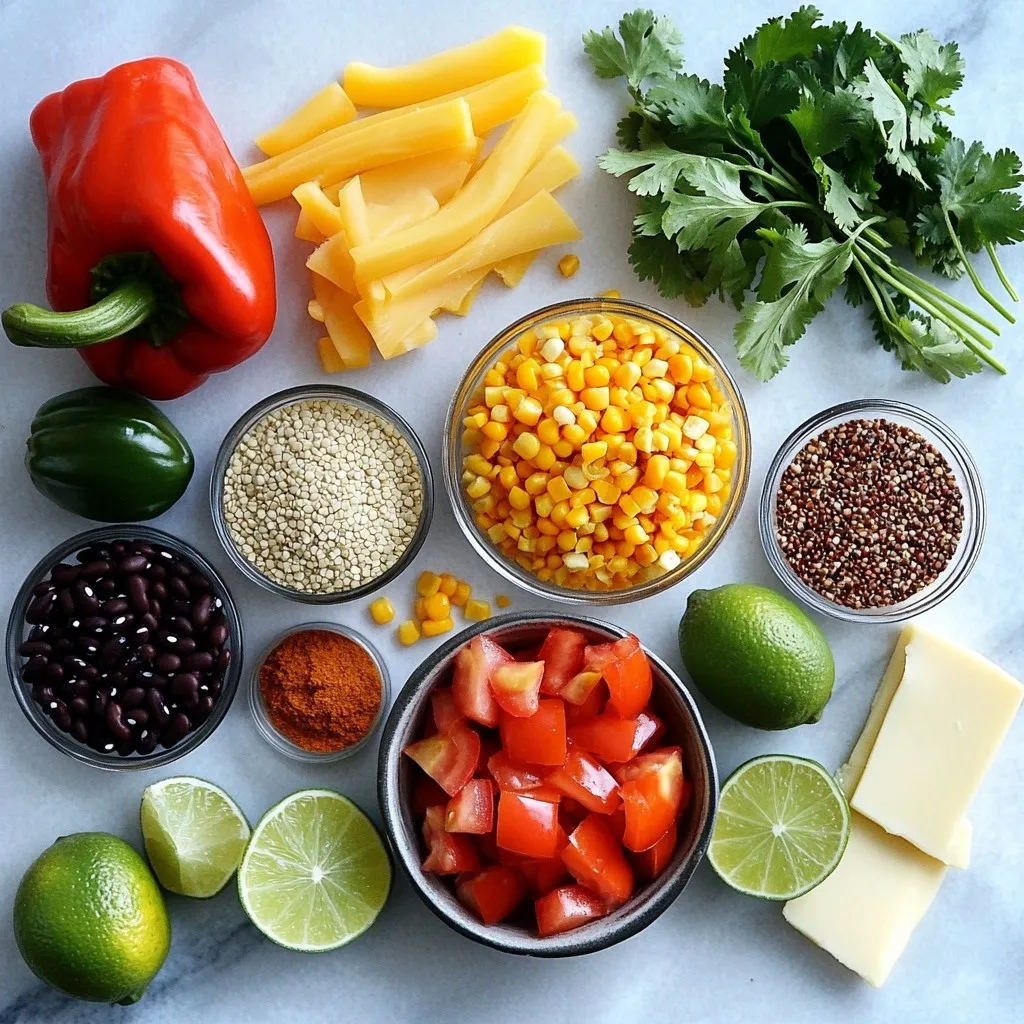
Ingredients
To make Tex-Mex quinoa stuffed peppers, gather these simple and fresh ingredients:
- 4 bell peppers (any color of your choice)
- 1 cup quinoa, rinsed under cold water
- 2 cups vegetable broth
- 1 can (15 oz) black beans, thoroughly rinsed and drained
- 1 cup corn kernels (can be frozen or fresh, depending on availability)
- 1 cup diced tomatoes (use canned or freshly chopped)
- 1 teaspoon ground cumin
- 1 teaspoon chili powder
- ½ teaspoon garlic powder
- ½ teaspoon onion powder
- Salt and pepper, to taste
- 1 cup shredded cheddar cheese (substitute with dairy-free cheese for a vegan alternative)
- Fresh cilantro, for garnish
- Lime wedges, for serving
Each ingredient plays a vital role in the flavor and texture of the dish. The bell peppers serve as a colorful and crunchy base. The quinoa offers a fluffy, nutty taste. Black beans add protein and fiber. Corn brings sweetness and texture, while spices like cumin and chili powder add warmth. The cheese melts beautifully, giving a creamy finish. Finally, cilantro and lime add a fresh burst that balances the dish.
This mix creates a delightful meal that is both nutritious and satisfying. Enjoy the colors and flavors as they come together in this recipe!

Step-by-Step Instructions
Preparing the Oven and Bell Peppers
- Preheat your oven to 375°F (190°C).
- Cut the tops off the bell peppers. Remove seeds and membranes. Place them cut-side up in a baking dish.
Cooking the Quinoa
- In a medium saucepan, bring 2 cups of vegetable broth to a boil.
- Add 1 cup of rinsed quinoa to the boiling broth.
- Lower the heat and cover. Let it simmer for about 15 minutes. The quinoa will become fluffy and absorb all the broth.
Combining the Filling
- In a large bowl, mix the cooked quinoa with:
- 1 can of black beans, rinsed and drained
- 1 cup of corn kernels
- 1 cup of diced tomatoes
- 1 teaspoon of ground cumin
- 1 teaspoon of chili powder
- ½ teaspoon of garlic powder
- ½ teaspoon of onion powder
- A pinch of salt and pepper
- Stir well to ensure everything is evenly mixed.
Stuffing and Baking
- Carefully spoon the quinoa mixture into each prepared bell pepper. Pack it gently.
- Sprinkle 1 cup of shredded cheddar cheese on top of each pepper.
- Cover the baking dish with aluminum foil.
- Bake for 25 minutes. Then, remove the foil and bake for another 10-15 minutes. The peppers should be tender, and the cheese melted and bubbly.
- Let them cool for a few minutes before serving. Garnish with fresh cilantro and lime wedges for a zesty touch.
Tips & Tricks
Perfecting Texture and Flavor
To get the right quinoa texture, rinse it well before cooking. This removes the bitter coating. Cook it in vegetable broth for added flavor. You want the quinoa fluffy, not mushy. If you need a cheese swap, use dairy-free cheese for a vegan dish. You can also try feta or goat cheese for a tangy twist.
Enhancing Presentation
Serve your stuffed peppers on a bed of fresh greens. This adds color and freshness. For garnishing, sprinkle cilantro on top. A squeeze of lime over the peppers can brighten the dish. You can also drizzle a bit of olive oil for extra flavor.
Customization Ideas
Adjust the spice level to match your taste. Add more chili powder for heat or less for a milder dish. Mix in extra vegetables like zucchini or spinach for more nutrition. You can also add cooked chicken or turkey for added protein. Get creative, and make it your own!
Pro Tips
- Choose Colorful Peppers: Using a mix of bell pepper colors not only makes the dish visually appealing but also adds a slight variation in flavor.
- Don’t Overcook Quinoa: Ensure that your quinoa is fluffy and not mushy by keeping an eye on the cooking time and following the package instructions closely.
- Customize Ingredients: Feel free to add other ingredients like diced zucchini, mushrooms, or spicy jalapeños to enhance the filling based on your taste preferences.
- Serve with Sides: Pair the stuffed peppers with a simple salad or avocado slices to create a well-rounded meal that complements the flavors.

Variations
Different Cheese Options
You can change the cheese for your stuffed peppers. If you want a vegan dish, use dairy-free cheese. It melts well and adds great flavor. For a twist, try pepper jack cheese. It gives a spicy kick to your meal.
Different Filling Options
You can add more protein to your filling. Ground turkey or beef makes the dish heartier. If you want to keep it plant-based, use lentils or chickpeas. You can also mix different beans. Black beans work well, but pinto or kidney beans add a nice taste too.
Cooking Method Variations
You can make these stuffed peppers in many ways. If you have an Instant Pot, it cooks them quickly. Just pressure cook for about 8 minutes. You can also use a slow cooker. It takes longer but makes them very tender. In summer, try grilling the peppers. It gives them a smoky flavor and keeps your kitchen cool.
Storage Info
Refrigeration Tips
To store leftover stuffed peppers, let them cool first. Place them in an airtight container. Keep them in your fridge for up to four days. This helps maintain taste and texture. When reheating, cover with foil to keep them moist.
Freezing Instructions
To freeze stuffed peppers, wrap each one in plastic wrap. Then, place them in a freezer bag. Make sure to squeeze out as much air as possible. This way, they stay fresh for up to three months.
When you’re ready to eat, thaw them overnight in the fridge. Reheat in the oven at 350°F (175°C) for about 25 minutes. Check that they are hot all the way through. Enjoy your tasty meal!
FAQs
How long do Tex-Mex Quinoa Stuffed Peppers last in the fridge?
Tex-Mex quinoa stuffed peppers last about 3 to 5 days in the fridge. Be sure to store them in an airtight container. This keeps them fresh and tasty for your next meal.
Can I use other grains instead of quinoa?
Yes, you can use other grains. Brown rice, farro, or couscous work well. Just adjust the cooking time and liquid based on the grain you choose.
What can I serve with stuffed peppers?
Stuffed peppers pair well with many sides. Consider serving them with a simple green salad or some tortilla chips. You could also add guacamole or salsa for extra flavor.
Can I make these stuffed peppers ahead of time?
Absolutely! You can prepare and stuff the peppers a day before. Just cover and store them in the fridge. When ready, bake them as directed.
How do I know when the peppers are fully cooked?
The peppers are fully cooked when they feel tender. Check by poking them with a fork. The cheese should also be melted and bubbly for the best taste.
In this blog post, we explored how to make delicious Tex-Mex quinoa stuffed peppers. We listed key ingredients and gave clear steps for preparation and cooking. Tips for better texture and flavor helped you customize your dish. We also shared storage advice for leftovers. You now have the tools to create a vibrant meal. Remember, you can always experiment with flavors to make it your own. Happy cookin

Tex-Mex Quinoa Stuffed Peppers
Ingredients
- 4 pieces bell peppers (any color of your choice)
- 1 cup quinoa, rinsed under cold water
- 2 cups vegetable broth
- 1 can black beans, thoroughly rinsed and drained (15 oz)
- 1 cup corn kernels (can be frozen or fresh, depending on availability)
- 1 cup diced tomatoes (use canned or freshly chopped)
- 1 teaspoon ground cumin
- 1 teaspoon chili powder
- 0.5 teaspoon garlic powder
- 0.5 teaspoon onion powder
- to taste Salt and pepper
- 1 cup shredded cheddar cheese (substitute with dairy-free cheese for a vegan alternative)
- to taste Fresh cilantro, for garnish
- to taste Lime wedges, for serving
Instructions
- Begin by preheating your oven to 375°F (190°C).
- Prepare the bell peppers by cutting off their tops and removing the seeds and membranes. Place the peppers upright, cut-side up, in a baking dish that can accommodate them neatly.
- In a medium saucepan, bring the vegetable broth to a rolling boil. Once boiling, add the rinsed quinoa. Lower the heat to a gentle simmer, cover, and let cook for about 15 minutes, or until the quinoa is fluffy and all the broth has been absorbed.
- In a large mixing bowl, combine the cooked quinoa with black beans, corn, diced tomatoes, ground cumin, chili powder, garlic powder, onion powder, and a pinch of salt and pepper. Stir well until all ingredients are evenly combined.
- Carefully spoon the quinoa mixture into each prepared bell pepper, packing it gently to ensure they’re filled without overflowing.
- Generously sprinkle the shredded cheddar cheese over the top of each stuffed pepper, allowing it to melt and enhance the flavor.
- Cover the baking dish tightly with aluminum foil and place it in the preheated oven. Bake for 25 minutes, then carefully remove the foil and allow the stuffed peppers to bake for an additional 10-15 minutes, or until the bell peppers are tender and the cheese is melted and bubbly.
- Once cooked to perfection, remove the dish from the oven and let the peppers cool for a few minutes. Garnish with fresh cilantro for a burst of color and flavor, and serve with wedges of lime on the side for squeezing over the peppers.


![- 8 oz spaghetti or fettuccine pasta - 2 boneless, skinless chicken breasts - 1 cup basil pesto (homemade or store-bought) - 1/2 cup heavy cream - 1/4 cup cherry tomatoes, halved - 1/4 cup freshly grated Parmesan cheese - Fresh basil leaves for garnish - Salt and freshly ground black pepper, to taste - 2 tablespoons extra virgin olive oil Gather these ingredients before you start cooking. The pasta and chicken form the base of your dish. The creamy pesto sauce adds rich flavor. The cherry tomatoes bring a burst of freshness. The Parmesan cheese tops it off with a salty kick. Fresh basil leaves make it look gorgeous. Using fresh ingredients makes a big difference. If you have the time, try making your own pesto. It’s simple and tastes amazing. You can adjust the flavors to your liking. You can also swap the pasta type if you want. Just keep in mind that different shapes may change how the sauce clings to the pasta. For the chicken, you want it juicy and tender. The seasoning is key here. Use good quality olive oil, salt, and pepper. This will help keep the flavor bright and fresh. Once you have everything, you’ll be ready to make a delicious meal. If you want the full recipe, check out the complete guide for step-by-step instructions. Start by boiling a large pot of water. Add a good amount of salt to the water. This will help flavor the pasta. Once the water is boiling, add your spaghetti or fettuccine. Cook it until it is al dente, which means it should be firm to the bite. This usually takes around 8-10 minutes. When done, drain the pasta. Make sure to save about 1/2 cup of the pasta water for later. While the pasta cooks, get ready to season the chicken. Sprinkle salt and pepper on both sides of the chicken breasts. Heat 2 tablespoons of olive oil in a large skillet over medium heat. When the oil is hot, add the chicken. Cook each side for about 6-7 minutes. You want the chicken to turn a nice golden brown. Check that the juices run clear when you cut into it. Once cooked, take the chicken out of the skillet and let it rest for a few minutes. Then, slice it into thin strips. In the same skillet, lower the heat to medium-low. Add your basil pesto to the pan and stir it. You want to warm it through but not burn it. After about a minute, slowly pour in 1/2 cup of heavy cream. Stir it all together until it is well mixed and heated, which should take about 2-3 minutes. Now, add the cooked pasta to the skillet with your creamy pesto sauce. Toss the pasta gently to make sure it gets coated evenly. If the sauce looks too thick, add a little of the reserved pasta water. This will help you reach your desired creamy consistency. To finish, fold in the halved cherry tomatoes and the sliced chicken. Stir everything together for another 2 minutes. This will warm the chicken and tomatoes through. Finally, sprinkle freshly grated Parmesan cheese on top. Toss it lightly to mix. For a bright touch, garnish with fresh basil leaves before serving. For a full recipe, check out the details above! You can use homemade or store-bought pesto for this dish. Homemade pesto gives you full control over flavors, but store-bought saves time. If you want a stronger basil taste, simply add more fresh basil leaves to your mix. For a milder flavor, blend in more nuts or cheese. This helps balance the taste to your liking. To keep your chicken juicy, avoid overcooking it. Cook chicken breasts in a hot skillet for 6-7 minutes on each side. The internal temperature should reach 165°F. Rest the chicken for a few minutes before slicing. This helps the juices stay inside. You can make your sauce thicker or lighter based on your taste. For a richer sauce, use more heavy cream. If you want a lighter option, try half-and-half or low-fat milk. Adding a splash of pasta water helps adjust the sauce's thickness too. This way, you can achieve the perfect creamy texture for your chicken pesto pasta. For the Full Recipe, check out the detailed instructions to create this delightful dish! {{image_4}} Adding vegetables to your Chicken Pesto Pasta makes it even better. It boosts flavor and nutrition. Seasonal veggies like spinach or bell peppers work great. Spinach adds a nice green color. Bell peppers give a sweet crunch. You can toss them in during the last few minutes of cooking. This way, they stay bright and fresh. If you need gluten-free pasta, you have choices! You can use rice pasta or chickpea pasta. These options taste great and cook well. Just follow the package instructions. Cooking times may differ, so keep an eye on them. You want your pasta to be tender but not mushy. Not in the mood for chicken? Try shrimp or tofu instead! Shrimp cooks fast and adds a nice twist. Just sauté them until they turn pink. Tofu is a fantastic plant-based option. Make sure to press it first to remove extra water. Adjust cooking times based on what you choose. This keeps your dish delicious and exciting. For the full recipe, check out the [Full Recipe]. Store any leftovers in the fridge. Use a tight-sealing container to keep your chicken pesto pasta fresh. Glass containers work well, as do plastic ones. Make sure to let it cool down before putting it away. It stays good in the fridge for up to three days. To freeze your chicken pesto pasta, pack it in an airtight container or freezer bag. Remove as much air as possible. This helps prevent freezer burn. You can freeze it for up to three months. Just label the bag with the date so you remember when you froze it. When reheating, use the microwave or stovetop. If using the microwave, heat in short bursts. Stir between each burst to ensure even warming. On the stovetop, add a splash of water or cream to keep it moist. This helps keep the creaminess intact. Enjoy your meal again as if it were fresh! To make chicken pesto pasta from scratch, follow these basic steps: 1. Cook the pasta. Boil water in a large pot, add salt, and cook your choice of spaghetti or fettuccine until al dente. 2. Prepare the chicken. Season boneless chicken breasts with salt and pepper. Sear them in olive oil until golden brown. 3. Make the sauce. In the same skillet, mix basil pesto with heavy cream until warm and creamy. 4. Combine. Toss the cooked pasta with the sauce and sliced chicken. Adjust the sauce with reserved pasta water if needed. 5. Serve. Garnish with cherry tomatoes, Parmesan cheese, and fresh basil. You can find the full recipe above for a detailed guide. Yes, you can make chicken pesto pasta ahead of time. Here are some tips: - Cooked pasta and sauce. Prepare the chicken and sauce, then store them separately from the pasta. This keeps them fresh. - Refrigerate. Store in airtight containers in the fridge for up to three days. - Freeze. For longer storage, freeze the chicken and sauce. Use within two months for best flavor. - Reheat. When ready, reheat the chicken and sauce. Cook the pasta fresh to keep it al dente. Chicken pesto pasta pairs well with various side dishes. Consider these suggestions: - Garlic bread. A warm, crispy slice complements the creamy pasta. - Salad. A light green salad with a tangy vinaigrette balances the richness of the dish. - Roasted vegetables. Seasonal veggies add color and nutrients to the meal. Chicken pesto pasta can be a healthy option. Here’s why: - Protein. Chicken provides lean protein, which is vital for muscle health. - Basil and olive oil. These ingredients are rich in antioxidants and healthy fats. - Pasta. Whole-grain pasta offers fiber, which aids digestion. - Portion control. Adjust the serving size to fit your dietary needs. Absolutely! You can use various pasta types. Here are some alternatives: - Whole wheat pasta. Adds extra fiber and nutrients. - Gluten-free pasta. Great for those with gluten sensitivities. - Zoodles. Spiralized zucchini for a low-carb option. - Penne or rigatoni. These shapes hold the sauce well, providing a satisfying bite. In this post, I covered how to make a delicious chicken pesto pasta. We discussed the main ingredients and their roles, along with simple steps for cooking. I also shared tips for perfecting your dish and exciting variations to try. In closing, this recipe is easy and flexible, letting you customize flavors. Whether you choose to add veggies or change proteins, your meal will impress. Enjoy this tasty dish and make it your own!](https://dishtreats.com/wp-content/uploads/2025/06/ae0d281d-adb6-406a-8a42-58bd8911a0b3-768x768.webp)
![For this dish, you need simple yet vibrant flavors. The essential ingredients are: - 2 lbs baby potatoes, halved - 1/4 cup extra virgin olive oil - 1/4 cup freshly squeezed lemon juice Baby potatoes are perfect because they cook evenly and taste great. Extra virgin olive oil adds rich flavor and helps the potatoes crisp up. Fresh lemon juice gives a bright, zesty kick that makes these potatoes shine. To boost the taste, we use a few key spices. They include: - 3 cloves garlic, finely minced - 2 teaspoons dried oregano - 1 teaspoon sea salt - 1/2 teaspoon freshly ground black pepper Minced garlic brings warmth and depth. Dried oregano adds an earthy note that pairs well with lemon. Sea salt and black pepper enhance all the flavors, making every bite delicious. When serving, a few garnishes can elevate the dish. Here are my favorites: - 1 tablespoon fresh parsley, finely chopped (for garnish) - Lemon wedges (for serving) Fresh parsley adds color and a hint of freshness. Lemon wedges let guests add more zing if they like. These simple touches make your Greek lemon potatoes look and taste even better. For the full recipe, check out the details above! - First, preheat the oven to 400°F (200°C). This helps the potatoes roast evenly. - Next, grab a large mixing bowl. Add the olive oil, lemon juice, minced garlic, oregano, salt, and black pepper. Whisk these together until mixed well. This marinade adds a zesty flavor that makes the potatoes shine. - Now, take your halved baby potatoes and add them to the bowl with the marinade. - Toss the potatoes gently in the mixture. Make sure each piece is coated well. This step is key for flavor. - Carefully transfer the coated potatoes to a large baking dish. Arrange them in a single layer. This helps them cook evenly and get that nice golden color. - Place the baking dish in the oven. Roast the potatoes for 40-45 minutes. Remember to toss them halfway through. This ensures they brown nicely. - Once they are golden and tender, take the dish out of the oven. Let the potatoes cool for a few minutes. Just before serving, sprinkle with chopped parsley. Serve with lemon wedges for a burst of flavor. For the full recipe, check the detailed instructions. To get that golden brown finish, choose small baby potatoes. Their skin crisps nicely, giving a great texture. After roasting for about half the time, toss the potatoes. This helps them brown evenly. Use a spatula to gently turn them. For added zest, consider mixing in lemon zest with your marinade. Lemon zest brightens the dish. You can also add fresh herbs, like thyme or rosemary, for depth. Balance the garlic and lemon by not using too much garlic. The garlic should enhance, not overpower. Serve the potatoes in a colorful bowl to catch the eye. Arrange lemon wedges around the edge. This not only looks nice but adds flavor. You can sprinkle fresh parsley on top for a pop of color. It makes the dish more appealing and fresh. For the complete process, refer to the Full Recipe. {{image_4}} You can add more flavor by using herbs. Fresh herbs bring a bright taste. Dried herbs are easy and still tasty. I love using fresh parsley and thyme. They add freshness and depth. You can also try rosemary for a bold flavor. Mix and match herbs to find your favorite combo. Want to change things up? Try adding different citrus fruits. Oranges or limes give a nice twist. You can also use vegetable broth instead of oil. This makes the dish lighter and adds a new taste. Feel free to experiment with flavors until you find what you love. You don’t have to roast your potatoes. You can cook them on the stovetop too. Just boil them first and then sauté in the lemon mix. This method makes them soft and flavorful. Grilling is another option. It adds a smoky flavor you’ll enjoy. Try grilling them for a fun twist on this classic dish. To store your leftover Greek lemon potatoes, let them cool. Once cooled, place them in an airtight container. Use a glass or plastic container with a tight lid for best results. Store them in the fridge. They will stay fresh for about 3 to 5 days. Label the container with the date to keep track. For reheating, the oven works best. Preheat your oven to 350°F (175°C). Spread the potatoes on a baking sheet in a single layer. Heat for about 10 to 15 minutes until warm. This keeps them crisp. You can also use a microwave, but it may make them soggy. If using the microwave, heat in short bursts. Check often to avoid overcooking. You can freeze Greek lemon potatoes if you want to save some for later. First, let them cool completely. Then, place the potatoes in a freezer-safe bag. Remove as much air as possible before sealing. They can last up to 2 months in the freezer. To thaw, move them to the fridge overnight. Reheat them in the oven as mentioned earlier for the best taste. For Greek lemon potatoes, I recommend using baby potatoes. They are small and tender, which makes them perfect for roasting. Their skin is thin, so you can enjoy the flavor without peeling. You can also use Yukon Gold potatoes for a creamy texture. These potatoes absorb the lemon and garlic well, enhancing the dish's flavor. Yes, you can make this recipe ahead of time. I suggest roasting the potatoes and storing them in an airtight container in the fridge. You can roast them a day in advance. To reheat, simply warm them in the oven at 350°F until heated through. This keeps the potatoes tasty and fresh for your meal. Easy Greek lemon potatoes pair well with many dishes. You can serve them with grilled chicken or lamb for a complete meal. They also go great with a fresh Greek salad, giving you a nice balance of flavors. For a lighter option, pair them with roasted vegetables. The bright lemon taste complements any dish beautifully. If you're looking for more details, you can check out the [Full Recipe] for step-by-step guidance. Greek lemon potatoes are a simple and refreshing dish to make. We explored essential ingredients, step-by-step instructions, and great tips. You can customize flavors with herbs or other citrus fruits. Don't forget how to store leftovers for later enjoyment. These potatoes are not just easy to prepare but also shine at any meal. Experiment and make this recipe your own! Enjoy the bold flavors and satisfying textures. You’ll love sharing this dish with family and friends.](https://dishtreats.com/wp-content/uploads/2025/06/9ec2dfc2-ebd8-4d91-9e7c-548975c099b6-768x768.webp)


