Teriyaki Tofu Power Bowls Flavorful and Easy Recipe

Craving a meal that’s both tasty and easy to make? Teriyaki Tofu Power Bowls are here to save your dinner time! I’ll show you how to whip up this delicious dish with simple steps and fresh ingredients. Packed with flavor and nutrients, these power bowls will please your palate and nourish your body. Let’s dive into this quick recipe that you’ll want to make again and again!
Why I Love This Recipe
- Healthy Ingredients: This recipe is packed with wholesome ingredients like tofu, quinoa, and fresh vegetables, making it a nutritious choice for any meal.
- Quick and Easy: With a total prep and cook time of just 30 minutes, this dish is perfect for busy weeknights when you need something satisfying and delicious.
- Customizable: You can easily swap out vegetables or grains based on your preference, allowing you to make this bowl your own!
- Flavorful Sauce: The homemade teriyaki sauce adds a sweet and savory flavor that perfectly complements the tofu and veggies, elevating the entire dish.
Ingredients
Main Ingredients for Teriyaki Tofu Power Bowls
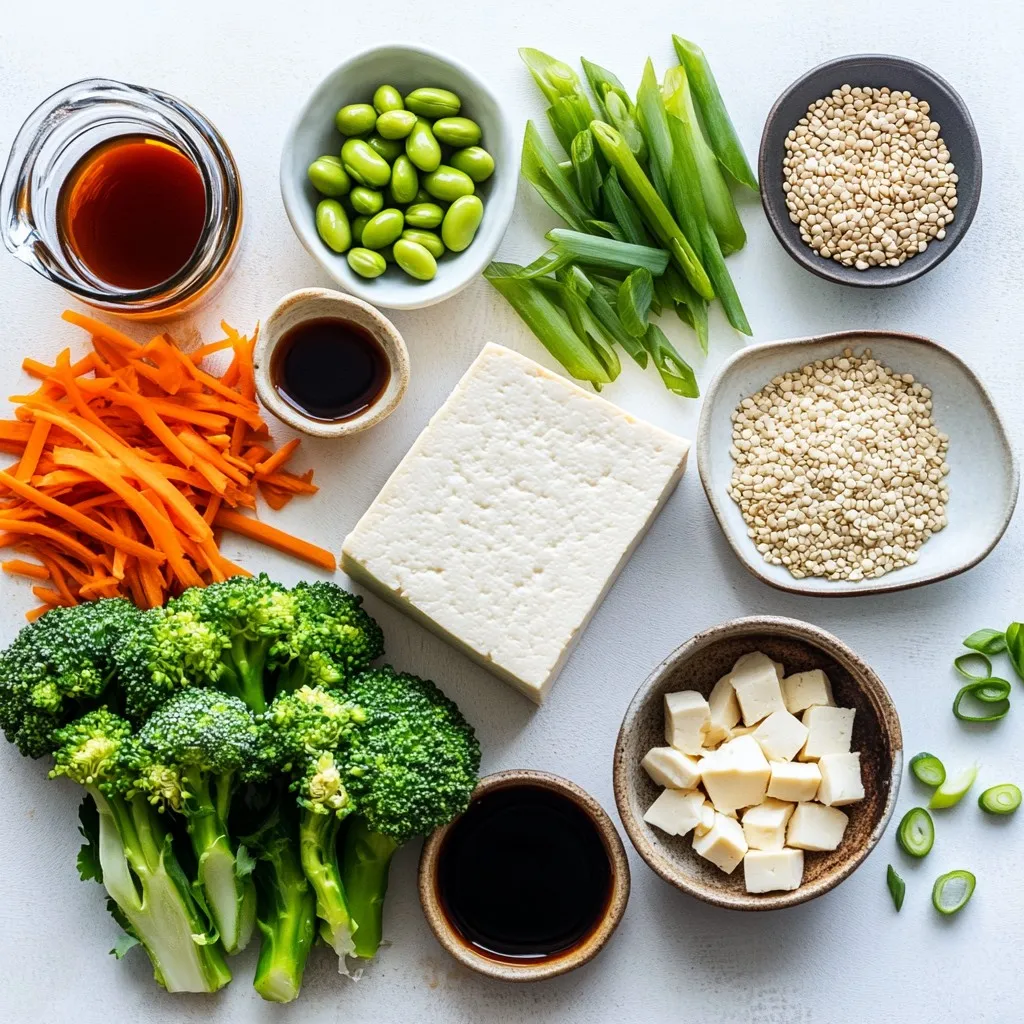
To make Teriyaki Tofu Power Bowls, you need fresh and simple ingredients. Here’s what you will need:
- 1 block (14 oz) firm tofu, thoroughly drained and pressed
- 1/4 cup soy sauce (or tamari for a gluten-free option)
- 2 tablespoons pure maple syrup
- 1 tablespoon rice vinegar
- 1 tablespoon toasted sesame oil
- 1 tablespoon cornstarch
- 2 cups cooked quinoa or brown rice
- 1 cup steamed broccoli florets
- 1 cup shredded carrots
- 1 cup shelled edamame
- 2 green onions, finely sliced
- Sesame seeds for garnish
- Sriracha sauce for serving (optional)
Each ingredient plays a key role. The tofu gives protein and texture. The soy sauce adds saltiness. Maple syrup brings sweetness, while rice vinegar adds a tangy note. Sesame oil gives a rich flavor, and cornstarch helps the tofu get crispy.
Optional Garnishes
You can dress up your bowls with these fun toppings:
- Finely sliced green onions
- Sesame seeds
- Sriracha sauce
These garnishes add flavor and color. Green onions are fresh and bright. Sesame seeds give a nutty crunch. Sriracha sauce adds heat, perfect for spice lovers.
Suggested Sides
Think about serving these sides with your power bowls:
- Steamed bok choy
- Roasted sweet potatoes
- Cucumber salad
These sides complement the flavors of the main dish. They add variety and nutrition to your meal. Enjoy experimenting with different sides to find your favorites!

Step-by-Step Instructions
Preparation of Tofu
First, you need to press the tofu. This step helps remove extra moisture. Wrap the tofu block in a clean kitchen towel. Then, place a heavy skillet or pot on top. Let it press for about 10 to 15 minutes. Once done, the tofu will be firmer and ready to cut.
Making the Teriyaki Sauce
While the tofu presses, you can make the teriyaki sauce. In a small bowl, mix together the soy sauce, maple syrup, rice vinegar, and sesame oil. Use a whisk to blend them well. This sauce adds great flavor to the tofu.
Cooking the Tofu
After pressing, cut the tofu into bite-sized cubes. Place the cubes in a bowl. Sprinkle cornstarch over them and toss gently. This coating helps make the tofu crispy. Heat a little oil in a large non-stick skillet over medium-high heat. Add the coated tofu cubes to the skillet. Cook them for about 3 to 4 minutes on each side. You want them golden brown and crispy. Once they are cooked, pour the teriyaki sauce over the tofu. Stir to coat every piece. Cook for another 2 to 3 minutes until the sauce thickens.
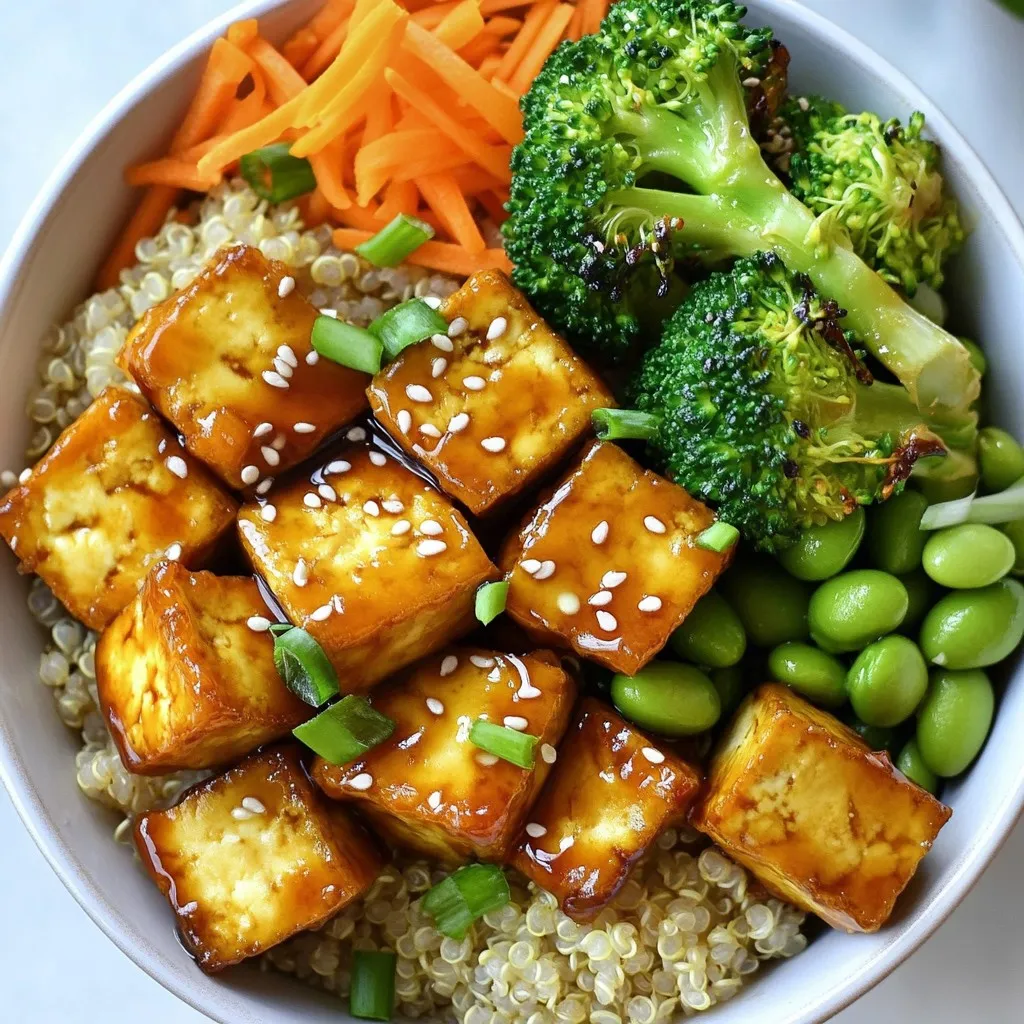
Assembling the Power Bowls
Now, it’s time to assemble your power bowls. Start with a base of cooked quinoa or brown rice in each bowl. Layer the steamed broccoli, shredded carrots, and edamame on top. Finally, add the teriyaki tofu pieces. Don’t forget to garnish with sliced green onions and sesame seeds. If you want some heat, serve with Sriracha sauce on the side.
Tips & Tricks
Best Way to Press Tofu
Tofu holds a lot of water. Pressing is key for better texture. Wrap your tofu block in a clean kitchen towel. Place a heavy skillet on top. Let it press for 10-15 minutes. This step helps to remove excess moisture. The firmer the tofu, the better it absorbs flavors.
Achieving Crispy Tofu
For crispy tofu, coat it in cornstarch. After pressing, cut the tofu into cubes. Toss the cubes in a bowl with cornstarch. Make sure every piece is coated. Heat a non-stick skillet over medium-high heat. Add a small amount of oil. Cook the tofu cubes for 3-4 minutes per side. They should turn golden brown and crispy. This step makes the tofu crunchy and delicious.
Customizing Your Teriyaki Sauce
Teriyaki sauce can be made your own. Use soy sauce or tamari for gluten-free. Mix in pure maple syrup for sweetness. Add rice vinegar for a tangy kick. Toasted sesame oil gives a nutty flavor. Adjust the flavors based on your taste. You can add garlic or ginger for more depth. Feel free to experiment with your sauce.
Pro Tips
- Press Tofu Well: Ensure you press the tofu long enough to remove as much moisture as possible. This helps achieve a crispy texture when cooked.
- Customize the Sauce: Feel free to adjust the sweetness of the teriyaki sauce by adding more or less maple syrup according to your taste preference.
- Experiment with Veggies: You can add or substitute other vegetables like bell peppers, snap peas, or spinach to add variety and nutrition to your power bowls.
- Use Fresh Ingredients: For the best flavor, use fresh vegetables and high-quality soy sauce or tamari. Fresh ingredients can significantly enhance the overall taste of the dish.

Variations
Alternative Protein Options
If you want to change up the protein in your Teriyaki Tofu Power Bowls, you have great options. You can use tempeh, chicken, or shrimp instead of tofu. Tempeh adds a nutty taste and a firm texture. Chicken gives a classic flavor, while shrimp cooks quickly and adds a nice seafood twist. Simply prepare them the same way as the tofu. Make sure to adjust cooking times.
Vegetable Swaps
You can easily swap vegetables to match your taste. If you don’t like broccoli, try bell peppers, snap peas, or zucchini. Each one brings a unique flavor and texture. For extra color, you can add purple cabbage or cherry tomatoes. Don’t forget to steam or sauté them lightly to keep them crisp and bright.
Gluten-Free Adjustments
To keep your dish gluten-free, use tamari instead of regular soy sauce. This small change keeps the flavor intact. Check other ingredients for gluten too. For example, some rice vinegars may have added ingredients. Always read labels to ensure everything is safe for your diet. With these adjustments, everyone can enjoy a tasty Teriyaki Tofu Power Bowl!
Storage Info
How to Store Leftovers
To store your Teriyaki Tofu Power Bowls, let them cool down first. Place them in an airtight container. Store in the fridge for up to three days. Keep the tofu and veggies separate from the grains if possible. This helps maintain their texture.
Reheating Instructions
When you’re ready to eat, take out the leftovers. You can reheat them in a microwave. Heat in short bursts, about 1-2 minutes, stirring in between. If you prefer the stovetop, use a pan over medium heat. Add a splash of water to keep the tofu moist. Cook until heated through.
Freezing Tips
If you want to freeze your Teriyaki Tofu Power Bowls, do so before adding the sauce. Freeze the tofu and veggies in one container. Store the cooked grains in another. They will keep well for about 2-3 months. When ready to eat, thaw overnight in the fridge. Then, sauté the tofu and veggies with the sauce until hot.
FAQs
Can I use other types of Tofu?
Yes, you can use soft or extra-firm tofu. Soft tofu will make a creamier dish, while extra-firm tofu stays firmer. If you choose soft tofu, be gentle when cooking. It may break apart easier. You can still enjoy a delicious flavor with either option.
How to make this dish vegan?
This dish is already vegan! The main ingredients are tofu, veggies, and a teriyaki sauce made from soy sauce and maple syrup. Just ensure you use a vegan type of soy sauce. Tamari is a great choice for a gluten-free option. This makes the recipe suitable for all vegan diets.
What can I serve with Teriyaki Tofu Power Bowls?
You can serve these bowls with many sides. Here are some ideas:
- Steamed asparagus for a fresh crunch.
- Brown rice for added fiber.
- A simple salad for extra veggies.
- Pickled vegetables for a tangy twist.
Feel free to mix and match your sides!
In this blog post, we explored how to make Teriyaki Tofu Power Bowls. We covered key ingredients, tasty sides, and step-by-step instructions for perfect tofu. Remember the tips for pressing and cooking tofu to achieve that crispy texture. Feel free to customize your teriyaki sauce and explore various protein and vegetable options. Lastly, store leftovers properly and enjoy them later. Now, you have all the tools to create a healthy and delicious meal. Enjoy making this dish your ow

Teriyaki Tofu Power Bowls
Ingredients
- 1 block (14 oz) firm tofu, thoroughly drained and pressed
- 0.25 cup soy sauce (or tamari for a gluten-free option)
- 2 tablespoons pure maple syrup
- 1 tablespoon rice vinegar
- 1 tablespoon toasted sesame oil
- 1 tablespoon cornstarch
- 2 cups cooked quinoa or brown rice
- 1 cup steamed broccoli florets
- 1 cup shredded carrots
- 1 cup shelled edamame
- 2 pieces green onions, finely sliced
- to taste sesame seeds for garnish
- to taste Sriracha sauce for serving (optional)
Instructions
- Begin by pressing the tofu to eliminate excess moisture. Wrap the tofu block in a clean kitchen towel and place a heavy skillet or pot on top. Allow it to press for approximately 10-15 minutes to achieve a firmer texture.
- While the tofu is being pressed, prepare the teriyaki sauce. In a small mixing bowl, whisk together the soy sauce, maple syrup, rice vinegar, and toasted sesame oil until well combined.
- After pressing, cut the tofu into bite-sized cubes. Place the cubes in a bowl and sprinkle cornstarch over them, gently tossing to ensure all pieces are evenly coated.
- In a large non-stick skillet, heat a small drizzle of oil over medium-high heat. Carefully add the cornstarch-coated tofu cubes and cook for approximately 3-4 minutes on each side, or until they turn golden brown and crispy.
- Once the tofu is nicely browned, pour the prepped teriyaki sauce over it in the skillet. Stir well to coat the tofu evenly, allowing it to cook for an additional 2-3 minutes until the sauce slightly thickens and clings to the tofu.
- To assemble the power bowls, start by layering the cooked quinoa or brown rice at the base of each serving bowl. Arrange the steamed broccoli, shredded carrots, and edamame on top, followed by the teriyaki tofu pieces.
- Finish by garnishing with finely sliced green onions and sprinkling sesame seeds generously over the bowls. If you desire an extra kick, serve with a side of Sriracha sauce for drizzling.


![To make stuffed bell peppers with quinoa, gather these tasty ingredients: - 4 large bell peppers (mixed colors) - 1 cup quinoa (rinsed) - 2 cups vegetable broth - 1 can black beans (drained and rinsed) - 1 cup corn kernels - 1 medium onion (finely chopped) - 2 cloves garlic (minced) - 1 teaspoon ground cumin - 1 teaspoon chili powder - ½ teaspoon smoked paprika - Salt and pepper to taste - 1 cup diced tomatoes - 1 cup shredded cheese - Fresh cilantro (optional for garnish) These ingredients work together to create a colorful and healthy meal. Quinoa is the star here, adding protein and fiber. The bell peppers not only look great but also bring sweetness and crunch. If you want to learn how to combine them into a delicious dish, check out the Full Recipe. - To cook quinoa with vegetable broth, start by rinsing 1 cup of quinoa under cold water. This step removes bitterness. Pour the rinsed quinoa into a medium saucepan. Add 2 cups of vegetable broth for added flavor. Bring the mixture to a boil over medium-high heat. Once boiling, reduce the heat to low. Cover the pan and let it simmer for about 15 minutes. You will know it's done when all the liquid is absorbed. - After cooking, fluff the quinoa with a fork. This makes it light and airy. Set the quinoa aside to cool while you prepare the other ingredients. - Heat a non-stick skillet over medium heat. Add 1 medium onion, finely chopped, and 2 cloves of minced garlic. Cook these until the onion turns soft and translucent. This takes about 3 to 5 minutes. - Next, add 1 can of drained black beans and 1 cup of corn kernels to the skillet. Stir in 1 cup of diced tomatoes, along with 1 teaspoon of ground cumin, 1 teaspoon of chili powder, ½ teaspoon of smoked paprika, and salt and pepper to taste. Mix well and let it cook for an additional 5 minutes until everything is warm. - To prepare the bell peppers, slice off the tops and remove the seeds and membranes. Choose 4 large bell peppers for a colorful dish. Place the hollowed peppers upright in a baking dish. Make sure they stand stable. - Now, fill each bell pepper with the quinoa and vegetable mix. Press it down gently to pack it in well. For a cheesy touch, top each pepper with 1 cup of shredded cheese. Let it cascade down the sides for a fun look. - Cover the baking dish with aluminum foil. This helps keep the moisture in. Place it in the preheated oven at 375°F (190°C). Bake for 25 minutes. - After 25 minutes, carefully remove the foil. Return the dish to the oven for another 10 to 15 minutes. You want the peppers to be tender, and the cheese to melt and bubble. It should have a lovely golden color when done. Now you have a delicious, colorful dish ready to serve! For full details, refer to the [Full Recipe]. How to choose the right bell peppers Pick large, firm bell peppers for stuffing. Look for vibrant colors like red, yellow, or green. The best peppers have smooth skin. Avoid any with soft spots or blemishes. This ensures a tasty bite every time. Ensuring even cooking Cut off the tops of the peppers evenly. This helps them stand upright. Remove seeds and membranes for better stuffing. Place them in a baking dish that fits snugly. This keeps them from tipping over during cooking. Adding herbs or spices for variety Fresh herbs like cilantro or parsley boost flavor. Try adding a pinch of oregano or thyme for depth. For a spicy touch, sprinkle in some red pepper flakes. These small tweaks make a big difference in taste. Recommended cheese types for best flavor Cheddar and mozzarella melt well and taste great. For a kick, use pepper jack cheese. If you like tang, feta cheese can add a nice twist. Experiment to find your favorite cheese blend. Essential kitchen tools and equipment You’ll need a sharp knife and a cutting board for prep. A medium saucepan is great for cooking quinoa. Use a non-stick skillet for sautéing vegetables. A sturdy spoon helps you mix everything well. Baking dish recommendations for even heat distribution Choose a glass or ceramic baking dish. These materials distribute heat evenly. Make sure it’s big enough to hold all your stuffed peppers. This way, they cook through without burning. For the full recipe, follow this link: [Full Recipe]. {{image_4}} You can change the protein in stuffed peppers easily. If you want a meat option, try ground turkey. It adds great flavor. For a plant-based choice, use tofu. You can mash it and mix it into the filling. Black beans are great, but these options offer variety. You can also make vegetarian or vegan options. Use black beans or lentils for protein. These keep it meat-free. Just ensure you skip the cheese for a vegan meal. There are many ways to customize the protein to fit your needs. Quinoa is a fantastic base for stuffed peppers, but you can switch grains. Rice is a classic choice that works well. Farro or couscous can also bring a different texture. They make the meal hearty and filling. If you need gluten-free options, use rice or quinoa. Both are naturally gluten-free. This way, everyone can enjoy your stuffed peppers without worry. Think about different flavors to spice things up. For a Mexican twist, add jalapeños or taco seasoning. This gives the dish a kick and adds excitement. You can also use salsa for added flavor. For a Mediterranean vibe, add olives or crumbled feta cheese. These ingredients enhance the taste and bring a fresh feel. Both options are simple yet effective ways to change your stuffed peppers. To keep your stuffed bell peppers fresh, store them in the fridge. Place them in an airtight container. They will stay good for up to 4 days. If you want to save them for later, freezing is a great option. Wrap each stuffed pepper in plastic wrap, then put them in a freezer-safe bag. This way, they can last for up to 3 months. For reheating in the oven, preheat it to 350°F (175°C). Place the peppers in a baking dish with a little broth or water. Cover with foil to keep moisture in. Bake for about 20 minutes or until heated through. If you need a quick option, use the microwave. Place one stuffed pepper on a microwave-safe plate. Heat on high for about 2-3 minutes. If it's not hot enough, heat in 30-second bursts until warm. Stuffed peppers last in the fridge for about 4 days. After that, they may spoil. Look out for any signs of spoilage. If you see mold or a bad smell, it's time to toss them. Always trust your senses! You typically bake stuffed bell peppers for 35 to 40 minutes. Start by covering them with foil for the first 25 minutes. This keeps them moist. After that, remove the foil to let the cheese melt and brown for another 10 to 15 minutes. Check the peppers to ensure they are tender but not mushy. Yes, you can prepare stuffed peppers in advance. Stuff the peppers and place them in a baking dish. Cover with foil and store them in the fridge for up to 24 hours. When ready to bake, just pop them in the oven. You may need to extend the baking time by a few minutes. If you want to swap quinoa, try rice, farro, or couscous. These grains provide a nice texture. Rice cooks quickly and absorbs flavors well. Farro adds a chewy bite, while couscous is fluffy and light. You can also use lentils for a protein boost. Stuffed peppers are quite healthy! They are full of fiber from the quinoa, beans, and veggies. Bell peppers are rich in vitamins A and C. This dish tends to be low in calories and high in nutrients. It offers a balanced meal with protein, carbs, and healthy fats. Absolutely! You can use green, red, yellow, or orange bell peppers. Each type has a unique taste. Green peppers are more bitter, while red ones are sweet and fruity. Mixing colors not only looks pretty but also gives different flavors. Feel free to choose your favorite or what’s on hand! For the complete method to make flavorful stuffed bell peppers, check out the [Full Recipe]. Here, I’ll share key details about the dish that will help you create a yummy meal your family will love. Stuffed bell peppers are colorful and fun. They make a great meal for any day. You can use any bell pepper color. Red, yellow, and green peppers add a nice look to your plate. Each color has a different taste too. Quinoa is the star here. It’s a healthy grain packed with protein. Rinsing it before cooking helps remove any bitter taste. You cook quinoa in vegetable broth for extra flavor. This makes it soft and fluffy, perfect for mixing with veggies. The filling is made from black beans, corn, diced tomatoes, and spices. Black beans add protein and fiber. Corn brings sweetness and crunch. Diced tomatoes add moisture and flavor, making the filling juicy. The spices—cumin, chili powder, and smoked paprika—give your dish a tasty kick. They create layers of flavor that make each bite exciting. Don’t forget to add salt and pepper to taste! When you stuff the peppers, pack the filling well. This keeps everything together during cooking. Topping with shredded cheese adds a melty touch. As the peppers bake, the cheese melts and gets golden. Baking them with foil keeps the peppers moist. Then, removing the foil lets the cheese get bubbly and brown. The result is a beautiful dish that is sure to impress! Stuffed peppers combine colorful ingredients into a tasty meal. We discussed how to prepare quinoa, sauté vegetables, and stuff the peppers. I shared tips for choosing the right peppers and flavoring your dish. Variations allow you to substitute proteins and grains based on your taste. Storing leftovers properly extends the life of your meal. Making stuffed peppers can be fun and creative. Enjoy trying new flavors and share this recipe with others!](https://dishtreats.com/wp-content/uploads/2025/06/552026c8-f020-4e58-b656-10611c333f52-768x768.webp)


