Teriyaki Tofu Bowls Flavorful and Wholesome Meal

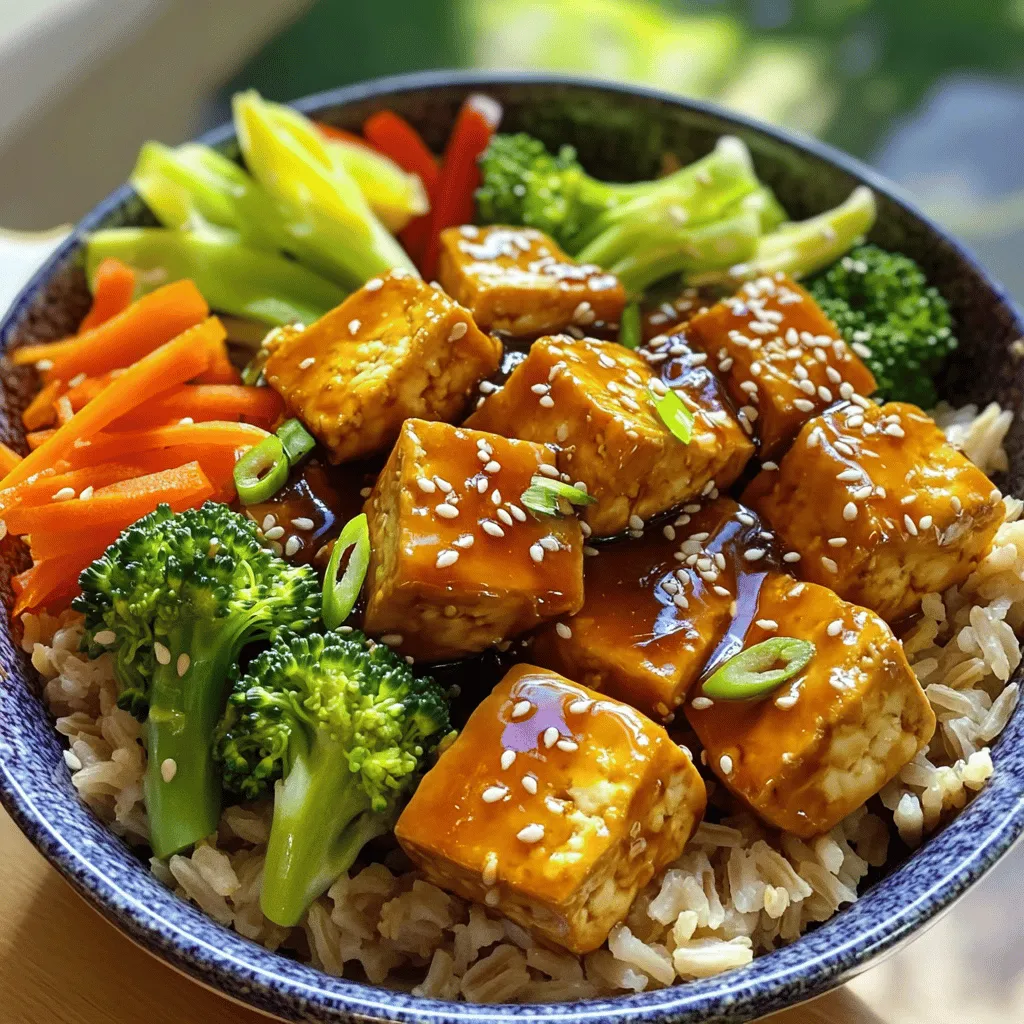
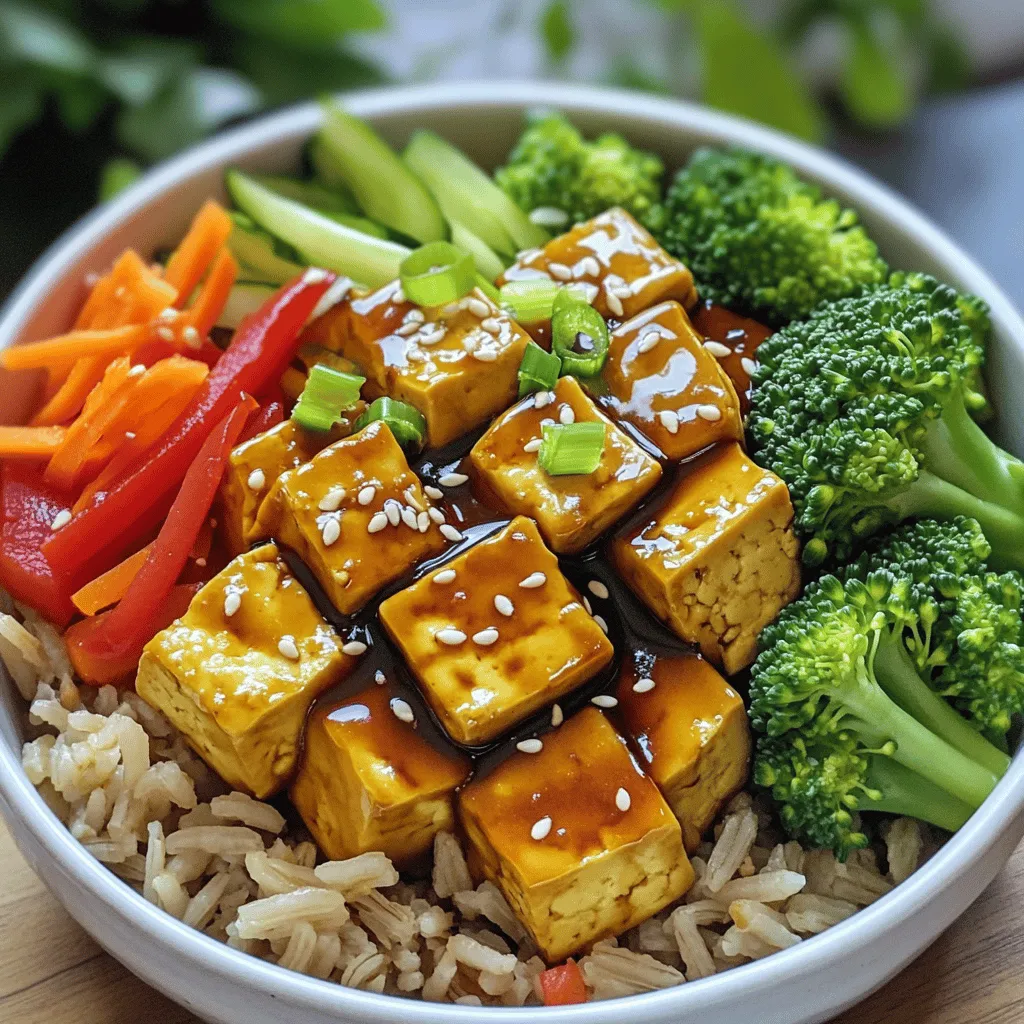
Craving a tasty and wholesome meal? Try my Teriyaki Tofu Bowls! This dish combines crispy tofu, fresh vegetables, and a rich, homemade teriyaki sauce. It’s packed with flavor and comes together in just a few simple steps. Whether you’re cooking for yourself or a crowd, these bowls are sure to impress. Let’s dive into the ingredients and get started on this delicious recipe!
Ingredients
Main Ingredients
- Firm tofu (1 block, pressed and cut into 1-inch cubes)
- Brown rice (1 cup)
- Sesame oil (2 tablespoons)
- Fresh broccoli florets (1 cup)
- Red bell pepper (1, thinly sliced)
- Medium carrot (1, julienned)
- Green onions (3, finely sliced)
Sauce Ingredients
- Garlic (2 cloves, minced)
- Fresh ginger (1-inch piece, grated)
- Soy sauce (1/4 cup, low sodium if desired)
- Honey or maple syrup (2 tablespoons)
- Rice vinegar (1 tablespoon)
- Cornstarch (1 tablespoon mixed with 2 tablespoons cold water)
Garnish
- Sesame seeds
Each ingredient plays a special role in making your Teriyaki Tofu Bowls flavorful and wholesome. The firm tofu gives a nice texture and absorbs the rich teriyaki sauce. Brown rice serves as a hearty base, adding fiber and nutrients. The sesame oil adds a nutty richness that elevates the dish.
The fresh vegetables, like broccoli, bell pepper, and carrot, not only add vibrant color but also pack in vitamins. They keep their crunch and bring a fresh taste that balances the savory sauce.
For the sauce, garlic and ginger add depth and warmth, while soy sauce brings umami. Honey or maple syrup sweetens it, and rice vinegar adds a tangy kick. The cornstarch thickens the sauce to coat your tofu and veggies beautifully.
Don’t forget the sesame seeds for garnish! They provide a delightful crunch and a lovely finish to your dish.
Step-by-Step Instructions
Cooking the Rice
- Cook brown rice according to package instructions.
- Fluff and set aside to keep warm.
Preparing the Sauce
- Combine soy sauce, honey (or maple syrup), vinegar, garlic, and ginger.
- Whisk until well mixed and set aside.
Cooking the Tofu and Vegetables
- Heat sesame oil in a skillet over medium heat.
- Cook cubed tofu until golden brown, about 8-10 minutes.
- Add broccoli, bell pepper, and carrot; stir-fry for about 5 minutes.
Combining and Thickening
- Pour teriyaki sauce over the tofu and vegetables.
- Simmer gently to combine flavors.
- Gradually add cornstarch mixture to thicken the sauce.
Serving the Dish
- Assemble rice in serving bowls.
- Top with the teriyaki tofu and vegetable mixture.
- Garnish with green onions and sesame seeds.
This dish is fun to make and enjoyable to eat. The sweet and salty sauce pairs well with the tofu and veggies.
Tips & Tricks
Cooking Tips
- Press tofu properly for better texture. This helps remove excess water.
- Use a non-stick skillet to prevent sticking. It makes cooking easier.
Flavor Enhancements
- Adjust sweetness by varying honey or maple syrup. Sweetness can change the taste.
- Add chili flakes for a spicy kick. This adds nice heat to the dish.
Presentation Tips
- Use colorful bowls for serving. Bright colors make the meal more appealing.
- Drizzle extra sesame oil and add a lime wedge. This enhances the flavor and look.
When you follow these tips, you’ll create a dish that looks and tastes amazing!Enjoy your cooking journey!

Variations
Vegan Options
You can easily make this dish fully vegan. Just swap honey for maple syrup. This small change keeps the sweet flavor while keeping it plant-based. Maple syrup adds a nice touch of richness. It also makes the dish friendly for those who avoid animal products.
Gluten-Free Adaptations
For a gluten-free version, use tamari instead of regular soy sauce. Tamari has a similar taste but does not contain wheat. This makes it a great choice for those with gluten sensitivity. The dish will still taste amazing, and you won’t miss the soy sauce at all.
Added Vegetables
Feel free to get creative with your veggies. You can try adding snap peas or zucchini. Both of these options add a nice crunch. They also bring vibrant colors and extra nutrients to the meal. Mix and match your favorite vegetables to make it your own!
Storage Info
Refrigeration
Store leftovers in an airtight container in the refrigerator for up to 3 days. This keeps the tofu and veggies fresh. Make sure they cool down before sealing. Proper storage helps maintain flavor and texture.
Freezing
You can freeze the tofu before adding the sauce. It will last for up to 1 month. To freeze, place the tofu cubes in a container. This method helps to keep the tofu’s texture. Just remember to thaw it in the fridge before cooking.
Reheating Tips
Reheat thoroughly in a skillet or microwave before serving. If using a skillet, heat on medium until hot. Stir to ensure even warming. In the microwave, use a microwave-safe dish and cover it. Heat in 30-second intervals until hot. Enjoy your meal just like when it was fresh!
FAQs
How do I make Teriyaki sauce from scratch?
You can easily make teriyaki sauce at home. Here’s a simple recipe:
- 1/4 cup soy sauce
- 2 tablespoons honey or maple syrup
- 1 tablespoon rice vinegar
- 2 cloves garlic, minced
- 1-inch piece ginger, grated
Mix all these ingredients in a bowl. Whisk until well combined. This sauce adds a sweet and savory taste to your dish. You can adjust the sweetness as you like.
Can I use other proteins instead of tofu?
Yes, you can switch tofu for chicken or tempeh. For chicken, cut it into bite-sized pieces. Cook it until golden brown like the tofu. Tempeh is another great option. It has a nutty flavor and adds protein. Use the same cooking steps as with tofu.
How long does cooked tofu stay fresh?
Cooked tofu keeps well in the fridge. Store it in an airtight container. It will stay fresh for about three days. If you want to keep it longer, consider freezing it.
What is the best way to press tofu?
Pressing tofu helps remove excess water. This gives it a better texture for cooking. You can wrap the tofu in a clean towel. Place a heavy object on top, like a cast-iron pan. Let it sit for about 15 to 30 minutes.
Is Teriyaki Tofu healthy?
Yes, teriyaki tofu is a healthy choice. Tofu is high in protein and low in calories. It contains iron and calcium too. The vegetables add fiber and vitamins. This dish is a balanced meal packed with nutrients.
In this article, I shared a delicious teriyaki tofu recipe. We covered key ingredients like firm tofu, brown rice, and colorful veggies. I guided you through making the sauce, cooking the dish, and serving ideas. Don’t forget the handy tips for flavor and presentation. This dish is easy to customize, vegan-friendly, and perfect for meal prep. Enjoy creating your tasty teriyaki tofu feast!


![- 2 cans young green jackfruit - 1 tablespoon olive oil - 1 medium onion, finely chopped - 1 teaspoon smoked paprika - 1 teaspoon ground cumin - 1 teaspoon chili powder - 1/2 teaspoon black pepper - 1/2 teaspoon cayenne pepper (adjust to taste) - 4 sturdy sandwich rolls - Coleslaw (optional, for topping) When making BBQ pulled pork sandwiches, the ingredients are key. Young green jackfruit is the star. It has a texture similar to pulled pork and absorbs flavors well. Use two cans for four servings, and don’t forget to rinse and drain them! For the base flavor, olive oil and onion work wonders. The oil helps to sauté the onion, which adds sweetness and depth. A finely chopped onion is best for even cooking and flavor distribution. Spices bring the dish to life. Smoked paprika adds a lovely smokiness, and ground cumin gives it warmth. Chili powder adds a kick, while black and cayenne pepper let you control the heat. For the sandwich, sturdy rolls hold up best. Choose your favorite type. Optional coleslaw adds crunch and creaminess. It’s a nice touch that balances the rich BBQ flavor. For the full recipe, follow the steps to create your BBQ pulled pork sandwiches that are simple and tasty! To start, you need to shred the jackfruit. Grab two cans of young green jackfruit, and drain them well. Rinse the jackfruit under cool water. With clean hands or two forks, pull apart the jackfruit into thin strands. Aim for a texture that mimics pulled pork. Set the shredded jackfruit aside for later use. Now, let’s sauté the onions and garlic. Heat one tablespoon of olive oil in a large skillet over medium heat. Add one finely chopped medium onion. Stir occasionally until the onion turns soft and translucent, about five minutes. Next, add minced garlic. Use four cloves for a nice kick. Sauté for another minute. You want the garlic fragrant, not browned. It’s time to bring it all together! Add the shredded jackfruit to the skillet. Mix well to coat the jackfruit with the onion and garlic. Now, it’s spice time! Incorporate one teaspoon of smoked paprika, one teaspoon of ground cumin, and one teaspoon of chili powder. Add half a teaspoon of black pepper and half a teaspoon of cayenne pepper. Stir everything together for a minute to let the flavors meld. Next, pour in one cup of BBQ sauce. You can use store-bought or homemade, depending on your preference. Mix until all the jackfruit strands are covered in sauce. Lower the heat and cover the skillet. Let it simmer for 20 to 25 minutes. Stir occasionally, adding a splash of water if it looks dry. Taste and season with salt as needed. Now, while the jackfruit simmers, you can toast the sandwich rolls. Preheat your oven or a skillet. Lightly toast the rolls until golden brown. This step adds a nice crunch. Once the jackfruit is ready, it’s time to assemble your sandwiches. Grab a toasted roll, spoon a good amount of BBQ jackfruit onto the bottom half. If you want, add some coleslaw for extra crunch. Top with the other half of the roll, and enjoy your smoky sweet BBQ pulled jackfruit sandwich! For the full recipe details, check [Full Recipe]. To get the best taste, adjust the spices to fit your likes. Start with the base spices: smoked paprika, ground cumin, and chili powder. These give the jackfruit a deep, rich flavor. If you like it spicy, add more cayenne pepper. Remember, you can always add more spice, but you can’t take it away! Toasting the rolls makes a big difference. Use a skillet or an oven. If using a skillet, heat it over medium heat. Place the rolls cut-side down and toast until golden brown. If you choose the oven, set it to 375°F (190°C). Bake the rolls for about 5-7 minutes. This adds a nice crunch that pairs well with the soft jackfruit. When serving BBQ pulled pork sandwiches, make it fun! Use a wooden board for a rustic look. Place the sandwiches on it and add a small bowl of BBQ sauce for dipping. You can also add extra coleslaw on the side for a pop of color and crunch. This makes your meal look inviting and delicious. For the full recipe, check out the recipe section! {{image_4}} Using a slow cooker makes this dish simple and hands-off. Start by shredding the jackfruit as before. Place it in the slow cooker with olive oil, chopped onion, and minced garlic. Stir in the spices: smoked paprika, ground cumin, chili powder, and black pepper. Pour in your BBQ sauce. Cover and cook on low for 6 to 8 hours. The jackfruit will absorb all the flavors and become tender. You’ll love how easy this method is! Different areas have their own special takes on BBQ pulled pork. In the South, you might try adding vinegar-based sauces for a tangy twist. In Texas, a smoky chipotle sauce can add a kick. Up North, you might find a sweeter sauce with apple cider. Feel free to explore these local flavors. Your sandwiches will reflect your own region's tastes! If you want to switch things up, there are other great options. You can use mushrooms or lentils. Both provide a hearty texture. For a lighter option, consider using shredded zucchini or eggplant. They soak up flavors well too. Just remember to adjust your spices to match. Enjoy the creativity in your kitchen! To keep your leftover sandwiches tasty, store them in an airtight container. Make sure to separate the jackfruit mixture from the rolls. This helps prevent sogginess. Leftover jackfruit can last in the fridge for about three to four days. If you plan to eat them soon, add some extra BBQ sauce to keep them moist. If you want to save the jackfruit mixture for later, freezing works well. First, let the jackfruit cool completely. Then, place it in a freezer-safe container or bag. Make sure to remove any air. This helps avoid freezer burn. The mixture can stay fresh for about three months. Just remember to label the container with the date. When you’re ready to enjoy your pulled pork sandwiches, reheating is key. For the best results, use the stovetop. Place the jackfruit in a skillet over low heat. Add a splash of water or BBQ sauce to keep it moist. Stir until heated through. If you prefer the oven, preheat it to 350°F (175°C). Cover the jackfruit in a baking dish with foil. Heat for about 15 minutes. Enjoy your delicious BBQ pulled pork sandwiches! Yes, you can make BBQ pulled pork sandwiches ahead of time. This dish is perfect for meal prep. I suggest cooking the jackfruit and storing it in the fridge. It stays fresh for about 3 to 5 days. When you're ready to eat, just reheat it on the stove. You can also toast the rolls just before serving. This way, the sandwiches taste fresh and warm. The best BBQ sauce is one that fits your taste. If you like sweet, try a honey BBQ sauce. If you prefer spicy, go for a chipotle sauce. There are many great store-bought options, like Sweet Baby Ray's or Stubb's. You can also make your own. A mix of ketchup, vinegar, and spices creates a great flavor. To make jackfruit taste like pulled pork, focus on flavor. Start by shredding the jackfruit into thin strands. Cook it with onions, garlic, and spices like smoked paprika and cumin. These add depth to the dish. The BBQ sauce is key too. It coats the jackfruit and infuses it with rich flavor. Let it simmer for a while to soak up all those tasty notes. This article covered how to make BBQ pulled jackfruit sandwiches. You learned about the main ingredients, spices, and how to prepare each component. I shared step-by-step instructions to help you shred, sauté, and combine ingredients. You also received tips for perfecting flavor, toasting rolls, and creative presentations. Lastly, we explored variations, storage info, and frequently asked questions. Enjoy cooking this tasty dish that’s both fun and simple to make!](https://dishtreats.com/wp-content/uploads/2025/06/394fc23c-fade-4441-b59c-acd30966e9f2-768x768.webp)

