Looking for a light and tasty meal? You’ll love these Teriyaki Mushroom Lettuce Cups! They are easy to make and perfect for a snack or a full meal. Packed with savory flavors from teriyaki mushrooms, this dish is fresh and healthy. Whether you’re vegan or just looking for a gluten-free option, I’ll guide you through simple steps and creative ideas. Let’s make this scrumptious dish together!
Ingredients
Complete List of Ingredients
To make Teriyaki Mushroom Lettuce Cups, you need these simple ingredients:
– 2 cups shiitake mushrooms, thinly sliced
– 1 cup button mushrooms, thinly sliced
– 1 tablespoon olive oil
– 2 cloves garlic, finely minced
– 1 tablespoon fresh ginger, finely minced
– 1/4 cup teriyaki sauce (store-bought or homemade)
– 1 teaspoon sesame oil
– 1/4 cup green onions, chopped
– 1/4 cup shredded carrots
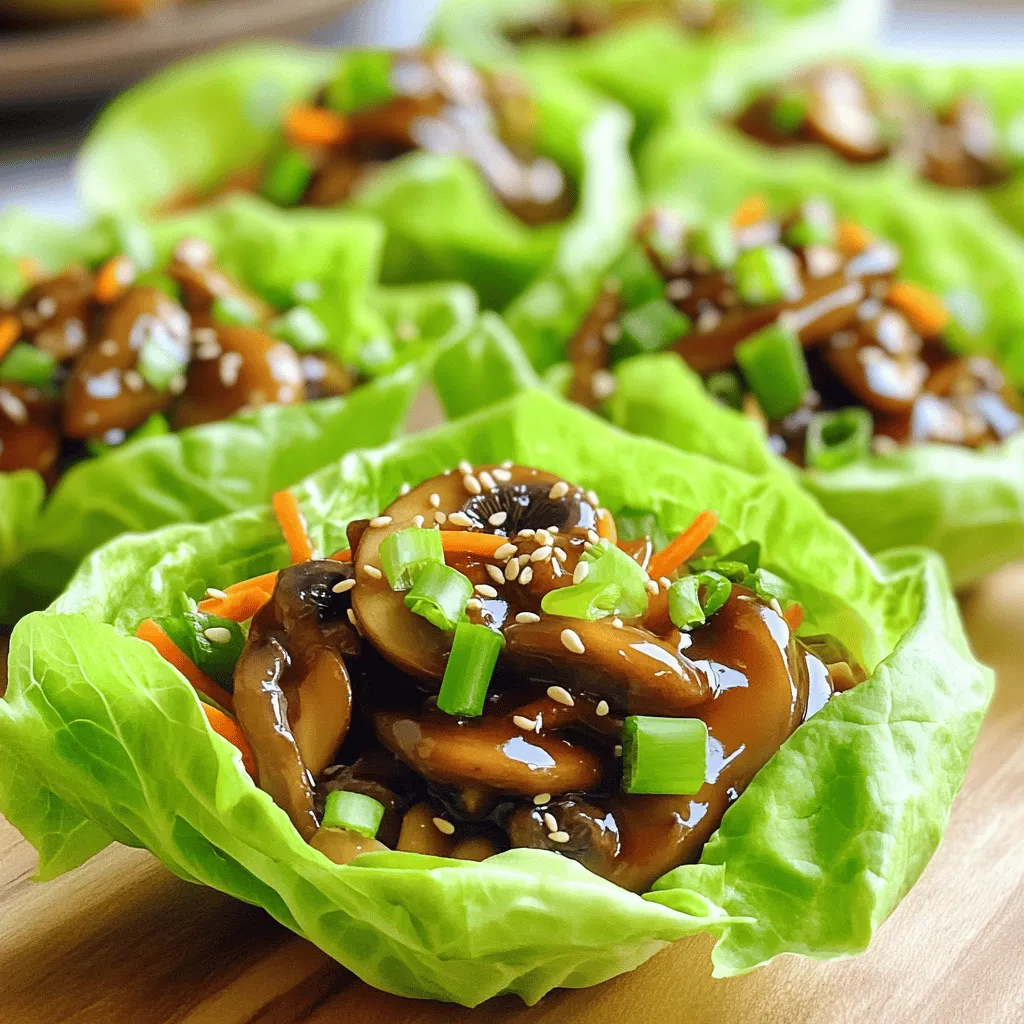
– 1 head of butter lettuce (or romaine), leaves carefully separated
– Sesame seeds, for garnish
Notes on Ingredient Substitutions
If you don’t have shiitake mushrooms, use any mushrooms you like. Cremini or portobello also work great. You can swap olive oil for another oil, like avocado oil. If you want a lower-sodium option, try a low-sodium teriyaki sauce. For a fresh twist, add lime juice or fresh herbs like cilantro.
Dietary Considerations (vegan, gluten-free options)
This dish is vegan and can be gluten-free. To make it gluten-free, choose a gluten-free teriyaki sauce. Most ingredients, like mushrooms and veggies, are naturally gluten-free. If you follow a vegan diet, all the ingredients fit right in. Enjoy this light meal with peace of mind, knowing it meets your dietary needs.
Step-by-Step Instructions
Detailed Cooking Method
To make teriyaki mushroom lettuce cups, start by heating olive oil in a large skillet. Use medium-high heat until the oil shimmers. Add minced garlic and ginger to the skillet. Sauté for about one minute. You want them to be aromatic and golden, but not burnt.
Next, add the sliced shiitake and button mushrooms. Sauté the mushrooms for about 5 to 7 minutes. Stir frequently until they turn tender and brown. This step enhances their flavor and texture. After that, lower the heat slightly. Pour the teriyaki sauce over the mushrooms. Cook for 2 to 3 minutes. Stir occasionally until the sauce thickens and coats the mushrooms well.
Finally, drizzle sesame oil into the pan. Fold in chopped green onions and shredded carrots. Cook for one more minute. The greens should wilt yet stay vibrant. Remove the skillet from heat and let it cool slightly.
Preparing the Mushrooms
Choosing the right mushrooms is key. I prefer shiitake and button mushrooms for their rich taste. Shiitake mushrooms have a meaty texture that holds up well. Button mushrooms add a mild flavor that balances the dish. Slice them thinly for even cooking.
Make sure to sauté them until they are golden. This caramelization brings out their natural sweetness. If you want a deeper flavor, you can add other mushrooms like portobello or oyster. Just remember to adjust cooking time based on thickness.
Assembling the Lettuce Cups
Now comes the fun part: assembling your lettuce cups. Take a leaf of butter lettuce or romaine. Place it on a flat surface. Spoon a generous amount of the mushroom mix into the center.
The lettuce should cradle the filling, creating a cup. Sprinkle sesame seeds on top for crunch. You can also add more green onions for extra flavor. Fold the lettuce around the filling. This makes a handheld cup that is easy to eat. Enjoy your flavorful and light meal!
Tips & Tricks
Common Mistakes to Avoid
When making Teriyaki Mushroom Lettuce Cups, avoid overcooking the mushrooms. They should be tender, not mushy. If you add too much teriyaki sauce at once, it can drown the mushrooms. Instead, pour it slowly and watch for thickening. Don’t skip the sesame oil; it adds a rich flavor. Lastly, ensure you wash the lettuce well to remove any grit.
How to Enhance Flavor
You can enhance the flavor of your mushroom filling in various ways. Try adding a splash of lime juice for brightness. Fresh herbs like cilantro or basil can add a nice touch. If you enjoy heat, some chili flakes or sriracha can spice things up. For a nutty crunch, toss in some chopped peanuts or cashews. Remember to taste as you go along!
Suggested Serving Sizes
For a light meal, one cup per person works well. If you’re serving these as appetizers, plan for two to three cups per guest. This dish is perfect for sharing at gatherings. You can easily double the recipe if you’re hosting a larger group. Just make sure to keep the lettuce and filling separate until ready to serve.

Variations
Different Types of Mushrooms to Use
You can switch up the mushrooms in this recipe. Shiitake mushrooms give a rich flavor, but other types work well too. Try using portobello mushrooms for a meaty bite. Cremini mushrooms add earthiness and depth. Even oyster mushrooms can bring a unique texture. Mix and match to find your favorite combo.
Additional Fillings and Toppings
Feel free to get creative with the fillings. You can add sliced bell peppers for crunch or diced cucumbers for freshness. Avocado will bring creaminess, while shredded cabbage adds a nice crunch. For a spicy kick, include sliced jalapeños or a drizzle of sriracha. You can also top with fresh herbs like cilantro or mint for added flavor.
Healthier Alternatives to Sauces
If you want a lighter option, consider using a homemade teriyaki sauce. You can mix soy sauce, honey, and a splash of rice vinegar. This gives you control over sweetness. You might also try coconut aminos, which has less sodium. For a tangy twist, use lemon juice or lime juice instead of teriyaki sauce. These options keep your meal light and tasty.
Storage Info
How to Store Leftovers
To store your leftover teriyaki mushroom lettuce cups, place them in an airtight container. Make sure to keep the mushroom filling separate from the lettuce leaves. This keeps the leaves crisp and fresh. Store the container in the fridge. Leftovers will stay good for about 3 days.
Reheating Instructions
When you are ready to eat leftovers, take the mushroom filling out of the fridge. Place it in a skillet over low heat. Stir it gently until the filling warms up. This method keeps the flavor intact. Avoid microwaving, as it can make the mushrooms soggy.
Freezing Tips
If you want to freeze the mushroom filling, place it in a freezer-safe bag. Squeeze out as much air as possible and seal the bag. You can freeze it for up to 2 months. When ready to use, thaw it overnight in the fridge. Reheat it as mentioned above before serving. The lettuce cups are best fresh, so it’s better to freeze only the filling.
FAQs
What can I substitute for lettuce?
If you want to change the lettuce, try using cabbage. Cabbage has a nice crunch. You can also use collard greens or Swiss chard. These options hold the filling well and add great flavor. For a low-carb choice, use cucumber slices or bell peppers. They work great for a fresh bite.
Can I make this recipe ahead of time?
Yes, you can prep ahead. Cook the mushroom mix and store it in the fridge. It stays fresh for up to three days. When you are ready to eat, warm the mixture in a pan. Then, serve it with fresh lettuce. This makes it easy for busy days or quick meals.
How do I make homemade teriyaki sauce?
Making teriyaki sauce at home is simple. You need:
– 1/4 cup soy sauce
– 1 tablespoon honey or brown sugar
– 1 tablespoon rice vinegar
– 1 teaspoon sesame oil
– 1 teaspoon cornstarch (optional, for thickness)
– 1 tablespoon water (mix with cornstarch if using)
Combine all the ingredients in a small pot over medium heat. Stir until it starts to bubble. If you want it thicker, add the cornstarch mix. Cook for another minute, then cool before using it in your dish. This sauce adds a personal touch to your teriyaki mushroom lettuce cups.
This blog post covered all the ingredients you need for the recipe. We discussed substitutions and options for different diets. You learned how to cook and prepare mushrooms and assemble tasty lettuce cups. We shared tips to avoid common mistakes and enhance flavor. You also found variations and storage info, plus answers to common questions.
Enjoy experimenting with this dish. It’s easy to prepare, fun to customize, and delicious to eat!


