Teriyaki Chicken Lettuce Cups Flavorful and Fresh Dish

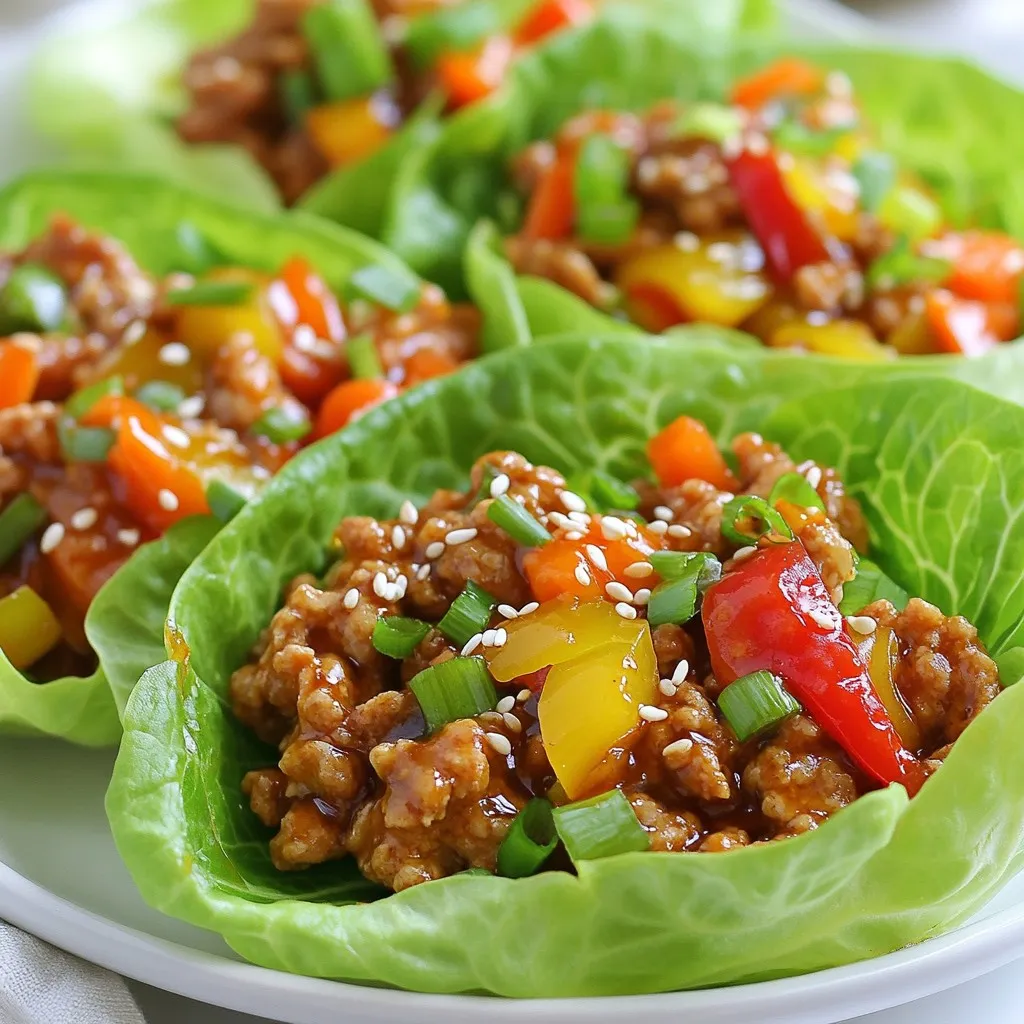
If you’re looking for a fresh, tasty meal that’s quick to make, you’re in the right place! Teriyaki Chicken Lettuce Cups are the perfect answer. They combine juicy chicken, vibrant veggies, and a sweet sauce, all wrapped in crisp lettuce. This dish is not only full of flavor but also easy to customize. Let’s dive into making these delightful cups that will impress your family and friends!
Why I Love This Recipe
- Quick and Easy: This recipe comes together in just 20 minutes, making it perfect for a weeknight dinner.
- Healthy and Fresh: Using lettuce cups instead of tortillas keeps the dish light, while the fresh vegetables add crunch and nutrition.
- Flavor Packed: The combination of teriyaki and soy sauce, along with ginger and garlic, creates a delicious umami flavor that’s hard to resist.
- Customizable: You can easily swap out the vegetables or add your favorite toppings, making this dish versatile and adaptable to your taste.
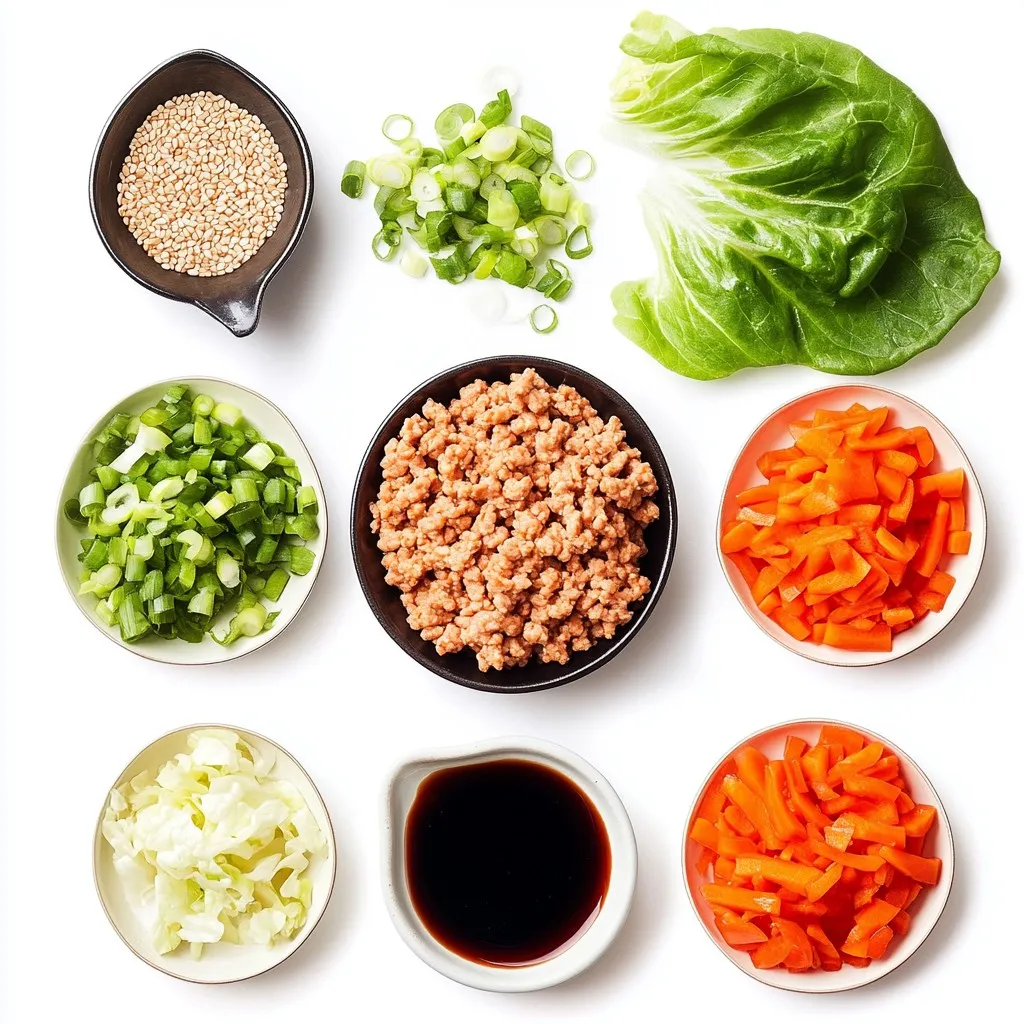
Ingredients
Main Ingredients
- 1 lb ground chicken
- 2 tablespoons teriyaki sauce
- 1 tablespoon soy sauce
- 1 tablespoon sesame oil
- 1 tablespoon fresh ginger, finely grated
- 2 cloves garlic, minced
Vegetables and Garnishes
- 1 bell pepper, finely chopped
- 1 medium carrot, grated
- 3 green onions, sliced diagonally
- 1 tablespoon sesame seeds (optional, for garnishing)
- 1 head of iceberg or butter lettuce, leaves carefully separated
The main ingredients create a rich and savory base. The ground chicken brings protein and texture. Teriyaki sauce and soy sauce add sweet and salty notes. Fresh ginger and garlic provide warmth and depth, making every bite burst with flavor.
Adding vegetables makes this dish vibrant and fresh. The bell pepper gives a nice crunch and color. Grated carrot adds sweetness and nutrients. Green onions bring a mild onion flavor, and sesame seeds can give a nutty crunch if you choose to add them.
For the lettuce, you can use iceberg or butter lettuce. Iceberg is crisp and sturdy, while butter lettuce is soft and tender. Both hold the filling well. You can also mix and match the veggies based on your taste. Feel free to add more or swap them out!

Step-by-Step Instructions
Cooking the Ground Chicken
1. Heat your skillet over medium heat. Add sesame oil and let it shimmer.
2. Next, add minced garlic and grated ginger. Sauté for about 30 seconds. This step fills your kitchen with a wonderful aroma.
3. Now, add 1 lb of ground chicken. Use a wooden spoon to break it apart. Cook for 5-7 minutes until it turns brown and is no longer pink.
Adding Sauces and Vegetables
1. Stir in 2 tablespoons of teriyaki sauce and 1 tablespoon of soy sauce. Mix well to coat the chicken in flavor.
2. Add 1 finely chopped bell pepper and 1 grated carrot. Cook for another 2-3 minutes. Stir often until the veggies soften and the mixture heats through.
3. Remove from heat and fold in 3 sliced green onions. This adds a fresh touch to your dish.
Assembling Lettuce Cups
1. Take a lettuce leaf and place it on your plate. Iceberg or butter lettuce works great.
2. Spoon a generous amount of the chicken mixture into the center of the leaf. This creates a lovely cup shape.
3. For a finishing touch, sprinkle 1 tablespoon of sesame seeds on top. This adds crunch and looks great on your plate.
These steps will lead you to a fresh and flavorful dish that is easy to make and enjoyable to eat!
Tips & Tricks
Cooking Tips
To ensure your chicken cooks evenly, choose ground chicken with a good fat content. This helps it stay juicy and flavorful. Use a large non-stick skillet for best results. The non-stick surface prevents the chicken from sticking and makes cooking easier. Keep the heat at medium to avoid burning the garlic and ginger.
Presentation Tips
When arranging your cups, use a vibrant platter to make your dish pop. Place the filled lettuce cups close together. This creates a fun and inviting look. For extra flair, drizzle some teriyaki sauce over the cups. Add more green onion slices and sesame seeds for a colorful touch.
Flavor Enhancements
To boost the flavor, try adding a splash of chili sauce for some heat. You can also mix in hoisin sauce for a sweeter taste. For side dishes, pair these cups with rice or a simple cucumber salad. These options balance the flavors and add texture to your meal.
Pro Tips
- Prep Your Ingredients: Having all your ingredients prepped and ready before you start cooking will streamline the process and ensure everything comes together smoothly.
- Choose Fresh Vegetables: Fresh, crisp vegetables not only enhance the flavor but also add vibrant color and texture to your lettuce cups. Opt for seasonal produce for the best taste.
- Adjust the Sauce to Taste: Feel free to adjust the amount of teriyaki and soy sauce to suit your preference. A little extra sauce can enhance the flavor without overwhelming the dish.
- Experiment with Toppings: Don’t hesitate to mix in or top your chicken mixture with other ingredients like diced cucumber, avocado, or even a sprinkle of chili flakes for an extra kick.

Variations
Protein Alternatives
You can switch out the ground chicken for ground turkey or beef. Ground turkey gives a leaner taste. Ground beef adds richness and flavor. Both options work well with teriyaki sauce.
If you want a vegetarian meal, try using plant-based protein. Crumbled tofu or tempeh absorbs flavors well. Just sauté them in sesame oil with garlic and ginger. This keeps your dish tasty and healthy.
Flavor Profile Changes
You can play with different sauces to change the flavor. Try hoisin or sweet chili sauce for a new twist. These choices add sweetness and depth.
If you like heat, toss in some chopped peppers. Sriracha or diced jalapeños can spice things up. This gives your dish a nice kick and makes it more exciting.
Serving Style Alternatives
Instead of lettuce cups, use wraps or tacos. Tortillas or rice paper make fun, hand-held meals. You can fill them with the teriyaki chicken mixture just like the cups.
Another option is to serve the chicken over rice or quinoa. This makes the meal more filling and hearty. Plus, it soaks up the delicious teriyaki sauce. Enjoy exploring these variations to suit your taste!
Storage Info
Storing Leftovers
After you enjoy your teriyaki chicken lettuce cups, store any leftovers in the fridge. Use an airtight container for best results. The cooked chicken mixture should stay fresh for about three to four days. If you leave it out at room temperature, it can spoil quickly. Always remember to check for any off smells or changes in color before eating.
Freezing Options
If you want to keep leftovers longer, freezing is a great option. Place the chicken mixture in a freezer-safe bag or container. Take out as much air as possible to prevent freezer burn. When you’re ready to eat, thaw it overnight in the fridge. Reheat in a skillet over low heat until warm, stirring often to keep it even.
Serving Suggestions
You can get creative with your leftover chicken! Try using it in a stir-fry with other veggies or on top of rice. You can also make a quick wrap using tortillas instead of lettuce. Another fun idea is to use it as a filling for baked potatoes. Each option gives you a new and tasty meal.
FAQs
How to make Teriyaki Chicken Lettuce Cups healthier?
To make Teriyaki Chicken Lettuce Cups healthier, you can make a few simple swaps:
- Use ground turkey instead of ground chicken. It has less fat.
- Choose low-sodium teriyaki sauce. This cuts down on salt.
- Add more veggies for extra fiber and nutrients. Try shredded cabbage or zucchini.
- Substitute sesame oil with a light olive oil for a healthier fat option.
These changes keep your meal tasty while improving nutrition.
Can Teriyaki Chicken Lettuce Cups be made ahead of time?
Yes, you can prepare Teriyaki Chicken Lettuce Cups ahead of time. Here’s how:
- Cook the chicken mixture and let it cool completely.
- Store it in an airtight container in the fridge. It lasts for 3-4 days.
- Wash and dry the lettuce leaves, then store them separately in a bag.
- When ready to eat, just reheat the chicken and assemble the cups.
This makes meal prep easy and quick!
Are there gluten-free options for this recipe?
Absolutely! If you need gluten-free options, consider these swaps:
- Use gluten-free soy sauce or tamari instead of regular soy sauce.
- Check your teriyaki sauce label. Many brands offer gluten-free versions.
- Avoid any added sauces that may contain gluten.
These swaps make your Teriyaki Chicken Lettuce Cups safe and delicious!
In this blog post, I shared a tasty recipe for Teriyaki Chicken Lettuce Cups. We explored the main ingredients, step-by-step cooking instructions, and useful tips for perfecting your dish. Variations let you customize flavors and proteins. I discussed storage options to help you save leftovers.
These cups are easy to make and fun to serve. I hope you try this healthy recipe soon! Keep experimenting to find your favorite flavors and enjoy every bit

Teriyaki Chicken Lettuce Cups
Ingredients
- 1 lb ground chicken
- 2 tablespoons teriyaki sauce
- 1 tablespoon soy sauce
- 1 tablespoon sesame oil
- 1 tablespoon fresh ginger, finely grated
- 2 cloves garlic, minced
- 1 bell pepper finely chopped (red or yellow)
- 1 medium carrot, grated
- 3 green onions sliced diagonally
- 1 tablespoon sesame seeds (optional, for garnishing)
- 1 head iceberg or butter lettuce, leaves separated
Instructions
- In a large non-stick skillet, heat the sesame oil over medium heat until shimmering.
- Add the minced garlic and freshly grated ginger to the skillet, sautéing for about 30 seconds until aromatic and fragrant.
- Carefully add the ground chicken, using a wooden spoon to break it apart. Cook for about 5-7 minutes, or until it's fully browned and no longer pink.
- Stir in the teriyaki sauce and soy sauce, ensuring the chicken is evenly coated with the flavorful sauces.
- Next, add the finely chopped bell pepper and grated carrot to the skillet. Cook for an additional 2-3 minutes, stirring frequently, until the vegetables soften and become tender, and the mixture is heated through.
- Remove the skillet from heat and gently fold in the sliced green onions, mixing until incorporated.
- To assemble, take an individual lettuce leaf and spoon a generous amount of the teriyaki chicken mixture into the center, creating a delightful cup shape.
- If desired, finish by sprinkling sesame seeds over the top for added crunch and visual appeal.


![- 2 cups canned chickpeas - Fresh herbs: parsley and cilantro - Key spices: cumin and coriander To make crispy baked falafel, start with the main ingredients. The base is 2 cups of canned chickpeas. They give falafel a wonderful texture. Fresh herbs like parsley and cilantro add bright flavors. Using both gives a fresh taste. Spices are key too. Ground cumin and coriander bring warmth and depth. They create a balance that makes falafel special. - Aromatics: onion and garlic - Binding ingredients: tahini and breadcrumbs - Optional: olive oil for drizzling Next, we have additional ingredients. Aromatics like onion and garlic make the falafel smell great. They add a savory note that enhances the dish. Binding ingredients are also important. Tahini helps hold everything together. Breadcrumbs add crunch and structure. If you want a golden and crispy finish, drizzle olive oil on top. It helps the falafel bake evenly and get that perfect crunch. For the full recipe, check out the detailed instructions provided. 1. Preheat your oven to 400°F (200°C). 2. Line a baking sheet with parchment paper. This helps prevent sticking and ensures even cooking. 3. In a food processor, add the drained chickpeas, chopped onion, minced garlic, parsley, cilantro, cumin, coriander, baking powder, salt, black pepper, lemon juice, and tahini. 4. Pulse the mixture. You want it well combined but still chunky, like a paste. 1. Transfer the mixture to a mixing bowl. 2. Fold in the breadcrumbs. If it feels wet, add more breadcrumbs until it holds together. 3. Use your hands to shape the mixture into small balls or patties, about the size of golf balls. 4. Place them evenly on the prepared baking sheet. 1. Drizzle a good amount of olive oil over the falafel balls. This helps them get crispy. 2. Bake in the oven for about 20 minutes. Flip them halfway through for even browning. 3. Look for a golden brown color and a crispy outside. 4. Let the falafel cool for a few minutes before serving. This enhances their flavor and texture. For the full recipe, check the detailed instructions provided earlier. To make your falafel crispy, olive oil plays a key role. It adds flavor and helps create a golden crust. I suggest drizzling olive oil on top of your falafel before baking. This not only enhances the taste but also promotes even cooking. Baking techniques matter too. Preheat your oven to 400°F (200°C) for the best results. Use parchment paper on your baking sheet to prevent sticking. This will help the falafel stay intact and crisp up nicely. Adjusting the breadcrumbs is also important. If your mixture feels too wet, add more breadcrumbs until it holds together. If you want extra crunch, consider using panko breadcrumbs. They give a delightful texture that enhances the overall experience. For a beautiful presentation, arrange your crispy baked falafel on a colorful platter. Pair it with a creamy tahini sauce and a fresh cucumber-tomato salad. This adds both flavor and visual appeal. You might also want to serve it with warm pita bread. Add a side of hummus or tzatziki for a fun dip. These flavors complement the falafel well and make for a tasty meal. One common mistake is not achieving the right consistency. If your falafel falls apart during baking, it may be too wet. Always ensure your mixture holds together well. Adjust breadcrumbs as needed to fix this. Another mistake is overcrowding the baking sheet. Give each falafel space to bake evenly. This helps them crisp up nicely. Flip them halfway through baking for even browning. Finally, don’t skip the cooling step. Let the falafel cool for a few minutes after baking. This enhances their flavor and texture, making your dish even more delightful. For the full recipe, you can refer to the detailed guide above. {{image_4}} You can make falafel even more exciting by adding spices. Try mixing in smoked paprika for a warm, smoky flavor. If you want a brighter taste, add some zest from a lemon. You might also enjoy using fresh herbs like mint or dill for a fresh twist. Each region has its own spin, so feel free to experiment! For those who need gluten-free options, you can swap breadcrumbs with ground oats or almond flour. Both work well and keep the falafel together. If you want to make it vegan, just skip the tahini or use sunflower seed butter instead. This way, everyone can enjoy these tasty bites! While baking gives falafel a nice crunch, you can try air frying them for a quicker option. Air-frying uses less oil and cooks them evenly. You can also pan-fry them in a little oil for golden-brown goodness. Just make sure to keep an eye on them so they don’t burn. For the full recipe, check out the detailed steps above to make your crispy baked falafel! To store leftover falafel, place them in an airtight container. This helps keep them fresh. If you have sauce, store it separately. Leftover falafel stays tasty for about three to four days in the fridge. For freezing, let the falafel cool completely first. Then, space them on a baking sheet and freeze until solid. Once frozen, transfer them to a freezer bag. This way, they won’t stick together. To reheat, bake them directly from the freezer. Heat at 375°F (190°C) for about 15-20 minutes until warm and crispy. In the fridge, your leftover falafel will last about three to four days. If frozen, they can last up to three months. Just remember to seal them well to avoid freezer burn. Enjoy your crispy baked falafel whenever you want with these easy storage tips. For the full recipe, check back to create these delicious bites! Crispy baked falafel pairs well with many sides. You can serve it with: - Hummus for a creamy dip - Tahini sauce for added flavor - Tzatziki sauce for a cool touch - Fresh salads like cucumber-tomato salad - Pita bread for a classic wrap These options enhance the meal and add fresh tastes. To achieve extra crispy falafel, follow these tips: - Use panko breadcrumbs instead of regular ones. They add more crunch. - Drizzle olive oil generously over the falafel before baking. This helps with browning. - Bake at 400°F (200°C) for the best crispiness. Flip them halfway for even cooking. These small changes can make a big difference in texture. Yes, you can use dried chickpeas! Here’s how: - Soak 1 cup of dried chickpeas overnight in water. This softens them. - Drain and rinse the chickpeas before using them in the recipe. - Cook them in boiling water for about 1 hour until tender. Using dried chickpeas gives a fresher taste but takes more time. For the complete details on making crispy baked falafel, check out the [Full Recipe]. Baked falafel is easy and fun to make. By using canned chickpeas, fresh herbs, and key spices like cumin, you create a tasty dish. Follow the steps for perfect shapes, timing, and crunch. Remember to use olive oil and adjust breadcrumbs for crispiness. Play with flavors and storage tips to maximize your enjoyment. With this guide, you can make falafel that delights and satisfies. Now, you're ready to impress friends and family with your delicious creation!](https://dishtreats.com/wp-content/uploads/2025/06/049364cc-9d10-4f08-b8d2-88a9c6614eda-768x768.webp)

![To make Rainbow Fruit Skewers, you need a mix of fresh fruits. Here’s the list of what you’ll need: - Fresh strawberries (1 cup) - Juicy orange segments (1 cup) - Sweet pineapple chunks (1 cup) - Crisp green grapes (1 cup) - Plump blueberries (1 cup) - Deep purple grapes or blackberries (1 cup) - Optional: Honey (2 tbsp) for drizzling - Fresh mint leaves for garnish Each fruit brings a burst of color and taste. Fresh strawberries add a sweet tang. Juicy orange segments bring a citrusy pop. Sweet pineapple chunks add tropical flair. Crisp green grapes offer crunch. Plump blueberries add a mild sweetness. Deep purple grapes or blackberries provide a rich finish. Feel free to mix and match. Use your favorite fruits or whatever you have at home. The goal is to create a vibrant, tasty treat. You can also drizzle honey on top for added sweetness. Mint leaves add a nice touch. They make the dish look fancy and smell great. Remember, this is just a guide. You can adjust the amounts to fit your needs. For the full recipe, check out the complete instructions above. Enjoy your colorful creation! To start, wash all your fruits under cool running water. This step keeps them clean and safe to eat. For strawberries, remove the green tops. If they are big, slice them in half. Next, peel the oranges. Cut them into segments and toss out any seeds. Chop the pineapple into bite-sized chunks. Rinse the green grapes and blueberries to remove dirt and make them shine. Grab your wooden skewers. If you plan to grill them, soak the skewers in water for 10 minutes to prevent burning. Now, it’s time to thread the fruits onto the skewers! I like to start with one strawberry, then add one orange segment, a pineapple chunk, and a green grape. After that, toss on a few blueberries and finish with a purple grape or blackberry. This order gives you a bright, colorful look. Aim for a rainbow effect with every skewer! For a little extra sweetness, drizzle honey over the assembled skewers. This step is optional but adds a nice touch. If you want a chill treat, place the skewers in the fridge for about 30 minutes. Chilling helps the flavors pop and makes them extra refreshing. Enjoy these delicious Rainbow Fruit Skewers at your summer gatherings or as a fun snack! For the full recipe, check out [Full Recipe]. Picking ripe fruits is key for tasty skewers. Here are signs to watch for: - Strawberries: Look for bright red color without any green tops. - Oranges: Choose firm, heavy oranges with smooth skin. - Pineapple: Smell the bottom. A sweet aroma means it's ripe. - Green Grapes: Look for a vibrant green color and firm texture. - Blueberries: Pick plump blueberries with a deep blue hue. - Purple Grapes/Blackberries: Choose ones that are dark and slightly soft. Keep your fingers safe while making skewers. Here’s how: - Use wooden skewers that are at least 10 inches long. - Soak them in water for 10 minutes. This helps avoid burning. - Hold the fruit steady with one hand. Use the other to push it onto the skewer. - Start with firm fruits like strawberries. This helps stabilize softer fruits later. - Avoid using too much force. This can break the fruit apart. Make your skewers look as good as they taste. Try these tips: - Arrange skewers in a colorful pattern. Use a mix of all the fruits. - Place them on a bright platter. A white dish makes colors pop. - Garnish the platter with fresh mint leaves. They add a lovely aroma. - For extra flair, drizzle honey on top. It adds shine and sweetness. Explore more ideas in the [Full Recipe]. {{image_4}} You can switch up the fruits based on the season. In spring, use strawberries and blueberries for sweetness. In summer, opt for ripe peaches and cherries. Fall brings apples and pears, adding crunch. Winter is perfect for citrus like tangerines and pomegranates. Each season offers fresh flavors for your skewers. You can create fun themes for parties. For a summer BBQ, use red, white, and blue fruits for a patriotic look. For Halloween, add orange slices and blackberries for a spooky vibe. During the holidays, use red strawberries and green grapes for a festive feel. Matching colors makes your skewers pop! Adding protein can make your skewers more filling. You can thread cubes of cheese like cheddar or mozzarella between the fruits. Greek yogurt is another option—use it as a dip on the side. This adds taste and gives you energy for your summer fun. For the full recipe, check out Rainbow Fruit Skewers! To keep your rainbow fruit skewers fresh, store them in an airtight container. This helps keep moisture in and prevents the fruit from drying out. You can also cover them with plastic wrap if you don’t have a container. In the fridge, these skewers stay fresh for up to three days. After that, the fruit may start to lose its flavor and texture. You can make these skewers a few hours before your event. Just prepare the fruit and assemble the skewers. Store them in the fridge until you are ready to serve. If you want to save time, wash and cut the fruit a day ahead. Keep the pieces in separate containers. This way, you can quickly assemble your skewers when needed. Check out the Full Recipe for more tips on making and storing your rainbow fruit skewers! To scale this recipe, double or triple the ingredients. Use a mix of fruits to please all tastes. Prepare a large platter to display the skewers. Set up a fruit station where guests can make their own skewers. This way, everyone can choose their favorite fruits. You can use frozen fruit, but it may not look as good. Frozen fruit tends to be softer and can lose its shape. If using frozen fruit, let it thaw and drain any excess water. Fresh fruit gives a better texture and taste for skewers. Yes, Rainbow Fruit Skewers are very healthy! Each fruit offers vitamins and minerals. For instance, strawberries provide vitamin C. Oranges are high in fiber. Pineapple contains bromelain, which helps digestion. Grapes and blueberries are full of antioxidants. Enjoy these colorful treats guilt-free! If you want a vegan option, use maple syrup or agave nectar. You can also try yogurt or nut butter for creaminess. For a sugar-free choice, use a sugar-free syrup. These alternatives add sweetness and keep the skewers fun and tasty. To keep fruit fresh, soak apple or banana slices in lemon juice. This helps prevent browning. Store skewers in the fridge until serving. Keep them covered to avoid drying out. Fresh mint leaves also help keep everything looking bright and fresh. For a full recipe, check out the detailed steps in the earlier section! Rainbow fruit skewers combine fresh fruits for a colorful and tasty treat. We walked through selecting ripe fruits, skewering them, and adding sweet touches like honey. You can use fun themes for parties or add proteins for a snack. Keep them chilled and store them well to enjoy later. In the end, these skewers are fun to make and good for you. Enjoy creating your own rainbow of flavors!](https://dishtreats.com/wp-content/uploads/2025/06/1f4123b9-dd53-4d15-af26-e58167d567ef-768x768.webp)
