Sweet Potato Chickpea Buddha Bowl Tasty and Healthy Meal

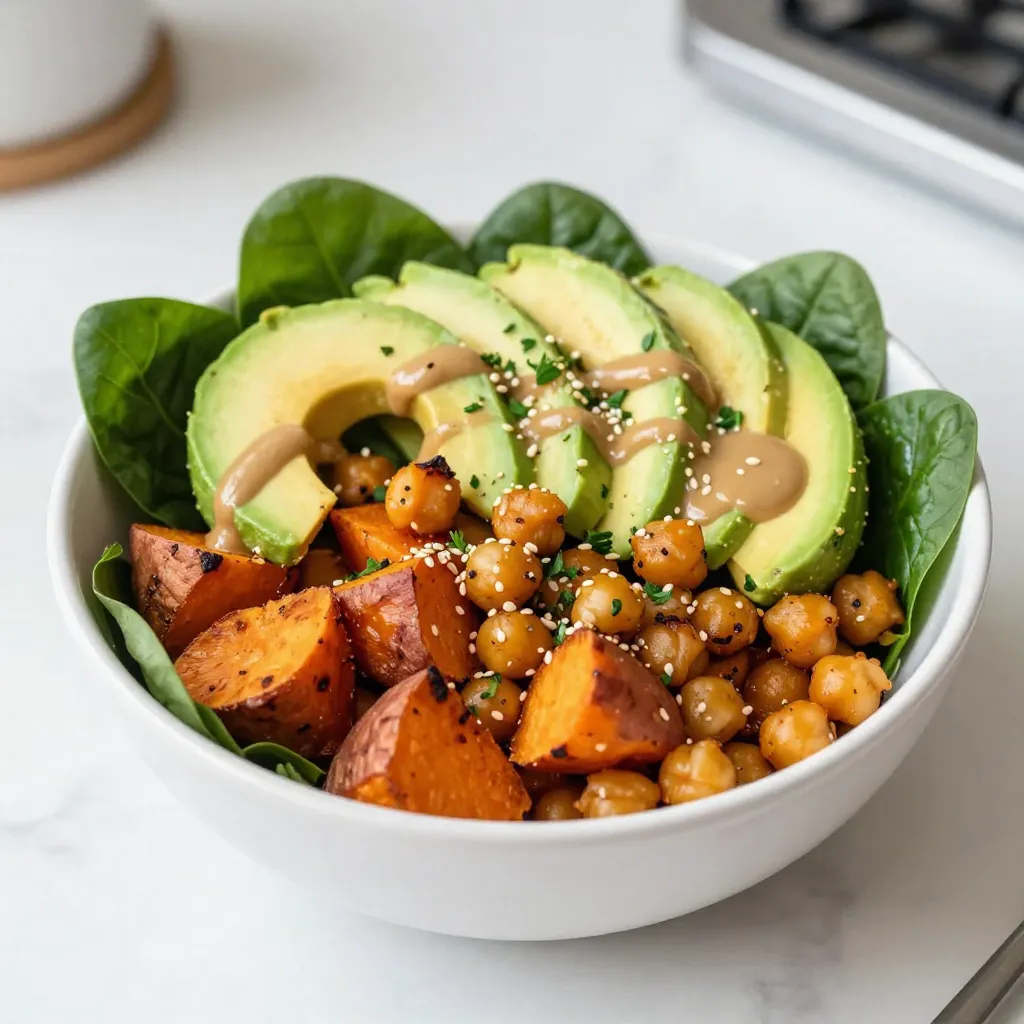
If you’re looking for a meal that’s both tasty and good for you, try a Sweet Potato Chickpea Buddha Bowl. This bowl is packed with nutrients and flavor. You can easily prepare it at home, with simple ingredients and spices. I’ll guide you step-by-step on how to make this colorful dish. Let’s dive into the delicious world of healthy eating!
Why I Love This Recipe
- Nourishing Ingredients: This Buddha bowl is packed with nutrient-dense foods like sweet potatoes and chickpeas, making it a wholesome meal option.
- Flavorful Harmony: The combination of smoked paprika, garlic powder, and cumin creates a deliciously aromatic profile that elevates the dish.
- Easy to Prepare: With minimal prep and cooking time, this recipe is perfect for busy weeknights or meal prep for the week ahead.
- Customizable and Versatile: You can easily swap out ingredients based on your preferences or seasonal produce, making it adaptable for any palate.
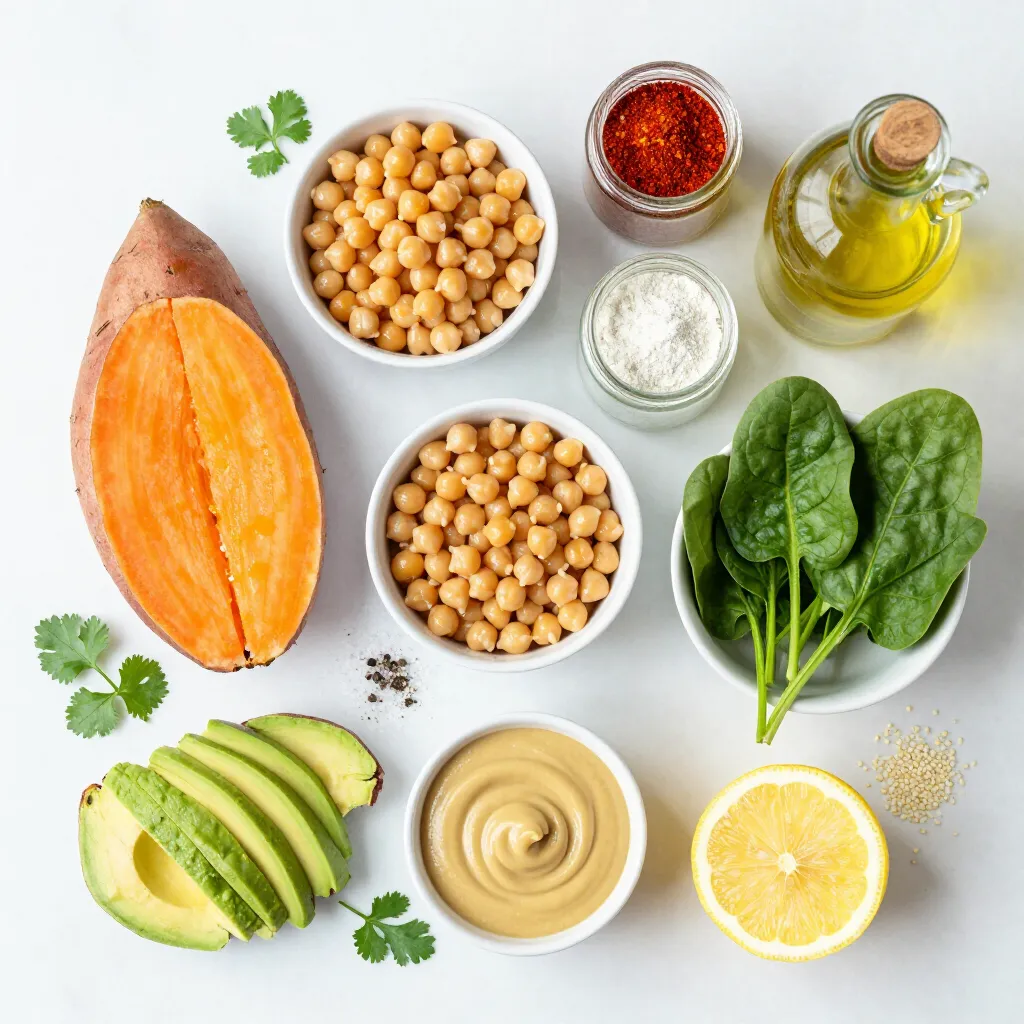
Ingredients
Main Ingredients
- 1 large sweet potato, peeled and diced into 1-inch cubes
- 1 can (15 oz) chickpeas, drained and thoroughly rinsed
- 2 tablespoons extra virgin olive oil
Sweet potatoes give this bowl a sweet flavor. Chickpeas add protein and texture. Olive oil helps in roasting and adds richness.
Spices & Seasonings
- 1 teaspoon smoked paprika
- 1 teaspoon garlic powder
- 1 teaspoon ground cumin
I love using smoked paprika for its deep flavor. Garlic powder enhances taste without overpowering. Ground cumin adds warmth and earthiness to the dish.
Fresh Ingredients
- 2 cups baby spinach, washed and dried
- 1 ripe avocado, halved and sliced
- Fresh herbs (such as cilantro or parsley), chopped for garnish
Baby spinach gives a fresh crunch. Avocado adds creaminess. Fresh herbs brighten the bowl and make it pretty.
Dressing Ingredients
- 1/4 cup tahini (sesame paste)
- 2 tablespoons freshly squeezed lemon juice
- 1/4 cup water (adjust as needed for dressing consistency)
Tahini brings a nutty flavor to the dressing. Lemon juice adds brightness, balancing the richness. Water helps adjust the dressing’s thickness for a smooth pour.

Step-by-Step Instructions
Preheat the Oven
Set your oven to 425°F (220°C). A hot oven helps the sweet potatoes roast well.
Prepare Sweet Potatoes and Chickpeas
Peel and dice one large sweet potato into 1-inch cubes. Drain and rinse one can of chickpeas. In a big bowl, mix the sweet potato and chickpeas. Add two tablespoons of olive oil. Season with one teaspoon each of smoked paprika, garlic powder, and ground cumin. Sprinkle in sea salt and black pepper. Toss until everything is well coated.
Roasting Process
Spread the sweet potato and chickpea mix evenly on a large baking sheet. This helps them roast evenly. Roast in the oven for 25-30 minutes. Halfway through, stir the mix to ensure they brown nicely. They will be ready when the sweet potatoes are fork-tender and slightly caramelized.
Make the Tahini Dressing
While the sweet potatoes are roasting, make the tahini dressing. In a small bowl, whisk together 1/4 cup of tahini, 2 tablespoons of lemon juice, and 1/4 cup of water. Keep whisking until smooth. If you want a thinner dressing, add more water until it reaches the right consistency.
Assemble the Buddha Bowl
Once the sweet potatoes and chickpeas are done, take them out of the oven. In each serving bowl, place a handful of fresh baby spinach at the bottom. Next, add the roasted sweet potatoes and chickpeas on top. Slice one ripe avocado and place it beside the roasted mix. Drizzle the tahini dressing over everything. Finish by sprinkling sesame seeds and chopped herbs on top for extra flavor and beauty. Enjoy your colorful and healthy meal!
Tips & Tricks
Ensuring Perfectly Roasted Sweet Potatoes
To get sweet potatoes that are crisp and tasty, follow these steps:
- Cut sweet potatoes into even 1-inch cubes. This helps them cook evenly.
- Toss them well with olive oil and spices. This adds flavor and promotes caramelization.
- Spread them in a single layer on your baking sheet. This prevents steaming and helps them brown.
- Stir halfway through cooking. This ensures all sides get that nice caramelized finish.
Dressing Adjustments
You can customize the tahini dressing to match your taste:
- For a thinner dressing, add more water a little at a time. Whisk until it’s smooth.
- To make it creamier, add more tahini. This gives a richer flavor and texture.
- Feel free to mix in other flavors like garlic or herbs. This can add extra depth.
Serving Suggestions
Pair your Buddha bowl with these options for a complete meal:
- Add grilled chicken or tofu for more protein. Both options complement the flavors well.
- Serve with a side of quinoa or brown rice. These grains can add heartiness.
- Try mixing in roasted veggies like bell peppers or zucchini. This adds color and nutrition.
Pro Tips
- Perfectly Roasted Sweet Potatoes: Ensure your sweet potatoes are cut into uniform 1-inch cubes for even cooking and consistent texture.
- Chickpea Crispiness: For extra crunch, try roasting the chickpeas separately for the last 10 minutes of the sweet potato cooking time.
- Adjusting Dressing Consistency: Start with less water when making the tahini dressing; you can always add more to reach your desired consistency.
- Flavor Boost with Fresh Herbs: Experiment with different herbs like dill or mint to add a refreshing twist to your Buddha bowl.
Variations
Gluten-Free Options
You can make your Buddha bowl gluten-free by changing the base. Instead of quinoa or rice, you can use:
- Cauliflower rice
- Lentils
- Zucchini noodles
These options keep your meal light and full of flavor. They also add more nutrients.
Protein Boosters
Want more protein? Try adding extra ingredients. You can include:
- Tofu: Firm or silken tofu works well. Just cube and sauté it.
- Chicken: Grilled or baked chicken adds a tasty touch.
These options make the bowl more filling and satisfying, perfect for a hearty meal.
Extra Veggies
Adding more veggies elevates your Buddha bowl. Consider these toppings:
- Roasted Brussels sprouts
- Sliced radishes
- Cherry tomatoes
These veggies add color and crunch. They also provide different textures and flavors. Mix and match to find your favorite combo!
Storage Info
Leftovers Storage
To keep your leftovers fresh, store them in an airtight container. Place the bowl in the fridge. It’s best to eat within three days. This way, you enjoy the flavors without losing quality.
Reheating Instructions
When reheating, use the oven or a skillet. This helps keep the sweet potatoes and chickpeas crispy. Heat at 350°F (175°C) for about 10-15 minutes. Stir occasionally to avoid burning. If using a microwave, heat for short bursts to keep the texture.
Freezing Guidelines
To freeze, let the bowl cool fully. Then, place it in a freezer-safe container. Make sure to leave some space for expansion. It can stay frozen for up to three months. When ready to eat, thaw overnight in the fridge. Reheat as mentioned above for best results.
FAQs
Can I use canned sweet potatoes instead?
You can use canned sweet potatoes. However, I recommend fresh ones. Canned sweet potatoes may be softer, affecting texture. If you use them, skip the roasting step. Just warm them slightly before adding to your bowl.
How can I make this recipe vegan?
This recipe is already vegan-friendly. All the ingredients, like chickpeas and sweet potatoes, are plant-based. Ensure your tahini has no added dairy. This way, you keep it purely vegan and delicious!
What can I use instead of tahini?
If you don’t have tahini, you can use peanut butter or sunflower seed butter. Both give a creamy texture. You can also mix Greek yogurt or hummus for a different flavor. Adjust the lemon juice for taste.
How long does it take to roast chickpeas?
Roasting chickpeas usually takes about 25-30 minutes. Make sure to stir them halfway through. They should be golden and crunchy when done. Check for a nice crunch, which adds a great bite to your bowl!
This blog post shares how to create a tasty Buddha bowl. You learned about the key ingredients, from sweet potatoes and chickpeas to fresh herbs and tahini dressing. I explained the steps to prepare and roast them for the best flavor. Plus, I included helpful tips for perfect results and storage methods to keep leftovers fresh.
Eating a colorful Buddha bowl is easy and fun. Enjoy mixing flavors and making this dish your own! Try out different ingredients and find what you love mos

Sweet Potato Chickpea Buddha Bowl
Ingredients
- 1 large sweet potato, peeled and diced into 1-inch cubes
- 1 can (15 oz) chickpeas, drained and thoroughly rinsed
- 2 tablespoons extra virgin olive oil
- 1 teaspoon smoked paprika
- 1 teaspoon garlic powder
- 1 teaspoon ground cumin
- to taste sea salt and freshly cracked black pepper
- 2 cups baby spinach, washed and dried
- 1 ripe avocado, halved and sliced
- 1 4 cup tahini (sesame paste)
- 2 tablespoons freshly squeezed lemon juice
- 1 4 cup water (adjust as needed for dressing consistency)
- for garnish sesame seeds
- for garnish fresh herbs (such as cilantro or parsley), chopped
Instructions
- Begin by preheating your oven to 425°F (220°C).
- In a sizable mixing bowl, combine the diced sweet potato and rinsed chickpeas. Drizzle with extra virgin olive oil and season with smoked paprika, garlic powder, cumin, sea salt, and freshly cracked black pepper. Toss everything together until well-coated.
- Spread the seasoned sweet potato and chickpea mixture onto a large baking sheet in an even layer.
- Roast in the preheated oven for about 25-30 minutes, stirring halfway through.
- While roasting, prepare the tahini dressing by whisking together tahini, lemon juice, and water until smooth. Adjust water for desired consistency.
- Once roasted, allow the sweet potatoes and chickpeas to cool slightly.
- To assemble, place a handful of fresh baby spinach at the bottom of each bowl.
- Artfully arrange the roasted sweet potatoes and chickpeas on top of the spinach.
- Nestle the sliced avocado alongside the roasted mixture and drizzle with tahini dressing.
- Sprinkle sesame seeds and freshly chopped herbs on top.
- Serve immediately and enjoy!


![To make this dish, you need a few key items. These ingredients work together for great flavor. Here’s what you will need: - 4 chicken thighs, bone-in and skin-on - 1/4 cup honey - 1/4 cup low-sodium soy sauce - 4 cloves garlic, finely minced - 1 tablespoon fresh ginger, grated - 1 teaspoon sesame oil - 1 tablespoon olive oil - Salt and freshly ground black pepper to taste While the main ingredients shine, you can add optional items for extra flavor. Try using these to enhance your dish: - A splash of rice vinegar for acidity - A pinch of red pepper flakes for heat - Fresh herbs like cilantro or parsley for freshness Presentation matters when serving food! Beautiful garnishes make a dish pop. Here’s what to top your chicken with: - 2 green onions, finely sliced - Sesame seeds for a crunchy finish First, grab a medium mixing bowl. Add 1/4 cup honey, 1/4 cup low-sodium soy sauce, 4 minced garlic cloves, 1 tablespoon of grated ginger, and 1 teaspoon of sesame oil. Whisk them together until mixed well. This sweet and savory blend will become your marinade and glaze. It infuses the chicken thighs with tasty flavor. Next, season the chicken thighs. Use salt and freshly ground black pepper on both sides. Heat 1 tablespoon of olive oil in a large skillet over medium-high heat. Once hot, place the chicken thighs skin-side down. Let them sear for about 6-8 minutes. You want that skin golden brown and crispy. This step adds great texture and taste. After searing, flip the chicken thighs. Pour the honey garlic mixture over them. Let it simmer gently, coating the chicken in flavor. Cover the skillet and reduce the heat. Cook for 15-20 minutes until the chicken reaches 165°F (75°C) inside. When the chicken is ready, remove the lid. Turn the heat back up to medium-high. Let the sauce simmer for 5 minutes, stirring often. This will thicken the sauce, helping it stick to the chicken. Once thickened, take the skillet off the heat. Allow the chicken to rest for a few minutes. This lets the juices settle, keeping the meat tender. Serve the chicken on a platter, drizzling the sauce over the top. Add a sprinkle of sliced green onions and sesame seeds for a bright finish. Enjoy your Honey Garlic Chicken Thighs! For the full recipe, refer to [Full Recipe]. To get crispy skin, start with bone-in, skin-on chicken thighs. Pat the skin dry with paper towels. This step removes moisture and helps the skin crisp up nicely. Heat olive oil in a hot skillet before adding the chicken. Sear it skin-side down for 6-8 minutes. Resist the urge to move the chicken too much. Let it cook undisturbed for a golden crust. For tender chicken, season it well with salt and pepper. This enhances flavor and locks in moisture. When cooking, keep an eye on the internal temperature. Aim for 165°F (75°C) to ensure it’s fully cooked. Let the chicken rest after cooking. This lets the juices settle back in, making each bite juicy and satisfying. Honey garlic chicken pairs well with several sides. Try serving it with steamed rice for a classic combo. The rice soaks up the tasty sauce. You can also serve it with a fresh green salad. The crunch of the veggies complements the soft chicken perfectly. Roasted vegetables add color and flavor, making for a well-rounded meal. For the full recipe, check out [Full Recipe]. {{image_4}} You can change the taste of honey garlic chicken thighs by swapping some ingredients. For a fruitier twist, try using maple syrup instead of honey. This will give your dish a rich, deep flavor. You can also replace soy sauce with coconut aminos for a gluten-free option. If you like citrus, add some fresh orange juice to the marinade. It brightens the flavor and adds a zesty note. While chicken thighs are juicy, you can use other cuts too. Chicken breasts work well if you prefer leaner meat. Just remember, they may dry out faster, so watch the cooking time. Drumsticks are another tasty option. They are fun to eat and stay moist during cooking. Whichever cut you choose, make sure it is about the same size for even cooking. Want some heat? It's easy to spice things up! Add red pepper flakes or sriracha to the marinade for a kick. You can also use fresh jalapeños or chili paste for a bolder flavor. Adjust the amount based on your heat tolerance. If you love spicy food, this will make your honey garlic chicken thighs truly exciting. For the full recipe, check out the [Full Recipe]. Store your honey garlic chicken thighs in an airtight container. Make sure to let them cool to room temperature first. They will stay fresh in the fridge for up to 3 days. This keeps the flavors intact and ensures the chicken remains juicy. To reheat, place the chicken thighs in a skillet over low heat. Cover the skillet to keep moisture in. Heat until warmed through, about 5-10 minutes. You can also microwave them, but cover the dish to prevent drying out. You can freeze the chicken thighs for later use. Wrap each thigh in plastic wrap, then place them in a freezer bag. They will last for about 2-3 months in the freezer. Thaw them in the fridge overnight before reheating. This method keeps the chicken tasty and tender. For the full recipe, refer to the section above. You should cook chicken thighs for about 20-25 minutes. Start by searing them for 6-8 minutes on the skin side. Then, flip them over and pour the sauce on top. Cover the skillet and let them simmer for 15-20 minutes. This method helps keep the meat juicy and full of flavor. Yes, you can use boneless chicken thighs. They will cook faster than bone-in thighs. Sear them for about 5-7 minutes on each side. Make sure to check their internal temperature. It should reach 165°F (75°C) to be safe to eat. The best way to check if the chicken is done is with a meat thermometer. Insert it into the thickest part of the thigh. When it reads 165°F (75°C), the chicken is ready. You can also cut into the meat. If the juices run clear, it’s cooked. To adjust the sweetness, add more honey for a sweeter taste. If you want it less sweet, add more soy sauce or a splash of vinegar. Taste the sauce as you go. This way, you can find the perfect balance for your dish. For the full recipe, please check the [Full Recipe]. Honey garlic chicken thighs are simple and tasty. We covered the key ingredients and optional marinades. You learned how to prepare the marinade and cook the chicken. I shared tips for crispy skin, tender meat, and delicious sides. We also explored variations and storage tips to keep your meals fresh. When you try this recipe, it will impress your family and friends. Enjoy the rich flavors and make it your own!](https://dishtreats.com/wp-content/uploads/2025/06/32d13aa5-8be9-48e3-be5a-1699ade8ce81-768x768.webp)


. It takes about 20 minutes to cook garlic butter steak bites. You spend 10 minutes prepping the ingredients and another 10 minutes cooking them. This quick cook time makes it easy to enjoy a tasty meal in no time. Yes, you can use other cuts of steak. Ribeye, filet mignon, or flank steak work well. Just remember to adjust the cooking time based on the cut you choose. Each cut has its own flavor and texture, so pick one you like best. You can serve garlic butter steak bites with various sides. Here are some great options: - Creamy mashed potatoes - Sautéed vegetables like green beans or broccoli - Fresh salad with light dressing - Crispy garlic bread These sides add flavor and balance to your meal. You can also use toothpicks for easy serving at parties or gatherings. For more ideas, check out the Full Recipe for garlic butter steak bites. It offers tips on presentation and other serving suggestions. In this post, we covered how to make garlic butter steak bites using simple ingredients. You learned about the key steps, from preparing the steak to combining it with garlic butter. We also shared tips for cooking and presented flavor variations to try. Finally, we discussed storage tricks and answered common questions. Keep this recipe handy for a quick and tasty meal. Enjoy your cooking and the delicious bites you create!](https://dishtreats.com/wp-content/uploads/2025/06/daf37226-e56f-491f-87e9-6665894a306e-768x768.webp)