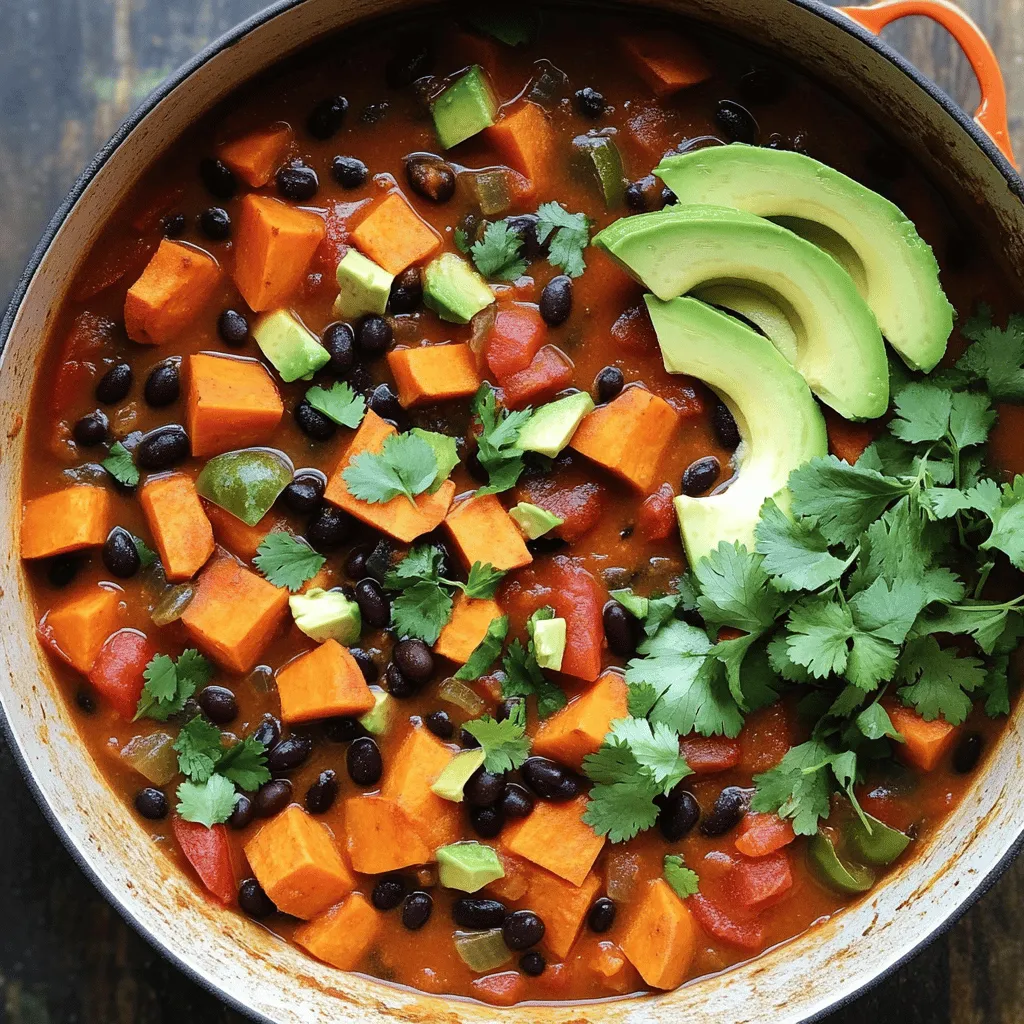
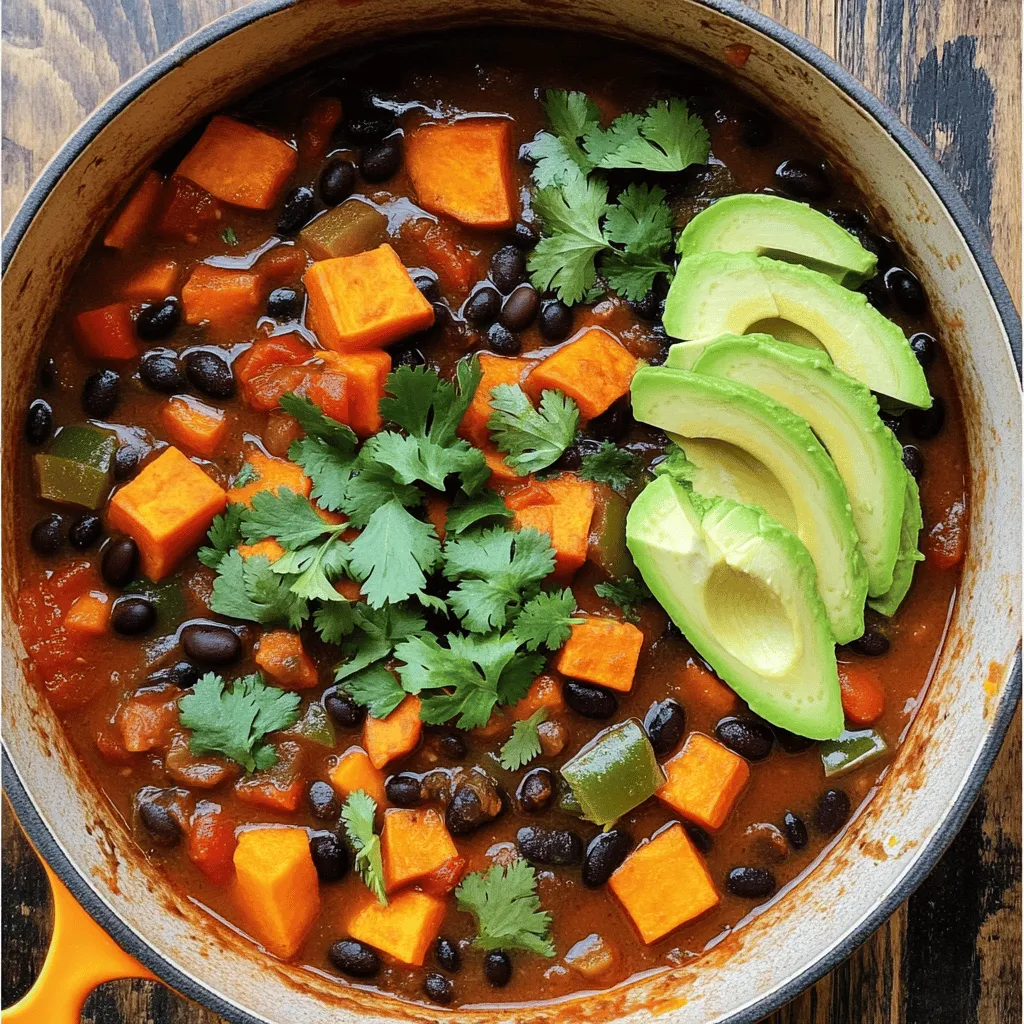
Are you ready to dive into a bowl of warmth and flavor? Sweet Potato Black Bean Chili is not just a meal; it’s a comforting hug on a chilly night. Packed with healthy ingredients, this dish offers a burst of taste and nutrition. Whether you want to impress guests or just enjoy a cozy evening at home, I’ll guide you through every step to create this colorful and hearty dish. Let’s get cooking!
Ingredients
Key Ingredients for Sweet Potato Black Bean Chili
Sweet potato black bean chili is full of tasty and healthy ingredients. Here are the main ones:
– Sweet Potatoes: These root veggies add natural sweetness and creaminess. They are high in vitamins A and C, plus fiber.
– Black Beans: Packed with protein and fiber, they make this dish filling. They also add a nice texture.
– Diced Tomatoes: They bring acidity and moisture. This adds depth to the chili’s flavor.
– Onion: Chopped onion gives the dish a savory base. It adds sweetness when cooked down.
– Garlic: Fresh garlic adds a punch of flavor. It also offers various health benefits.
– Bell Pepper: It adds crunch and color. Bell peppers are rich in vitamin C.
– Chili Powder: This spice blend brings warmth and depth. It gives the chili its signature flavor.
– Ground Cumin: It enhances the dish with earthiness. Cumin is known for its digestive benefits.
– Smoked Paprika: This spice adds a smoky note. It gives the chili a unique taste.
– Cayenne Pepper: Use this for heat. Adjust it to your spice preference.
– Vegetable Broth: It adds liquid and flavor. Use low-sodium broth for a healthier option.
– Olive Oil: This is used for sautéing. It’s a healthier fat choice.
– Salt and Black Pepper: These basic seasonings enhance all flavors.
– Fresh Cilantro: It’s for garnish. Cilantro adds freshness and color.
– Avocado: Sliced avocado serves as a creamy topping. It adds healthy fats.
Optional Add-ins and Substitutions
You can change up the recipe to suit your taste. Here are some ideas:
– Add-ins: Try corn, zucchini, or diced carrots for more veggies. They add more color and nutrients.
– Alternative Spices: Consider adding coriander or oregano for extra flavor. These spices can change the chili’s profile.
– Beans: You can swap black beans for kidney beans or pinto beans. Each type has its own taste and texture.
– Vegetables: Use any seasonal veggies you have. They can make the chili unique and fresh.
Garnishing Options
Garnishes can make the dish look great and taste even better. Here are some top choices:
– Cilantro Leaves: A sprinkle on top adds color and freshness.
– Sliced Avocado: Place slices on the side or on top for creaminess.
– Lime Wedges: Serve with lime for a zesty kick. Squeeze it over the chili for added brightness.
– Cheese: If you eat dairy, sprinkle cheese on top. It adds richness and flavor.
– Sour Cream or Greek Yogurt: A dollop of either can cool down the heat and add creaminess.
Step-by-Step Instructions
Preparation Steps
Start by gathering your ingredients. This makes cooking smoother. Chop the onion and bell pepper into small pieces. I find it helps to use a sharp knife for clean cuts. For the sweet potatoes, peel them first. Cut them into 1-inch cubes for even cooking.
To chop the onion, cut it in half from root to tip. Remove the skin and lay it flat. Slice down and across to dice it well. For the bell pepper, cut off the top and bottom. Remove the seeds, then slice it into strips before chopping.
Cooking Process
Heat the olive oil in a large pot over medium heat. Add the chopped onion and bell pepper. Sauté them for about 5 minutes. They should become soft and a bit clear. Next, add the minced garlic and stir for 1-2 minutes. You want it fragrant but not burnt.
Now, add the sweet potato cubes. Sprinkle in the chili powder, cumin, smoked paprika, and cayenne. Stir well to coat the sweet potatoes with spices. Let them cook for 2-3 minutes to bring out the flavor.
Pour in the vegetable broth and add the canned tomatoes with their juices. Add the rinsed black beans too. Season with salt and pepper. Increase the heat until it boils. Once boiling, reduce the heat to low. Cover the pot and let it simmer for 25-30 minutes. This step is key for deep flavor.
Final Touches
After simmering, taste the chili. Adjust the seasoning as needed. You might want more salt or spices. For a perfect consistency, you can mash a few sweet potato cubes against the pot’s side. This thickens the chili without losing texture.
Serve it hot, garnished with fresh cilantro leaves. Add avocado slices for a creamy touch. The contrast of flavors and textures makes this dish special.Enjoy your cooking!
Tips & Tricks
Cooking Techniques
For this chili, I recommend using a large pot or a Dutch oven. These pots hold heat well and help spread it evenly. Start on medium heat. This keeps the veggies from burning while they soften. You can add more oil if it feels too dry. To boost the flavor, sauté your onions and bell peppers until they are soft and sweet.
When you add spices, cook them for a couple of minutes. This brings out their full taste. Stir well, so the sweet potatoes soak up all the spice goodness.
Meal Prep Advice
To save time, you can chop your veggies ahead of time. Store them in the fridge in separate containers. This way, when you’re ready to cook, just toss them in the pot. You can also make the chili a day before. It tastes even better when the flavors mix overnight.
If you want to prepare it for busy nights, make a big batch and freeze half. This dish holds up well in the freezer. It’s perfect for quick meals later.
Serving Suggestions
This chili pairs well with rice or cornbread. The soft texture of the bread works well against the chili’s bold flavors. Top it with fresh cilantro and avocado for added creaminess. If you have leftovers, try using them in tacos or burritos. They add a hearty twist!
For a fun twist, serve the chili over baked potatoes. This adds a new layer of flavor and makes for a filling meal too.Enjoy cooking!
Variations
Different Protein Sources
You can easily change the protein in this chili. If you want to add meat, ground turkey or beef works well. Just brown the meat before adding the vegetables. For a plant-based twist, try adding lentils or chickpeas. Both are great for a hearty meal that fits a vegan or vegetarian diet.
Spice Level Adjustments
Not everyone likes the same spice level. To make your chili milder, skip the cayenne pepper. You can also add a bit of sugar to balance the heat. If you like it hot, feel free to add more cayenne or even some fresh jalapeños. Other spice blends, like taco seasoning, can give your chili a fun twist.
Additional Ingredients
Seasonal veggies can boost your chili’s flavor and nutrition. Try adding corn, zucchini, or spinach for a fresh taste. You can also toss in some black olives or diced bell peppers. These add color and flavor, making your chili even heartier than the basics.
Storage Info
Best Practices for Storage
Store your sweet potato black bean chili in the fridge for up to 5 days. Use an airtight container to keep it fresh. If you want to freeze it, use freezer-safe containers or heavy-duty freezer bags. Remove as much air as possible to prevent freezer burn. Label your containers with the date for easy tracking.
Reheating Instructions
To reheat, the stovetop works best. Pour the chili into a pot over medium heat. Stir occasionally until it’s hot. You can also use the microwave. Place the chili in a microwave-safe bowl. Heat in short bursts, stirring in between, to ensure even heating. This way, you keep all the great flavors intact.
Shelf Life
In the fridge, your chili lasts about 5 days. If you freeze it, you can enjoy it for 3 months. Watch for signs of spoilage, like an off smell or mold. If you see any, it’s best to toss it out. Keeping track of your chili’s age ensures you enjoy it at its best!
FAQs
How long does it take to cook Sweet Potato Black Bean Chili?
Cooking Sweet Potato Black Bean Chili takes about 40 minutes. You need 10 minutes for prep and 30 minutes for cooking. This total time gives you a warm, filling meal.
Can I make Sweet Potato Black Bean Chili in a slow cooker?
Yes, you can make this chili in a slow cooker. First, sauté the onion, garlic, and bell pepper on the stove. Then, add all ingredients to the slow cooker. Set it on low for 6-8 hours or high for 3-4 hours. This method allows the flavors to blend nicely.
What can I serve with Sweet Potato Black Bean Chili?
You can serve chili with several tasty sides. Try cornbread, rice, or tortilla chips. A fresh salad adds color and crunch. For a creamy touch, serve slices of avocado on the side.
Is Sweet Potato Black Bean Chili gluten-free?
Yes, this chili is gluten-free! All the ingredients are safe for gluten-free diets. Just ensure the vegetable broth you choose is labeled gluten-free. Enjoy this hearty dish without worry.
This blog post shared how to make Sweet Potato Black Bean Chili from scratch. We looked at key ingredients and their benefits, plus optional add-ins for extra flavor. You learned efficient cooking steps to create a tasty dish with perfect consistency. I gave you helpful tips for meal prep and served suggestions to enjoy leftovers.
In closing, this chili is versatile and easy to adapt. Whether you prefer it spicy or mild, you can create a dish just for you. Enjoy making it again and again!


