Sweet Chili Shrimp Bowls Quick and Tasty Recipe

Looking for a quick and tasty meal? You’ll love these Sweet Chili Shrimp Bowls! This simple recipe combines juicy shrimp, fluffy jasmine rice, and vibrant veggies for a dish that’s packed with flavor. In this article, I’ll guide you through the ingredients, cooking steps, and some helpful tips to make your bowls perfect every time. Let’s dive in and get cooking!
Ingredients
Main Ingredients
- 1 lb large shrimp, peeled and deveined
- 2 tablespoons sweet chili sauce
- 2 cups cooked jasmine rice
Vegetables and Garnishes
- 1 red bell pepper, thinly sliced
- 1 cup baby spinach
- 1 ripe avocado, sliced
Seasonings and Oils
- 1 tablespoon soy sauce
- 1 tablespoon sesame oil
- 1 tablespoon freshly chopped cilantro
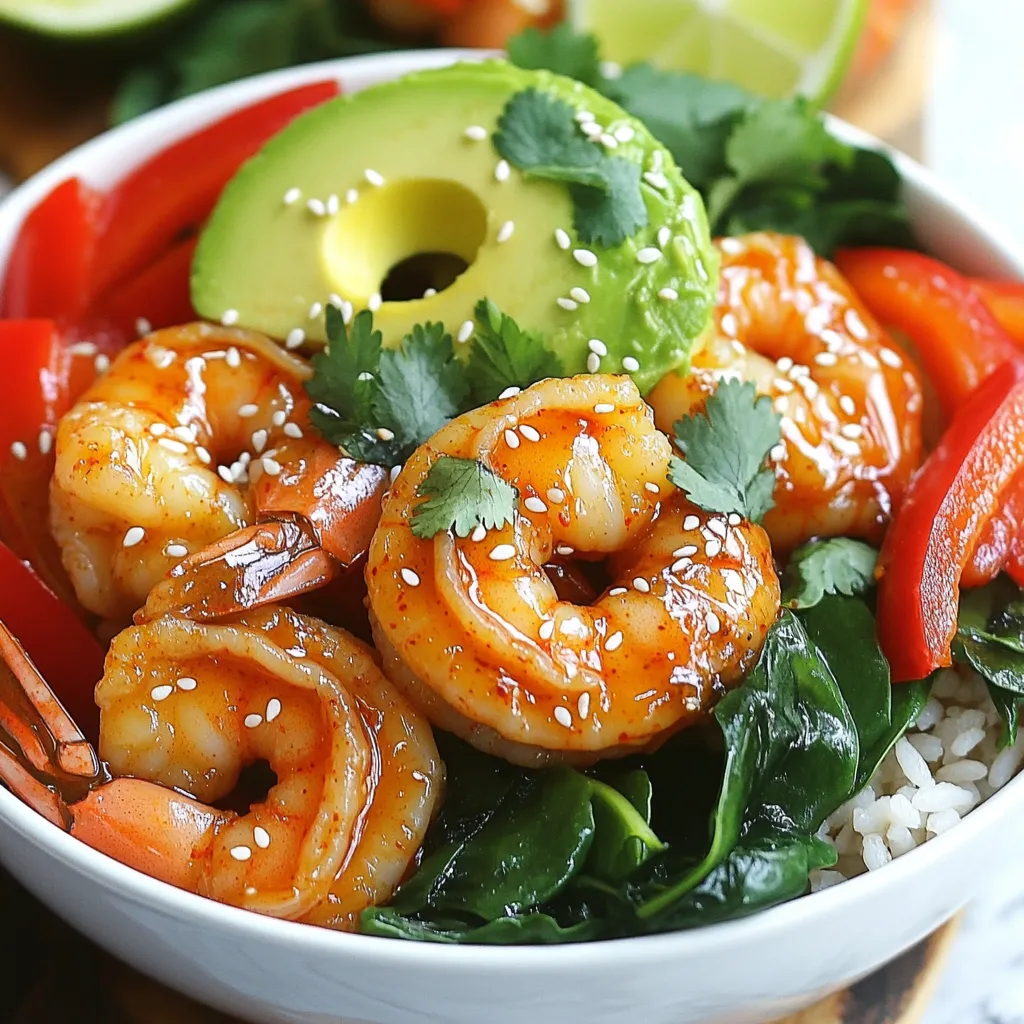
Sweet Chili Shrimp Bowls are simple yet full of flavor. The star of this dish is the large shrimp. They soak in the sweet chili sauce, soy sauce, and sesame oil. This marinade gives them a tasty kick. The jasmine rice serves as a perfect base. It is fluffy and slightly sticky, holding all the goodness.
For fresh colors and crunch, add red bell pepper and baby spinach. The bell pepper adds sweetness and a lovely crunch. The spinach wilts perfectly, adding a touch of green. Lastly, the avocado gives a creamy texture. It balances out the heat from the chili sauce.
Remember to top each bowl with fresh cilantro. This herb adds a burst of flavor. You can also sprinkle sesame seeds for extra crunch. Each ingredient works together to create a delicious meal. Enjoy every bite!
Step-by-Step Instructions
Preparation of Ingredients
- Marinate the shrimp: Start by placing 1 pound of peeled and deveined shrimp in a medium bowl. Pour in 2 tablespoons of sweet chili sauce, 1 tablespoon of soy sauce, and 1 tablespoon of sesame oil. Add salt and freshly cracked pepper to taste. Mix well to coat each shrimp. Let them sit for about 15 minutes. This step is key for great flavor.
- Cook jasmine rice: If you haven’t made the rice yet, cook 2 cups of jasmine rice according to the package instructions. Fluff the rice once it’s done and set it aside. This will be the base of your bowl.
Cooking Process
- Sauté shrimp in skillet: Heat a drizzle of oil in a large non-stick skillet over medium-high heat. Once hot, add the marinated shrimp. Cook for about 2 to 3 minutes on each side. The shrimp should turn pink and opaque when done. This quick cooking keeps them tender and juicy.
- Add red bell pepper: After cooking the shrimp, toss in the thinly sliced red bell pepper. Sauté for an additional 2 minutes. This softens the pepper while keeping some crunch. It’s a great color and flavor boost.
Final Assembly
- Layer shrimp and veggies on rice: Remove the skillet from heat. Stir in 1 cup of baby spinach until it wilts gently. To assemble, place a generous scoop of jasmine rice in a deep bowl. Add the shrimp, red bell pepper, and wilted spinach on top.
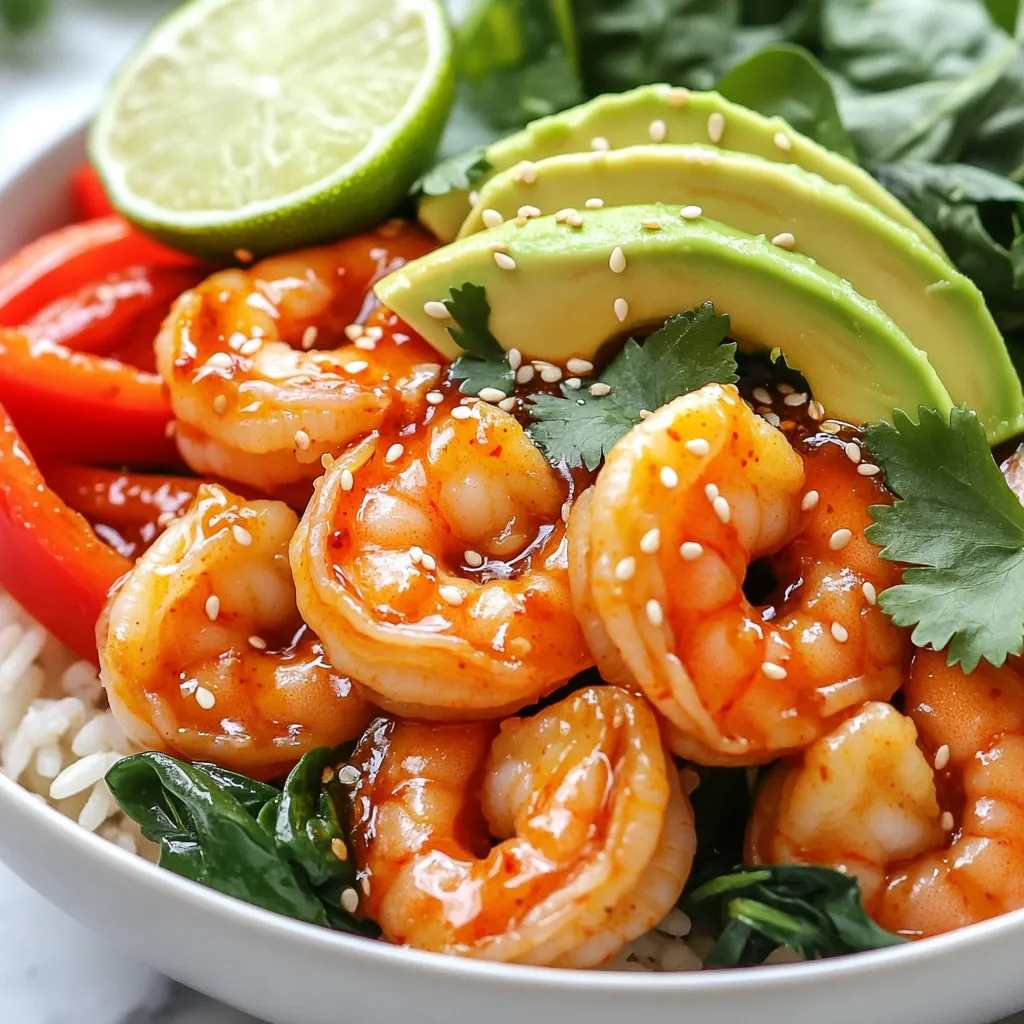
- Garnish and serve: Top each bowl with slices of ripe avocado, some freshly chopped cilantro, and a sprinkle of sesame seeds for crunch. Serve with lime wedges on the side. Squeezing fresh lime juice adds a zesty touch that brightens the dish. Enjoy your colorful and tasty Sweet Chili Shrimp Bowls!
Tips & Tricks
Cooking Tips
- Ensuring perfect shrimp texture: Cook shrimp only until pink and opaque. This usually takes 2-3 minutes on each side. Overcooking can make them rubbery. Always use fresh shrimp for the best texture.
- Best practices for cooking jasmine rice: Rinse rice under cold water until the water runs clear. This removes excess starch and prevents clumping. Follow package instructions closely for perfect fluffiness. Use a 1:1.5 rice-to-water ratio for best results.
Presentation Tips
- Arranging ingredients for visual appeal: Start with a base of jasmine rice. Layer shrimp and veggies on top, allowing colors to shine. Use deep bowls to showcase the vibrant layers.
- Garnishing ideas for added flavor: Finish with avocado slices, fresh cilantro, and sesame seeds. Add lime wedges on the side for a burst of freshness. A well-garnished bowl makes each bite more inviting.
Flavor Enhancement
- Suggested serving sauces or mixes: Try drizzling extra sweet chili sauce over the top for added sweetness. A splash of soy sauce can deepen the savory notes.
- How to adjust spiciness: For more heat, add sliced jalapeños or a dash of sriracha. If you prefer it milder, skip the spicy garnishes. Balance flavors to suit your taste.

Variations
Ingredient Swaps
You can easily change up the protein in this dish.
- Chicken: Swap shrimp for chicken breast. Cut it into small pieces. Cook until no longer pink.
- Tofu: Use firm tofu for a plant-based choice. Press it to remove water, then cut it into cubes. Sauté until golden.
For veggies, feel free to get creative:
- Broccoli: Add steamed broccoli for extra crunch.
- Carrots: Use thinly sliced carrots for a sweet bite.
- Zucchini: Sauté zucchini for a fresh taste.
Flavor Modifications
Want to spice things up?
- Add Heat: Stir in some chopped fresh chili or a dash of red pepper flakes. This gives your dish a fiery kick.
- Sweet Alternatives: If you prefer a sweeter touch, add honey or pineapple chunks. This will balance the heat nicely.
Serving Suggestions
For a complete meal, consider these ideas:
- Pairing with Sides: Serve with a crisp green salad or garlic bread. This adds freshness and texture.
- Drink Options: A chilled lemonade or coconut water works great. They enhance the sweet chili flavors.
If you plan ahead, make this a meal prep option.
- Batch Cooking: Prepare shrimp and rice in advance. Store in airtight containers. Reheat for a quick, tasty meal any day.
Storage Info
Refrigeration Guidelines
To store leftovers, place the shrimp bowls in an airtight container. Make sure to cool them to room temperature first. This helps keep the shrimp and vegetables fresh. You can store them in the fridge for up to three days. After that, the flavor and texture may change.
Freezing Tips
If you want to freeze the shrimp bowls, separate the shrimp from the rice and veggies. This keeps everything fresh. Place the shrimp in a freezer-safe bag, and squeeze out the air. You can freeze them for up to three months. When you are ready to eat, thaw the shrimp in the fridge overnight. To reheat, cook in a skillet until hot. Add the rice and veggies to warm them up too.
Quality Maintenance
To avoid sogginess, store the rice and shrimp separately. Use glass or plastic containers with tight lids. This keeps moisture out and preserves flavor. If you notice any extra liquid, drain it before serving. This way, your Sweet Chili Shrimp Bowls stay tasty and fresh!
FAQs
How do I know when the shrimp is fully cooked?
You can tell shrimp is cooked when it turns pink and opaque. The shrimp should curl slightly. If you see a “C” shape, it’s done. Make sure not to overcook it. Overcooked shrimp will become tough and rubbery. Keep an eye on the cooking time. It usually takes 2-3 minutes on each side.
Can I make this recipe ahead of time?
Yes, you can prep this recipe ahead of time! Marinate the shrimp a few hours before cooking. Cook the jasmine rice and store it in the fridge. You can also slice the bell pepper and avocado in advance. When you’re ready to eat, just warm the shrimp and rice. This makes meal prep easy and fast!
What can I substitute if I don’t have shrimp?
If you don’t have shrimp, try chicken or tofu. Both options work well in this dish. For chicken, cut it into small pieces and cook until fully done. For tofu, press it to remove moisture, then sauté until golden. Both will soak up the sweet chili sauce flavor nicely!
This blog post covered a delicious shrimp bowl recipe with sweet chili sauce, jasmine rice, and colorful veggies. You learned how to marinate shrimp and cook jasmine rice perfectly. We shared tips for great textures, presentation, and even some creative swaps. Storage advice ensures your leftovers stay fresh and tasty.
Now, you can enjoy this flavorful dish anytime. Get creative and make it your own!


. In this blog post, we explored the vibrant world of Spicy Black Bean Tacos. We discussed essential ingredients, cooking methods, and creative variations. You can easily adjust flavors, store leftovers, and find quick reheating tips. Tacos are fun to make and customize. With fresh toppings and the right spices, you’ll create a dish everyone loves. Enjoy making these tasty tacos and share them with family and friends. Trust me, they’ll want your recipe!](https://dishtreats.com/wp-content/uploads/2025/07/c52f9e49-68ab-4e28-8267-2347654248bf-768x768.webp)
![To make Crispy Parmesan Ranch Potato Skins, gather these simple ingredients: - 4 large russet potatoes - 1 cup shredded sharp cheddar cheese - 1/2 cup grated Parmesan cheese - 1/4 cup sour cream - 2 tablespoons ranch seasoning mix - 1/4 cup green onions, chopped - 3 tablespoons olive oil - Salt and pepper to taste - Optional: hot sauce for serving These items will help you create a tasty snack that everyone loves. The russet potatoes give a sturdy base, while the cheese brings flavor and creaminess. The ranch seasoning mix adds a punch of taste that makes these skins special. I always keep a few extra green onions on hand for garnish. They add color and a mild onion flavor that enhances the dish. I recommend using fresh ingredients for the best results. Fresh potatoes will give you a crispier skin. The cheese should be high-quality for a richer flavor. If you like spice, have hot sauce ready for a kick! For the full recipe, visit the [Full Recipe] section. 1. Preheat your oven to 400°F (200°C) to get it ready for baking. 2. Scrub the russet potatoes under cold running water. Dry them completely with a clean towel. 3. Prick each potato with a fork six to eight times. This helps steam escape while they bake. 1. Rub each potato with olive oil. Make sure they are well-coated. 2. Sprinkle salt on the potatoes for extra flavor. 3. Place the potatoes on the middle rack of the oven. Bake for 45-60 minutes. Check their doneness by piercing with a fork. 1. Once baked, let the potatoes cool for about 10 minutes. This makes them easier to handle. 2. Slice each potato in half lengthwise. Now you have boat-like shapes! 3. Scoop out a bit of the flesh, leaving about 1/4 inch intact along the skin. 1. Brush the insides of each potato skin with olive oil. Season with salt and pepper for taste. 2. Add a generous amount of shredded cheddar cheese in each skin. Then sprinkle the remaining Parmesan cheese on top. 3. Put the filled skins back in the oven, cut-side up. Bake for an extra 10-15 minutes. The cheese should melt and the edges should crisp. 4. While baking, mix the remaining Parmesan cheese, ranch seasoning, and chopped green onions in a bowl. 5. When the potato skins are crispy, take them out. Top each skin with the ranch mix. 6. Return the potato skins to the oven for 5 more minutes. This lets the flavors meld beautifully. Enjoy your Crispy Parmesan Ranch Potato Skins hot, served with sour cream and optional hot sauce! For complete details, refer to the Full Recipe. To make your potato skins crispy, follow these simple steps: - Bake at a high temperature: Set your oven to 400°F (200°C). High heat gets the skins nice and crisp. - Use olive oil: Coat the skins well in olive oil. This helps them crisp up and adds flavor. - Season well: Don’t skip the salt and pepper. Seasoning is key for great taste. You can switch up the cheese for your potato skins. Here are some ideas: - Monterey Jack: This cheese melts well and adds a creamy texture. - Gouda: It gives a smoky flavor that pairs nicely with ranch. - Feta: For a tangy twist, sprinkle some crumbled feta on top. Balancing flavors is important. Use milder cheeses with stronger toppings. Adding more flavor is easy! Here are some tips: - Spices: Try adding paprika or garlic powder for extra kick. - Herbs: Fresh herbs like parsley or chives brighten up the dish. - Toppings: Consider adding crispy bacon bits or diced tomatoes for extra texture. These tips help you make the best crispy Parmesan ranch potato skins. For the complete recipe, check out the Full Recipe section. {{image_4}} For a twist, try different spice blends. You can use garlic powder, onion powder, or smoked paprika. Each adds a unique taste. You can also switch the ranch seasoning for taco seasoning. It gives a fun and zesty flavor. - Garlic powder - Onion powder - Smoked paprika - Taco seasoning Explore different flavor profiles. For a spicy kick, add cayenne pepper or chili powder. If you like fresh herbs, try dill or parsley. These choices keep your potato skins exciting and tasty. Get creative with toppings to suit your taste. You can add crispy bacon bits for a savory crunch. If you're vegan, top with dairy-free cheese or avocado. - Crispy bacon bits - Dairy-free cheese - Avocado slices For a fresh touch, add chopped tomatoes or jalapeños. You can also sprinkle some fresh cilantro or green onions. This way, everyone can enjoy their potato skins just how they like them. Pair your potato skins with a hearty soup or salad. A warm chili or creamy broccoli soup works well. These sides make a filling meal. - Hearty chili - Creamy broccoli soup - Fresh garden salad You can also serve them with grilled chicken or fish. This gives a nice balance to your meal. The crispy potato skins shine as a fun side dish. For more ideas, check out the full recipe. To keep your crispy potato skins fresh, store them in the fridge. Place them in an airtight container. They will stay good for about 3 days. Make sure they cool completely before sealing. This helps prevent excess moisture. When you want to enjoy your leftovers, use an oven for the best taste. Preheat it to 350°F (175°C). Place the potato skins on a baking sheet. Heat them for about 10-15 minutes. This keeps them crispy. Avoid using a microwave, as it can make them soggy. Yes, you can freeze potato skins! To freeze, let them cool completely. Place them in a single layer on a baking sheet. Freeze them for about 1-2 hours. After that, transfer them to a freezer bag. Remove as much air as possible. For thawing, place the skins in the fridge overnight before reheating. The best potatoes for potato skins are large russet potatoes. They have thick skin and a fluffy interior. This makes them perfect for holding toppings. Their size allows for a good amount of filling. Plus, they get crispy when baked, which is what we want. Yes, you can prepare them ahead of time. Bake the potatoes and scoop out the flesh. Store the skins in the fridge until you're ready to bake. Just add cheese and toppings before the final bake. This saves time and makes serving easier. To keep potato skins crispy, follow these tips: - Ensure you coat the skins with olive oil. - Bake them at a high temperature. - Avoid overcrowding the baking sheet. - Don't cover them while they cool. These steps help maintain crunchiness and flavor. Crispy Parmesan Ranch Potato Skins go well with several sauces. Here are some tasty pairings: - Sour cream - Ranch dressing - Hot sauce - Guacamole - Salsa These sauces add flavor and enhance your snack experience. Yes, you can freeze potato skins for later use. Bake the skins and let them cool completely. Then, store them in airtight containers. They can last a couple of months in the freezer. When ready to enjoy, bake them directly from frozen. This way, you get to savor that crispy goodness again! This blog post guides you on making Crispy Parmesan Ranch Potato Skins, covering every step. You learned about needed ingredients and how to prepare them. I shared tips for achieving crispy skins and creative topping ideas. You also discovered ways to store and reheat leftovers. Enjoy making this tasty treat! With your new skills, you can impress friends and family. These potato skins are simple and delicious.](https://dishtreats.com/wp-content/uploads/2025/07/2d854721-5686-49a1-8fc7-db971342c8a3-768x768.webp)


![- 2 medium zucchinis, grated - 1 can (15 oz) black beans, drained and rinsed - 1 cup corn kernels (fresh or frozen) - 1 small red onion, finely chopped - 2 cloves garlic, minced - 1 teaspoon ground cumin - 1 teaspoon smoked paprika - 1 cup enchilada sauce (store-bought or homemade) - 8 whole wheat tortillas - 1 cup shredded cheese (cheddar or a vegan alternative) - 2 tablespoons olive oil - Salt and pepper, to taste - Fresh cilantro, chopped, for garnish - Cooking timeline (Prep time: 15 mins, Total time: 40 mins) - Serving Size information (Servings: 4) When I gather ingredients for zucchini and black bean enchiladas, I love how simple it is. Fresh zucchinis are key for flavor and texture. Black beans add protein and fiber. You can use frozen corn or fresh, depending on what you have. A small red onion gives a sweet taste, while garlic adds a nice kick. Spices like cumin and smoked paprika bring warmth and depth to the dish. I like using enchilada sauce from the store to save time, but homemade is always a treat. Whole wheat tortillas provide a hearty base, and shredded cheese ties everything together. Olive oil helps cook the veggies and adds richness. Adding salt and pepper to taste is important. Finally, a sprinkle of fresh cilantro on top makes the dish pop with color and flavor. For the full recipe, check out the details above. - Step 1: Preheat your oven to 375°F (190°C). This helps your enchiladas cook evenly. - Step 2: Heat 2 tablespoons of olive oil in a skillet over medium heat. Add 1 small red onion, finely chopped. Sauté for about 3-4 minutes, until the onion turns soft and clear. - Step 3: Add 2 cloves of minced garlic to the skillet. Cook for 1 minute, stirring often. The garlic should smell strong but not brown. - Step 4: Mix in 2 medium zucchinis, grated, 1 can of black beans (drained and rinsed), and 1 cup of corn. Sprinkle in 1 teaspoon of ground cumin, 1 teaspoon of smoked paprika, salt, and pepper. Cook this mix for 5-7 minutes. The zucchini should be tender and well mixed. - Step 5: Remove the skillet from heat. Stir in half of the 1 cup of enchilada sauce, making sure everything is coated well. - Step 6: Take a whole wheat tortilla and place it flat. Spoon some of the zucchini mixture down the center. Roll it tightly, then place it seam-side down in a baking dish. Repeat this for all tortillas. - Step 7: Once all tortillas are rolled, pour the remaining enchilada sauce evenly over the top. - Step 8: Sprinkle 1 cup of shredded cheese over the enchiladas. Make sure to cover them well. - Step 9: Cover the baking dish with foil. Bake for 20 minutes to let the flavors blend. - Step 10: Remove the foil and bake for another 10 minutes. The cheese should be melted and slightly golden. Feel free to check the Full Recipe for more details and tips! To keep your zucchini filling just right, follow these tips. First, grate your zucchini and then salt it lightly. Let it sit for about ten minutes. This step helps draw out excess moisture. After that, squeeze the zucchini to remove the water. This way, your filling stays firm, not soggy. Next, adjust the seasoning to match your taste. Start with the suggested spices, but feel free to add more cumin or paprika if you want a stronger flavor. A dash of lime juice can also brighten up the dish. When serving these enchiladas, presentation is key. Use a colorful plate to make the dish pop. A sprinkle of fresh cilantro on top adds a nice touch. You can also add a wedge of lime for extra flair. Pair these enchiladas with a simple salad or some fluffy rice. Both options complement the flavors well. Try a side of avocado or a dollop of sour cream to make it even better. Avoid overstuffing the tortillas. If you pack too much filling in, they may tear. Just a good spoonful is enough. Also, let the enchiladas cool for a few minutes after baking. This step helps them set up nicely. If you serve them too hot, the filling may spill out. Trust me, waiting a bit is worth it! If you want the full recipe, remember to check out the [Full Recipe]. {{image_4}} You can change the beans in this dish. Pinto or kidney beans work great too. They add a different taste while keeping it healthy. You can also add other veggies. Bell peppers or spinach can give your enchiladas a new twist. Just chop them up and mix them in with the other filling. If you need gluten-free options, you can use corn tortillas instead of wheat ones. They taste great and work well with the filling. For a dairy-free version, try vegan cheese. It melts nicely and keeps the dish creamy without the dairy. Want more kick? Add spices or hot sauce to the filling. A bit of chili powder or cayenne can spice things up. You can also try different types of enchilada sauce. Green sauce or mole sauce can change the whole flavor profile. Experiment to find what you love best! To keep your zucchini and black bean enchiladas fresh, store them in the fridge. Place them in an airtight container. This will help seal in flavors and moisture. If you have a lot of leftovers, you can freeze them too. Wrap each enchilada tightly in plastic wrap, then place them in a freezer-safe bag. This method prevents freezer burn and keeps them tasty. When it comes to reheating, I recommend using the oven. Preheat it to 350°F (175°C). Place the enchiladas in a baking dish. Cover them with foil to keep the moisture in. Heat for about 20 minutes. This way, they won’t dry out. You can also use a microwave, but they might lose some texture. If you use the microwave, heat in short bursts to check the warmth. In the fridge, these enchiladas last for about 3 to 4 days. Make sure to eat them before then for the best taste. If you freeze them, they can last for up to 3 months. Just remember to label your bags with dates. This helps you keep track of how long they’ve been there. For the best flavor, try to eat frozen enchiladas within that time frame. You can prep the filling in advance. Just cook the zucchini, black beans, and spices as described in the recipe. Allow it to cool, then store it in the fridge for up to two days. When you’re ready to eat, just assemble the enchiladas with the tortillas and sauce. You can also roll the enchiladas and place them in the baking dish. Cover them tightly and refrigerate. Bake them when you're ready to serve. This method saves time and keeps flavors fresh. Yes, you can. To make cheese-free enchiladas, simply skip the cheese or use a plant-based option. You can add extra veggies or a sprinkle of nutritional yeast for a cheesy flavor. Another option is to serve guacamole or a creamy avocado sauce on top after baking. This adds richness and pairs well with the enchiladas. There are several great options! For a low-carb choice, use large lettuce leaves like romaine or kale. You can also use thinly sliced zucchini or eggplant as a gluten-free alternative. If you want something heartier, try using corn tortillas or even large portobello mushrooms. Each option gives a unique flavor and texture to the dish. Yes, you can use frozen zucchini. Just remember to thaw it first and drain any excess water. This helps keep your filling from becoming too watery. Frozen zucchini is convenient and still delivers great taste in the enchiladas. Just follow the same cooking steps as fresh zucchini. It’s an easy way to enjoy this dish anytime. For the full recipe, refer to the earlier section. In this post, we explored how to make tasty zucchini and black bean enchiladas. I shared a simple recipe, with clear steps and helpful tips. You learned about ingredient choices, cooking methods, and ways to store leftovers. Always remember to check the filling, so it stays moist but not soggy. These enchiladas are not just easy to make; they also fit various diets. Enjoy creating your own version and delight in the flavors! Your kitchen adventure starts here.](https://dishtreats.com/wp-content/uploads/2025/07/2cd92dac-f668-457e-8990-b41595643bf1-768x768.webp)