Stuffed Mini Bell Peppers Flavorful and Easy Recipe

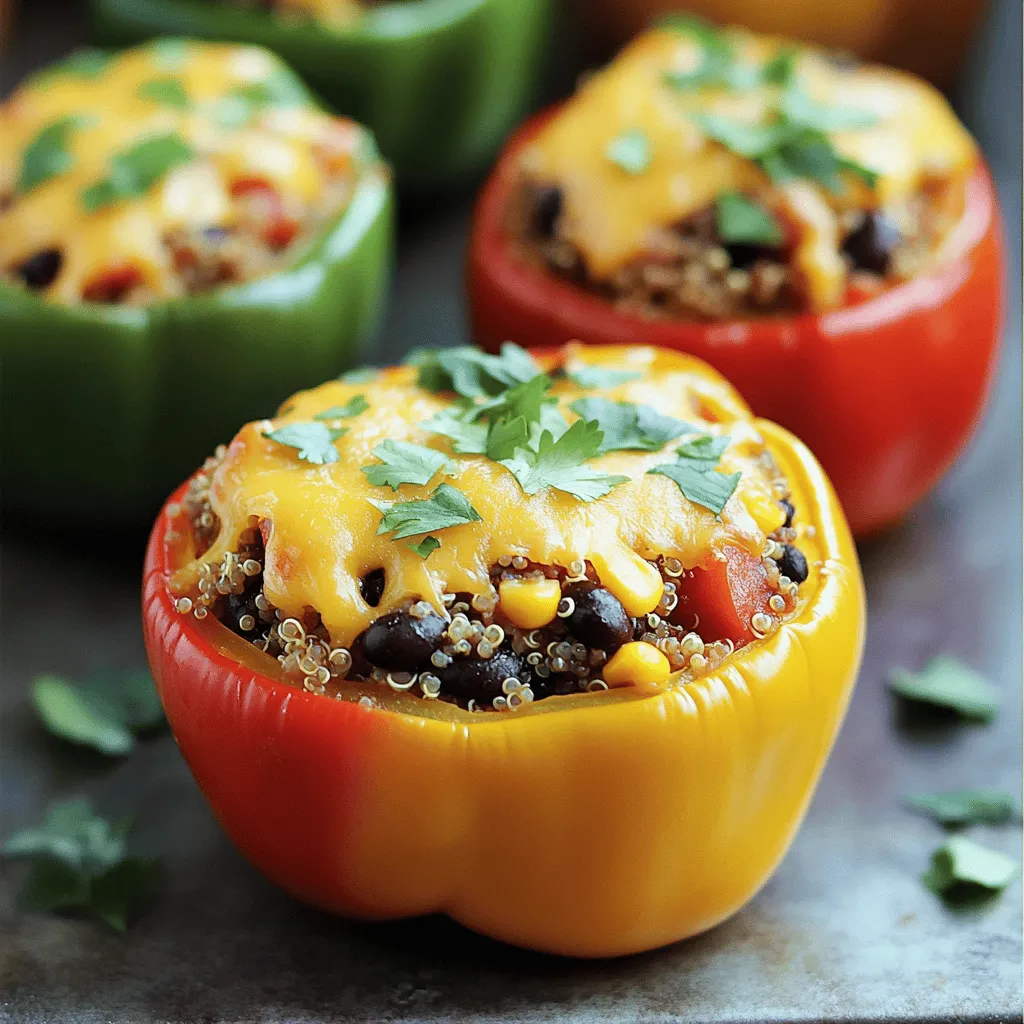
Are you ready to impress your taste buds? Stuffed Mini Bell Peppers are your answer! In this easy recipe, you’ll discover how these vibrant, bite-sized treats can pack a flavorful punch. Whether you’re a seasoned chef or just starting out, I’ll guide you through simple steps, ingredient tips, and mouthwatering variations. Let’s dive into this colorful dish that’s perfect for any occasion!
Ingredients
Essential Ingredients for Stuffed Mini Bell Peppers
To make stuffed mini bell peppers, you need these key ingredients:
- 12 mini bell peppers (a colorful mix for visual appeal)
- 1 cup cooked quinoa (preferably chilled)
- 1 cup black beans, rinsed and drained thoroughly
- 1 cup corn (fresh, frozen, or canned, drained if canned)
- 1/2 cup diced tomatoes (fresh or canned, drained if canned)
- 1 cup shredded cheese (cheddar for richness or pepper jack for a kick)
- 1 teaspoon cumin (ground)
- 1 teaspoon smoked paprika (for a depth of flavor)
- 1 teaspoon garlic powder (for a savory touch)
- 1/2 teaspoon onion powder (to enhance the flavor profile)
- Salt and freshly ground pepper, to taste
- Fresh cilantro, chopped (for garnishing and freshness)
- 1 tablespoon olive oil (for richness and moisture)
These ingredients create a mix of flavors and textures that make the dish exciting.
Optional Ingredients for Added Flavor
You can add extra ingredients for more flavor:
- Chopped jalapeños (for heat)
- Diced onion (for crunch and sweetness)
- Ground turkey or beef (for a meaty option)
- Fresh lime juice (for a zesty kick)
- Avocado (for creaminess)
These optional ingredients allow you to customize your dish to your taste.
Ingredient Substitutions
If you need to swap ingredients, here are some ideas:
- Use brown rice instead of quinoa for a different grain.
- Substitute chickpeas for black beans for a different protein source.
- Try goat cheese or feta instead of cheddar for a tangy flavor.
- Use salsa instead of diced tomatoes for added spice and flavor.
These substitutions keep your dish fresh and exciting while still being delicious.
Step-by-Step Instructions
Preparation Steps for the Oven and Peppers
First, preheat your oven to 375°F (190°C). This step is key for great cooking. Next, take your mini bell peppers and cut off the tops. Make sure to remove all the seeds inside. You can save the tops for another recipe or toss them.
Mixing the Stuffing Ingredients
Grab a large mixing bowl for the filling. Add 1 cup of cooked quinoa, 1 cup of black beans, and 1 cup of corn. Don’t forget the 1/2 cup of diced tomatoes. Mix these well. Then, add spices: 1 teaspoon of cumin, 1 teaspoon of smoked paprika, 1 teaspoon of garlic powder, and 1/2 teaspoon of onion powder. Season with salt and pepper. Stir until everything is well mixed. Pour in 1 tablespoon of olive oil. This adds moisture and flavor.
Baking and Finalizing the Stuffed Peppers
Now, it’s time to stuff the peppers. Use a spoon to fill each pepper with the mixture. Press down gently, but don’t split them. Place the stuffed peppers in a baking dish. If they wobble, use crumpled foil to keep them steady. Top each pepper with 1/2 cup of shredded cheese. Cover the dish with foil and bake for 20 minutes. After that, remove the foil and bake for another 10-15 minutes. Look for tender peppers and bubbly cheese. Once baked, let them cool for a few minutes. Add fresh cilantro on top for a bright finish. Enjoy your stuffed mini bell peppers!
Tips & Tricks
How to Perfectly Cook Mini Bell Peppers
To cook mini bell peppers just right, start with fresh peppers. Look for ones with bright colors and firm skin. Preheat your oven to 375°F (190°C). This will help cook the peppers evenly. When you cut the tops off, make sure to remove all seeds. This keeps the filling in and makes them taste better.
Achieving Flavorful Stuffing Every Time
To make a tasty stuffing, use a mix of cooked quinoa, black beans, corn, and diced tomatoes. You can add spices like cumin and smoked paprika for a great flavor boost. Don’t forget to drizzle some olive oil in the mix. This adds moisture and helps bind everything together. Taste your mixture before stuffing the peppers. Adjust the salt and pepper to your liking.
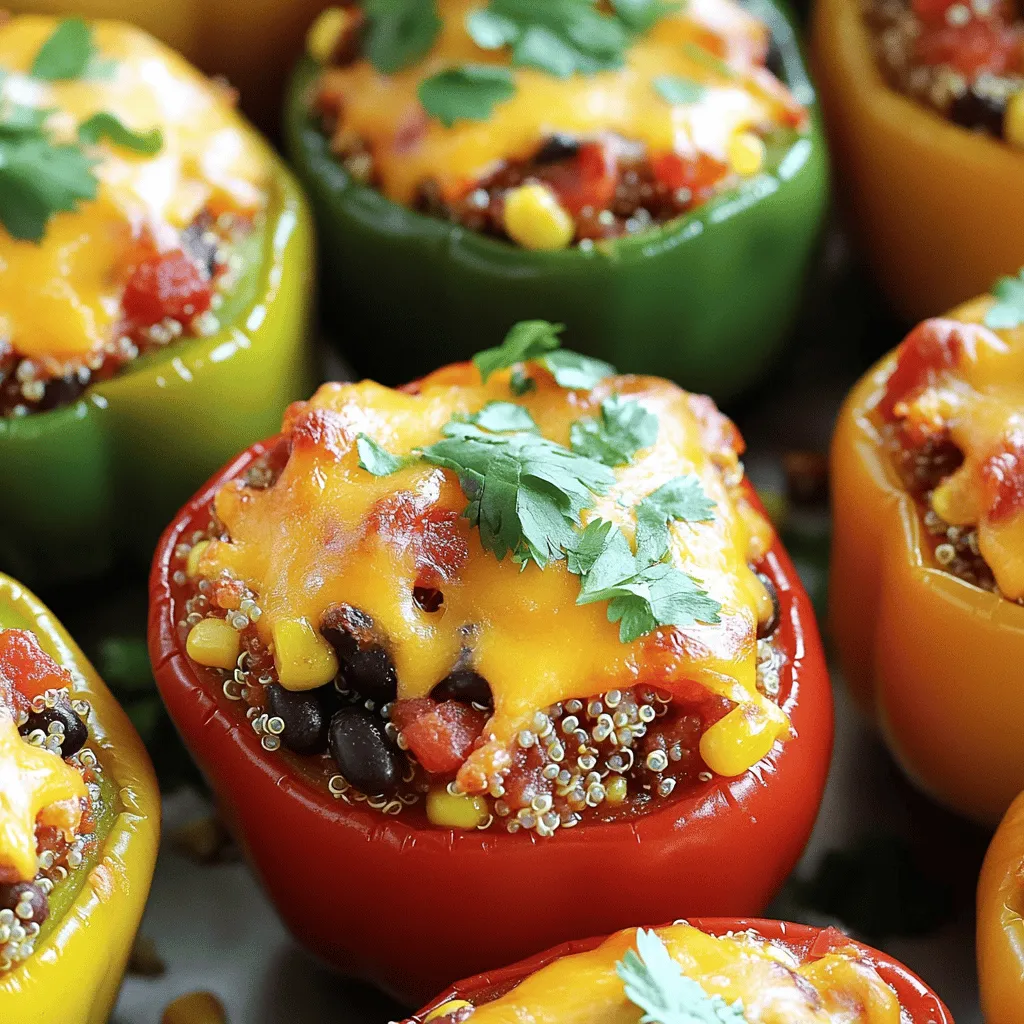
Presentation Tips for Serving
When serving, arrange the stuffed mini bell peppers on a colorful plate. This makes them look even more appealing. Garnish with fresh cilantro for a pop of color. The green from the cilantro pairs nicely with the bright peppers. You could also sprinkle extra cheese on top for a fun touch. Serve them warm for the best taste.

Variations
Vegetarian Stuffed Mini Bell Peppers
For a tasty vegetarian option, skip the meat and focus on fresh veggies.These veggies bring color and nutrients. You can also swap the black beans for chickpeas for a different flavor.
Keto-Friendly Options for Stuffed Peppers
If you’re on a keto diet, you can make simple changes. Replace quinoa with cauliflower rice. Cauliflower rice keeps the dish low in carbs and adds a nice texture. You can also use cream cheese instead of shredded cheese for added richness. This switch helps keep the fat content high while cutting carbs.
Different Filling Combinations
Let your creativity shine by trying new filling combinations! You can mix in cooked ground turkey or chicken for added protein. For a Mediterranean twist, use feta cheese, olives, and herbs like basil or oregano. You can even make a sweet version by adding fruits like apples with cinnamon and nuts. Each filling brings its own unique flavor and character.
Storage Info
How to Store Leftover Stuffed Mini Bell Peppers
To keep your stuffed mini bell peppers fresh, let them cool first. Place leftovers in an airtight container. You can store them in the fridge for up to three days. If you want to enjoy them later, freezing is a great option too.
Reheating Instructions for Best Flavor
When you’re ready to eat, reheat your stuffed peppers for the best taste. Preheat your oven to 350°F (175°C). Place the peppers on a baking sheet. Cover them with foil to keep moisture in. Heat for about 15-20 minutes. Check if they’re warm throughout before serving.
Freezing Stuffed Mini Bell Peppers
Freezing stuffed mini bell peppers is simple. After baking, let them cool completely. Wrap each pepper in plastic wrap, then place them in a freezer bag. They can last up to three months in the freezer. When you want to eat them, thaw them in the fridge overnight. Reheat as mentioned for a delicious meal.
FAQs
How Long Do Stuffed Mini Bell Peppers Last?
Stuffed mini bell peppers can last in the fridge for about 4 days. Store them in an airtight container. This keeps them fresh and tasty. If you notice any changes in smell or texture, it’s best to throw them away. Always check for signs of spoilage before eating leftovers.
Can I Make Stuffed Mini Bell Peppers in Advance?
Yes, you can make stuffed mini bell peppers in advance. Prepare the filling and stuff the peppers a day ahead. Store them in the fridge until you’re ready to bake. This saves time and makes meal prep easier. Just adjust your baking time if they are cold from the fridge.
What Can I Serve with Stuffed Mini Bell Peppers?
Stuffed mini bell peppers pair well with many dishes. You can serve them with a fresh salad or a side of rice. They also go great with salsa or guacamole for dipping. For a heartier meal, serve them with grilled chicken or fish. These sides complement the flavors of the peppers well.
Stuffed mini bell peppers are fun and tasty. We covered essential and optional ingredients to help you create the perfect filling. You learned how to prepare, bake, and make your dish look great. We explored variations, like vegetarian and keto options, so you can mix it up. Lastly, we discussed storing and reheating leftovers for later enjoyment. Keep experimenting with flavors. Enjoy making stuffed mini bell peppers your own!


![- 2 medium zucchinis - 1 cup cherry tomatoes - 1 cup fresh mozzarella balls - 1/4 cup fresh basil leaves - 2 tablespoons balsamic vinegar - 1 tablespoon extra virgin olive oil - Sea salt and freshly cracked black pepper - 1 tablespoon basil pesto (optional) When making Zucchini Noodle Caprese Salad, you want the freshest ingredients. Start with the zucchinis. I like using medium-sized ones, as they spiralize well. Spiralizing turns them into fun noodles. Next, grab a cup of cherry tomatoes. Halve them to release their juicy flavor. Fresh mozzarella balls add creamy texture. Halve these too for easy bites. You can't forget the fresh basil! I suggest tearing the leaves for a fragrant touch. Now, for the dressing, grab balsamic vinegar and extra virgin olive oil. These will bring brightness to your salad. Don't skip on sea salt and cracked black pepper. They enhance the flavors. If you're feeling adventurous, add basil pesto for an extra kick. For the full recipe, check out the details in the complete guide. Enjoy the fresh taste and vibrant colors of this simple dish! To start, you need to spiralize the zucchinis. Use a spiralizer or a vegetable peeler. Aim for long, noodle-like strands. This will give your salad a fun texture. After spiralizing, transfer the noodles to a large mixing bowl. Make sure they are separate from the other ingredients. Next, it's time to add the other ingredients. Toss in the halved cherry tomatoes and fresh mozzarella balls. Be careful not to crush the mozzarella. It adds creaminess to the salad. Now, take the fresh basil leaves. Tear them by hand and scatter them over the salad. This adds a bright aroma. In a small bowl, whisk together balsamic vinegar and extra virgin olive oil. Add a pinch of sea salt and freshly cracked black pepper. Whisk until the mixture is smooth. This vinaigrette will bring all the flavors together. Now it’s time to combine everything. Drizzle the vinaigrette over the salad. Use tongs to gently mix the ingredients. Aim to coat every strand of zucchini without breaking them. If you want extra flavor, you can add basil pesto on top before serving. Enjoy your salad right away for the best taste. For a deeper flavor, let it sit for 10-15 minutes. You can find the Full Recipe above for detailed instructions. To make great zucchini noodles, use a good spiralizer. A handheld spiralizer works well, but a countertop version is even better. This tool gives you long, even noodles. After spiralizing, place the noodles in a colander. This helps drain excess water. Zucchini holds a lot of moisture, so this step is key. If your noodles are too wet, they can make your salad soggy. Adjusting seasoning is easy. Start with sea salt and black pepper. Taste the salad as you mix. If you want more flavor, add a bit more salt or pepper. Fresh herbs bring your salad to life. I love using torn basil leaves. They add a lovely aroma and taste. You can also try parsley or mint for a twist. Serve your salad in wide, shallow bowls. This makes it look beautiful and inviting. For a gourmet touch, drizzle balsamic reduction on top. It adds a nice shine and flavor. Finally, garnish with extra torn basil. This not only looks good but adds freshness too. Enjoy your meal that is as pretty as it is tasty. For the full recipe, be sure to follow my detailed steps! {{image_4}} You can easily swap out the zucchini for other vegetables. Carrots, cucumber, or even sweet potatoes can add crunch and color. Each veggie brings its own taste and texture. If you want to change the cheese, try feta or goat cheese. These options add a tangy twist to your salad. You can explore different vinaigrettes to change the flavor. A lemon vinaigrette can give a bright, fresh taste. You can also try a garlic-infused dressing. This adds depth and makes each bite exciting. Don't be afraid to mix and match! Pair this salad with proteins to make it a full meal. Grilled chicken or shrimp works well. You can also enjoy it as a side dish with steak or fish. Add some crusty bread, and you have a lovely dinner. Enjoy it at a picnic or a barbecue for a fun twist! To keep your Zucchini Noodle Caprese Salad fresh, store it in an airtight container. This helps keep moisture out. If possible, separate the dressing from the salad. This keeps the zucchini from getting soggy. You can mix it just before serving. For the best taste, use the salad within two days. If you plan to enjoy leftovers, consider adding fresh basil and mozzarella right before eating. This keeps the flavors bright and vibrant. In the fridge, this salad lasts about two days. After that, the zucchini may lose its crunch. Check for any off smells or slimy textures. These are signs that the salad has gone bad. If you notice them, it’s time to toss it out. Enjoy your fresh salad while it’s at its best! For the full recipe, click here: [Full Recipe]. Yes, you can prepare parts of the salad ahead of time. Spiralize the zucchinis and store them in an airtight container. Keep them in the fridge. You can also chop the tomatoes and mozzarella and store them separately. Assemble the salad just before serving. This keeps the flavors fresh and bright. Zucchini noodles are very healthy. They are low in calories and high in water content. This makes them great for hydration. Zucchini is full of vitamins A and C, which boost your immune system. They are also a good source of fiber, which promotes good digestion. If you don’t like mozzarella, try using feta cheese or goat cheese. Both options add a nice tangy flavor. You can also use avocado for creaminess if you want a dairy-free choice. Each option adds its own twist to the salad. Yes, you can use many herbs instead of basil. Fresh parsley, cilantro, or mint can add unique flavors. Oregano is another great option. Feel free to mix and match to create your own version. This keeps the salad exciting and fresh. To avoid soggy noodles, salt the zucchini first. Let them sit for about 10 minutes. This draws out excess moisture. After that, pat them dry with a paper towel. This helps keep your salad crisp and enjoyable. This salad combines fresh zucchini noodles, tomatoes, and mozzarella for a tasty dish. You learned how to prepare the ingredients, mix flavors, and present it beautifully. Customizing the salad with unique flavors or proteins can make it your own. Always store leftovers properly to keep them fresh. With these tips, you can enjoy a delicious and healthy meal anytime. Embrace creativity and have fun in the kitchen!](https://dishtreats.com/wp-content/uploads/2025/06/9c06bc60-1dc6-4324-8b6b-f347b8231277-768x768.webp)

![- 2 boneless, skinless chicken breasts, sliced into thin strips - 2 tablespoons honey - 4 cloves garlic, minced - 2 tablespoons low-sodium soy sauce - 1 tablespoon sesame oil - 1 red bell pepper, thinly sliced - 1 cup broccoli florets - 1 cup snap peas - 1 carrot, julienned - 2 tablespoons vegetable oil - Salt and pepper to taste I love using fresh chicken for this dish. It cooks well and tastes great. Honey adds a sweet touch, while garlic gives it a nice punch. You can pick any colorful veggies you like. I usually choose bell peppers, broccoli, and snap peas for their crunch. - Sesame seeds - Sliced green onions Garnishes make your meal pop! Sesame seeds add a nutty flavor. Green onions give a fresh, sharp taste. They make the dish look fancy, too. - Skillet or wok - Mixing bowl - Whisk A large skillet or wok is best for stir-frying. It helps cook everything quickly and evenly. You’ll also need a mixing bowl for the sauce. A whisk is handy to mix your sauce smoothly. For the full recipe and cooking instructions, check the [Full Recipe]. - How to prepare the sauce To make the sauce, grab a small mixing bowl. Add 2 tablespoons of honey and 4 minced garlic cloves. Pour in 2 tablespoons of low-sodium soy sauce and 1 tablespoon of sesame oil. Whisk these ingredients well until they blend smoothly. This sauce will be full of flavor! - How to season the chicken Take 2 sliced chicken breasts and place them in a bowl. Lightly sprinkle salt and pepper over the chicken. Toss it gently to coat every piece evenly. This step is key to making sure your chicken tastes great. - Cooking the chicken Heat a large skillet or wok over medium-high heat. Add 1 tablespoon of vegetable oil. Once the oil shimmers, add the seasoned chicken strips. Cook them for about 5-7 minutes. Look for a golden color and make sure they are cooked all the way through. Remove the chicken and set it aside on a plate. - Stir-frying the vegetables In the same skillet, add another tablespoon of vegetable oil. Throw in the sliced red bell pepper, 1 cup of broccoli florets, 1 cup of snap peas, and 1 julienned carrot. Stir-fry these vegetables for 3-4 minutes. You want them to stay vibrant and crisp-tender. - Combining and flavoring the dish Now, return the cooked chicken to the skillet. Pour the honey garlic sauce over everything. Stir it well to coat all the chicken and vegetables. Cook for an extra 2-3 minutes. This allows the sauce to thicken and stick to your meal. - How to garnish and serve Once done, take the skillet off the heat. Sprinkle sesame seeds and sliced green onions over the stir fry. This adds a nice crunch and fresh flavor. For an appealing look, serve it in shallow bowls on a bed of rice or noodles. Enjoy your tasty Honey Garlic Chicken Stir Fry! Check the Full Recipe for more details! For the best stir-fry, set your heat to medium-high. This helps to cook the chicken fast and keep it juicy. When cooking, work in batches if your pan is small. This way, the chicken won’t steam. To get crisp veggies, don’t overcrowd the pan. Just like the chicken, cook the veggies fast. Stir them often, about three to four minutes will do. Add some red pepper flakes for a spicy kick. You can also try fresh ginger for a nice zing. Balancing sweet and savory is key. If it’s too sweet, add a dash more soy sauce. Taste as you go to find the perfect mix. Serve your stir fry in shallow bowls. Place it on a bed of rice or noodles for a great look. Top with extra sesame seeds and sliced green onions. A lime wedge on the side adds color and flavor! {{image_4}} You can switch the chicken for other proteins. Tofu works great for a vegetarian dish. Just press and cube the tofu, then cook it like the chicken. Shrimp is another tasty option. It cooks fast and adds a nice flavor. Feel free to mix up the veggies. Bell peppers, zucchini, and green beans all taste amazing. Seasonal flavors add fun too! Use fresh corn in summer or squash in fall. These choices bring color and taste to your meal. You can change the sauce to fit your taste. If you want less sweetness, use less honey. To make it salty, add more soy sauce. Want some heat? Toss in red chili flakes or chopped peppers. This will spice up your stir fry and make it unique. To store your honey garlic chicken stir fry, cool it down first. Place the leftovers in an airtight container. This helps keep out air and moisture. I recommend using glass or BPA-free plastic containers. They are safe and durable. Make sure to refrigerate within two hours of cooking. This keeps the dish fresh and safe to eat. Yes, you can freeze honey garlic chicken stir fry! It freezes well and saves time for future meals. To freeze, use a freezer-safe container or a zip-top bag. Remove as much air as possible before sealing. For best results, eat it within three months. When you're ready to eat, thaw it in the fridge overnight. Reheat it in a skillet over medium heat until hot. This keeps the chicken and veggies tender. Leftovers will last about three to four days in the fridge. Always check for signs of spoilage before eating. If it smells off or has a strange color, it’s best to toss it. You'll want to avoid any food safety risks. Remember, good storage means enjoying your tasty meal later! To cut the sweetness, reduce the honey. Use one tablespoon instead of two. You can also add more soy sauce to balance the flavor. Adding a splash of rice vinegar or lime juice helps too. These add tang without making it too sweet. You can also use low-sugar honey or a sugar-free sweetener. Yes, you can prepare the chicken and veggies ahead of time. Slice the chicken and chop the vegetables. Store them in the fridge until you're ready to cook. You can also mix the sauce in advance. Just keep it in a sealed container. When you are ready to eat, cook it all together for a quick meal. Some good side dishes include: - Steamed rice - Fried rice - Noodles - Quinoa - A fresh green salad These sides add more texture and flavor to your meal. They also help soak up the tasty sauce. - Full Recipe: Detailed cooking instructions for easy reference. In this blog post, we explored the key ingredients and cooking steps for honey garlic chicken stir fry. We covered how to prepare the sauce, cook the chicken, and stir-fry the veggies. I shared useful tips on enhancing flavors and balancing taste. Plus, we discussed variations and storage methods for your leftovers. Cooking can be fun and rewarding. With these skills, you can create tasty meals. Enjoy trying new ingredients and discovering your favorites. Happy cooking!](https://dishtreats.com/wp-content/uploads/2025/07/ad7e2fa8-e610-4152-a96e-e496d4740468-768x768.webp)


