Are you ready for a meal that’s both tasty and healthy? Stuffed acorn squash with quinoa offers a flavorful delight you can’t resist. This dish combines sweet and nutty flavors with fresh ingredients. Whether you’re planning a family dinner or a cozy night for yourself, I’ll guide you through each step. Let’s dive into the ingredients and make a meal that delights every palate!
Ingredients
List of Ingredients for Stuffed Acorn Squash with Quinoa
To make the stuffed acorn squash, gather these key ingredients:
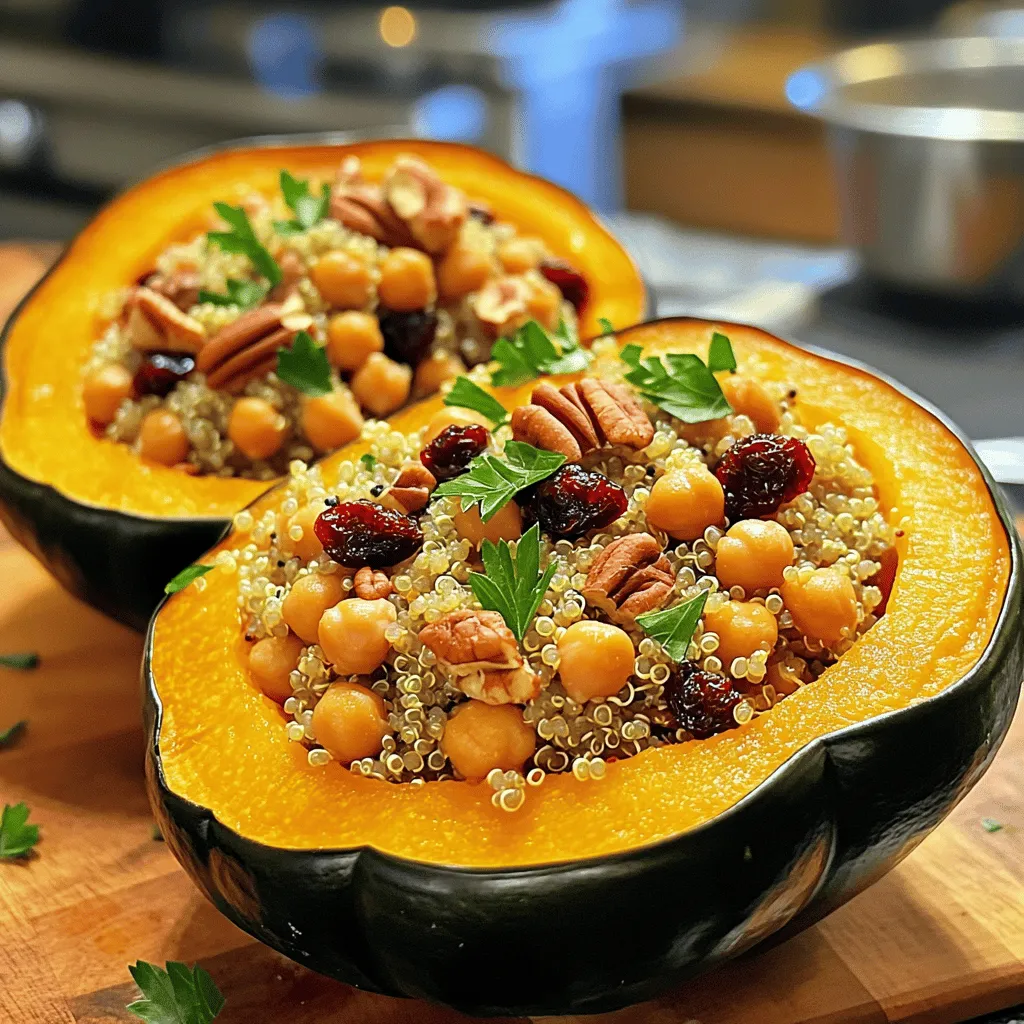
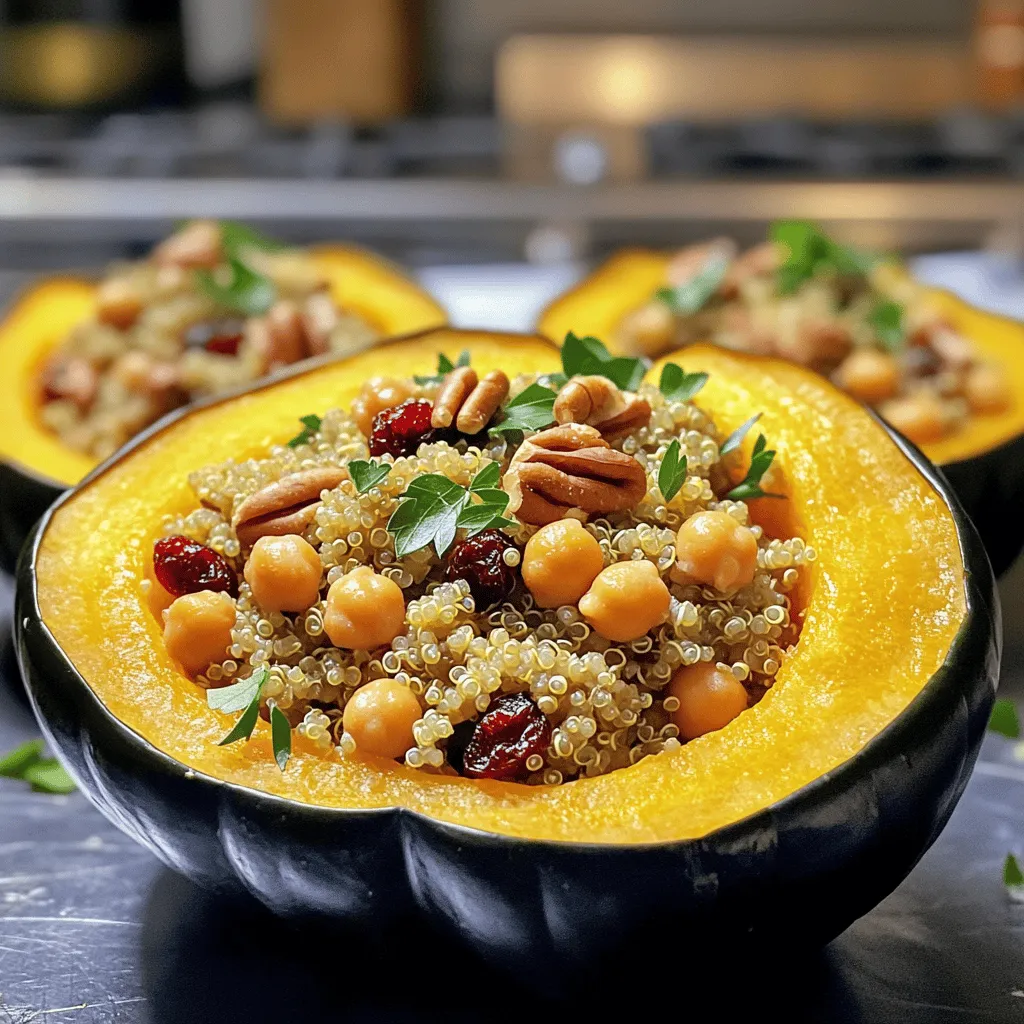
– 2 medium acorn squashes, halved and seeds removed
– 1 cup quinoa, rinsed and drained
– 2 cups vegetable broth (or water)
– 1 cup cooked chickpeas (canned or boiled)
– 1/2 cup dried cranberries
– 1/4 cup chopped pecans
– 1 small onion, finely diced
– 2 cloves garlic, minced
– 1 teaspoon ground cumin
– 1 teaspoon ground cinnamon
– Salt and freshly ground black pepper to taste
– 2 tablespoons olive oil
– Fresh parsley or cilantro for garnish
Optional Garnishes
For a little extra flair, consider these garnishes:
– A drizzle of olive oil
– Extra cranberries for a pop of color
– Chopped pecans for crunch
– Fresh herbs, like parsley or cilantro
Substitution Suggestions
You can easily swap some ingredients for different flavors:
– Use brown rice instead of quinoa for a heartier texture.
– Swap chickpeas for black beans or lentils for a change.
– Try walnuts or almonds in place of pecans for a different nutty flavor.
– If you want a sweet touch, consider adding diced apples or pears.
These options let you customize the recipe to your taste or what you have on hand.
Step-by-Step Instructions
Preparing the Acorn Squash
To start, you need to preheat your oven to 400°F (200°C). This step warms the oven for roasting the squash. Next, take the halved acorn squashes and place them cut-side up on a baking sheet. Brush each half with olive oil. I like to use about 1 tablespoon per half. Then, sprinkle salt and black pepper on top. Roast the squash for 25 to 30 minutes. You want the squash to be tender and easy to pierce with a fork.
Cooking the Quinoa
While the squash roasts, it’s time to cook the quinoa. In a medium saucepan, bring 2 cups of vegetable broth to a rolling boil. After that, add 1 cup of rinsed quinoa. Cover the pot and lower the heat. Let it simmer on low for about 15 minutes. When done, the quinoa will be fluffy, and all the liquid should be absorbed. Remove it from the heat but keep it covered for another 5 minutes. This steaming step makes the quinoa even better.
Making the Filling
Now, let’s make the filling. In a large skillet, heat 1 tablespoon of olive oil over medium heat. Add a small diced onion and sauté it for about 5 minutes. The onion should turn translucent. Next, stir in 2 minced garlic cloves, 1 teaspoon of ground cumin, and 1 teaspoon of ground cinnamon. Cook this mix for about 1 minute until you smell the great aroma. Then, add 1 cup of cooked chickpeas, 1/2 cup of dried cranberries, and 1/4 cup of chopped pecans. Stir everything well and let it cook for another 3 to 4 minutes. This helps all the flavors mix. Finally, fluff your cooked quinoa with a fork and add it to the skillet. Mix everything well and season with salt and black pepper to taste. Now your filling is ready for the squash!
Tips & Tricks
Best Cooking Techniques
To make stuffed acorn squash shine, use roasting as your main cooking method. Roasting gives the squash a sweet, caramelized flavor that takes this dish to the next level. When you roast, make sure to cut the squash in half and scoop out the seeds first. Brush them with olive oil and sprinkle with salt. This helps the squash cook evenly.
How to Ensure Perfectly Tender Squash
For tender squash, roast at 400°F (200°C). This temperature creates a nice balance between cooking through and browning. Cook for about 25-30 minutes, until a fork easily pierces the flesh. If you want extra tenderness, you can cover the squash with foil during the first half of cooking. This traps steam and helps make it soft.
Flavor Enhancement Ideas
To boost flavors, add spices to the quinoa mix. Ground cumin and cinnamon work wonders. You can also include fresh herbs like thyme or rosemary for a fragrant twist. Consider adding a splash of lemon juice for brightness. If you enjoy a bit of heat, add a pinch of red pepper flakes. To make your meal more colorful, top the dish with extra cranberries and pecans before serving.
Variations
Vegetarian Alternatives
You can easily make this dish vegetarian by swapping out the chickpeas. Try using lentils or black beans instead. Both options add protein and flavor. You can also use roasted vegetables like zucchini or bell peppers for extra taste and texture. Mix in some spinach or kale for a nutrient boost.
Gluten-Free Options
The main ingredient, quinoa, is naturally gluten-free. If you want to add grains, choose gluten-free options like rice or millet. Always check labels on ingredients like broth and spices to ensure they are gluten-free. This way, you can enjoy a safe and tasty meal.
Seasonal Ingredient Swaps
Use seasonal ingredients to change the flavor of the stuffing. In fall, add apples or pears for sweetness. In winter, try adding brussels sprouts or sweet potatoes. Spring brings fresh herbs like mint or basil, while summer allows for tomatoes or corn. These swaps keep the dish fresh and exciting all year round.
Storage Info
Refrigeration Tips
After you make the stuffed acorn squash, let it cool to room temperature. Store leftovers in an airtight container. Place it in the fridge for up to three days. This keeps the flavors fresh and safe. If you plan to eat it later, cover each half well to avoid drying out.
Freezing Guidelines
You can freeze stuffed acorn squash for longer storage. Wrap each half tightly in plastic wrap. Then, place them in a freezer-safe bag or container. This helps prevent freezer burn. They will last for about three months in the freezer. When you are ready to enjoy them, thaw in the fridge overnight before reheating.
Reheating Instructions
To reheat, preheat your oven to 350°F (175°C). Place the stuffed squash on a baking sheet. Cover with aluminum foil to retain moisture. Heat for about 20-25 minutes, or until warmed through. You can also use the microwave. Place a half in a microwave-safe dish and cover it. Heat for 3-5 minutes, checking often to avoid overcooking. Enjoy your delicious meal again!
FAQs
How long does it take to cook acorn squash?
Cooking acorn squash usually takes about 25 to 30 minutes. First, you roast it in the oven at 400°F (200°C). You want it tender enough to pierce easily with a fork. This time may vary a bit, depending on the size of the squash. Keep an eye on it to avoid overcooking.
Can I prepare the stuffing ahead of time?
Yes, you can prepare the stuffing a day ahead. Cook the quinoa and mix it with the chickpeas, cranberries, and spices. Store it in the fridge until you are ready to stuff the squash. This makes the cooking process faster and easier on the day you plan to serve it.
What can I serve with stuffed acorn squash?
Stuffed acorn squash pairs well with a simple green salad or roasted vegetables. You could also serve it with a light soup for a complete meal. For a festive touch, consider adding cranberry sauce or a dollop of yogurt on the side.
Is there a vegan version of this recipe?
This recipe is already vegan-friendly! It uses quinoa, chickpeas, and cranberries for a hearty filling. You can enjoy the stuffed acorn squash without any animal products. For added flavor, consider using vegetable broth instead of water when cooking the quinoa.
Stuffed acorn squash with quinoa is a tasty dish. We covered the ingredients, preparation, and cooking steps. I shared tips to make cooking easier and your dish more flavorful. You can also explore variations to suit your taste or dietary needs. Remember, you can store leftovers well and reheat them easily. Enjoy this healthy, satisfying meal anytime. Try it out and share your results!


