Strawberry Oatmeal Breakfast Bars Easy and Healthy Treat

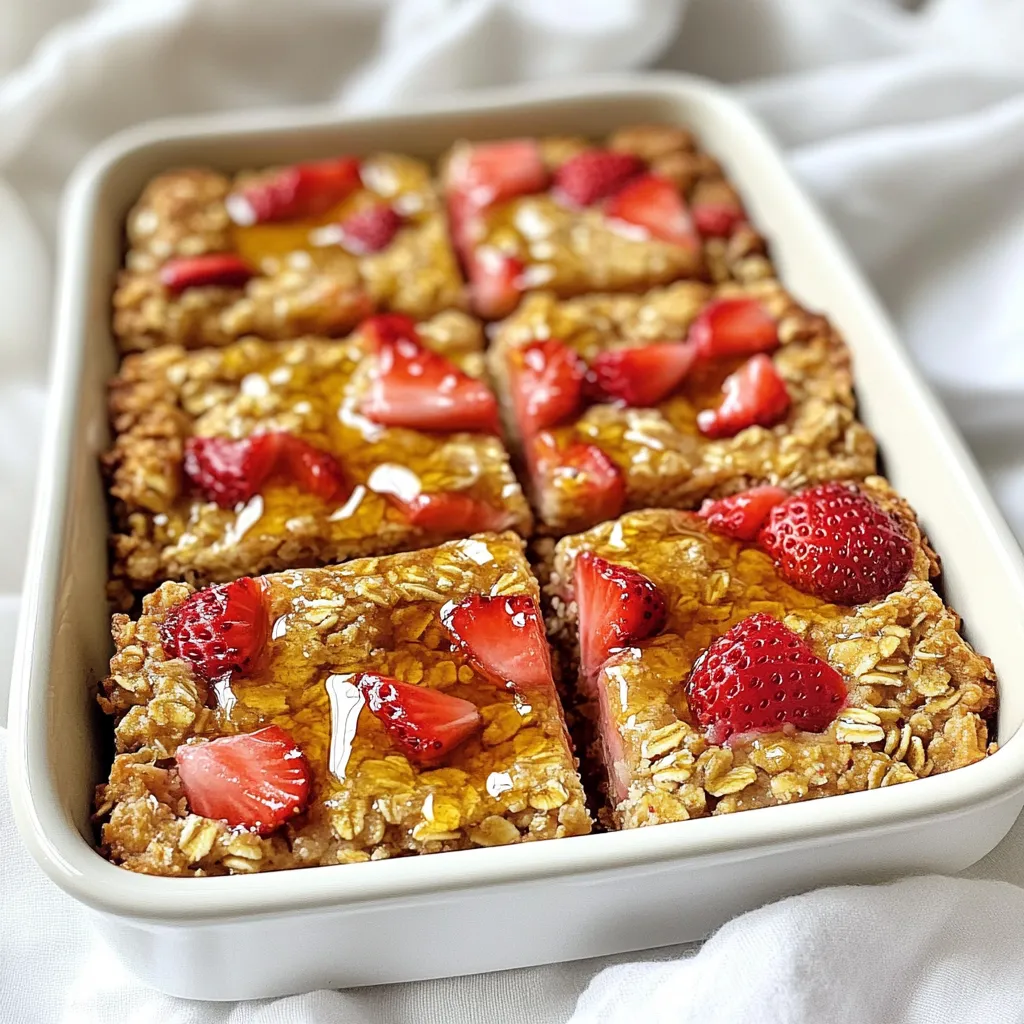
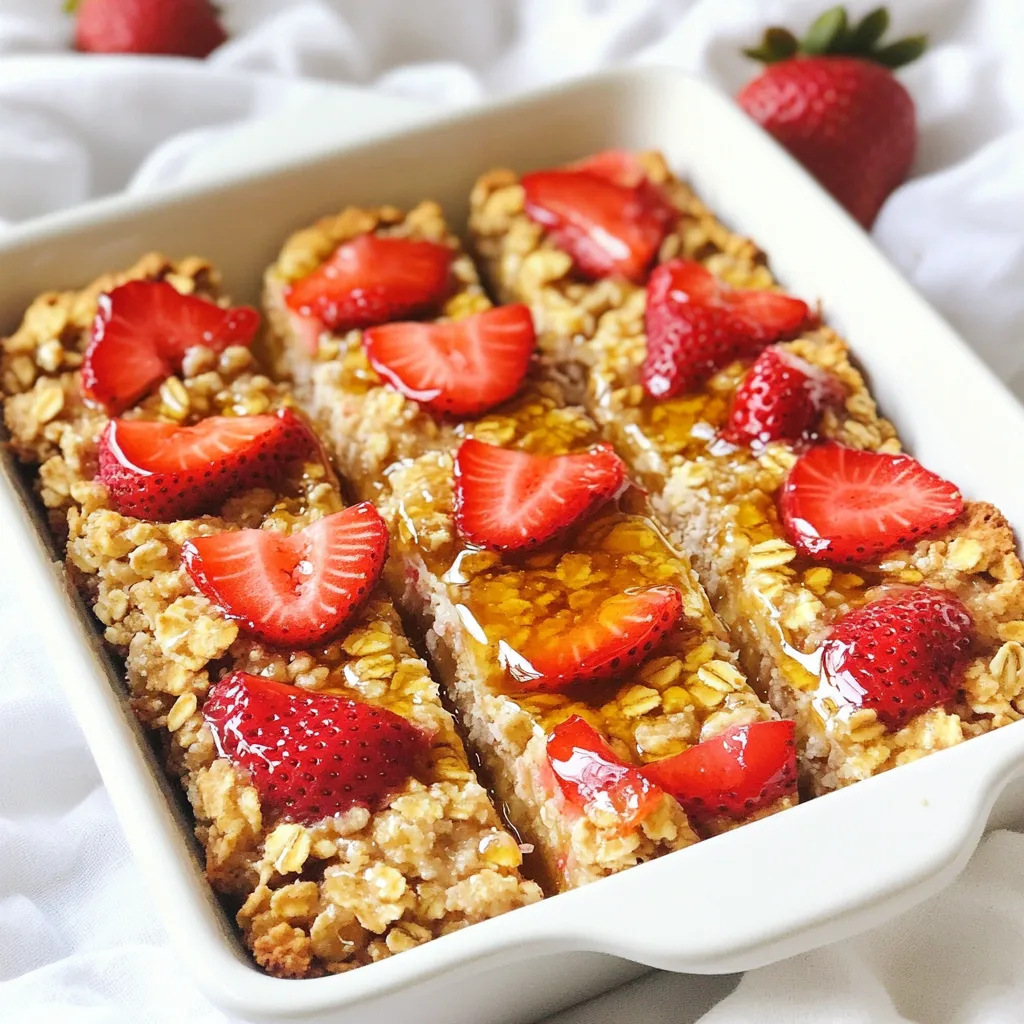
Looking for a quick and healthy breakfast that tastes great? Try my Strawberry Oatmeal Breakfast Bars! These bars are easy to make and packed with flavor. You only need simple ingredients like rolled oats, almond flour, and fresh strawberries. They are perfect for busy mornings or as a delicious snack. Let’s dive into how you can whip up this tasty treat in no time!
Ingredients
Essential Ingredients
- 1 ½ cups rolled oats
- ½ cup almond flour
- ½ teaspoon baking powder
- ½ teaspoon ground cinnamon
- 1/4 cup honey or maple syrup
- 1/3 cup almond milk (or any milk of choice)
- 2 tablespoons coconut oil, melted
- 1 teaspoon pure vanilla extract
- 1 cup fresh strawberries, hulled and coarsely chopped
- A pinch of salt
These ingredients make the heart of my strawberry oatmeal breakfast bars. Each one plays a key role in flavor and texture.
Rolled oats bring a chewy base. Almond flour adds a nice nutty taste and helps with moisture. Baking powder gives the bars a lift, while ground cinnamon adds warmth and spice.
For sweetening, I love using honey or maple syrup. Both add a gentle sweetness without being overpowering. Almond milk makes the mix creamy, but feel free to use any milk you enjoy.
Coconut oil is my go-to fat here. It keeps the bars moist and adds a subtle coconut flavor. Pure vanilla extract enhances all the other tastes.
Finally, fresh strawberries are the star of the show. They burst with flavor and add natural sweetness. A pinch of salt rounds everything out, making these bars a delightful treat.
Make sure to gather these ingredients before starting. They work together to create a healthy and tasty breakfast option you’ll love.
Step-by-Step Instructions
Preparation Steps
1. Preheat your oven to 350°F (175°C). Get an 8×8 inch baking dish ready by lining it with parchment paper. Let some paper hang over the edges. This helps with easy removal.
2. In a large bowl, mix rolled oats, almond flour, baking powder, ground cinnamon, and a pinch of salt. Stir these dry ingredients until well blended.
3. In another bowl, whisk together honey or maple syrup, almond milk, melted coconut oil, and pure vanilla extract. Make sure this mixture is smooth and mixed well.
4. Slowly pour the wet mixture into the dry ingredients. Stir gently until just combined. Fold in the chopped strawberries carefully to keep them intact.
Baking Process
5. Pour the mixture into the lined baking dish. Use a spatula to spread it out evenly. Make sure the strawberries are well-distributed.
6. Bake in the preheated oven for 25-30 minutes. Look for the edges to turn golden brown. Insert a toothpick into the center. It should come out clean if done.
7. Once baked, take the dish out of the oven. Let it cool in the pan for about 10 minutes. Use the parchment paper to lift the bars out and place them on a wire rack to cool fully.
Serving Suggestions
8. Once the bars are cool, slice them into desired portions. To make them pretty, serve them topped with fresh strawberries or a sprinkle of cinnamon. Store any leftovers in an airtight container in the fridge for up to a week.
Tips & Tricks
Best Practices for Preparation
- Avoiding overmixing: When you mix the wet and dry ingredients, stir gently. Overmixing makes the bars tough. You want a soft texture, so mix until just combined.
- Importance of ingredient temperatures: Use room temperature ingredients for best results. Cold ingredients can affect the mix and baking time.
Customization Options
- Sweetener alternatives: You can swap honey or maple syrup for agave syrup or coconut sugar. Each sweetener adds a unique flavor.
- Flavor variations and add-ins: Feel free to add spices like nutmeg or ginger. You can also mix in nuts or seeds for crunch.
Troubleshooting Common Issues
- Overbaking tips: Keep an eye on the bars while they bake. If edges turn dark brown, they may be overbaked.
- Texture adjustments: If the bars are too dry, add a splash of almond milk next time. For chewier bars, try adding a bit more coconut oil.

Variations
Fruit Alternatives
You can switch up the fruit in these bars. Other berries work great. Try blueberries or raspberries for a tasty twist. You can also add mashed bananas. They bring a nice sweetness and moisture. Just use about one large banana. Mix it in with the wet ingredients.
Dietary Modifications
If you need gluten-free options, use certified gluten-free oats. They work just like rolled oats. For vegan substitutions, replace honey with maple syrup. This keeps the bars sweet without using any animal products. Use almond milk or any plant-based milk you like.
Flavor Enhancements
Want to add some crunch? Toss in nuts or seeds like walnuts or chia seeds. They add texture and healthy fats. If you love chocolate, mix in some chocolate chips. Dark chocolate pairs well with the strawberries and makes a delightful treat.
Storage Info
Storage Recommendations
To keep your strawberry oatmeal breakfast bars fresh, store them in the fridge. Place the bars in an airtight container. This keeps moisture out and prevents them from drying out. If you stack the bars, add parchment paper between layers. This way, they won’t stick together.
Freezing Instructions
You can freeze these bars for later. First, let the bars cool completely. Then, wrap each bar in plastic wrap. Place the wrapped bars in a freezer bag. Seal it tightly to avoid freezer burn. When you want to eat a bar, take it out and let it thaw in the fridge overnight.
Shelf Life
In the fridge, your bars will last about a week. Look for signs of spoilage. If you see mold or notice a sour smell, toss them out. Fresh strawberries can spoil faster, so check your bars often. Enjoy them while they are still tasty and fresh!
FAQs
Common Questions
Can I use quick oats instead of rolled oats?
Yes, you can use quick oats. They will make the bars softer. However, quick oats may change the texture slightly. Rolled oats offer more chewiness and substance.
How can I make these bars nut-free?
To make these bars nut-free, swap almond flour with oat flour or all-purpose flour. Use regular milk instead of almond milk. This keeps the bars tasty and safe for nut allergies.
What’s the best way to reheat strawberry oatmeal bars?
The best way to reheat bars is in the microwave. Heat for 10 to 15 seconds. This warms them nicely without drying them out. You can also warm them in the oven at 350°F for about 5 minutes.
Nutritional Information
Caloric content per serving
Each bar has about 120 calories. This can vary based on the sweetener and milk used. Always check your specific ingredients for exact numbers.
Key nutrients found in the bars
These bars are rich in fiber, thanks to the oats and strawberries. They also provide healthy fats from coconut oil. You get a good amount of vitamins from the strawberries too.
Serving Size and Suggestions
Recommended portion sizes
I suggest slicing the bars into 12 pieces. This size is great for breakfast or a snack. You can adjust the size based on your hunger.
Pairing ideas for a balanced breakfast
Pair these bars with yogurt for protein. A side of fresh fruit adds extra vitamins. You can also enjoy them with a glass of milk for a filling meal.
You learned how to make delicious strawberry oatmeal bars. We covered the key ingredients, simple steps, and smart tips. Customizing your bars makes them uniquely yours. Whether you prefer vegan or gluten-free options, there’s a way to suit your needs. Remember to store properly for freshness or freeze for later. Enjoy your tasty creation, and feel proud of your new skills! Keep experimenting with flavors to find your favorite blend.


![- 2 grilled chicken breasts, shredded - 1 cup BBQ sauce (choice of homemade or your favorite store-bought) - 4 cups mixed greens (combination of spinach, arugula, and romaine) - 1 cup cherry tomatoes, halved - 1 cup corn (freshly cooked, canned, or frozen) - 1 ripe avocado, diced - ½ cup red onion, finely sliced - ½ cup shredded cheddar cheese - ¼ cup fresh cilantro, chopped (optional for garnish) - Salt and freshly ground black pepper, to taste - Tortilla chips, for serving on the side Gather these ingredients before you start cooking. Grilled chicken gives a great flavor. You can use any BBQ sauce you like. If you want homemade sauce, that works too! The salad greens add crunch and freshness. Cherry tomatoes and corn give sweetness. Avocado adds creaminess. Red onion gives a nice bite. Shredded cheese makes everything richer. The cilantro is optional, but it adds a nice touch. Finally, don’t forget the tortilla chips for a fun crunch on the side. This combination makes for a bright, colorful, and tasty BBQ chicken salad bowl. For the complete recipe, follow the steps provided in the article. First, shred your grilled chicken breasts. Place the chicken in a medium bowl. Next, pour in your BBQ sauce. You can use homemade sauce or your favorite store-bought kind. Mix it well. Make sure every piece of chicken gets coated with the sauce. This step is key to getting great flavor. After mixing, set the chicken aside. Let it sit for a few minutes. This allows the flavors to meld together. Grab a large salad bowl for this part. Start by adding your mixed greens, which can include spinach, arugula, and romaine. Next, toss in the halved cherry tomatoes, corn, and sliced red onion. Use salad tongs or your hands to mix the greens and veggies. You want everything to be evenly distributed. Now, gently add the diced avocado. Take care to fold it in without mashing it. This keeps the avocado pieces intact and adds a creamy texture. Now it’s time for the fun part! Divide your colorful salad mixture into individual serving bowls. This makes for a beautiful display. On top of each bowl, add a generous scoop of the BBQ chicken. Finish each bowl with a sprinkle of shredded cheddar cheese. This adds richness and flavor. If you like, you can also garnish with fresh cilantro. This step gives a nice touch. Serve your bowls with tortilla chips on the side. They add a satisfying crunch to the meal. For the full recipe, check out the earlier section. Grilling chicken gives it a smoky flavor. This method adds a nice char. Baking chicken is easier and keeps it juicy. Choose what fits your time and setup. For great BBQ flavor, marinate the chicken overnight. This helps the sauce soak in well. Boost your BBQ sauce with spices. Try adding garlic powder, onion powder, or smoked paprika. Fresh herbs like oregano or thyme can also work wonders. If you want cheese alternatives, try feta or goat cheese. Both add a tangy kick to your salad. Layer your salad ingredients for a beautiful look. Start with greens, then add the chicken. Place colorful toppings like tomatoes and corn on top. Use bright bowls to make the meal pop. Vibrant tortilla chips add a fun touch and great crunch. For the full recipe, check back to the beginning! {{image_4}} You can make BBQ chicken salad bowls even more fun by swapping ingredients. Instead of grilled chicken, try using pulled pork or even tofu for a vegetarian option. These proteins still soak up that yummy BBQ flavor. For salad greens, don't feel stuck with just one type. You can mix in kale, romaine, or even baby spinach. Each green adds a new taste and texture. You might also consider adding different vegetables like bell peppers or cucumbers. They can add a nice crunch and freshness to your bowls. While BBQ sauce is a star, you can explore other dressings too. Ranch dressing gives a creamy twist. A tangy vinaigrette can make the salad lighter. Try mixing BBQ sauce with ranch for a unique blend. Don't hesitate to play with BBQ sauce flavors. You could use a spicy version for a kick or a honey BBQ for sweetness. Each type creates a new experience every time you make this dish. When serving your BBQ chicken salad bowls, think about sides that go well. Cornbread or sweet potato fries are great options. They can balance the salad's freshness with some warmth. Get creative with your bowls. Use large lettuce leaves as edible bowls or even hollowed-out bell peppers. This makes your meal fun and different. Plus, it adds color and excitement to your table. For more ideas, check out the Full Recipe to get inspired on how to mix things up! To keep your BBQ chicken salad fresh, store it in the fridge. Use airtight containers. This helps keep the flavors and textures intact. You can also separate the chicken from the salad if you prefer. For reheating BBQ chicken, place it in a microwave-safe dish. Heat it for short intervals, about 30 seconds at a time. Stir it in between to ensure even heating. You want it warm, not hot, to keep the chicken juicy. You can safely eat your prepared salad for up to three days. After that, the greens may wilt and lose their crunch. If you want to keep it longer, consider freezing some components. You can freeze the BBQ chicken for up to three months. Just make sure to package it well in freezer bags. The salad greens and toppings should stay in the fridge, as freezing changes their texture. For a full recipe on how to make this delicious dish, check the [Full Recipe]. It takes about 15 minutes to prep and 15 minutes to cook. So, in total, you’ll need around 30 minutes. This quick time makes it perfect for busy days. Yes, you can prepare this salad ahead of time! Just keep the salad and chicken separate until you’re ready to eat. This way, the greens stay fresh and crisp. You can store the chicken in the fridge for up to three days. When you are ready, mix them together for a tasty meal. If you want to swap out BBQ sauce, you can try teriyaki sauce for a sweet twist. Ranch dressing also works well if you prefer something creamy. Each option gives a different flavor, making your salad fun and unique. To make this recipe gluten-free, choose a gluten-free BBQ sauce. Many brands offer tasty options. Also, ensure your tortilla chips are gluten-free. This way, you can enjoy this dish without worry! This blog post detailed how to create tasty BBQ chicken salad bowls. You learned about key ingredients, from grilled chicken to colorful salad greens. We discussed step-by-step instructions for preparing and assembling the salad, along with cool tips for flavor and presentation. You also discovered variations for ingredients, sauces, and serving suggestions. Now, you can enjoy these bowls at home. Try new flavors and enjoy your meals. With simple swaps, your salad will always be fresh and fun.](https://dishtreats.com/wp-content/uploads/2025/06/ab007e5c-1328-4456-8678-35604ca2185e-768x768.webp)

![- 8 oz linguine or spaghetti - 1 lb large shrimp, peeled and deveined - 4 cloves garlic, finely minced - 1/4 cup extra-virgin olive oil - 1 teaspoon red pepper flakes - 1/2 cup fresh parsley, finely chopped - 1 lemon, juiced and zested - Salt and freshly ground black pepper to taste - Grated Parmesan cheese (optional) To make Quick Garlic Shrimp Pasta, you need fresh and quality ingredients. The base of this dish is linguine or spaghetti, which holds the sauce nicely. I love using large shrimp because they cook quickly and have a great flavor. Garlic is a must here. It adds a rich, aromatic taste that makes the dish special. Next, the olive oil brings everything together. I always choose extra-virgin for its fresh and fruity flavor. Red pepper flakes add that perfect kick. Adjust the amount to fit your spice level. Fresh parsley brightens the dish, making it look vibrant. The lemon juice and zest add a zesty touch that balances the richness. Don’t forget salt and pepper to enhance all the flavors. If you want to make it extra savory, sprinkle some grated Parmesan cheese on top. These ingredients work together to create a dish that is simple yet full of flavor. For the full recipe, refer to the section above. - Bring a large pot of water to a boil. - Add salt to the water for flavor. - Cook the pasta according to the package instructions. - Reserve about 1 cup of the pasta water before draining. - Heat olive oil in a large skillet over medium heat. - Add minced garlic and red pepper flakes. - Sauté the garlic for about 30 seconds until fragrant. - Introduce the shrimp into the skillet. - Season the shrimp with salt and black pepper. - Cook for about 2-3 minutes until the shrimp turn pink and opaque. - Toss the cooked pasta into the skillet with the shrimp. - Add the reserved pasta water for creaminess. - Pour in lemon juice and zest for brightness. - Fold in the chopped fresh parsley for a fresh taste. - Taste and adjust seasoning if needed. - Plate the pasta into individual bowls. - Garnish with extra parsley and a lemon wedge. - Serve warm and enjoy this dish. For detailed cooking steps, check the Full Recipe. To get the best garlic taste, avoid burning it. When you heat garlic, it should become fragrant but not brown. Burnt garlic can taste bitter and ruin your dish. Start with medium heat and watch it closely. If you like spice, adjust the red pepper flakes. Add more for heat or less for mildness. Taste as you go, and find what suits you best. Cooking pasta to al dente is key. This means the pasta should be firm but not hard. Overcooked pasta can turn mushy and lose its bite. Before draining your pasta, save some pasta water. This starchy water helps the sauce stick and adds flavor. It’s a simple trick that makes a big difference! For side dishes, consider a fresh salad or garlic bread. These pair well with the pasta and add balance to your meal. When it comes to wine, a crisp white wine works best. Look for a Sauvignon Blanc or a Pinot Grigio. These wines enhance the garlic flavors and make the meal feel special. {{image_4}} You can switch up the pasta to fit your needs. Try whole wheat or gluten-free pasta. Both options work well with this dish and add a different taste. Fresh herbs can change the flavor too. Use basil or chives for a fresh twist. They brighten up the shrimp pasta and add a new layer of taste. You can explore other seafood options if you want. Scallops and calamari both taste great in this dish. They offer a nice change from shrimp while keeping the dish light. For a vegetarian version, use mushrooms instead of shrimp. Mushrooms have a meaty texture and soak up flavors well. This swap keeps the dish satisfying without meat. Want a richer sauce? Adding cream can make your dish more decadent. It gives the pasta a smooth texture that many love. You can also add cherry tomatoes for freshness. They pop with flavor and add color to your plate. This small change can elevate your garlic shrimp pasta experience. For a full recipe, check out the details above. To store leftover pasta, place it in an airtight container. Make sure to let it cool first. This helps prevent sogginess. You can keep it in the fridge for up to three days. After that, the shrimp may lose its quality. Always check for any off smells or changes in color before eating. When reheating pasta, use a skillet. This keeps the dish from getting too dry. Add a splash of water or olive oil to help. Heat it on low, stirring gently. Avoid using the microwave if you can. It can make the shrimp rubbery. Always taste a little before serving to ensure it's warm and flavorful. Yes, you can freeze garlic shrimp pasta! First, let the dish cool completely. Then, place it in a freezer-safe container. Leave some space for expansion. You can freeze it for up to two months. To thaw, move it to the fridge overnight. Reheat it on the stove, adding a bit of water or oil to restore moisture. You can make Quick Garlic Shrimp Pasta in about 30 minutes. - Prep time: 10 minutes - Cooking time: 20 minutes Yes, you can use frozen shrimp. Just thaw them first. - To thaw shrimp, place them in cold water for about 15-20 minutes. - Ensure shrimp are peeled and deveined before cooking. You can pair this dish with several sides: - A fresh garden salad - Garlic bread for dipping - Steamed vegetables like broccoli or asparagus To reduce the spice, you can: - Use fewer red pepper flakes or omit them. - Add more olive oil or butter to mellow the heat. I recommend using linguine or spaghetti. - These pasta types hold the sauce well. - You can also try fettuccine for a different texture. For the full recipe, refer to the [Full Recipe]. Quick Garlic Shrimp Pasta is simple and tasty. You learned about key ingredients, cooking steps, and useful tips. I focused on making garlic and shrimp shine while keeping it easy. You can swap out ingredients, store leftovers, and reheat without losing flavor. Try different flavors to make it your own. Follow these steps, and enjoy a delicious meal any day of the week. Cooking should be fun and satisfying, so gather your ingredients and start creating!](https://dishtreats.com/wp-content/uploads/2025/06/6901a993-fcd3-4db1-9297-5790b6f94dfa-768x768.webp)


![To make a Banana Berry Protein Shake, you need the right ingredients. Here’s what to gather: - 1 ripe banana, sliced - 1 cup mixed berries (strawberries, blueberries, raspberries) - 1 cup unsweetened almond milk (or your preferred milk) - 1 scoop vanilla protein powder - 1 tablespoon creamy almond butter - 1 tablespoon chia seeds (optional) - 1 teaspoon honey or maple syrup - Ice cubes (optional for chill) Each ingredient plays a key role in taste and nutrition. The banana adds natural sweetness and creaminess. Mixed berries bring a burst of flavor and antioxidants. Almond milk keeps it light, while protein powder helps build muscle. Almond butter adds healthy fats, and chia seeds offer extra fiber. Honey or maple syrup gives a touch more sweetness. If you like it cold, ice cubes are great! Gather all these items, and you're ready to blend a tasty and nutritious sip. Check the [Full Recipe] for more details on how to combine them. 1. Prepping the Ingredients Start by getting all your ingredients ready. Peel the banana and slice it into rounds. Rinse the mixed berries in cold water. This step ensures your shake tastes fresh and clean. 2. Blending the Banana and Berries Take your blender and add the sliced banana and mixed berries. These fruits give your shake a sweet and fruity flavor. The banana also adds creaminess. 3. Adding Sweeteners and Ice Next, pour in the almond milk and add the scoop of vanilla protein powder. For extra richness, add the creamy almond butter. If you want it sweeter, drizzle in honey or maple syrup. If you like your shake cold, toss in some ice cubes. 4. Blending to Perfection Blend all the ingredients on high speed. Keep blending until the mixture is smooth and creamy. If needed, stop the blender and scrape down the sides. This helps mix everything well. 5. Final Adjustments and Serving Taste your shake. If it needs more sweetness, add more honey or syrup. Blend for a few more seconds. Once ready, pour your shake into a tall glass. For a nice touch, garnish with whole berries and a sprinkle of chia seeds. Follow these steps for a quick and tasty Banana Berry Protein Shake. Check the Full Recipe for more details! Choosing the Best Ingredients Choosing ripe, fresh ingredients makes a big difference. Use a banana that is soft but not brown. This gives your shake a creamy texture. For berries, mix a few types. Strawberries, blueberries, and raspberries all work well together. They add flavor and vibrant color. Almond milk is a great choice, but feel free to use any milk you like. A scoop of vanilla protein powder boosts nutrition and taste. For extra creaminess, add almond butter. Adjusting Sweetness to Taste Not everyone likes the same level of sweetness. Start with one teaspoon of honey or maple syrup. Blend your shake, then taste it. If you want it sweeter, add more honey or syrup. Blend again for a few seconds. This way, you control the sweetness just right for you. Achieving the Right Consistency The texture of your shake matters. If it’s too thick, add more almond milk. If you want it thicker, add ice cubes or more banana. Blend until smooth. If needed, stop the blender to scrape down the sides. Make sure everything is mixed well. The perfect shake should be creamy, not runny. Enjoy your shake right away for the best flavor and texture. For the full recipe, check out the detailed steps above. {{image_4}} You can make this shake your own by changing a few ingredients. Here are some fun ways to do that. - Using Different Protein Powder Flavors: You do not have to stick with vanilla. Try chocolate, strawberry, or even peanut butter protein powder. Each adds a unique twist to the shake. - Swapping the Milk Options: While almond milk works great, feel free to use any milk you like. Cow's milk, soy milk, or oat milk all blend well. Each milk type changes the taste and creaminess. - Adding Other Fruits or Nut Butters: Mix in a scoop of peanut butter for a nutty flavor. You can also try adding spinach for more nutrients without changing the taste. Other fruits, like mango or pineapple, can bring a tropical vibe to the shake. Explore these variations to make your Banana Berry Protein Shake even more exciting. For the full recipe, check out the main article. Best Practices for Refrigeration After making your shake, store it in a sealed container. Glass jars work well. Keep it in the fridge. This will keep it fresh for up to 24 hours. Shake it well before drinking again. The ingredients may settle. Freezing Suggestions for Longer Storage If you want to save your shake for later, freeze it! Pour the shake into ice cube trays. Once frozen, pop the cubes into a freezer bag. This way, you can blend a quick smoothie later. Just blend the cubes with a little extra milk for a quick treat. Reheating Tips for Enjoyment You can’t really heat a protein shake. It’s best enjoyed cold. If you want a warm drink, try making a warm smoothie instead. Blend your fruits with warm milk. This makes a nice cozy drink. Don't forget to check out the full recipe for more details on making your shake! Can I make this shake without protein powder? Yes, you can skip protein powder. Use extra almond butter or Greek yogurt instead. This keeps the shake creamy and adds more protein naturally. Are there vegan options for the ingredients? Absolutely! Use almond milk or oat milk for the base. Choose plant-based protein powder, and all your ingredients will be vegan-friendly. How can I make this shake higher in protein? To boost protein, add more protein powder or include Greek yogurt. You can also mix in seeds like hemp or flax for extra protein and nutrition. What are the health benefits of a banana berry shake? This shake is rich in vitamins and minerals. Bananas offer potassium, while berries are full of antioxidants. Protein supports muscle growth and recovery. It’s a great snack or meal replacement. For the full recipe, check out the details above! In this blog post, we covered how to make a Banana Berry Protein Shake. We explored key ingredients, preparation steps, and tips for the best shake. You learned how to customize it and store any leftovers. This shake is tasty, healthy, and easy to make. It can give you energy for your day. I hope you enjoy making this shake as much as I do!](https://dishtreats.com/wp-content/uploads/2025/06/30fc0a4a-a0e9-4093-9184-98c8d7d33465-768x768.webp)