Strawberry Chocolate Chip Scones Tasty and Simple Treat

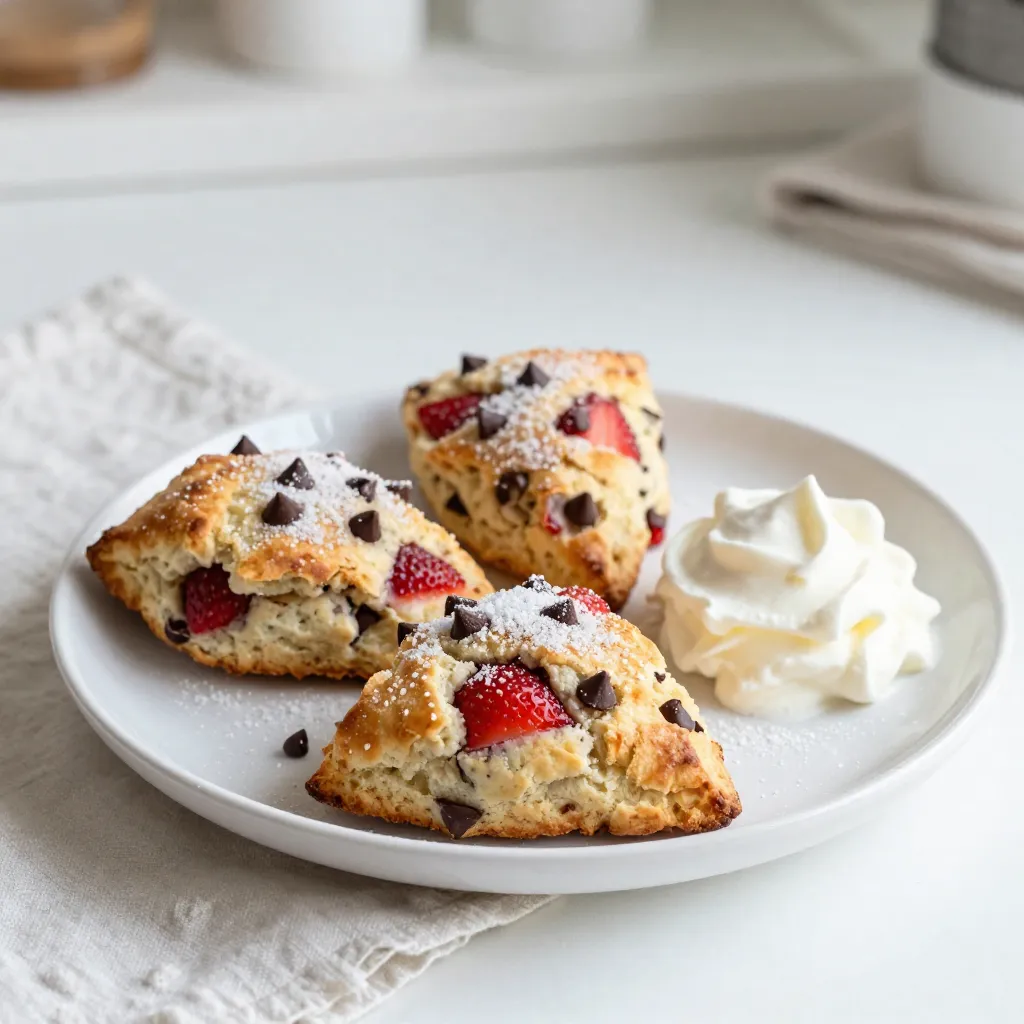
Are you ready for a delicious treat that’s easy to make? Strawberry Chocolate Chip Scones offer a perfect blend of sweet strawberries and rich chocolate. They are light, flaky, and sure to brighten your morning. In this guide, I’ll show you how to whip up these tasty scones using simple ingredients and a few easy steps. Let’s dive into the world of baking and create a treat you’ll love to share!
Why I Love This Recipe
- Delicious Flavor Combination: The blend of fresh strawberries and rich chocolate chips creates a delightful balance of sweetness and tartness in every bite.
- Easy to Make: This scone recipe is straightforward and requires minimal ingredients, making it perfect for both novice and experienced bakers.
- Perfect for Any Occasion: Whether for breakfast, brunch, or an afternoon treat, these scones are versatile and sure to impress guests.
- Beautiful Presentation: The golden-brown scones topped with coarse sugar and served with fresh strawberries make for an inviting and visually appealing dish.
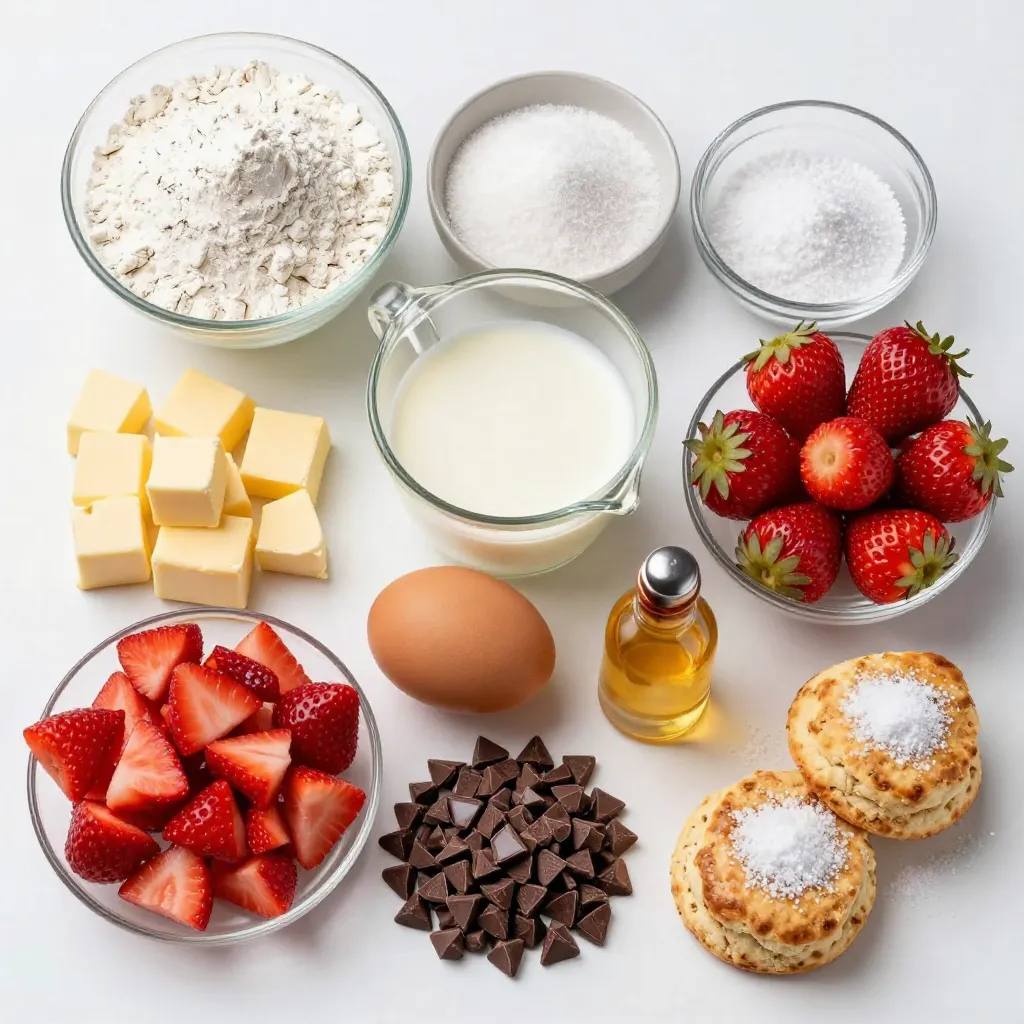
Ingredients
List of Key Ingredients
- 2 cups all-purpose flour
- 1/4 cup granulated sugar
- 2 teaspoons baking powder
- 1/2 teaspoon salt
- 1/2 cup cold unsalted butter, diced into small cubes
- 1/2 cup heavy cream
- 1 large egg, at room temperature
- 1 teaspoon vanilla extract
- 1 cup fresh strawberries, hulled and diced into small pieces
- 3/4 cup semisweet chocolate chips
- 1 tablespoon coarse sugar for topping
When I make these scones, I use fresh and high-quality ingredients. Each one plays a key role. The flour provides the base, while sugar adds sweetness. Baking powder makes them rise. Salt enhances the flavors and balances the sweetness.
Using cold butter is crucial. It creates a flaky texture. The heavy cream brings moisture to the dough. The egg helps bind everything together. Vanilla adds a warm flavor that pairs well with chocolate and strawberries.
Fresh strawberries bring a burst of flavor and color. They add moisture and a fruity zing. Semisweet chocolate chips give a rich sweetness that complements the strawberries. Lastly, coarse sugar on top gives a nice crunch.
Optional Enhancements
- Fresh herbs like basil or mint can uplift the flavor.
- Adding citrus zest, like lemon or orange, brightens the scone.
- You can also swap sugar for honey or maple syrup.
- Use almond flour or oat flour for gluten-free options.
These enhancements allow you to customize the recipe. Feel free to experiment based on your taste. Use what you have on hand to create your perfect scone.

Step-by-Step Instructions
Preparation Overview
- Preheat your oven to 400°F (200°C). This step is key for a good bake.
- Line a baking sheet with parchment paper. This helps prevent the scones from sticking.
- In a large bowl, mix 2 cups of all-purpose flour, 1/4 cup of granulated sugar, 2 teaspoons of baking powder, and 1/2 teaspoon of salt. Whisk these dry ingredients together well.
Making the Dough
- Add 1/2 cup of cold unsalted butter, diced into small cubes, to the flour mixture.
- Use a pastry cutter or your fingers to mix the butter into the flour. You want a crumbly texture. This helps the scones become light and flaky.
- In a separate bowl, whisk together 1/2 cup of heavy cream, 1 large egg, and 1 teaspoon of vanilla extract. Mix until smooth.
Combining and Shaping
- Pour the wet mixture into the dry ingredients. Gently stir until just combined. Be careful not to overmix.
- Fold in 1 cup of diced fresh strawberries and 3/4 cup of semisweet chocolate chips. Make sure they are evenly mixed.
- Transfer the dough onto a floured surface. Pat it into a round disc about 1-inch thick.
- Use a sharp knife to cut the disc into 8 wedges. Place the wedges on the prepared baking sheet. Leave space between each scone.
- Sprinkle 1 tablespoon of coarse sugar on top of each scone for a nice finish.
- Bake the scones for 15 to 20 minutes. They should be golden brown at the edges. Watch them closely as they bake!
- Once done, cool the scones on a wire rack for a few minutes. Enjoy them warm!
Tips & Tricks
Ensuring Light and Flaky Scones
To make light and flaky scones, use cold butter. Cold butter makes small pockets in the dough. This helps create a tender texture. Cut the butter into the flour until it looks like coarse crumbs. This step is key for great scones.
Be careful not to overmix the dough. Overmixing can lead to tough scones. Mix until just combined. This keeps your scones soft and fluffy.
Perfect Baking Techniques
Watch the bake time closely. You want golden edges for perfect scones. Depending on your oven, bake for 15 to 20 minutes. Check them at the 15-minute mark to avoid burning.
Let the scones cool on a wire rack. This helps them keep a nice texture. Cooling allows steam to escape, keeping them fluffy.
Serving Suggestions
Serve your scones warm with whipped cream or fruit jams. A dollop of whipped cream adds a rich touch. You can also use your favorite jam for a sweet burst of flavor.
Pair the scones with tea or coffee. A hot drink complements the sweet scones well. Enjoy them as a delightful breakfast or snack!
Pro Tips
- Use Cold Ingredients: Ensure your butter and cream are cold to achieve the best texture for your scones. This helps create a flaky and tender result.
- Don’t Overmix: Mix the dough just until combined. Overmixing can lead to dense scones, so be gentle when combining the wet and dry ingredients.
- Fresh Strawberries: Use fresh strawberries for the best flavor and texture. Frozen strawberries can make the dough too wet and affect the baking process.
- Watch the Baking Time: Keep an eye on the scones towards the end of baking. They should be golden brown at the edges, and a few minutes can make a significant difference.
Variations
Seasonal Fruit Swaps
You can change the fruit to suit the season. Blueberries and raspberries work great in this recipe. They add a fresh taste and look beautiful. If you find a fruit in season, give it a try! You may discover a new favorite. Just make sure to chop any larger fruits into small pieces. This helps the dough mix evenly.
Different Chocolate Options
Chocolate chips can vary too! You can choose dark chocolate instead of semisweet. Dark chocolate gives a richer taste. If you prefer something sweeter, go for white chocolate chips. Each type of chocolate brings a unique flavor to the scones. Feel free to mix and match your chocolate choices for fun experiments.
Gluten-Free Alternatives
If you need gluten-free scones, you can use gluten-free flour mixes. These mixes are easy to find in stores. They can replace regular flour in a 1:1 ratio. Just check the packaging for any special instructions. Your scones will still taste delicious and fluffy! Enjoy all the flavors without the gluten.
Storage Info
Storing Leftover Scones
To keep your scones fresh, store them in an airtight container. This method helps maintain their soft texture. You can leave them at room temperature for up to two days. If you want to keep them longer, consider freezing.
Freezing Scones
You can freeze both pre-baked and baked scones. For pre-baked scones, shape the dough and place the wedges on a baking sheet. Freeze them for about an hour. Once frozen, transfer them to a zip-lock bag. For baked scones, let them cool completely before wrapping in plastic wrap. Then place them in a freezer bag. To thaw, leave them at room temperature for a few hours. Reheat baked scones in the oven at 350°F for about 10 minutes for a fresh taste.
FAQs
How do I know when scones are done baking?
Look for a few signs. The scones should turn golden brown around the edges. You can also lightly tap the top; it should feel firm. If they sound hollow when you knock on the bottom, they are done.
Can I make the dough ahead of time?
Yes, you can prepare the dough in advance. Mix the dry and wet ingredients, then combine. Wrap the dough in plastic wrap and refrigerate it for up to 24 hours. When you are ready, shape and bake the scones as usual.
What’s the best way to warm up leftover scones?
To warm leftover scones, preheat your oven to 350°F (175°C). Place the scones on a baking sheet lined with parchment. Heat them for about 5 to 10 minutes. This method keeps them fresh and tasty. Enjoy with a bit of butter for added flavor.
This blog post covered all the important steps to make delicious scones. You learned about the key ingredients and optional enhancements that can make your treats unique. We discussed preparation, dough-making, and shaping tips to ensure your scones are light and flaky.
Remember to try different fruits, chocolates, and gluten-free options for variety. Finally, store leftovers properly or freeze them to keep them fresh. With these tips, you’ll bake perfect scones every time. Enjoy your baking adventur

Strawberry Chocolate Chip Scones
Ingredients
- 2 cups all-purpose flour
- 1/4 cup granulated sugar
- 2 teaspoons baking powder
- 1/2 teaspoon salt
- 1/2 cup cold unsalted butter, diced into small cubes
- 1/2 cup heavy cream
- 1 large egg, at room temperature
- 1 teaspoon vanilla extract
- 1 cup fresh strawberries, hulled and diced into small pieces
- 3/4 cup semisweet chocolate chips
- 1 tablespoon coarse sugar for topping
Instructions
- Preheat your oven to 400°F (200°C) and line a baking sheet with parchment paper to prevent sticking.
- In a large mixing bowl, combine the all-purpose flour, granulated sugar, baking powder, and salt. Whisk these dry ingredients together until evenly mixed.
- Add the cold diced butter to the flour mixture. Using a pastry cutter or your fingertips, quickly work the butter into the flour until the mixture achieves a texture resembling coarse crumbs.
- In a separate bowl, whisk together the heavy cream, egg, and vanilla extract until the mixture is smooth and well combined.
- Carefully pour the wet mixture into the dry ingredients. Gently mix together until just combined – avoid overmixing to keep the scones tender.
- Gently fold in the diced strawberries and semisweet chocolate chips, ensuring they are evenly distributed throughout the dough without overworking it.
- Transfer the dough onto a lightly floured surface and gently pat it into a round disc about 1-inch thick.
- Using a sharp knife, cut the disc into 8 equal wedges. Place the wedges onto the prepared baking sheet, ensuring there is space between each scone for proper baking.
- Generously sprinkle coarse sugar over the top of each scone to enhance sweetness and create a lovely texture when baked.
- Bake the scones in the preheated oven for 15 to 20 minutes, or until they are golden brown at the edges and cooked through.
- Once baked, remove the scones from the oven and allow them to cool on a wire rack for a few minutes before serving.


![- 1 cup all-purpose flour - 1 cup whole wheat flour - 1 tablespoon baking powder - 1/2 teaspoon baking soda - 1/4 teaspoon salt I love using both all-purpose and whole wheat flour. The all-purpose flour gives the muffins a light texture. The whole wheat adds a nutty flavor and a bit of extra fiber. Mixing these flours helps balance taste and nutrition. - 1 cup plain Greek yogurt - 1/2 cup granulated sugar - 1/4 cup honey - 2 large eggs - 1 teaspoon vanilla extract - Zest of 1 lemon - Juice of 1 lemon Greek yogurt is key for moisture. It makes the muffins rich and creamy. The combination of sugar and honey gives a nice sweetness. The eggs help bind everything together. Lemon juice and zest brighten the flavor, making each bite fresh and zesty. - 1 cup fresh or frozen blueberries - 2 tablespoons melted coconut oil or butter Blueberries are the star of this recipe. They burst with flavor and add a great texture. You can use fresh or frozen. If you use frozen, they still work well! The melted coconut oil or butter adds richness, but you can skip it if you prefer a lighter muffin. You can find the full recipe for these delightful muffins online. Happy baking! First, preheat your oven to 375°F (190°C). This step is key for even baking. Next, prepare your muffin tin by lining it with paper liners or greasing the cups. This helps with easy muffin removal later. Now, let’s mix the dry ingredients. In a large bowl, combine: - 1 cup all-purpose flour - 1 cup whole wheat flour - 1 tablespoon baking powder - 1/2 teaspoon baking soda - 1/4 teaspoon salt Whisk these dry ingredients well. Make sure there are no lumps. In another bowl, add the wet ingredients. You will need: - 1 cup plain Greek yogurt - 1/2 cup granulated sugar - 1/4 cup honey - 2 large eggs - 1 teaspoon vanilla extract - Zest of 1 lemon - Juice of 1 lemon Whisk these until smooth. This helps blend all the flavors together. Now, it’s time to combine the two mixtures. Gently fold the wet ingredients into the dry ones using a spatula. Stir slowly. This helps keep your muffins light and fluffy. Don’t overmix! Overmixing makes the muffins dense. Once you see a few floury spots, stop mixing. Next, it’s time for the blueberries. Add: - 1 cup fresh or frozen blueberries - 2 tablespoons melted coconut oil or butter Fold these in gently. You want to keep the blueberries whole for bursts of flavor. Now, scoop the batter into your prepared muffin cups. Fill each cup about two-thirds full. This allows space for the muffins to rise. Place the muffin tin in your preheated oven. Bake for 18-20 minutes. To check for doneness, insert a toothpick into the center of a muffin. If it comes out clean, they are ready! After baking, let the muffins cool in the tin for about 5 minutes. This helps them set. Then, move them to a wire rack to cool completely. These steps will lead you to a batch of delicious Blueberry Lemon Yogurt Muffins. For the complete recipe, see [Full Recipe]. To get the best muffins, do not overmix the batter. Mixing too much can make the muffins tough. When you mix, just combine until you see no dry flour. This way, your muffins stay light and fluffy. When folding in the blueberries, do it gently. If you stir too hard, the berries will burst and color the batter. Just use a spatula and fold them in lightly. This keeps the berries whole and gives you lovely pops of flavor in each bite. You can add even more flavor to your muffins. Consider adding lemon zest for a bright taste. You might like to include nuts, like walnuts or pecans, for crunch. When it comes to blueberries, fresh berries taste great, but frozen ones work too. If you use frozen berries, do not thaw them first. This helps keep your batter cold, giving you a better rise. Using the right tools helps a lot. A non-stick muffin tin is your best bet. You can also use paper liners for easy cleanup. For mixing, a large bowl works well. I suggest a sturdy spatula for folding the batter. This combo makes mixing fun and easy. With the right tools, your baking will be smooth and enjoyable. For the full recipe, check out the details above. {{image_4}} You can make these muffins gluten-free. Simply replace the all-purpose flour with a gluten-free flour blend. Many blends work well, so pick one you like. Just ensure it has a good balance of starches and protein to mimic regular flour. This way, you can enjoy the same tasty muffins without the gluten. Want to mix it up? Try adding chocolate chips or walnuts for a delightful twist. They add a nice crunch and richness. You can also use other fruits like raspberries or cranberries. They pair well with the lemon and blueberry flavors. Each fruit adds its own unique taste, making each batch special. You can switch up the yogurt too. Use flavored yogurts like vanilla or lemon for extra taste. If you prefer dairy-free options, there are many great alternatives available. Look for coconut or almond-based yogurts. They keep the muffins moist and tasty, making it fun to experiment with flavors. For the full recipe, check out the details above. To keep your blueberry lemon yogurt muffins fresh, store them in an airtight container. This will keep them moist and tasty. You can keep them at room temperature for up to three days. If you want them to last longer, put them in the fridge. They can stay fresh for about a week in the refrigerator. Freezing muffins is a great way to keep them longer. To freeze, let the muffins cool completely. Then, wrap each muffin in plastic wrap. Place them in a freezer bag or container. This method helps prevent freezer burn. You can enjoy them for up to three months. When you're ready to eat a frozen muffin, take it out and let it sit at room temperature for about 30 minutes. For a warm treat, heat it in the microwave for 15-20 seconds. This will make it soft and delicious again. Blueberry lemon yogurt muffins are perfect for any time of day. I love having them for breakfast or as a snack. They also make a great dessert. To make it even better, try pairing these muffins with yogurt or a drizzle of honey. This adds a nice touch and enhances the flavor. Enjoy your muffins fresh from the oven or at room temperature! If you want to explore more recipes, check out the Full Recipe for even more delicious ideas. Blueberry lemon yogurt muffins stay fresh for about 2 to 3 days at room temperature. Keep them in an airtight container to maintain their moisture. If you store them in the fridge, they can last for up to a week. Just make sure to seal them well to prevent them from drying out. Yes, you can easily swap ingredients. If you want less sugar, use less granulated sugar or honey. For flour, you can mix all-purpose flour with whole wheat flour or use a gluten-free blend. You can also use flavored yogurt instead of plain yogurt for a fun taste twist. If your muffins turn out dense, check your mixing technique. Overmixing can cause this issue. Make sure to mix just until combined. You can also try adding a bit more baking powder or soda to lighten the texture. Lastly, ensure your ingredients are fresh, especially baking powder. To make these muffins healthier, reduce the sugar by a third. You can also replace some all-purpose flour with whole wheat flour to add fiber. Adding oats or ground flaxseed can boost nutrition without changing the flavor much. Enjoy these muffins while keeping health in mind! For the full recipe, refer to the earlier section. This blog post covered how to make delicious Blueberry Lemon Yogurt Muffins. We explored ingredients, step-by-step instructions, and tips for perfect texture. Variations like gluten-free options and different mix-ins add fun twists. Proper storage helps keep your muffins fresh. These muffins are a tasty way to enjoy healthy snacks or breakfast. Remember, baking is about having fun and experimenting. Enjoy every bite!](https://dishtreats.com/wp-content/uploads/2025/06/d36ee35c-287f-4b25-b661-333d5a68e192-768x768.webp)


