Strawberry Cheesecake Smoothie Protein Boost Delight

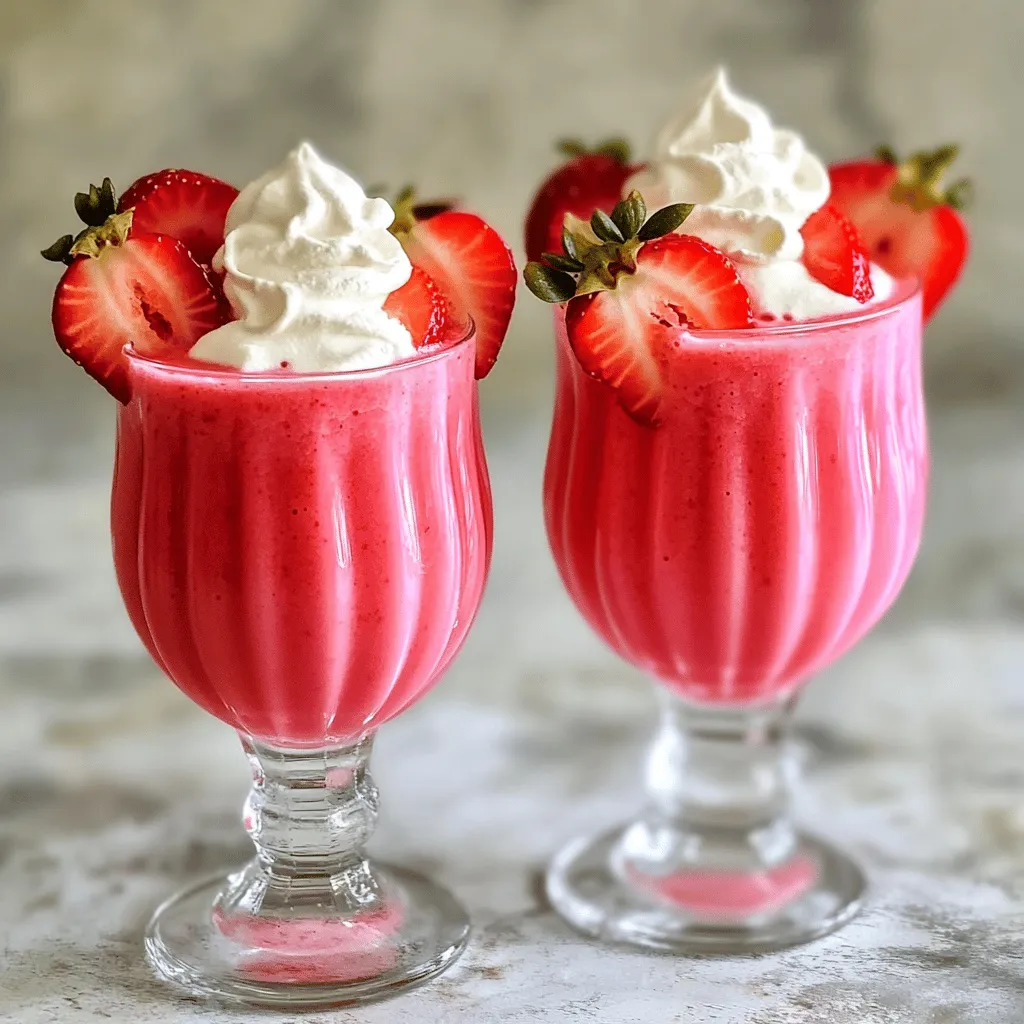
Are you ready to enjoy a delicious and healthy treat? The Strawberry Cheesecake Smoothie Protein Boost Delight is here to satisfy your cravings while keeping you energized. With fresh strawberries, creamy yogurt, and a boost of protein, this smoothie is not just tasty but also easy to make. Let’s dive into the ingredients and steps that will bring this delightful drink into your kitchen!
Ingredients
Main Ingredients
- 1 cup fresh strawberries, hulled and roughly chopped
- 1/2 cup vanilla-flavored Greek yogurt
- 1/2 cup almond milk (or your preferred milk alternative)
- 1 scoop vanilla protein powder
Optional Ingredients
- 2 tablespoons cream cheese, softened to room temperature
- 1 tablespoon honey (or maple syrup for a vegan option)
- 1/4 teaspoon pure vanilla extract
- A pinch of ground cinnamon
- Ice cubes (optional, for a thicker texture)
To create the best Strawberry Cheesecake Smoothie, use fresh ingredients. The strawberries bring a bright flavor. Greek yogurt adds creaminess and extra protein. Almond milk keeps it light and smooth. The vanilla protein powder packs in more protein for your day.
You can add cream cheese for a richer taste. Honey or maple syrup sweetens the mix. Pure vanilla extract enhances the flavors. A pinch of cinnamon gives a warm, cozy note. Ice cubes help thicken the smoothie if you prefer a denser texture.
Make sure to use the best quality ingredients. Fresh strawberries will always taste better. Choose a yogurt that’s creamy and flavorful. This will make your smoothie a true delight!
Step-by-Step Instructions
Preparing the Ingredients
First, you need to hull and chop the strawberries. Hulling means removing the green tops. Once you have done that, chop the strawberries into smaller pieces. This helps them blend better. Next, measure out the yogurt, almond milk, and protein powder. You will need 1/2 cup of yogurt, 1/2 cup of almond milk, and 1 scoop of protein powder.
Blending Process
Now it’s time to assemble your blender. Make sure it’s clean and ready to go. Start by adding the hulled strawberries, yogurt, almond milk, and protein powder to the blender. Next, add the softened cream cheese, honey, vanilla extract, and a pinch of cinnamon. Blend everything on high speed. You want a smooth and creamy texture. If you like it thicker, toss in a few ice cubes and blend again.
Final Touches
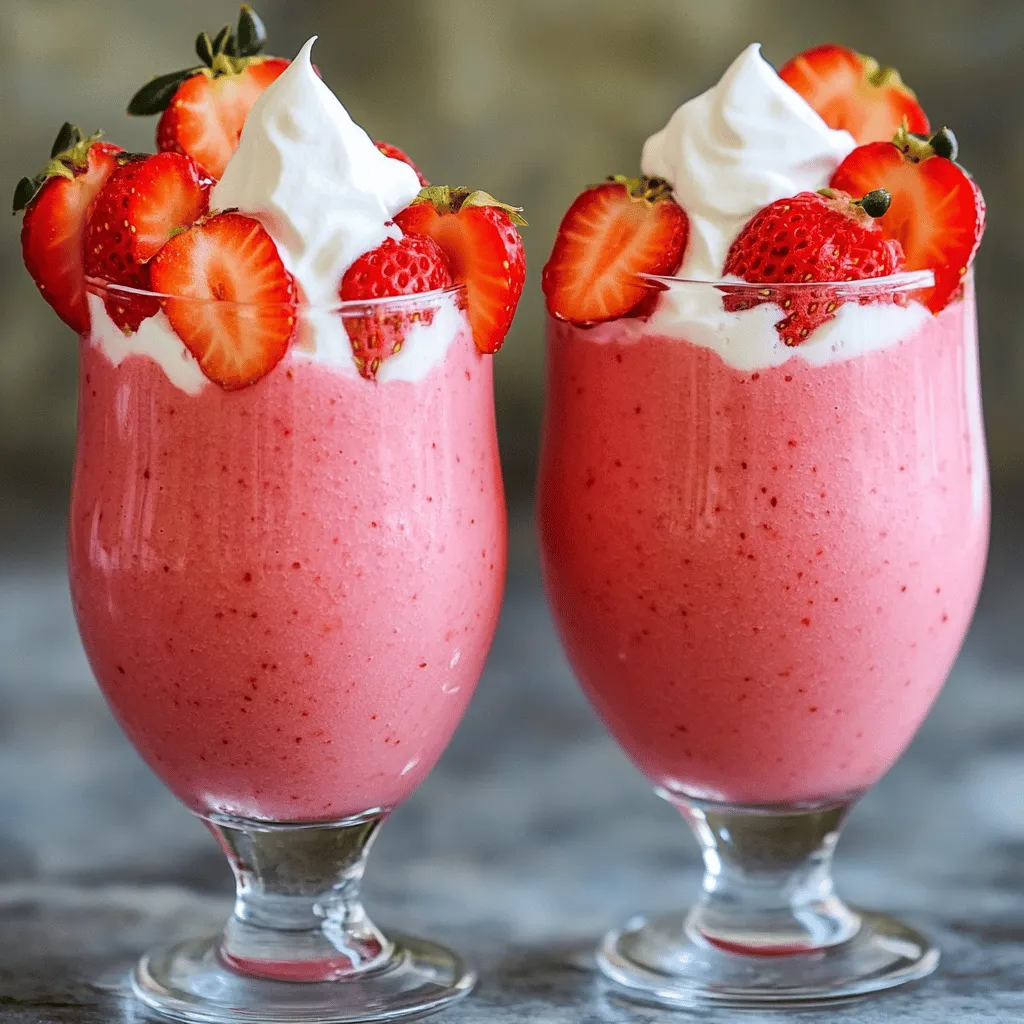
After blending, check the sweetness of your smoothie. If you want it sweeter, add more honey or maple syrup and blend once more. Now, pour the smoothie into glasses. For a nice touch, you can garnish with fresh strawberries or a dollop of whipped cream. This adds a lovely finish to your delightful smoothie!
Tips & Tricks
Ensuring Creaminess
To make your strawberry cheesecake smoothie super creamy, start with soft ingredients. Use room-temperature cream cheese and Greek yogurt. These ingredients blend together easily, giving you that smooth texture. When blending, start on low speed. Gradually increase it to high. This method helps mix everything well without splattering.
Sweetness Adjustments
Choosing sweeteners is fun! You can use honey or maple syrup. Both add a nice touch of sweetness. During prep, taste your smoothie. If it needs more sweetness, just add a bit more honey or syrup. Blend again to mix it well.
Presentation Suggestions
For a beautiful display, use clear glasses. This lets you show off the lovely pink color of the smoothie. You can garnish with fresh sliced strawberries. A sprinkle of crushed graham crackers adds a nice touch, making it look like cheesecake. Enjoy serving this delightful treat!

Variations
Dairy-Free Options
You can easily make this smoothie dairy-free. For yogurt, swap Greek yogurt with a vegan yogurt, like coconut or almond. For cream cheese, use a vegan cream cheese made from nuts or tofu. This keeps the creamy texture while being plant-based. Use almond milk or coconut milk to maintain a rich flavor without dairy.
Flavor Customizations
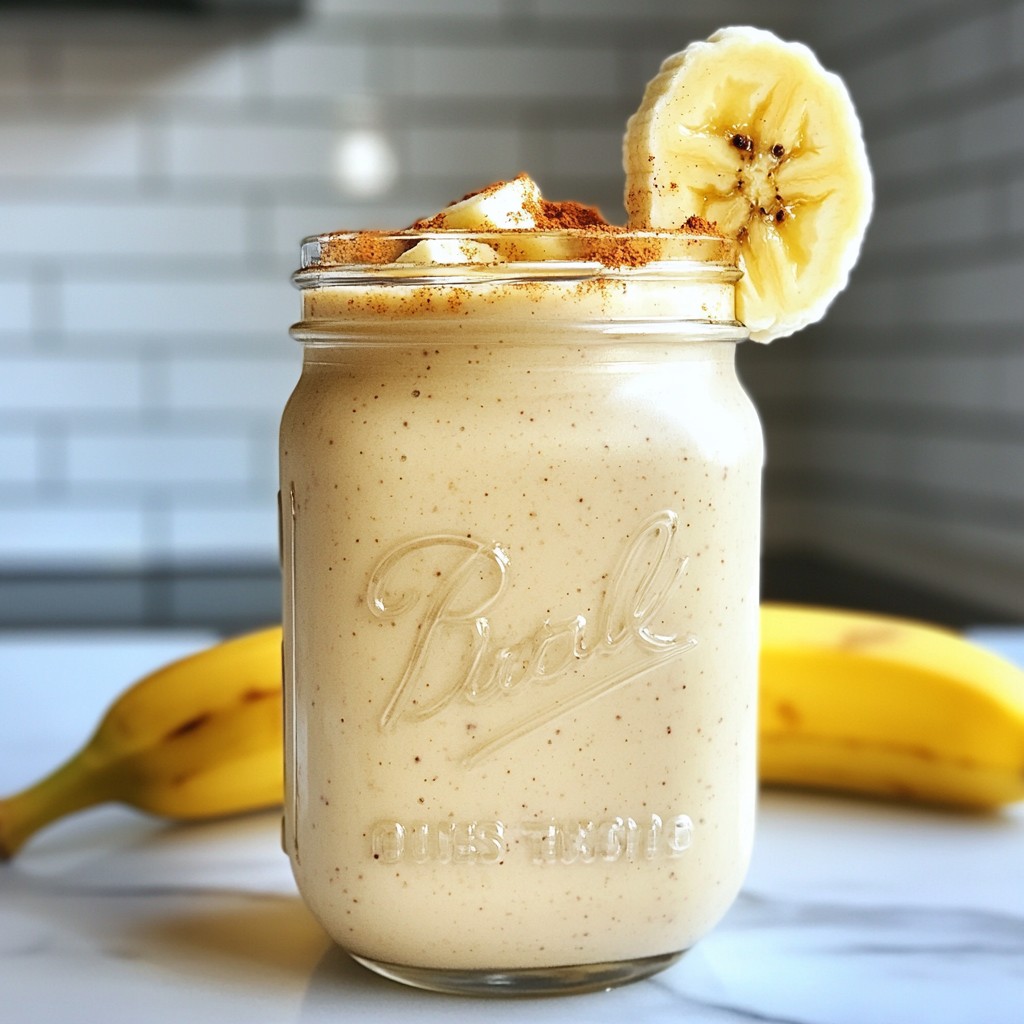
Want to change up the taste? Add other fruits! Bananas give it a creamy feel, and blueberries add a fresh burst. You can also play with spices. Try adding a bit of nutmeg or extra cinnamon for warmth. A splash of almond or coconut extract can deepen the flavor even more.
Protein Boosts
To up the protein, you can swap vanilla protein powder for chocolate or a plant-based option. Add chia seeds for extra fiber and omega-3s. Oats are another great choice; they give your smoothie a thicker texture and more staying power. Just blend them in with the other ingredients for a nutritious boost.
Storage Info
Keeping Smoothies Fresh
To keep your strawberry cheesecake smoothie fresh, store it in the fridge. Use an airtight container. This helps keep the flavors intact and prevents spoilage. The smoothie can stay fresh for about 1-2 days. If you notice separation, just give it a good shake before drinking.
Freezing for Later
You can freeze your smoothie for later use. Pour it into freezer-safe containers, leaving some space at the top. The smoothie can last for about a month in the freezer. To thaw, simply place it in the fridge overnight. For a quick thaw, you can use the microwave on low. After thawing, blend it again to restore its creamy texture.
Best Consumption Practices
For the best taste, enjoy your smoothie within a day of making it. Its flavor and texture are at their peak right after blending. If you have leftovers, consider turning them into smoothie popsicles. Just pour the leftover smoothie into molds and freeze. You’ll have a tasty treat for later!
FAQs
Can I make this smoothie vegan?
Yes, you can easily make this smoothie vegan. Here are some substitutions for dairy ingredients:
- Use coconut yogurt instead of Greek yogurt.
- Replace almond milk with any plant-based milk, like oat or soy milk.
- Swap cream cheese with vegan cream cheese or silken tofu.
- For sweetening, use maple syrup instead of honey.
These changes keep the tasty flavor while making it plant-based.
How can I make this smoothie thicker?
To make this smoothie thicker, try these techniques:
- Add more frozen strawberries instead of fresh ones.
- Include ice cubes while blending for a cold, dense texture.
- Use less almond milk to create a creamier base.
- Consider adding a banana for natural thickness.
Experiment with these tips to find your perfect texture.
Is it possible to prepare this smoothie in advance?
Yes, you can prepare this smoothie in advance. Here are some best practices:
- Blend all ingredients except ice and store in the fridge for up to 24 hours.
- If you want to freeze it, pour into a freezer-safe container, leaving space for expansion.
- Thaw in the fridge overnight before blending again to restore its creamy texture.
These steps make it easy to enjoy your smoothie anytime.
This blog post covers how to make a delicious smoothie with fresh ingredients. You learned about the main ingredients like strawberries and yogurt, plus optional ones for added flavor. I shared step-by-step directions for blending and adjusting sweetness. Tips for creaminess and presentation can help elevate your drink. Remember, you can customize flavors and boost protein to fit your needs. With proper storage, you can enjoy your smoothie fresh or frozen. Dive in and make it your own, and enjoy the tasty benefits!


![When you make cheesy sheet pan chicken quesadillas, you need the right ingredients for the best taste. Here’s what you will need: - Shredded chicken options - 2 cups cooked chicken, shredded (rotisserie chicken works wonderfully) - Cheese varieties - 1 cup shredded cheddar cheese - 1 cup shredded Monterey Jack cheese - 1/2 cup cream cheese, softened - 1/4 cup sour cream - Vegetables and other mix-ins - 1 medium red bell pepper, diced - 1 medium green bell pepper, diced - 1 small red onion, finely chopped - 1 tablespoon taco seasoning - 8 large flour tortillas - 1 tablespoon olive oil - Fresh cilantro, chopped (for garnish) - Salsa, for serving - Avocado or guacamole, for serving These ingredients blend together to create a flavor-packed meal. Using rotisserie chicken saves time and adds great taste. The mix of cheddar and Monterey Jack gives a creamy, melty texture. Adding bell peppers and onions adds crunch and freshness. The taco seasoning gives it that extra kick. Feel free to experiment with your favorite veggies and cheese. This recipe is versatile and allows you to customize it to your liking. For the full recipe, check out the details above. Set your oven to 400°F (200°C). This heat helps the quesadillas cook evenly. Grab a large baking sheet and line it with parchment paper. This step is key because it keeps the quesadillas from sticking. Plus, it makes clean-up a breeze. In a big bowl, mix your ingredients well. You will need cooked chicken, cheddar cheese, Monterey Jack cheese, cream cheese, sour cream, diced red and green bell peppers, chopped red onion, and taco seasoning. The mixture should be smooth and creamy. Look for a texture that is spreadable but not runny. This helps keep the filling inside the tortillas. On a flat surface, lay down four tortillas. Spread the chicken mixture evenly on each one. Make sure to reach the edges so every bite is tasty. Then, place another tortilla on top of each filled one. Press down gently. This helps them stick together and hold the filling in. Once your quesadillas are ready, move them to the baking sheet. Brush the tops with olive oil. This adds flavor and helps them turn golden brown. Bake in your preheated oven for 15-20 minutes. Look for a nice golden color and melted cheese inside. These signs tell you they are done. After baking, take the quesadillas out and let them cool for a few minutes. This makes slicing easier. Cut each quesadilla into quarters for serving. Aim for about 4-6 servings, depending on your crowd. These quesadilla wedges are perfect for sharing! Avoiding Soggy Tortillas To keep your tortillas crisp, avoid overfilling them. Less is more! Also, use the right amount of olive oil on top. This will help them brown nicely. Always make sure to bake them until they are golden brown. Best Types of Tortillas to Use For the best texture, I recommend using large flour tortillas. They hold the filling well and become soft when baked. Corn tortillas can work too, but they may crack more easily. Pairing with Dipping Sauces Serve your quesadillas with a variety of dips. Salsa is a classic choice. You can also offer guacamole and sour cream. These add creaminess and flavor. Garnishes for Presentation To make your dish look great, sprinkle fresh cilantro on top. You can also add sliced jalapeños for a pop of color. This makes your quesadillas look fancy and appetizing. Adjusting the Recipe If you have a big group, you can easily double the recipe. Just make sure to use a larger baking sheet. This way, you can cook more quesadillas at once. Time-Saving Tips Use rotisserie chicken for quick prep. It saves time and adds great flavor. You can also chop your veggies ahead of time. This keeps the cooking quick and easy. To see the full recipe, check out the [Full Recipe]. {{image_4}} Alternative Proteins You can switch the chicken for other proteins. Try shredded beef or cooked shrimp. For a lighter option, use turkey. If you prefer plant-based meals, chickpeas or tofu work well too. Different Cheese Combos Cheese is key to quesadillas. You can mix different cheeses for fun flavors. Pepper Jack adds spice, while gouda gives a smoky touch. Experiment with cream cheese and feta for creamy bites. Adding Spices or Herbs Spice up your quesadillas! Add chili powder or cumin for warmth. Fresh herbs like cilantro or parsley brighten flavors. A squeeze of lime gives a fresh zing. Incorporating Beans or Corn Beans and corn boost nutrition and flavor. Black beans add protein, while corn brings sweetness. Mix them into your filling for a hearty twist. Gluten-Free Options To make this dish gluten-free, swap flour tortillas for corn ones. Always check labels to ensure they meet your needs. You can also serve the filling on lettuce wraps. Vegetarian Adjustments For a vegetarian version, skip the chicken. Use mushrooms or zucchini for a meaty texture. Add more beans and veggies to keep it filling. For the full recipe, check the [Full Recipe]. To store your cheesy sheet pan chicken quesadillas, let them cool first. Wrap them tightly in plastic wrap or foil. You can also place them in an airtight container. This keeps them fresh and tasty. - Shelf Life: When stored properly, quesadillas last up to 3 days in the fridge. After that, they may lose flavor and freshness. If you want to save some for later, freezing is great! - How to Freeze Quesadillas: First, cool them completely. Then, wrap each quesadilla in plastic wrap. Place them in a freezer-safe bag or container. This helps prevent freezer burn. - Reheating Tips for Best Results: To reheat, thaw overnight in the fridge. Then, bake them at 350°F (175°C) for about 10 minutes. This makes them warm and crispy again. Don't let any filling go to waste! - Creative Ways to Use Leftovers: You can add leftover filling to salads or burritos. Mix it with scrambled eggs for a tasty breakfast. - Recipes Using Leftover Filling: Try using the filling in omelets or as a topping for nachos. You can also use it in stuffed peppers for a fun twist. For more details on making this dish, check out the [Full Recipe]. To make this dish gluten-free, swap out regular flour tortillas for gluten-free ones. Many brands offer great taste and texture. You can also check for taco seasoning that is gluten-free. This way, you keep all the flavor without the gluten. Yes, you can use raw chicken. Just make sure to cook it first. You can bake or grill the chicken until it reaches 165°F (75°C). Shred the cooked chicken before mixing it with the other ingredients. This keeps your quesadillas safe and tasty. To reheat quesadillas, use the oven or a skillet. Preheat the oven to 350°F (175°C) and bake for about 10 minutes. If using a skillet, heat it over medium heat. Cook for 2-3 minutes on each side until warm and crispy. This way, you keep the texture nice. Look for a golden brown color on the outside. You should also see melted cheese oozing out from the edges. A crispy texture means they are ready to enjoy. Let them cool for a few minutes after baking before slicing. Quesadillas pair well with many sides. You can serve them with salsa or guacamole for dipping. A fresh salad or some Mexican rice adds a nice touch too. Black beans are another great side option. These sides enhance your meal and make it even more fun to eat. You now have all the tools to make great chicken quesadillas. We covered essential ingredients and step-by-step instructions. Use the tips to avoid soggy tortillas and serve with tasty dips. Don’t forget to explore variations to suit your taste. Store any leftovers properly for future meals. Whether for a quiet dinner or a crowd, you’re ready to impress. Enjoy your cooking and have fun creating delicious quesadillas!](https://dishtreats.com/wp-content/uploads/2025/07/9e515845-1856-4bb5-82ee-80ca33afd87d-768x768.webp)