Spinach Apple Pecan Salad Fresh and Flavorful Meal

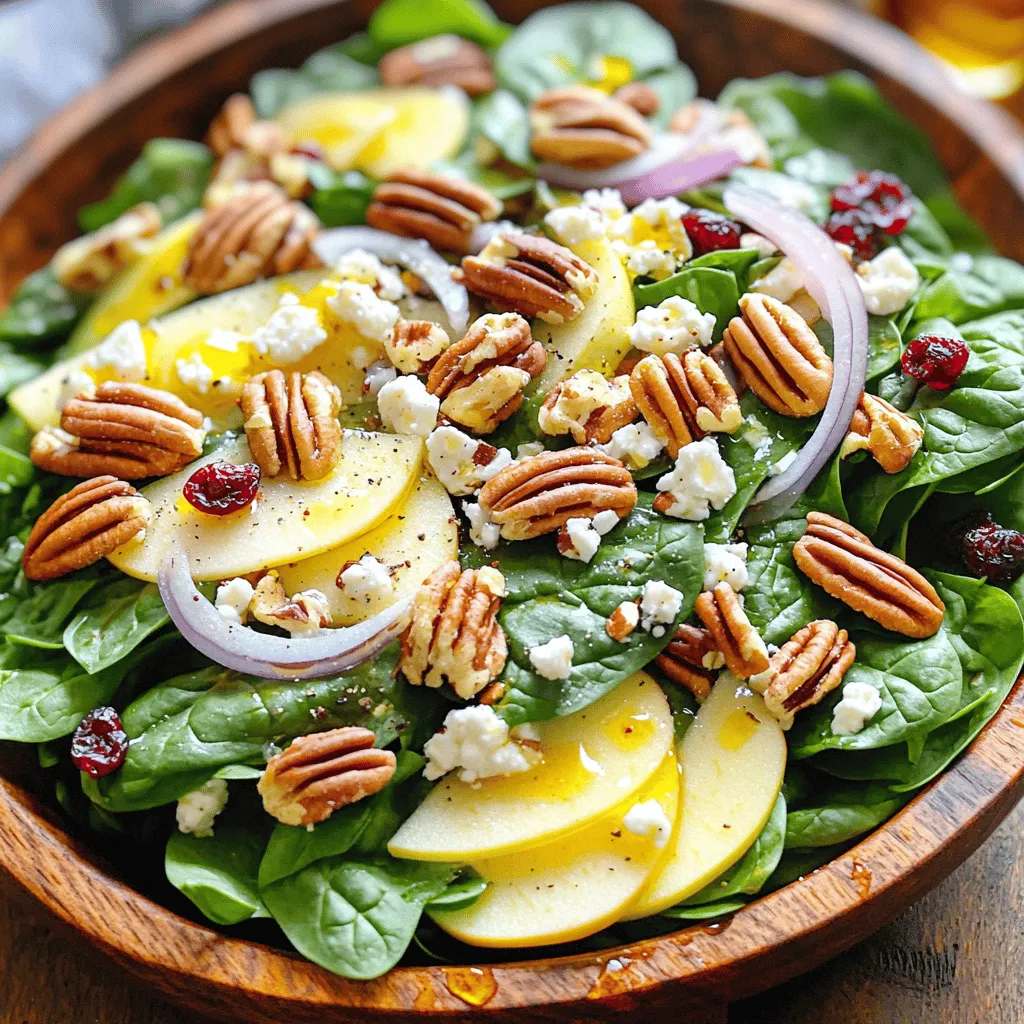
Looking for a fresh and flavorful meal? You’ve found it! This Spinach Apple Pecan Salad bursts with taste and crunch. Packed with baby spinach, crisp apples, and toasted pecans, it’s a delightful twist on your typical salad. Plus, I’ll share a simple dressing recipe that ties it all together perfectly. Let’s dive into the easy steps to create this vibrant dish—your taste buds will thank you!
Ingredients
Fresh Ingredients
- Baby spinach: Start with 4 cups of fresh baby spinach. Look for vibrant green leaves without brown spots. This will be the base of your salad.
- Apple varieties and selection tips: Choose a large apple, like Fuji or Honeycrisp. These apples are sweet and crisp. Make sure it is firm and free of bruises. Slice it thinly for easy eating.
- Pecans and optional toppings: Use 1/2 cup of pecan halves. Lightly toast them for extra flavor. You can also add crumbled feta cheese or dried cranberries for more taste and texture.
Dressing Components
- Extra virgin olive oil: This rich oil adds flavor and helps blend the salad. Use 3 tablespoons for your dressing.
- Apple cider vinegar: Use 2 tablespoons to add a tangy taste. It brightens the flavors and balances sweetness.
- Honey and seasonings: Add 1 tablespoon of honey for sweetness. Don’t forget salt and freshly ground black pepper to taste. This helps enhance all the flavors in the salad.
Step-by-Step Instructions
Preparing the Dressing
To make the dressing, grab a small mixing bowl. Add the olive oil, apple cider vinegar, honey, salt, and freshly ground black pepper. Use a whisk to mix until smooth. This simple blend gives the salad a bright flavor. Let it sit for a few minutes. This helps the flavors combine well.
Tips for achieving the best flavor:
- Use fresh olive oil for a richer taste.
- Adjust honey for sweetness based on your preference.
- Always taste and tweak the seasoning before dressing the salad.
Toasting the Pecans
Next, let’s toast the pecans. Heat a dry skillet over medium flame. Once hot, add the pecan halves. Stir them often for about 3 to 5 minutes. Watch closely to avoid burning. They should smell nutty and turn golden brown. Once done, remove them from heat and let them cool.
Recommended techniques:
- A skillet works best, but you can use an oven at 350°F for 8-10 minutes.
- Keep stirring to ensure even toasting and avoid any burnt pieces.
Assembling the Salad
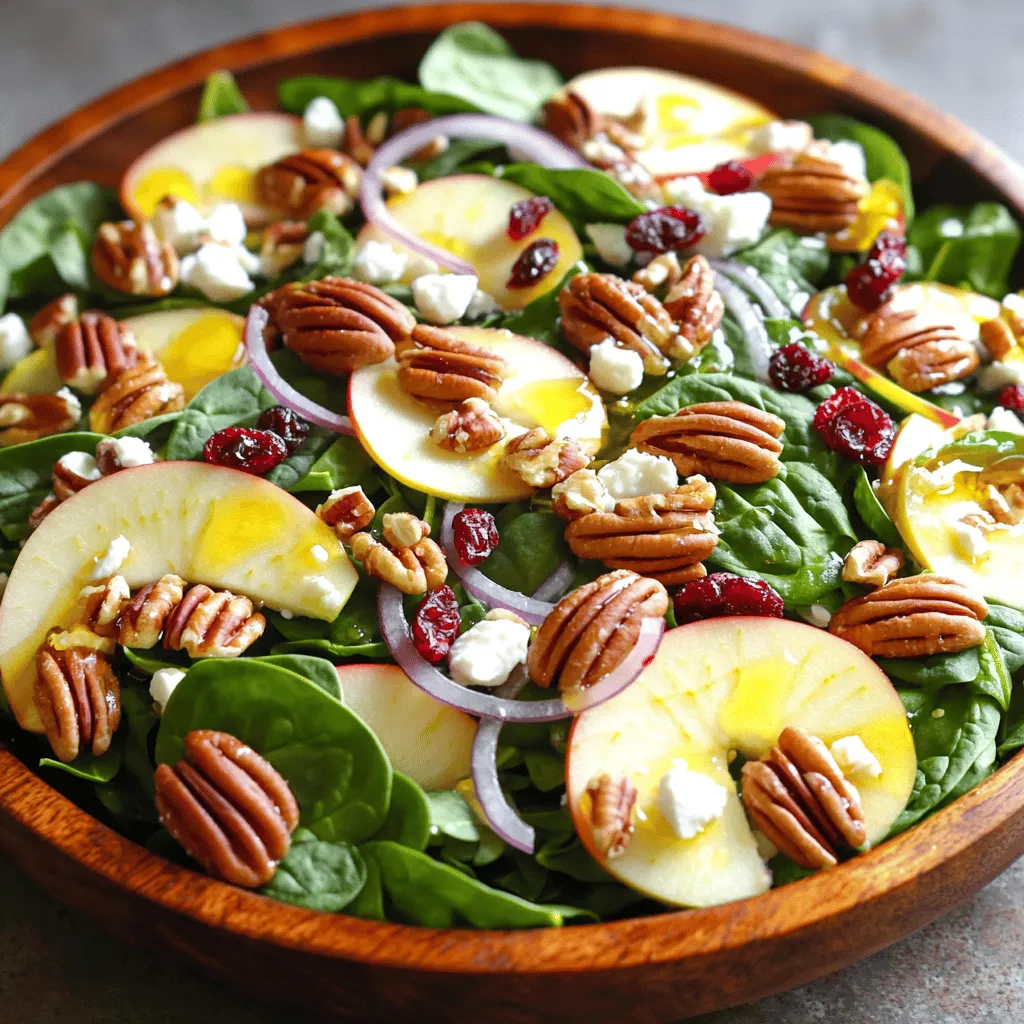
Now, it’s time to assemble the salad. In a large mixing bowl, start with the baby spinach as your base. Next, lay the sliced apple on top. Add the toasted pecans, followed by crumbled feta cheese. Then, sprinkle the red onion and dried cranberries over everything. This layering looks nice and makes each bite tasty.
Importance of the order of assembly:
- Starting with spinach keeps it fresh and crisp.
- Layering helps distribute flavors evenly.
Dressing and Tossing the Salad
Now, drizzle your prepared dressing over the salad gently. Aim to coat all the ingredients lightly. This step is key for flavor.
Techniques for gentle tossing:
- Use salad tongs or large spoons to lift and mix.
- Toss slowly to avoid bruising the spinach. This method keeps the salad looking fresh and bright.
You can serve right away or chill it for a few minutes to enhance the flavors.
Tips & Tricks
Choosing Fresh Ingredients
To make a great spinach apple pecan salad, fresh ingredients are key. Here are some tips:
- Spinach: Look for bright green leaves. They should feel crisp and firm. Avoid any leaves that are wilting or yellow.
- Apples: Choose apples that are firm and heavy for their size. Good choices include Fuji and Honeycrisp. Check for any bruises or soft spots.
- Pecans: Select pecan halves that smell nutty and fresh. Avoid any that seem stale or have a rancid smell.
Customizing the Recipe
You can easily change this salad to fit your taste. Here are some ideas:
- Dressings: Try different dressings like balsamic vinaigrette or poppy seed dressing. Each will give a unique twist.
- Substitutions: If you’re vegan, skip the feta and add avocado. For nut allergies, sunflower seeds can replace pecans.
Presentation and Serving Suggestions
How you serve this salad matters. Here are some fun ideas:
- Serving Ideas: Serve in clear glass bowls. This showcases the colorful layers. You can also garnish with extra pecans or a slice of apple on the side.
- Pairing: This salad goes well with grilled chicken or fish. It also works great as a side for sandwiches or wraps.

Variations
Seasonal Ingredients
You can change this salad based on the season. In spring, try adding strawberries or blueberries. In fall, use pears or grapes. Mixing fruits keeps it fresh and exciting. Check your local market for what’s in season. Using fresh ingredients enhances flavor and nutrition.
Dietary Alternatives
If you need a vegan salad, skip the feta cheese. Use avocado for creaminess instead. For a gluten-free option, ensure the dressing is certified gluten-free. If you want nut-free, try sunflower seeds or pumpkin seeds. These swaps make the salad fit your needs without losing taste.
Flavor Enhancements
To boost the flavor, add fresh herbs like basil or mint. A sprinkle of thyme can add warmth. For cheese lovers, swap feta with goat cheese or blue cheese. Different dressings can also change the taste. Try a balsamic vinaigrette or a creamy ranch. Each variation offers a new twist on this delicious salad.
Storage Info
Best Practices for Freshness
To keep your spinach apple pecan salad fresh, store it in a sealed container. This will prevent the spinach from wilting. If you have leftovers, do not add the dressing until you are ready to eat. The dressing can make the salad soggy.
- Fresh spinach lasts about 3 to 5 days in the fridge.
- Sliced apples may brown quickly. Use lemon juice to slow this down, or eat them within a day for the best taste.
- Pecans can stay fresh for up to 6 months if stored in a cool, dry place.
Meal Prep Tips
Preparing your salad ingredients in advance can save time. Wash and dry the spinach, then store it in a paper towel-lined container. This helps keep it crisp.
- Slice the apples and keep them in water with lemon juice. This keeps them fresh and bright.
- Toast the pecans and store them in an airtight container. They stay crunchy this way.
- Assemble your salad just before eating. This keeps all the textures and flavors intact.
For easy meals, you can mix and match ingredients.Enjoy a fresh salad quickly by having everything ready to go!
FAQs
Common Questions about Spinach Apple Pecan Salad
Can I make this salad ahead of time?
Yes, you can prepare the salad a few hours ahead. Just keep the dressing separate until serving. This keeps the spinach fresh and crisp.
What is the nutritional value of the salad?
This salad is rich in vitamins and minerals. Spinach is high in iron and vitamin K. Apples add fiber and vitamin C. Pecans offer healthy fats and protein.
How can I make it more filling?
To make this salad heartier, add grilled chicken or chickpeas. Quinoa also adds protein and makes it more satisfying.
What are the health benefits of spinach and apples?
Spinach helps with bone health and muscle function. Apples can support heart health and digestion. Together, they offer a great mix of nutrients.
Recipe Adjustments
How to adjust for a larger group?
Simply double or triple the ingredients. Use a large bowl for mixing. This way, everyone can enjoy a tasty salad.
Can I use canned ingredients?
You can use canned apples or nuts if fresh ones are not available. Just rinse canned items to reduce extra salt or sugar.
This blog post covered how to make a delicious Spinach Apple Pecan Salad. We talked about choosing fresh ingredients like baby spinach, apples, and pecans. I shared tips for making the perfect dressing and toasting pecans. You learned how to layer the salad for a beautiful look and how to toss it evenly.
In the end, this salad is customizable and easy to make. Whether you serve it as a side or main dish, it will impress. Try different fruits, dressings, and toppings to find your favorite version. Happy cooking!


![- 1 lb boneless, skinless chicken breasts, cut into bite-sized pieces - 1 cup dill pickle juice - 1 cup all-purpose flour - 1 teaspoon onion powder - 1 teaspoon garlic powder - 1 teaspoon paprika - 1 teaspoon black pepper - 1/2 teaspoon salt - 2 large eggs, beaten - 1 cup breadcrumbs (use panko for added crunch) - 1/2 cup ranch dressing - Fresh dill, for garnish (optional) These ingredients create a tasty flavor mix. The chicken gets a nice tang from the dill pickle juice. The spices add warmth and depth. The ranch dressing gives a creamy finish. You will need some basic tools for the best results. Here’s what I suggest: - Mixing bowls for marinating and breading - A whisk for beating the eggs - A baking sheet lined with parchment paper or greased - Measuring cups and spoons for accuracy These tools help streamline your cooking process. They ensure that each step flows smoothly and efficiently. If you want to change things up, here are some easy swaps: - Use chicken thighs instead of breasts for more flavor. - Swap out ranch dressing for blue cheese dressing for a bolder taste. - Try gluten-free flour if you need a gluten-free option. - Use crushed cornflakes instead of breadcrumbs for extra crunch. These substitutions can make the recipe your own. You can keep it fun and exciting while still enjoying the core flavors. For the complete recipe, check the [Full Recipe]. To start, grab a mixing bowl. Place the bite-sized chicken pieces into it. Pour in the dill pickle juice, making sure the chicken is fully submerged. Cover the bowl with plastic wrap or a lid. Now, let it chill in the fridge. For best results, marinate for at least one hour. If you have time, overnight is even better. This step adds so much flavor to the chicken! Next, let’s set up a breading station. You will need three bowls. In the first bowl, mix the all-purpose flour with onion powder, garlic powder, paprika, black pepper, and salt. Stir well until everything is combined. In the second bowl, pour in the beaten eggs. Whisk them until they are smooth. In the third bowl, fill it with breadcrumbs, preferably panko. Panko gives a nice crunch to the bites. After marinating, take the chicken out of the fridge. Gently pat the chicken pieces dry with paper towels. Start by dredging each piece in the flour mix. Make sure to shake off any extra flour. Next, dip the chicken into the beaten eggs. Finally, coat the chicken well with the breadcrumbs. Now, preheat your oven to 400°F (200°C). Prepare a baking sheet by lining it with parchment paper or greasing it lightly. Arrange the breaded chicken bites in a single layer. Bake for 15-20 minutes. They should turn golden brown and crispy. Check that the internal temperature reaches 165°F (75°C). Once cooked, move the chicken bites to a serving platter. Drizzle ranch dressing on top and sprinkle with fresh dill if you like. This adds a lovely touch! For the full recipe, be sure to check the details. To get crispy chicken bites, follow a few key steps. First, make sure to marinate the chicken in dill pickle juice. This adds flavor and helps keep the meat moist. Next, dry the chicken pieces well before breading. Excess moisture can lead to soggy bites. When coating, use seasoned flour first, then dip in egg, and finally cover with breadcrumbs. I recommend using panko breadcrumbs for extra crunch. Bake at 400°F (200°C) until golden brown and fully cooked. Avoid common mistakes for the best results. Do not rush the marination process; it is crucial for flavor. Skipping the drying step can lead to less crispy bites. Also, ensure you do not overcrowd the baking sheet. Leave space between each piece to allow hot air to circulate. Lastly, check the internal temperature. Chicken should reach 165°F (75°C) to be safely eaten. For tailgating or parties, serve these bites with extra ranch dressing for dipping. This adds a nice creamy touch. You can also pair them with fresh pickle slices for added crunch. For a fun twist, consider setting up a dipping station. Include various sauces, like buffalo sauce or honey mustard. This lets guests customize their bites. {{image_4}} Want some heat? Add hot sauce to the marinade. This gives your chicken bites a spicy kick. You can also mix cayenne pepper into the flour. Adjust the amount to your taste. This adds flavor without overwhelming the pickle taste. If you enjoy heat, this variation is for you! Looking for a lighter option? Use an air fryer to cook your chicken bites. This method cuts down on oil and keeps them crisp. Preheat your air fryer to 400°F (200°C). Place the breaded chicken in a single layer. Cook for about 12-15 minutes. Check that they reach an internal temperature of 165°F (75°C). You get a crunchy texture without deep frying! Want a veggie twist? Try using cauliflower instead of chicken. Cut cauliflower into bite-sized florets. Marinate them in the dill pickle juice for the same time. Follow the same breading and cooking steps. Bake or air fry until golden and crispy. This gives you a tasty, plant-based snack that everyone will love. You can find the full recipe for Pickle Ranch Chicken Bites and try these fun variations! To keep your leftover chicken bites fresh, place them in an airtight container. Make sure they cool down to room temperature before sealing. This method helps prevent moisture, which can make them soggy. Store the container in the fridge for up to three days. When you're ready to enjoy your chicken bites again, reheating properly is key. I recommend using an oven or an air fryer for the best results. Preheat the oven to 375°F (190°C). Place the chicken bites on a baking sheet and heat for about 10-15 minutes. This method helps restore their crispy texture. If using an air fryer, set it to 350°F (175°C) and heat for about 5-7 minutes. If you want to save some chicken bites for later, freezing is a great option. First, let them cool completely. Then, arrange the bites in a single layer on a baking sheet and freeze for about an hour. Once frozen, transfer them to a freezer-safe bag or container. They can last up to three months in the freezer. When you're ready to eat, just reheat them from frozen, following the tips above for that perfect crunch. For the full recipe, check out the details above. The best way to marinate chicken is to use a flavorful liquid. For Pickle Ranch Chicken Bites, you will soak the chicken in dill pickle juice. This juice adds a zesty kick and keeps the meat juicy. Place the cut chicken in a bowl and cover it with the pickle juice. Make sure all pieces are fully submerged. Cover the bowl and refrigerate for at least an hour. For even better flavor, let it marinate overnight. This method works well for any chicken dish. Yes, you can use frozen chicken for this recipe. However, it is best to thaw the chicken first. Place it in the fridge overnight or submerge it in cold water for quicker thawing. Once thawed, cut the chicken into bite-sized pieces. After that, follow the marination steps as usual. Using frozen chicken may change the texture slightly, but it will still taste great. To make a low-carb version of Pickle Ranch Chicken Bites, you can skip the breadcrumbs. Instead, coat the chicken pieces in crushed pork rinds or almond flour. Both options give a nice crunch without the carbs. You can also use a low-carb ranch dressing for dipping. This way, you keep the flavor and texture while making it suitable for a low-carb diet. Enjoy your tasty bites without the guilt! In this post, we explored how to make Pickle Ranch Chicken Bites. We discussed key ingredients, cooking essentials, and helpful substitutions. I shared step-by-step instructions for marinating, breading, and baking. You learned tips for crispy bites and common mistakes to avoid. We covered variations like spicy bites and vegetarian options. Finally, I provided storage tips and answered FAQs. Try these bites for your next gathering. They’re fun, easy, and full of flavor! Enjoy your cooking adventure!](https://dishtreats.com/wp-content/uploads/2025/07/7f7f749c-ecc1-4920-b674-4460a511463b-768x768.webp)

![To make the best creamy buffalo chicken dip, you need the following key ingredients: - 2 cups shredded cooked chicken - 1/2 cup cream cheese, softened to room temperature - 1/2 cup sour cream - 1/2 cup plain Greek yogurt - 1/2 cup buffalo sauce (adjust based on desired heat level) - 1 cup shredded sharp cheddar cheese These ingredients create a rich and creamy base that is sure to please any crowd. The chicken adds protein and heartiness, while the cream cheese, sour cream, and Greek yogurt provide a smooth texture. Buffalo sauce gives it that spicy kick, and the sharp cheddar cheese adds a wonderful flavor. You can also enhance your dip with these optional ingredients for extra flavor: - 1/2 teaspoon garlic powder - 1/2 teaspoon onion powder - 1 tablespoon fresh chives, finely chopped (plus additional for garnishing) Garlic powder and onion powder add depth to the dip's flavor profile. Fresh chives bring a pop of color and a mild onion taste. Feel free to add your favorite seasonings to make it truly yours. For the full recipe, check out [Full Recipe]. To start, we need to mix the creamy base. In a large mixing bowl, combine the softened cream cheese, sour cream, and Greek yogurt. Use a hand mixer or spatula to blend until smooth. Make sure there are no lumps. This creamy base will give the dip its rich texture. Next, we add the chicken and buffalo sauce. Fold in the shredded cooked chicken and buffalo sauce gently. Add garlic powder, onion powder, salt, and pepper. Mix until everything is well combined. The buffalo sauce gives this dip its signature kick. Adjust the sauce to suit your taste. Now, we prepare to bake the dip. Spoon the creamy chicken mixture into a medium-sized baking dish. Spread it out evenly. For a cheesy finish, sprinkle some reserved cheddar cheese on top. Preheat your oven to 350°F (175°C). Place the baking dish in the oven and bake for about 20 minutes. The dip should be bubbling and the top lightly golden. After baking, let the dip cool for about 5 minutes. This helps prevent burns when serving. Garnish with fresh chopped chives for a pop of color. For dipping, I recommend using tortilla chips, crunchy celery sticks, or sweet carrot sticks. These dippers complement the creamy dip perfectly. Enjoy this dish at your next gathering or game day! For the complete recipe, check out the [Full Recipe]. To get the perfect creaminess, blend the cream cheese, sour cream, and Greek yogurt well. Use a hand mixer for a smooth texture. This step ensures your dip is rich and velvety. If it feels too thick, add a splash of buffalo sauce to loosen it up. When it comes to heat, buffalo sauce is your friend. Start with half a cup, then taste. If you want more heat, add a little more sauce. Remember, you can always add, but you can't take away! For mixing, I recommend a sturdy mixing bowl and a hand mixer. This combination makes it easy to achieve a smooth mix. If you prefer, a spatula works just as well. For baking, use a medium-sized baking dish. A glass or ceramic dish helps the dip bake evenly. You might also want a cookie sheet underneath for easy handling. Pair your dip with tortilla chips for crunch. Fresh celery and carrot sticks add a great veggie option. You can even set up a fun dip station with various dippers. Try serving the dip in individual ramekins for a party. It makes each serving special and easy to grab. A wooden cutting board adds a rustic touch, making it look even more inviting! {{image_4}} You can easily make this dip fit your needs. For a gluten-free option, use gluten-free buffalo sauce. Check labels to ensure all ingredients are safe. You can also swap regular sour cream with a gluten-free version. If you're watching carbs, try using cream cheese and Greek yogurt as they are lower in carbs. You can reduce the amount of buffalo sauce or serve with veggies instead of chips. Celery sticks and carrot sticks are great low-carb dippers! Want to shake things up? Add a twist with different cheeses. Blue cheese adds a bold flavor that many love. You can also use mozzarella or pepper jack for a creamy texture and a kick. Incorporate extra spices, like smoked paprika or cayenne, to enhance the flavor. Adding diced bell peppers or jalapeños gives it a crunchy texture. These simple changes make your dip unique and fun! No oven? No problem! You can make this dip in a slow cooker. Just mix all ingredients and cook on low for 2-3 hours. Stir occasionally for a creamy result. If you have an air fryer, you can use it too! Place the dip in a heat-safe dish and cook at 350°F for about 15-20 minutes. This method gives it a crispy top while keeping the inside gooey. For the full recipe, check out the link. To keep your creamy buffalo chicken dip fresh, store it in an airtight container. Make sure to let it cool completely before sealing. This helps lock in flavors. Place the container in the fridge. Your dip can last up to 3 days this way. If you have more leftovers, you can freeze it. Use freezer-safe bags or containers. Just be sure to remove as much air as possible. When properly stored, it can last up to 3 months in the freezer. When it comes time to enjoy your dip again, reheating it is key. The best method is to use the oven. Preheat the oven to 350°F (175°C). Place the dip in an oven-safe dish and cover it with foil. Heat for about 15-20 minutes. This keeps the dip creamy and prevents it from drying out. You can use the microwave if you're short on time. Place a portion in a microwave-safe bowl. Heat in 30-second bursts, stirring in between. This method may change the texture a bit, but it still tastes great. In the fridge, your dip stays fresh for about 3 days. After that, the flavor and texture may change. Signs that your dip has gone bad include an off smell, discoloration, or separation. If you see any of these signs, it's best to throw it away. Always trust your senses! For the full recipe, check out the Buffalo Bliss Chicken Dip section above. Can I make this dip ahead of time? Yes, you can prepare this dip ahead of time. Mix all the ingredients and store it in the fridge. Bake it just before serving. This makes it easy for parties. Is it possible to use canned chicken instead of shredded? Yes, you can use canned chicken. It saves time and is easy to mix in. Just drain and shred the chicken before adding it to the dip. The dip has about 300 calories per serving. Each serving is roughly 1/2 cup. If you want to lower calories, use low-fat cream cheese or Greek yogurt. This gives you a tasty dip without adding too many calories. Creamy Buffalo Chicken Dip is great for game day, parties, or family gatherings. It’s a crowd-pleaser! Pair it with cold drinks like beer or soda. You can also serve it with fresh veggies and chips for extra crunch. This article covered how to make creamy buffalo chicken dip, from ingredients to storage. We explored main and optional ingredients, easy step-by-step instructions, tips for a perfect dip, and variations. In the end, making this dip is all about fun and flavor. Enjoy experimenting with ingredients and serving ideas. Whether for game day or a gathering, this dip will impress your guests!](https://dishtreats.com/wp-content/uploads/2025/07/05957703-937f-462f-adea-92812be79973-768x768.webp)


