Are you ready to taste something truly delicious? Spinach and feta stuffed peppers offer a savory delight that’s hard to resist. Packed with flavor and nutrients, these easy-to-make stuffed peppers will wow your taste buds. In this article, I’ll share simple steps, helpful tips, and variations for everyone to enjoy. Let’s dive into the world of tasty stuffed peppers and elevate your meal game!
Ingredients
List of Ingredients
– 4 large bell peppers (choose from red, yellow, orange, or green)
– 2 cups fresh spinach, finely chopped
– 1 cup crumbled feta cheese (packed for extra flavor)
– 1 cup cooked quinoa (or substitute with brown rice for variation)
– 1 small onion, finely diced
– 2 cloves garlic, minced (for aromatic depth)
– 1 tablespoon extra virgin olive oil
– 1 teaspoon dried oregano (or a mix of Italian herbs)
– Salt and pepper to taste
– ½ cup marinara sauce (store-bought or homemade for added richness)
– Fresh parsley for garnish (optional, but recommended for freshness)
Key Ingredient Benefits
Each ingredient in this dish brings something special:
– Bell peppers: They are colorful and packed with vitamins A and C. Their sweetness balances the savory filling.
– Spinach: This leafy green is rich in iron and antioxidants. It adds a fresh taste and bright color.
– Feta cheese: Feta adds a creamy texture and tangy flavor. It’s lower in fat than many cheeses, making it a healthier choice.
– Quinoa: This grain is high in protein and fiber. It makes the dish hearty and filling.
– Onion and garlic: Both add depth and aroma. They enhance the overall flavor of the filling.
– Olive oil: A heart-healthy fat, olive oil adds richness and helps with cooking the vegetables.
– Oregano: This herb offers a classic Italian flavor and has anti-inflammatory properties.
– Marinara sauce: It gives moisture and a rich taste. It’s also a source of lycopene, which is good for your heart.
Recommended Substitutes
If you want to switch things up, here are some great options:
– Bell peppers: Try zucchini or eggplant if you want a twist.
– Fresh spinach: Kale or Swiss chard work well too. They are both hearty and flavorful.
– Feta cheese: Goat cheese or ricotta can be used for a different texture.
– Quinoa: Brown rice or couscous can replace it for a different grain.
– Olive oil: You can use avocado oil or butter for a change in flavor.
– Marinara sauce: Try pesto or a cheese sauce for a unique taste.
These ingredients and substitutes give you plenty of options to create a delicious meal.
Step-by-Step Instructions
Preheat and Prepare
First, preheat your oven to 375°F (190°C). This helps cook the peppers evenly. Next, take 4 large bell peppers. Cut off their tops and remove the seeds. You want them empty but strong enough to stand. This gives you a great base for your filling.
Sautéing Aromatics
In a medium skillet, heat 1 tablespoon of extra virgin olive oil over medium heat. Add 1 small diced onion and 2 minced garlic cloves. Stir for about 3-4 minutes until they smell good and look clear. This step adds depth to the dish.
Creating the Filling
In a large bowl, mix the sautéed onion and garlic with 2 cups of finely chopped spinach, 1 cup of cooked quinoa, and 1 cup of crumbled feta cheese. Season with 1 teaspoon of dried oregano, salt, and pepper. Stir well until everything is mixed. This filling is flavorful and packed with nutrients.
Stuffing and Baking the Peppers
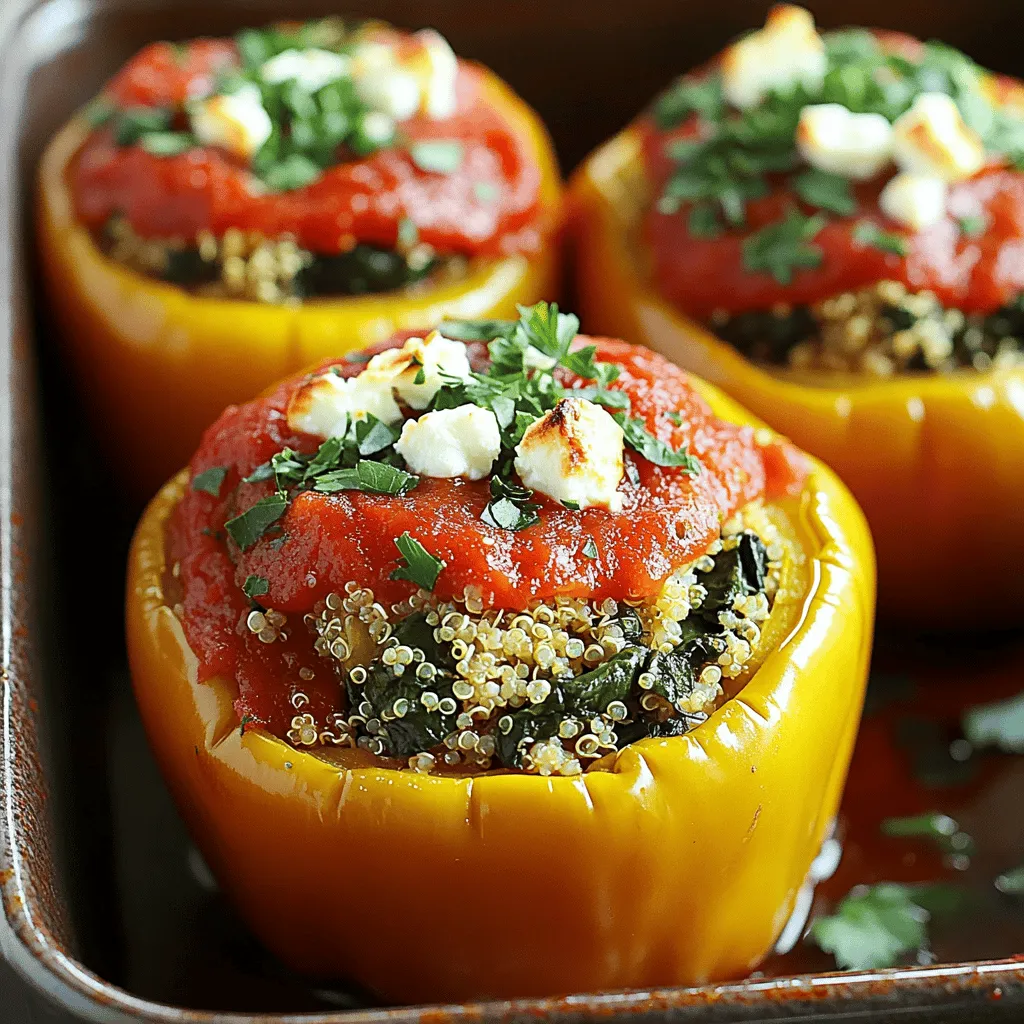
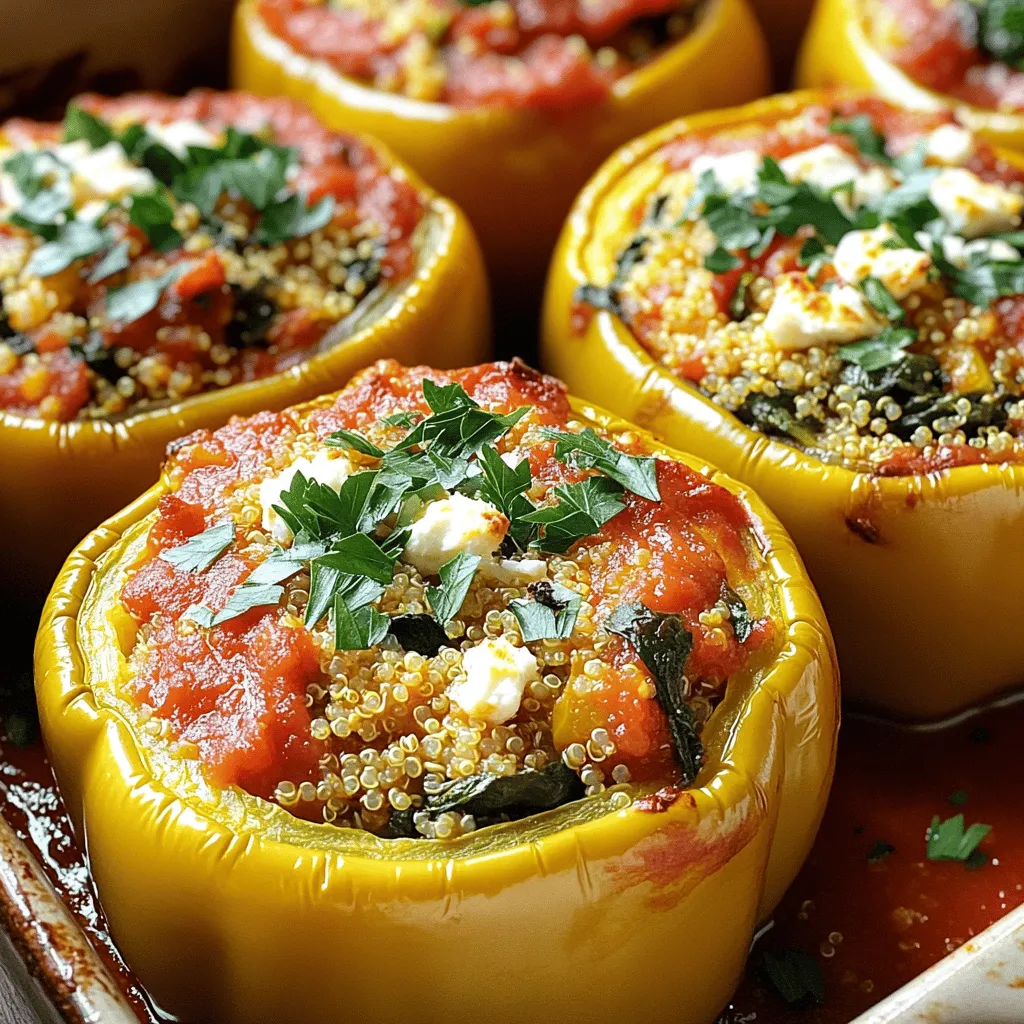
Now, take each bell pepper and fill it with the spinach and feta mixture. Press it down lightly. Place the stuffed peppers upright in a baking dish. Spoon ½ cup of marinara sauce over the top of each pepper. This adds moisture and flavor while baking. Cover the dish with foil and bake for 25 minutes. Then, remove the foil and bake for another 10-15 minutes. This makes the peppers soft and the tops golden. When done, let them cool slightly before serving. You can garnish with fresh parsley for a pop of color.
Tips & Tricks
Secrets for Perfectly Stuffed Peppers
To make your peppers shine, focus on the filling. Use fresh spinach for the best flavor. Crumbled feta should be packed tightly for a rich taste. Mixing in some cooked quinoa adds texture and protein. Ensure you season well with salt and pepper. A little dried oregano gives it a nice kick. Always pack the filling into the peppers lightly. This way, they won’t overflow while baking.
Common Mistakes to Avoid
One common mistake is not pre-cooking the spinach. This step helps release excess moisture. Another error is over-stuffing the peppers. Too much filling can lead to messy baking. Also, avoid using peppers that are too small. They need enough space to hold all the goodness. Always check that your oven is preheated. A hot oven helps the peppers cook evenly and become tender.
Serving Suggestions
Serve your spinach and feta stuffed peppers warm. Pair them with a simple green salad for balance. A drizzle of balsamic glaze on top adds a sweet touch. You can also serve them with crusty bread to soak up the sauce. For a more filling meal, add a side of roasted vegetables. If you want to impress, garnish with fresh parsley. It brightens the dish and adds a pop of color.
Variations
Vegan Alternatives
You can make stuffed peppers vegan easily. Instead of feta cheese, try using tofu. Crumble firm tofu and mix it with nutritional yeast. This gives a cheesy flavor without dairy. You can also add vegan cheese if you like. For the protein, replace quinoa with lentils or chickpeas. Both options work well and add great taste. Use vegetable broth instead of olive oil when sautéing to keep it vegan.
Gluten-Free Options
If you need a gluten-free meal, you are in luck. Quinoa is naturally gluten-free. It’s a perfect base for the filling. You can also use brown rice or cauliflower rice as substitutes. Both options keep the dish light and healthy. Just check your marinara sauce to ensure it is gluten-free. Most store-bought brands are, but it is good to verify.
Flavor Additions
Want extra flavor? Try adding spices like cumin or smoked paprika to the filling. These spices will add a nice kick. You can also mix in sun-dried tomatoes for a sweet and tangy taste. Fresh herbs like basil or dill will brighten the dish as well. For a bit of crunch, sprinkle some pine nuts or walnuts on top before serving. These add a delightful texture and taste.
Storage Info
Storing Leftovers
After enjoying your spinach and feta stuffed peppers, store any leftovers in an airtight container. This keeps them fresh for up to three days in the fridge. Make sure they are completely cooled before sealing. If you want to keep them longer, freezing is a great option.
Reheating Instructions
To reheat your stuffed peppers, preheat the oven to 350°F (175°C). Place the peppers in a baking dish and cover with foil. Bake for about 20 minutes or until they are hot throughout. You can also use a microwave for quick reheating. Just place a pepper on a plate and heat for 2-3 minutes, checking to ensure it heats evenly.
Freezing Guidelines
If you want to freeze your stuffed peppers, it’s best to do so before baking. Wrap each pepper tightly in plastic wrap and then in foil to prevent freezer burn. They can last up to three months in the freezer. When you are ready to cook, thaw them overnight in the fridge.This way, you get a fresh and tasty meal whenever you want!
FAQs
How do I make spinach and feta stuffed peppers?
To make spinach and feta stuffed peppers, start by preheating the oven to 375°F (190°C). Cut the tops off the bell peppers and remove the seeds. In a skillet, heat olive oil, then sauté diced onion and minced garlic until soft. Add chopped spinach, cooking until wilted. In a bowl, mix the sautéed veggies with cooked quinoa, crumbled feta, oregano, salt, and pepper. Stuff the mixture into the peppers, add marinara sauce on top, and bake for about 35-40 minutes.
Can I use frozen spinach?
Yes, you can use frozen spinach! Just make sure to thaw and drain it well. Frozen spinach can save time and still offer great flavor. It may have more moisture than fresh spinach, so be sure to squeeze out excess water before mixing it with other ingredients. This keeps your filling from getting soggy.
What are the best peppers for stuffing?
The best peppers for stuffing are large bell peppers. You can use red, yellow, orange, or green ones. They are sweet, tender, and hold their shape well. Choose peppers that feel firm and have no blemishes. If you want a spicier kick, consider using poblano or Anaheim peppers. These add a different flavor profile.
How long do stuffed peppers last in the fridge?
Stuffed peppers can last in the fridge for about 3 to 4 days. Store them in an airtight container to keep them fresh. When you’re ready to eat, just reheat them in the oven or microwave. If you notice any off-odors or mold, it’s best to discard them.
Can I make this dish ahead of time?
Yes, you can make this dish ahead of time! You can prepare the stuffed peppers and store them in the fridge before baking. Just cover them tightly with foil or plastic wrap. When you’re ready to bake, you may need to add a few extra minutes to the cooking time since they will be cold. This makes meal prep easier and saves time on busy days.
In this post, we covered how to make stuffed peppers. I shared the best ingredients, key benefits, and substitutes. We went through step-by-step instructions on preparation, stuffing, and baking. Tips helped you avoid common mistakes and offered serving ideas. We explored options for vegan and gluten-free variations too. Finally, I provided storage info and answered common questions.
These stuffed peppers are tasty and fun to make. Try this dish for a healthy and satisfying meal.


