Are you ready to bring some heat to your dinner table? These Spicy Gochujang Noodles are quick to prepare and bursting with flavor! Using a few simple ingredients, you can create a delicious dish that pleases even the pickiest eaters. Whether you’re a busy parent or a student, this meal fits your schedule. Join me as we dive into this exciting recipe that will spice up your weeknight meals!
Ingredients
Required Ingredients
– 200g thick rice noodles
– 2 tablespoons gochujang (Korean chili paste)
– 1 tablespoon soy sauce
– 1 tablespoon sesame oil
– 1 tablespoon honey (or maple syrup for a vegan option)
– 1 teaspoon grated fresh ginger
– 2 cloves garlic, finely minced
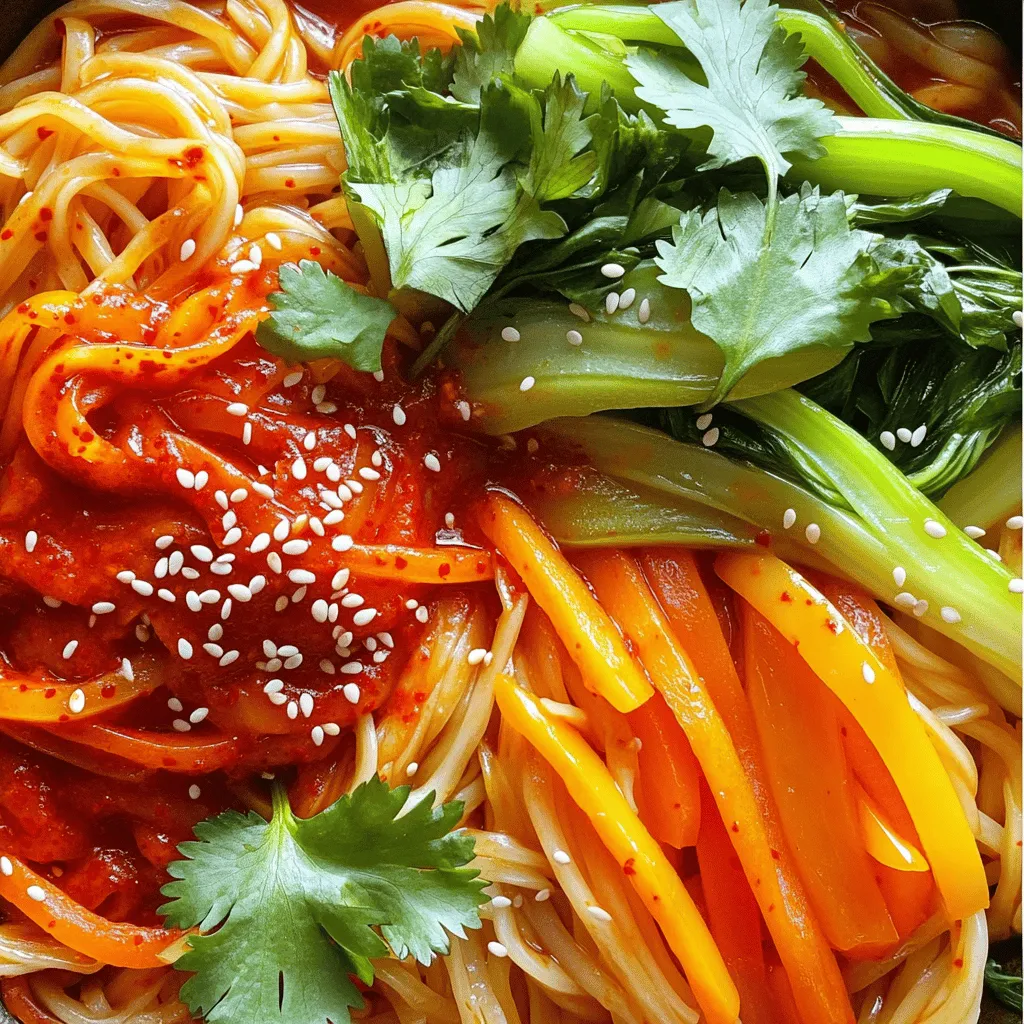
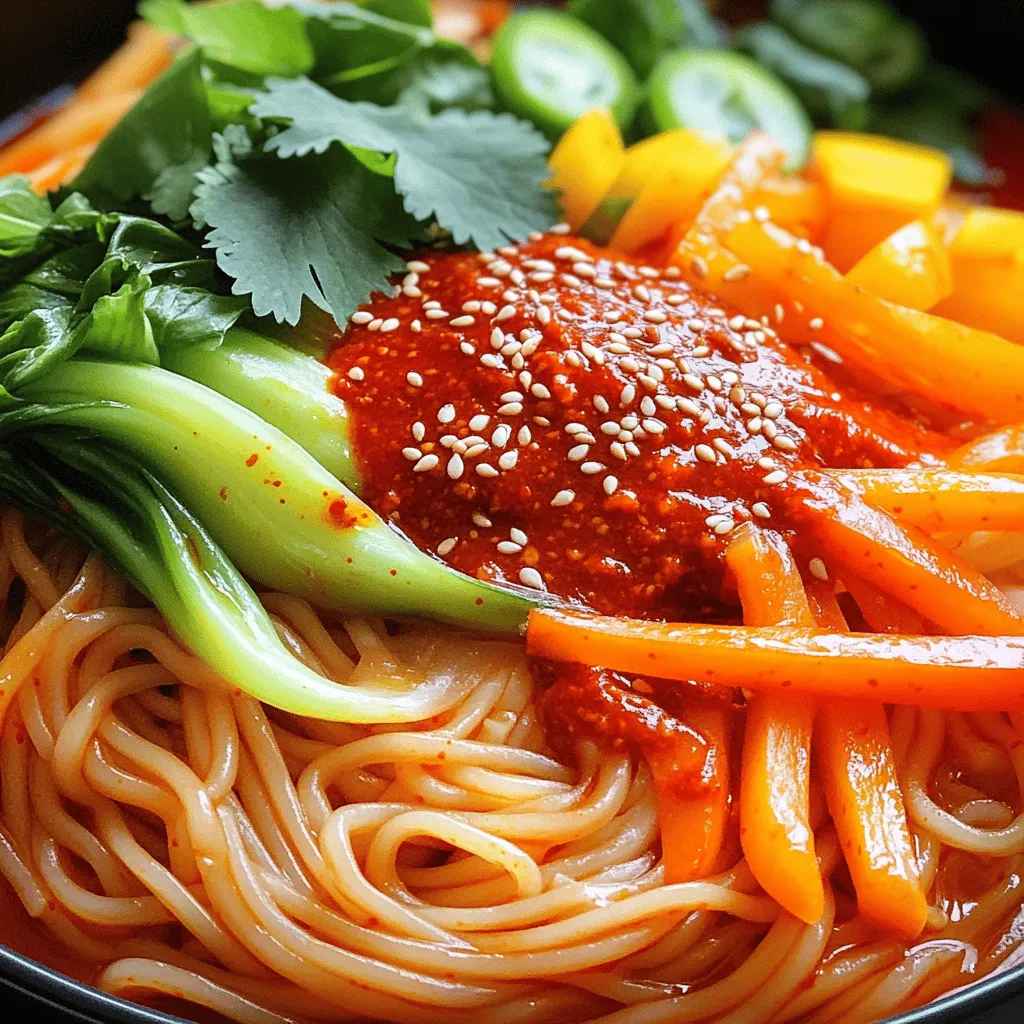
– 1 cup bok choy, roughly chopped
– 1 medium carrot, julienned
– 1 bell pepper (any color), thinly sliced
– 2 green onions, finely chopped
– Sesame seeds, for garnish
– Fresh cilantro leaves, for garnish
Optional Ingredients
– Additional protein options (chicken, tofu, shrimp)
– Other vegetables (mushrooms, zucchini, spinach)
Gathering the right ingredients is the first step to making spicy gochujang noodles. Thick rice noodles are key, giving the dish a chewy texture. Gochujang adds heat and depth. The soy sauce and sesame oil bring umami and richness. Honey or maple syrup balances the spice with a touch of sweetness.
Fresh ginger and garlic provide a fragrant kick. Bok choy, carrots, and bell peppers add color and crunch. Green onions, sesame seeds, and cilantro finish the dish with fresh notes.
If you want to customize your meal, feel free to add proteins like chicken or tofu. You can include more veggies too, like mushrooms or zucchini. Have fun mixing and matching!
Step-by-Step Instructions
Cooking the Noodles
To cook thick rice noodles, start by boiling water in a large pot. Once the water is bubbling, add 200g of thick rice noodles. Cook them for about 8-10 minutes, or until they feel soft. When they are done, drain them well and rinse under cold water. This stops the cooking and keeps them from getting sticky. Set the noodles aside in a colander.
Preparing the Gochujang Sauce
In a small bowl, mix 2 tablespoons of gochujang with 1 tablespoon of soy sauce, 1 tablespoon of sesame oil, and 1 tablespoon of honey. You can use maple syrup if you want it vegan. Next, add 1 teaspoon of grated fresh ginger and 2 cloves of finely minced garlic. Stir well until it’s smooth. If you like it spicier, add another tablespoon of gochujang.
Sautéing the Vegetables
Use a large skillet for this step. Heat a teaspoon of oil over medium heat. Once hot, toss in 1 cup of roughly chopped bok choy, 1 medium julienned carrot, and 1 thinly sliced bell pepper. Sauté these for about 4-5 minutes. Stir them often until they are tender but still crisp.
Tossing Everything Together
Add the cooked noodles to the skillet with the sautéed veggies. Drizzle the gochujang sauce over everything. Use tongs or a spatula to toss them together gently. Make sure the noodles are covered well with the sauce. Cook for another 2-3 minutes to heat everything through.
Final Touches
Once done, take the skillet off the heat and fold in 2 finely chopped green onions. When you serve the noodles, plate them up nicely. Top with a sprinkle of sesame seeds and fresh cilantro leaves for a pop of color and flavor.
Tips & Tricks
Achieving the Perfect Noodle Texture
To cook thick rice noodles, start by boiling water. This is the key to soft noodles. Follow the package instructions for cooking time. Once the noodles are tender, drain them. Rinse them under cold water. This stops cooking and keeps them firm.
Customizing the Flavor
Want more heat? Add an extra tablespoon of gochujang. For sweetness, stir in more honey or maple syrup. You can also mix in other sauces. Try soy sauce or sesame sauce for a twist. This lets you play with flavors.
Preparing Ahead
You can make the sauce ahead of time. Mix gochujang, soy sauce, sesame oil, honey, ginger, and garlic. Store it in the fridge. For veggies, chop them up earlier too. When reheating, add a splash of water. This keeps everything moist and tasty.
Variations
Vegan Alternatives
You can easily make this dish vegan. First, swap honey for maple syrup. Maple syrup adds sweetness and keeps it plant-based. Next, boost the veggies! Try adding mushrooms, zucchini, or spinach. These add flavor and nutrients, making the dish even more colorful.
Gluten-Free Options
If you need gluten-free noodles, look for rice noodles or other gluten-free types. They work well in this recipe. For the sauce, check that your soy sauce is gluten-free. Some brands offer a gluten-free version. This small change ensures everyone can enjoy the meal.
Different Asian Noodle Recipes
Want to mix things up? Use ramen or udon noodles instead. Ramen adds a nice chew, while udon is thicker and heartier. You can also try fusion recipes. Combine gochujang with peanut sauce for a tasty twist. Experimenting with different noodles keeps your meals exciting!
Storage Info
Storing Leftovers
To keep your spicy gochujang noodles fresh, use airtight containers. Glass or plastic containers work well. Make sure the noodles cool down before sealing. Store your leftovers in the fridge for up to three days. Always label the container with the date for easy tracking.
Freezing Tips
You can freeze spicy gochujang noodles for later. First, let the noodles cool fully. Then, place them in freezer-safe bags. Squeeze out as much air as possible. They can last up to three months in the freezer. When you’re ready to eat, thaw them in the fridge overnight. Reheat in a skillet over medium heat with a splash of water for best results.
Shelf Life
Cooked noodles last about three to four days in the fridge. Always check for signs of spoilage. If they smell sour or look slimy, it’s time to toss them. Keeping them stored properly will help you enjoy your delicious meal longer!
FAQs
How spicy are Spicy Gochujang Noodles?
Gochujang has a unique heat. It is spicy but also sweet and deep. The spice level can vary based on brands. If you want more heat, add more gochujang. Taste your sauce before mixing it with the noodles. Adjust to your liking. Balance is key.
Can I use different noodles?
Yes, you can use many types of noodles. Rice noodles are thick and chewy, but other options work too. Try soba, udon, or even spaghetti if you prefer. Each noodle brings its own texture. Just make sure to cook them right.
Where can I buy gochujang?
You can find gochujang in many places. Look in Asian markets or international aisles of grocery stores. Online, sites like Amazon or specialty food shops have it too. Read reviews to find a quality brand.
Is it possible to make this recipe in advance?
Yes, you can prep this dish ahead of time. Cook the noodles and store them separately. Keep the sauce in the fridge. Sauté the veggies right before serving. When ready, just heat everything together. This keeps the noodles and veggies fresh.
What can I serve with Spicy Gochujang Noodles?
These noodles pair well with many sides. Try spring rolls or dumplings for appetizers. A simple cucumber salad adds a nice crunch. You can also serve it with grilled chicken or shrimp for protein. Enjoy mixing flavors!
Spicy Gochujang Noodles are simple to make and packed with flavor. You learned about key ingredients and how to prepare them step by step. Remember, you can customize your dish with different proteins or veggies. Whether you prefer it spicy or sweet, the choice is yours. Lastly, store leftovers properly to enjoy this dish later. Dive into your kitchen and treat yourself to a tasty meal!


