If you’re craving a bold and hearty meal, these Spicy Cajun Turkey Meatballs are the answer! This easy recipe mixes ground turkey with vibrant spices for a dish that’s bursting with flavor. You’ll find everything you need, from simple ingredients to step-by-step instructions, ensuring your meatballs turn out perfect every time. Get ready to impress your taste buds and serve up something delicious in no time!
Ingredients
List of Ingredients
– Ground turkey: This lean meat is the star of our dish. It is healthy and packs a punch of flavor. Using ground turkey helps keep the meatballs moist while staying low in fat.
– Breadcrumbs and cheese: I prefer using panko breadcrumbs for added crispiness. They give the meatballs a nice crunch. The Parmesan cheese adds a cheesy taste that enhances the overall flavor.
– Vegetables and seasoning components: Green bell pepper and yellow onion add freshness and texture. Garlic brings a rich aroma. Cajun seasoning gives the meatballs their spicy kick. Smoked paprika adds depth, while cayenne pepper boosts the heat. You can adjust the cayenne to suit your taste. Salt and pepper round out the flavors, making every bite delicious. Fresh parsley adds a pop of color and freshness when serving.
Step-by-Step Instructions
Preparation Steps
Start by prepping your oven and baking sheet. Preheat your oven to 400°F (200°C). Line a baking sheet with parchment paper. This step helps with easy cleanup and keeps the meatballs from sticking.
Next, mix your wet and dry ingredients. In a large bowl, combine 1 lb of ground turkey with 1/2 cup of breadcrumbs, 1/4 cup of grated Parmesan cheese, 1/4 cup of finely chopped green bell pepper, 1/4 cup of finely chopped yellow onion, and 2 cloves of minced garlic. Stir gently until everything is well mixed.
In a small bowl, whisk together 1 large beaten egg, 1 tablespoon of Cajun seasoning, 1 teaspoon of smoked paprika, 1/2 teaspoon of cayenne pepper, and a pinch of salt and pepper. This mixture adds moisture and flavor to your turkey blend.
Pour the egg mixture over the turkey mixture. Use your hands or a spatula to mix everything well. The mixture should be moist, yet it needs to hold together when you shape it.
Shaping the Meatballs
Now it’s time to shape your meatballs. With clean hands, form the mixture into golf ball-sized meatballs. Make sure they are compact. Place each meatball onto the prepared baking sheet, spacing them evenly apart. This helps them cook evenly.
Baking Instructions
For baking, place the meatballs in the preheated oven. Bake them for about 20 minutes. They should be cooked through and have a light golden-brown color. To be sure, use a meat thermometer. The internal temperature should reach 165°F (75°C).
While the meatballs bake, heat 1 cup of marinara sauce in a small saucepan over low heat. Stir occasionally until it warms through.
Once the meatballs are done, remove them from the oven. Let them cool for a few minutes on the baking sheet.
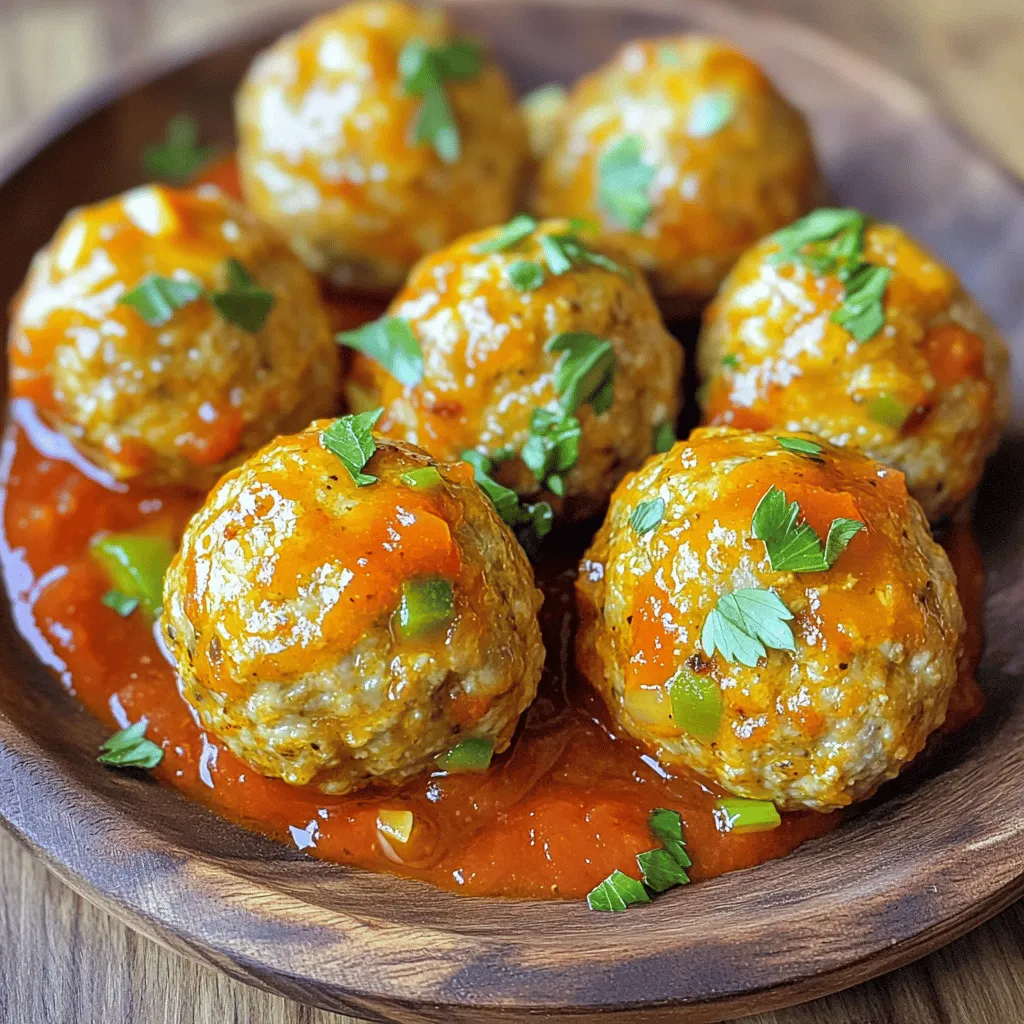
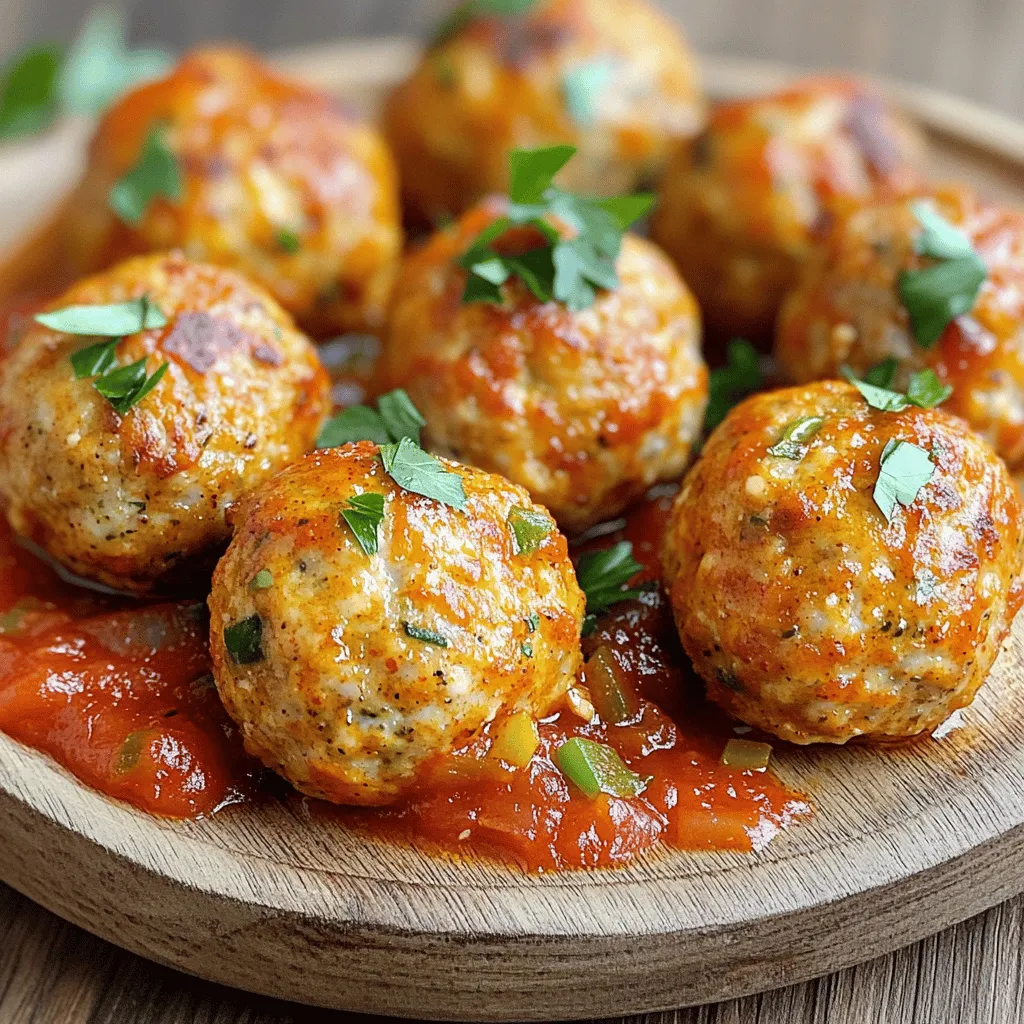
Now, you’re ready to serve! Plate the meatballs and drizzle them with the warm marinara sauce. Add a sprinkle of fresh parsley on top for color and freshness. Enjoy your flavorful dish!
Tips & Tricks
Adjusting the Spiciness
To change the heat level of your meatballs, you have options. If you want more spice, add extra cayenne pepper. Start with a half teaspoon, then taste. Increase it slowly to avoid overpowering the flavor. For less heat, just skip the cayenne or use a milder seasoning. You can also use less Cajun seasoning for a lighter kick. Always taste as you go to find your perfect balance.
Cooking Techniques for Best Results
A meat thermometer is key for perfect meatballs. Insert it into the center; it should read 165°F (75°C). This ensures they are safe and juicy. To get a crispy exterior, use panko breadcrumbs. They create a great texture. Bake them on parchment paper to avoid sticking and make cleanup easy. If you want extra crunch, broil the meatballs for a few minutes at the end.
Serving Suggestions
These meatballs shine when paired with marinara sauce. Warm the sauce in a small pot while the meatballs bake. Serve the meatballs on a plate, drizzled with sauce. Garnish with fresh parsley for color. For sides, consider crusty bread or a salad. The bread is perfect for dipping into the sauce. Enjoying these meatballs with friends makes every bite better!
Variations
Ingredient Substitutions
If you need a gluten-free option, swap breadcrumbs for gluten-free breadcrumbs. You can also use crushed cornflakes or oats. For a dairy-free diet, skip the Parmesan cheese or use a dairy-free cheese. These changes keep the meatballs tasty while meeting your needs.
Additional Flavor Twists
You can enhance the flavor with other spices or herbs. Try adding thyme or oregano for an earthy taste. For extra heat, mix in chili powder or red pepper flakes. You can even add fresh herbs like cilantro or basil for a unique twist.
Serving Options
While marinara sauce is great, you can try other sauces too. Consider serving the meatballs with a spicy remoulade or a creamy ranch dip. They also pair well with coleslaw or roasted vegetables. For a fun touch, serve them in soft tortillas for mini tacos.
Storage Info
Refrigeration Guidelines
After cooking your Spicy Cajun Turkey Meatballs, let them cool for a few minutes. Place them in an airtight container. This helps keep them fresh. Store the meatballs in the fridge for up to three days. If you want to keep them longer, freezing is a better option.
Freezing Meatballs
To freeze your meatballs, first, let them cool completely. Next, line a baking sheet with parchment paper. Arrange the meatballs in a single layer on the sheet. This prevents them from sticking together. Place the baking sheet in the freezer for one to two hours. Once frozen, transfer the meatballs to a freezer-safe bag. Make sure to label the bag with the date. They can stay in the freezer for up to three months.
Reheating Instructions
To reheat the meatballs, you can use the oven or the microwave. If using the oven, preheat it to 350°F (175°C). Place the meatballs on a baking dish and cover with foil. Heat for about 15-20 minutes. If you’re in a hurry, use the microwave. Place the meatballs on a plate and cover with a damp paper towel. Heat for one to two minutes, checking to make sure they are hot throughout. Enjoy your flavorful meatballs with marinara sauce!
FAQs
Common Questions About Spicy Cajun Turkey Meatballs
Can I make these spicy meatballs ahead of time?
Yes, you can prepare these meatballs a day ahead. Just mix all the ingredients and form the meatballs. Place them on a baking sheet and cover with plastic wrap. Store them in the fridge. When ready to cook, bake them straight from the fridge. This saves time.
What can I serve with Cajun turkey meatballs?
These meatballs pair well with many sides. Here are some ideas:
– Crusty bread for dipping in marinara sauce
– A fresh green salad with a light dressing
– Roasted vegetables for a colorful plate
– Rice or pasta to soak up the sauce
Are these meatballs suitable for meal prep?
Absolutely! These meatballs are great for meal prep. You can cook a big batch early in the week. Store them in airtight containers in the fridge. Reheat them when you’re ready to eat. They stay tasty for several days, making meals easy and fun!
This blog post covered how to make spicy Cajun turkey meatballs. We discussed the key ingredients, from ground turkey to vibrant spices. I shared steps for prepping, mixing, and shaping the meatballs, along with baking tips.
For success, remember to adjust the heat and use a meat thermometer. Try different flavors and serve with tasty sides. Store leftovers properly and enjoy them later. With these tips, you’ll create delicious meatballs every time. Happy cooking!


