Looking for a quick meal that’s packed with flavor? Spicy Black Bean Tacos are your answer! These tasty tacos are not just simple to prepare, but they also offer a burst of spice that will satisfy your cravings. With just a few basic ingredients and some fresh toppings, you can whip up a satisfying meal that’s perfect for any day of the week. Let’s dive into how to create these delicious tacos step by step!
Ingredients
Essential Ingredients for Spicy Black Bean Tacos
– 2 cans (15 oz each) black beans, thoroughly rinsed and drained
– 1 tablespoon extra-virgin olive oil
– 1 medium onion, finely chopped
– 3 cloves garlic, minced
– 1 chipotle pepper in adobo sauce, minced
– 1 teaspoon ground cumin
– 1 teaspoon smoked paprika
– Sea salt and freshly cracked black pepper, to taste
– 8 small corn or flour tortillas
– 1 ripe avocado, sliced into thin wedges
– 1 cup cherry tomatoes, halved
– Fresh cilantro leaves, chopped, for garnish
– Lime wedges, for an extra splash of zest
I love using black beans as the base for these tacos. They are rich in protein and fiber, making them a healthy choice. Olive oil gives a nice flavor when sautéing the onion and garlic. The chipotle pepper adds a smoky kick that really makes the dish stand out.
Optional Ingredients to Enhance Flavor
– Extra chipotle pepper in adobo sauce
– Fresh herbs like cilantro or parsley
– Additional vegetables such as bell peppers or corn
If you want to amp up the spice, add an extra chipotle pepper. Fresh herbs can brighten the tacos. You can also toss in some veggies like bell peppers for added crunch and color. Each of these optional ingredients helps to create a taco that is truly unique.
Step-by-Step Instructions
Easy Preparation of Spicy Black Bean Filling
To start, heat a large skillet over medium heat. Pour in 1 tablespoon of olive oil. Once warm, add 1 finely chopped onion. Sauté the onion for about 5 minutes. You want it to be soft and see-through. Next, mix in 3 minced garlic cloves and 1 minced chipotle pepper. Stir for 1 to 2 minutes. The smell will be amazing!
Now, add the star of the show: 2 cans of black beans. Pour them in and stir well. Add 1 teaspoon of ground cumin and 1 teaspoon of smoked paprika for depth. Sprinkle in sea salt and black pepper to taste. Cook this mixture for 5 to 7 minutes. Use a fork to mash some beans lightly. This helps the flavors blend. Taste it and adjust the spices if needed.
Perfectly Warming Tortillas
Soft tortillas make all the difference! To warm them, use a dry skillet over medium heat. Heat each tortilla for about 30 seconds on both sides. They should feel soft and pliable. If you prefer, wrap the tortillas in foil. Place them in a preheated oven at 350°F (175°C) for about 10 minutes. This method works well for a larger batch.
Assembling Your Tacos
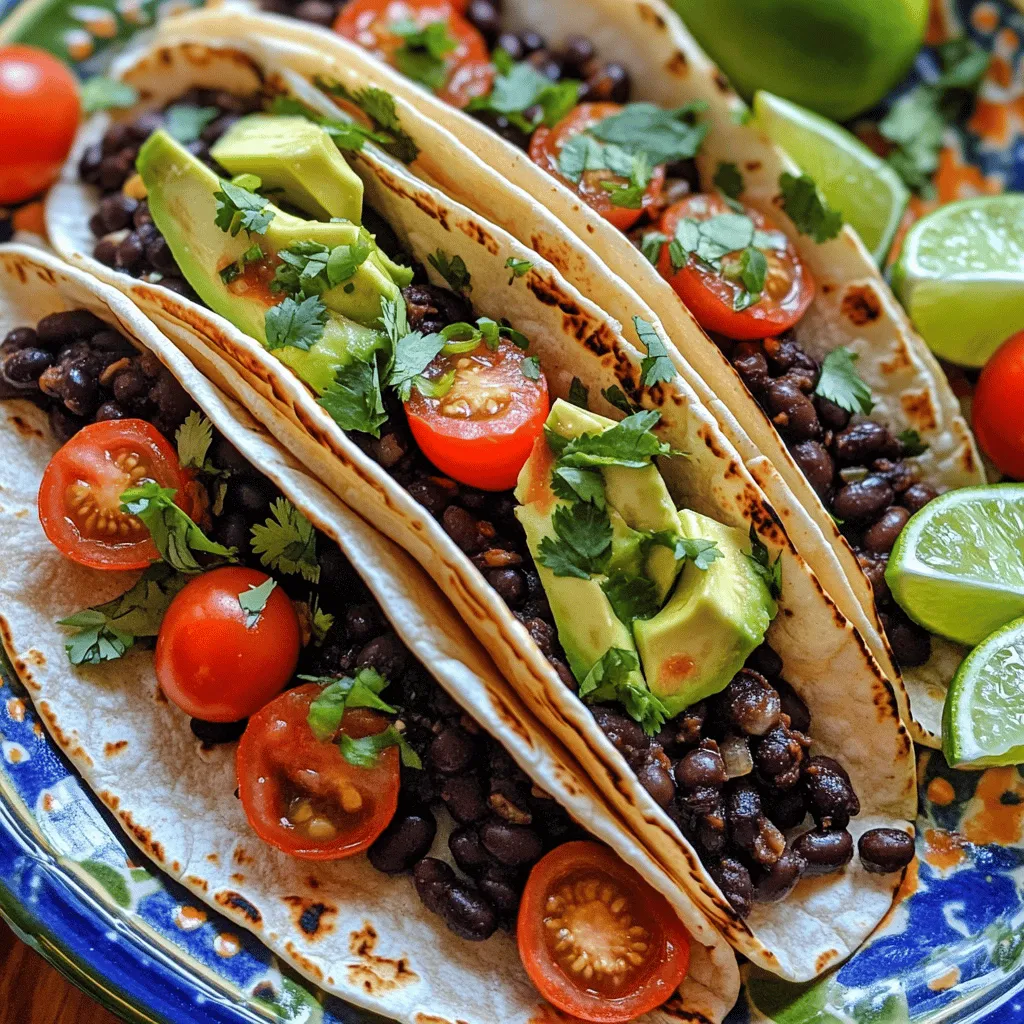
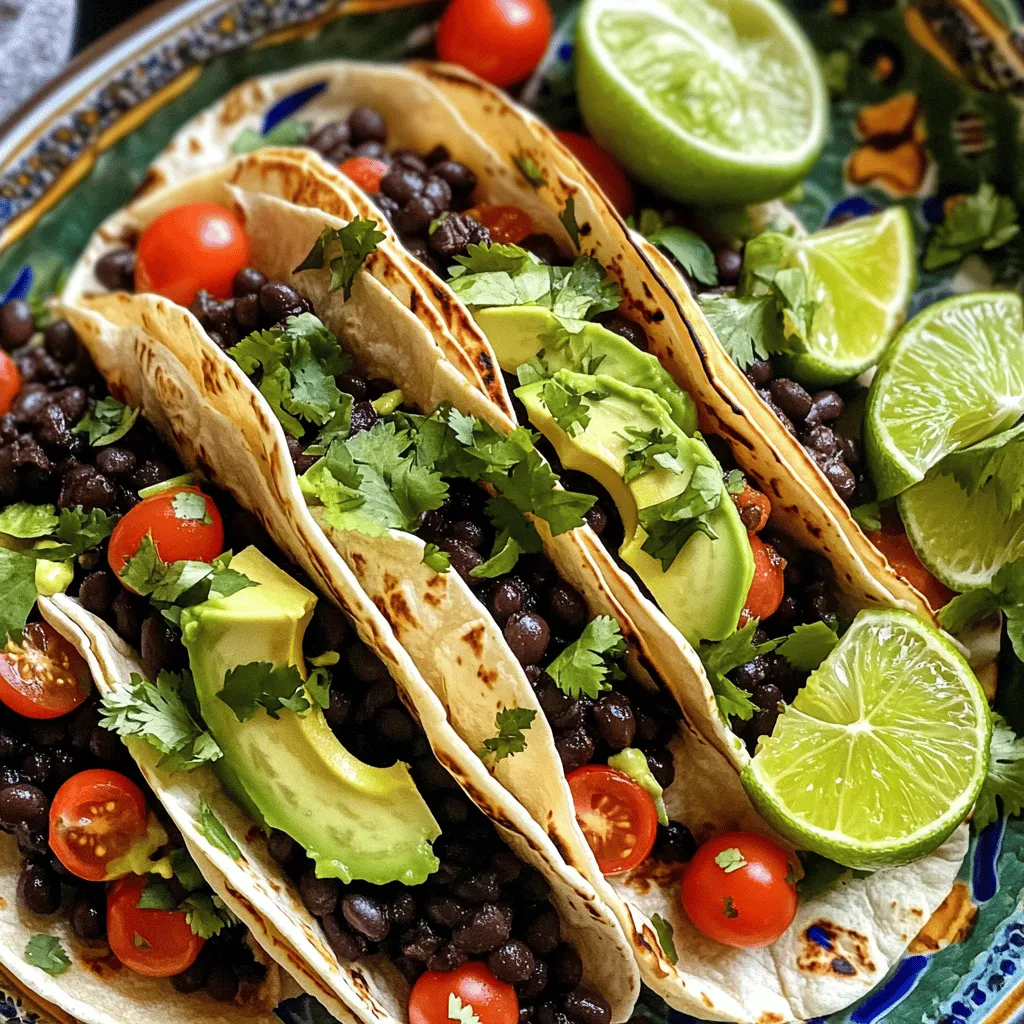
Now comes the fun part: assembling your tacos! Start with a warmed tortilla. Spoon a good amount of the black bean mixture right in the center. Next, add a few slices of creamy avocado. Then, sprinkle some halved cherry tomatoes on top. Finally, finish with fresh cilantro for a burst of flavor.
For a beautiful presentation, arrange your tacos on a colorful platter. Garnish with extra cilantro and lime wedges. This adds a nice touch and makes your dish look vibrant. Enjoy your spicy black bean tacos right away!
Tips & Tricks
How to Make the Best Spicy Black Bean Tacos
To make the best spicy black bean tacos, start with spice level. If you want more heat, add more chipotle pepper. You can also mix in hot sauce for an extra kick. For less heat, use only half the pepper or skip it entirely.
Next, balancing flavors with toppings is key. Creamy avocado helps tone down the heat. Fresh cilantro adds brightness. Cherry tomatoes bring sweetness and color. Don’t forget lime wedges for a zesty finish. Squeeze lime over the tacos just before eating for a fresh burst.
Common Mistakes to Avoid
One common mistake is overcooking the beans. This can make them mushy and lose texture. Cook them just enough to heat through. Mash lightly for a creamy mix, but keep some whole for texture.
Another mistake is skipping essential spices. Cumin and smoked paprika are must-haves. They bring depth and warmth. Without them, your tacos might taste flat. Always taste and adjust the seasoning before serving to ensure full flavor.
Variations
Vegan and Gluten-Free Options
For a vegan and gluten-free twist, you can easily swap ingredients. Instead of regular tortillas, use corn tortillas, which are naturally gluten-free. If you want to keep it vegan, ensure any toppings, like sour cream, are plant-based. Here are some ideas for tasty toppings:
– Fresh avocado slices
– Chopped lettuce
– Diced red onion
– Sliced jalapeños
– Dairy-free cheese
These swaps keep the dish tasty while meeting dietary needs.
Additional Flavor Profiles
Want to mix things up? You can add meats or alternative proteins to your spicy black bean tacos. Ground turkey or chicken adds a savory touch. For a plant-based option, try lentils or tempeh for added protein.
You can also use different types of beans. Pinto beans or kidney beans work well, bringing new flavors and textures. Each variation can change the taste, making your taco night exciting.
Storage Info
Best Practices for Storing Leftovers
To keep your spicy black bean tacos fresh, store the bean mixture and tortillas separately.
– Refrigerating the bean mixture: Place the cooled bean mixture in an airtight container. This will keep it fresh for up to 4 days. Make sure it cools completely before sealing to avoid moisture inside.
– Storing tortillas properly: Wrap any leftover tortillas in plastic wrap or aluminum foil. Store them in a zip-top bag to keep them soft. This helps prevent them from drying out.
Reheating Tips
Reheating your tacos right will make them taste great again.
– Best methods for reheating for optimal taste: For the bean mixture, use a skillet over medium heat. Stir it often until it’s hot. For tortillas, warm them in a dry skillet. This brings back their softness and flavor.
– How to avoid soggy tortillas: Don’t microwave the tortillas. Instead, heat them in a skillet for a short time. This keeps them crisp and prevents sogginess.
FAQs
How do I make black bean tacos spicier?
To heat up your black bean tacos, you can follow a few simple tips. First, add more chipotle pepper in adobo sauce to your bean mixture. This gives a smoky, spicy kick. You can also mix in cayenne pepper or crushed red pepper flakes. These spices boost the heat without changing the overall flavor.
For sauces, try a few drops of your favorite hot sauce. Look for options like sriracha or a habanero sauce. These will add both spice and flavor. Remember to taste as you go. You want to enjoy the heat, not just feel it!
Can I freeze black bean tacos?
Yes, you can freeze black bean tacos for later use. To freeze, place the cooled bean mixture in a freezer-safe bag. Make sure to remove as much air as possible. You can also freeze the tortillas separately. Wrap them tightly in foil or plastic wrap.
When you are ready to eat, thaw the bean mixture in the fridge overnight. Heat it in a pan until warm. For the tortillas, warm them in a dry skillet or the oven. This keeps them soft and tasty.
What can I serve with spicy black bean tacos?
Spicy black bean tacos pair well with many sides and dips. Consider serving them with a fresh salad or some Mexican rice. Guacamole and salsa make great dips too. They add flavor and a cool contrast to the spice of the tacos.
For drinks, try a light beer or a fruity mocktail. A limeade or agua fresca complements the tacos nicely. The refreshing taste balances the heat and enhances your meal experience.
Spicy black bean tacos are simple and fun to make. You start with black beans, add aromatics, and choose tasty toppings. Remember to adjust spice levels and avoid common mistakes. There are vegan options and fun variations to try. For leftovers, store beans properly and reheat carefully. You can spice them up or freeze for later. These tacos can impress anyone at your table. Now, gather your ingredients and start cooking! Enjoy this flavorful dish and make it your own.


