Southwest Stuffed Sweet Potatoes Simple and Delicious

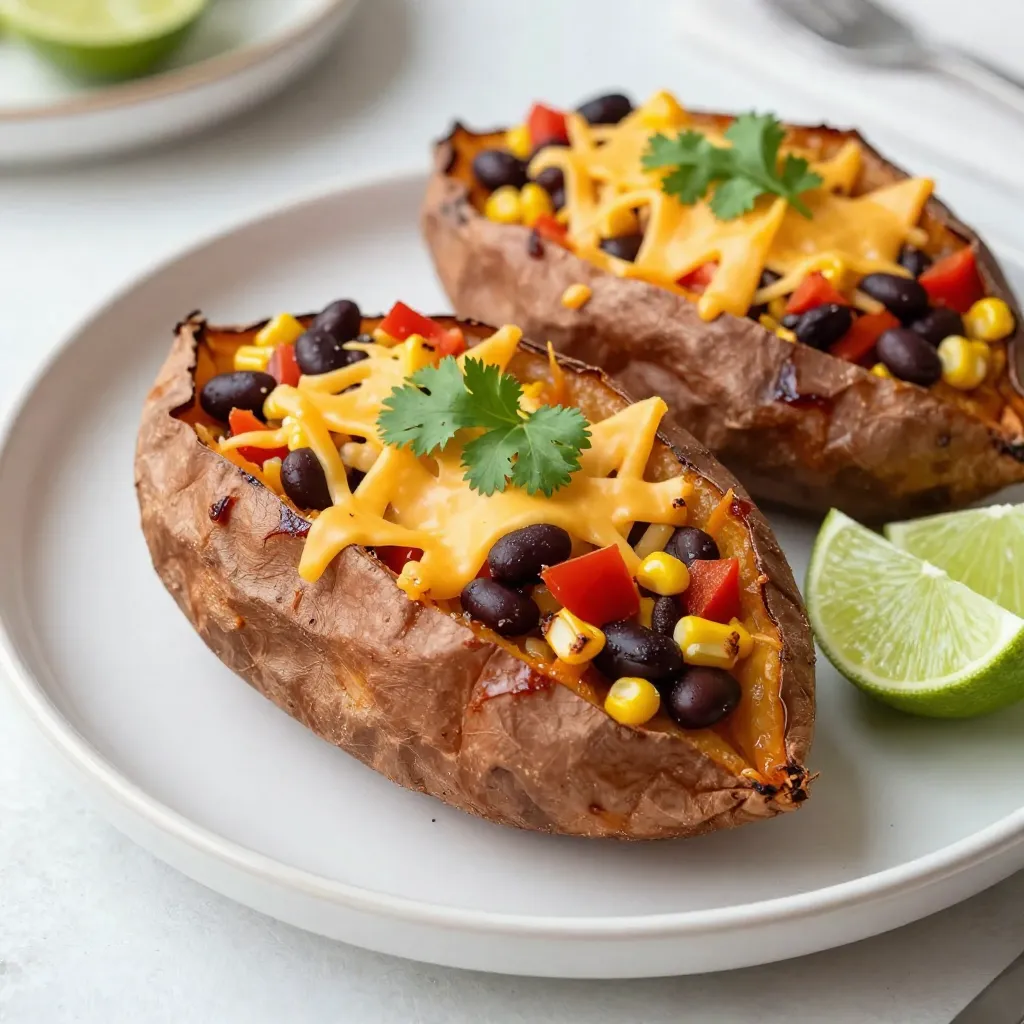
Are you ready to enjoy a burst of flavor with minimal effort? Southwest Stuffed Sweet Potatoes are your answer! This simple, delicious recipe features sweet potatoes filled with savory beans, corn, and spices. Not only are they easy to make, but they’re also packed with nutrition. Get ready to impress your taste buds and nourish your body with this delightful dish! Let’s dive into the ingredients and get cooking!
Why I Love This Recipe
- Healthy and Nutritious: Sweet potatoes are packed with vitamins and minerals, making this dish a wholesome option for any meal.
- Flavor Explosion: The combination of spices, black beans, and corn creates a savory filling that is bursting with flavor.
- Customizable: You can easily adjust the ingredients or spices to suit your taste preferences or dietary needs.
- Eye-Catching Presentation: The vibrant colors of the stuffed sweet potatoes make for an appealing dish that’s perfect for gatherings.
Ingredients
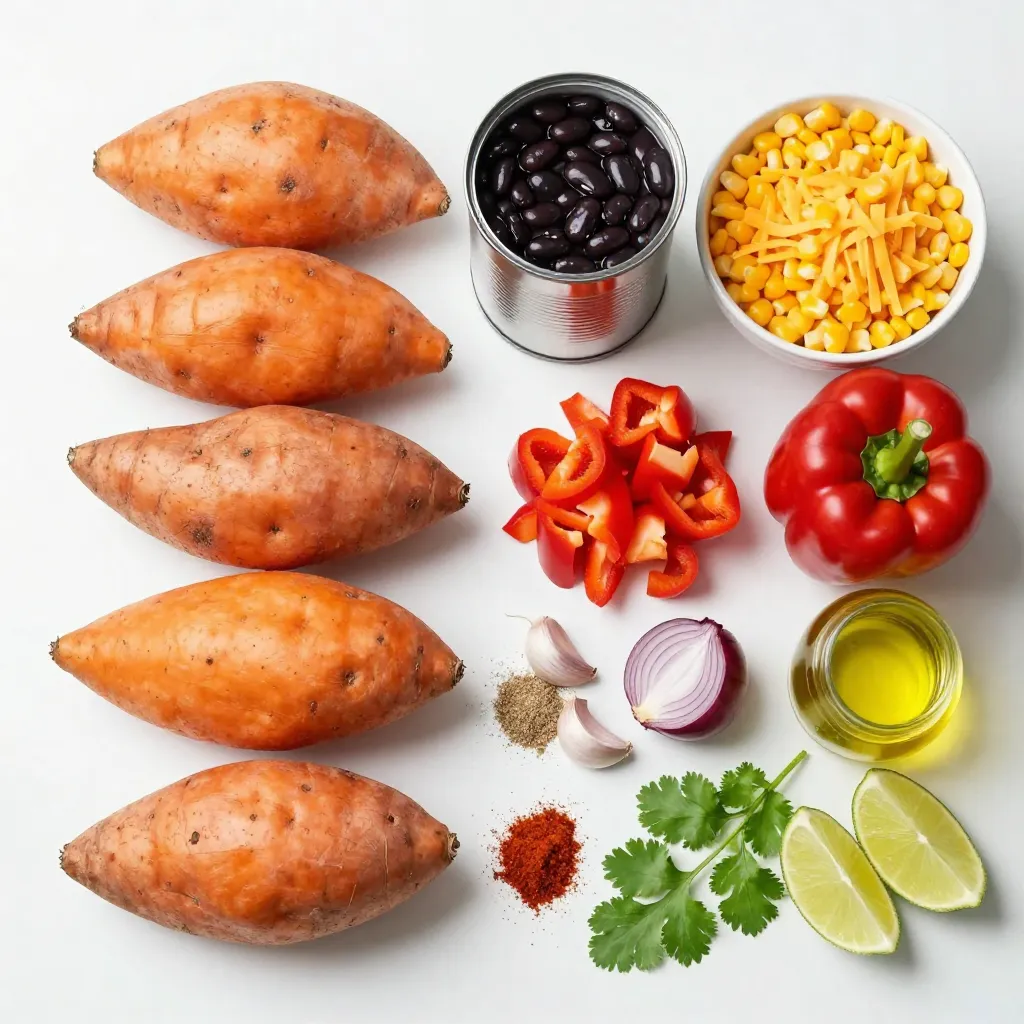
To make these tasty Southwest stuffed sweet potatoes, gather the following ingredients:
- 4 medium sweet potatoes
- 1 can (15 oz) black beans, rinsed and drained
- 1 cup corn kernels (fresh or frozen)
- 1 red bell pepper, diced
- 1 small red onion, diced
- 2 cloves garlic, minced
- 1 teaspoon ground cumin
- 1 teaspoon smoked paprika
- ½ teaspoon chili powder
- Salt and pepper to taste
- ½ cup shredded cheddar cheese (optional)
- 2 tablespoons olive oil
- 2 tablespoons fresh cilantro, chopped
- Lime wedges for serving
These ingredients come together to create a filling and flavorful dish. Sweet potatoes bring a natural sweetness. Black beans add protein and texture. Corn introduces a sweet crunch. The bell pepper and onion offer a nice bite of freshness. Garlic and spices give this dish a warm depth. You can top it with cheese for an extra creamy touch. Fresh cilantro and lime add brightness to every bite. Enjoy cooking!

Step-by-Step Instructions
Preparation
- Preheat the oven to 400°F (200°C).
- Rinse the sweet potatoes under water. Use a fork to poke holes in each potato. This helps steam escape while baking. Place them on a baking sheet lined with parchment paper.
Baking the Sweet Potatoes
- Bake the sweet potatoes for 45-60 minutes, or until they feel soft. You can tell they are done when a fork slides in easily.
Cooking the Filling
- Heat olive oil in a large skillet over medium heat. Add diced red onion and bell pepper. Sauté for about 5 minutes until they soften and smell good.
- Next, add minced garlic, ground cumin, smoked paprika, and chili powder. Cook for another minute until the spices smell great.
- Stir in the rinsed black beans and corn. Cook for 5 more minutes. Season with salt and pepper to taste.
Stuffing the Sweet Potatoes
- Once your sweet potatoes are baked, let them cool for a few minutes. Carefully slice each potato down the middle.
- Use a fork to fluff the insides. This makes them light and fluffy. Fill each potato with the savory bean and corn mixture.
Final Touches
- If you like cheese, sprinkle some shredded cheddar on top of each stuffed potato. Return them to the oven for another 5 minutes, until the cheese melts.
- Remove from the oven and garnish with fresh cilantro. Serve with lime wedges for a fresh burst of flavor.
Tips & Tricks
Best Baking Techniques
To bake sweet potatoes just right, follow these steps:
- Preheat your oven to 400°F (200°C).
- Wash the sweet potatoes well.
- Use a fork to poke holes in each potato.
- Place them on a lined baking sheet.
- Bake for 45 to 60 minutes. Check for softness with a fork.
These tips help keep the sweet potatoes tender and fluffy inside.
Enhancing Flavor
To boost the taste, try adding these spices:
- Cayenne pepper for heat.
- Ground coriander for a citrusy twist.
- A dash of cinnamon for warmth.
You can also add toppings like:
- Crumbled feta cheese for a tangy bite.
- Sliced green onions for crunch.
- Avocado for creaminess.
These extras give your dish more depth and fun flavors.
Perfect Serving Ideas
For a beautiful presentation, serve the stuffed potatoes on a colorful platter.
- Arrange lime wedges around them for brightness.
- Add a sprinkle of extra cilantro on top for color.
You can also serve these with a side salad or rice for a complete meal. These ideas help make your dish inviting and tasty!
Pro Tips
- Choose the Right Sweet Potatoes: Opt for medium-sized sweet potatoes for even cooking and easier handling when stuffing.
- Enhance Flavor with Toppings: Consider adding avocado slices or a dollop of sour cream on top for a creamy, delicious contrast to the spices.
- Customize the Filling: Feel free to add other ingredients like diced jalapeños or cooked quinoa for added texture and nutrition.
- Make Ahead: You can prepare the filling in advance and store it in the fridge for up to 3 days, making mealtime even quicker.
Variations
Vegetarian Options
For a veggie twist, swap the black beans with lentils. Lentils cook fast and add protein. You can also add more colorful veggies. Try zucchini, spinach, or diced carrots. They bring fresh flavors and texture. This makes the dish even healthier and more vibrant.
Gluten-Free Adjustments
This recipe is already gluten-free since sweet potatoes and beans are safe for all. Just check your spices and cheese. Some brands add gluten, so read the labels. Using fresh ingredients ensures that your meal is totally gluten-free and safe for everyone.
Flavor Variations
Want to change up the taste? You can try different spices. Use taco seasoning for a bold kick. A pinch of cinnamon can add a sweet note. You could also replace the cheese with avocado for a creamy touch. Each choice makes the meal unique and fun to explore.
Storage Info
How to Store Leftovers
To keep your stuffed sweet potatoes fresh, store them in the fridge. Place them in an airtight container. You can also wrap them tightly in plastic wrap. If you want to freeze them, wrap each potato in foil. Use a freezer-safe bag for extra protection.
Reheating Instructions
When it’s time to eat leftovers, I suggest reheating them in the oven. Preheat your oven to 350°F (175°C). Place the stuffed potatoes on a baking sheet. Heat for about 15-20 minutes. This helps keep the texture nice. You can also use a microwave. Heat them for 1-2 minutes. Just remember to cover them to avoid drying out.
Shelf Life
These stuffed sweet potatoes last about 3-5 days in the fridge. If you freeze them, they can last up to 3 months. Just make sure to label them with the date. This way, you can enjoy your tasty meal later!
FAQs
Can I make Southwest Stuffed Sweet Potatoes in advance?
Yes, you can make these sweet potatoes ahead of time. Bake and stuff them, then store in the fridge. They last about three days. When you are ready, just reheat them in the oven. This keeps the flavors fresh. You can also prepare the filling in advance. Store it separately in the fridge and stuff the sweet potatoes when ready to bake.
What can I substitute for black beans?
If you do not have black beans, try other beans. Kidney beans or pinto beans work well. You can even use chickpeas for a unique twist. These beans will still add protein and flavor. Just make sure to rinse and drain them first.
Are Southwest Stuffed Sweet Potatoes healthy?
Yes, they are healthy! Sweet potatoes are packed with vitamins A and C. Black beans provide fiber and protein. Corn adds some sweetness and more nutrients. This dish is also low in fat, especially if you skip the cheese. It’s a great choice for a balanced meal.
How can I make this recipe spicier?
To add heat, try adding jalapeños or diced green chilies to the filling. You can also sprinkle cayenne pepper into the mix. If you enjoy hot sauce, drizzle some on top before serving. Adjust the spice level to match your taste.
This blog covered a flavorful recipe for Southwest stuffed sweet potatoes. We explored the ingredients needed, the steps for preparation, and tips to enhance flavor. You can make this dish vegetarian or gluten-free with easy swaps.
Remember to store leftovers properly and enjoy them later. Whether you serve it for dinner or meal prep, this dish brings joy to your table. Try it out, and let these stuffed sweet potatoes brighten your meal

Southwest Stuffed Sweet Potatoes
Ingredients
- 4 medium sweet potatoes
- 1 can (15 oz) black beans, rinsed and drained
- 1 cup corn kernels (fresh or frozen)
- 1 medium red bell pepper, diced
- 1 small red onion, diced
- 2 cloves garlic, minced
- 1 teaspoon ground cumin
- 1 teaspoon smoked paprika
- ½ teaspoon chili powder
- to taste salt and pepper
- ½ cup shredded cheddar cheese (optional)
- 2 tablespoons olive oil
- 2 tablespoons fresh cilantro, chopped
- for serving lime wedges
Instructions
- Start by preheating your oven to 400°F (200°C).
- Rinse the sweet potatoes thoroughly under running water. Using a fork, pierce each potato several times to allow steam to escape during baking. Arrange them on a baking sheet lined with parchment paper for easy cleanup.
- Place the baking sheet in the preheated oven and bake the sweet potatoes for approximately 45-60 minutes. They're ready when a fork can easily slide into the flesh.
- While the sweet potatoes are baking, heat the olive oil in a large skillet over medium heat. Add the diced red onion and red bell pepper to the skillet, sautéing them for about 5 minutes until they begin to soften and become fragrant.
- Incorporate the minced garlic along with the ground cumin, smoked paprika, and chili powder into the skillet. Sauté for an additional minute, allowing the spices to become aromatic.
- Next, stir in the rinsed black beans and corn, cooking the mixture for an additional 5 minutes to ensure everything is heated through. Season generously with salt and pepper to enhance the flavors.
- Once the sweet potatoes are cooked, remove them from the oven and allow them to cool for a few minutes for easier handling. Carefully slice each sweet potato down the center, creating a pocket for the stuffing.
- Using a fork, gently fluff the insides of each sweet potato, creating a light and airy texture. Generously fill each pocket with the savory black bean and corn mixture.
- If you’re using cheese, sprinkle some shredded cheddar on top of each filled sweet potato. Return them to the oven for an additional 5 minutes, or until the cheese is melted and bubbly.
- Finally, remove from the oven and garnish each stuffed sweet potato with freshly chopped cilantro. Serve them immediately with lime wedges on the side for that extra burst of freshness.


![To make this dish, you need a few key items. These ingredients work together for great flavor. Here’s what you will need: - 4 chicken thighs, bone-in and skin-on - 1/4 cup honey - 1/4 cup low-sodium soy sauce - 4 cloves garlic, finely minced - 1 tablespoon fresh ginger, grated - 1 teaspoon sesame oil - 1 tablespoon olive oil - Salt and freshly ground black pepper to taste While the main ingredients shine, you can add optional items for extra flavor. Try using these to enhance your dish: - A splash of rice vinegar for acidity - A pinch of red pepper flakes for heat - Fresh herbs like cilantro or parsley for freshness Presentation matters when serving food! Beautiful garnishes make a dish pop. Here’s what to top your chicken with: - 2 green onions, finely sliced - Sesame seeds for a crunchy finish First, grab a medium mixing bowl. Add 1/4 cup honey, 1/4 cup low-sodium soy sauce, 4 minced garlic cloves, 1 tablespoon of grated ginger, and 1 teaspoon of sesame oil. Whisk them together until mixed well. This sweet and savory blend will become your marinade and glaze. It infuses the chicken thighs with tasty flavor. Next, season the chicken thighs. Use salt and freshly ground black pepper on both sides. Heat 1 tablespoon of olive oil in a large skillet over medium-high heat. Once hot, place the chicken thighs skin-side down. Let them sear for about 6-8 minutes. You want that skin golden brown and crispy. This step adds great texture and taste. After searing, flip the chicken thighs. Pour the honey garlic mixture over them. Let it simmer gently, coating the chicken in flavor. Cover the skillet and reduce the heat. Cook for 15-20 minutes until the chicken reaches 165°F (75°C) inside. When the chicken is ready, remove the lid. Turn the heat back up to medium-high. Let the sauce simmer for 5 minutes, stirring often. This will thicken the sauce, helping it stick to the chicken. Once thickened, take the skillet off the heat. Allow the chicken to rest for a few minutes. This lets the juices settle, keeping the meat tender. Serve the chicken on a platter, drizzling the sauce over the top. Add a sprinkle of sliced green onions and sesame seeds for a bright finish. Enjoy your Honey Garlic Chicken Thighs! For the full recipe, refer to [Full Recipe]. To get crispy skin, start with bone-in, skin-on chicken thighs. Pat the skin dry with paper towels. This step removes moisture and helps the skin crisp up nicely. Heat olive oil in a hot skillet before adding the chicken. Sear it skin-side down for 6-8 minutes. Resist the urge to move the chicken too much. Let it cook undisturbed for a golden crust. For tender chicken, season it well with salt and pepper. This enhances flavor and locks in moisture. When cooking, keep an eye on the internal temperature. Aim for 165°F (75°C) to ensure it’s fully cooked. Let the chicken rest after cooking. This lets the juices settle back in, making each bite juicy and satisfying. Honey garlic chicken pairs well with several sides. Try serving it with steamed rice for a classic combo. The rice soaks up the tasty sauce. You can also serve it with a fresh green salad. The crunch of the veggies complements the soft chicken perfectly. Roasted vegetables add color and flavor, making for a well-rounded meal. For the full recipe, check out [Full Recipe]. {{image_4}} You can change the taste of honey garlic chicken thighs by swapping some ingredients. For a fruitier twist, try using maple syrup instead of honey. This will give your dish a rich, deep flavor. You can also replace soy sauce with coconut aminos for a gluten-free option. If you like citrus, add some fresh orange juice to the marinade. It brightens the flavor and adds a zesty note. While chicken thighs are juicy, you can use other cuts too. Chicken breasts work well if you prefer leaner meat. Just remember, they may dry out faster, so watch the cooking time. Drumsticks are another tasty option. They are fun to eat and stay moist during cooking. Whichever cut you choose, make sure it is about the same size for even cooking. Want some heat? It's easy to spice things up! Add red pepper flakes or sriracha to the marinade for a kick. You can also use fresh jalapeños or chili paste for a bolder flavor. Adjust the amount based on your heat tolerance. If you love spicy food, this will make your honey garlic chicken thighs truly exciting. For the full recipe, check out the [Full Recipe]. Store your honey garlic chicken thighs in an airtight container. Make sure to let them cool to room temperature first. They will stay fresh in the fridge for up to 3 days. This keeps the flavors intact and ensures the chicken remains juicy. To reheat, place the chicken thighs in a skillet over low heat. Cover the skillet to keep moisture in. Heat until warmed through, about 5-10 minutes. You can also microwave them, but cover the dish to prevent drying out. You can freeze the chicken thighs for later use. Wrap each thigh in plastic wrap, then place them in a freezer bag. They will last for about 2-3 months in the freezer. Thaw them in the fridge overnight before reheating. This method keeps the chicken tasty and tender. For the full recipe, refer to the section above. You should cook chicken thighs for about 20-25 minutes. Start by searing them for 6-8 minutes on the skin side. Then, flip them over and pour the sauce on top. Cover the skillet and let them simmer for 15-20 minutes. This method helps keep the meat juicy and full of flavor. Yes, you can use boneless chicken thighs. They will cook faster than bone-in thighs. Sear them for about 5-7 minutes on each side. Make sure to check their internal temperature. It should reach 165°F (75°C) to be safe to eat. The best way to check if the chicken is done is with a meat thermometer. Insert it into the thickest part of the thigh. When it reads 165°F (75°C), the chicken is ready. You can also cut into the meat. If the juices run clear, it’s cooked. To adjust the sweetness, add more honey for a sweeter taste. If you want it less sweet, add more soy sauce or a splash of vinegar. Taste the sauce as you go. This way, you can find the perfect balance for your dish. For the full recipe, please check the [Full Recipe]. Honey garlic chicken thighs are simple and tasty. We covered the key ingredients and optional marinades. You learned how to prepare the marinade and cook the chicken. I shared tips for crispy skin, tender meat, and delicious sides. We also explored variations and storage tips to keep your meals fresh. When you try this recipe, it will impress your family and friends. Enjoy the rich flavors and make it your own!](https://dishtreats.com/wp-content/uploads/2025/06/32d13aa5-8be9-48e3-be5a-1699ade8ce81-768x768.webp)
![- 1 cup rolled oats - 1 cup coconut milk - 1 ripe mango, diced - 1 tablespoon chia seeds - 1 tablespoon honey or maple syrup - 1/4 cup unsweetened shredded coconut - 1/2 teaspoon vanilla extract - A pinch of salt - Fresh mint leaves for garnish You need one cup of rolled oats for a hearty base. The coconut milk adds creaminess, so use one cup. A ripe mango gives a sweet touch, diced into small cubes. Add one tablespoon of chia seeds for thickness. If you want more sweetness, include one tablespoon of honey or maple syrup. The shredded coconut adds flavor and texture—use a quarter cup. Vanilla extract, half a teaspoon, gives a nice aroma. Lastly, a pinch of salt enhances all flavors. You can customize this recipe to suit your taste. Here are some fun ideas: - Add berries for a burst of flavor. - Include nuts for a crunchy texture. - A dash of cinnamon can add warmth. - Try using flavored yogurt for extra creaminess. These add-ins can make your mango coconut overnight oats even more delicious! You’ll find the Full Recipe linked here for all the details. Making mango coconut overnight oats is simple. You need just a few steps. Gather your ingredients and tools first. Get a medium bowl and two airtight containers. This will make your prep easy and quick. 1. Combine the Base: In your bowl, mix the rolled oats, coconut milk, chia seeds, honey or maple syrup, vanilla extract, and a pinch of salt. Stir well until everything is smooth. 2. Add Mango and Coconut: Next, gently fold in the diced mango. Add half of the shredded coconut into the mix. This adds flavor and texture. 3. Portion It Out: Divide the mixture into two containers. Make sure each one has equal amounts. This helps with serving later. 4. Chill Overnight: Seal your containers tightly. Place them in the fridge for at least 4-6 hours, or overnight. This allows the oats to soak up the liquid. 5. Stir and Serve: The next morning, take the oats out. Stir them well to mix the flavors again. 6. Garnish: Top each serving with the rest of the shredded coconut. Add more diced mango if you like. This makes the dish look fresh and inviting. 7. Add Mint: For a final touch, place a mint leaf on top. This adds color and a hint of flavor. When serving, use clear glass jars. This lets the bright mango and white coconut shine. The layers look beautiful, and the mint adds a pop of green. Your mango coconut overnight oats are now ready to enjoy! For the complete recipe, check the [Full Recipe]. To make the best overnight oats, start with quality rolled oats. They absorb liquid well and create a creamy texture. Use coconut milk for a delightful taste. You can choose canned coconut milk for a rich flavor or carton milk for a lighter option. Add a pinch of salt to enhance the sweetness of the mango. Mix the ingredients well to ensure all oats soak evenly. Make sure to let them chill overnight. This allows the flavors to blend beautifully. You can change the recipe based on your taste. Instead of honey, try maple syrup for a different sweetness. If you want an extra crunch, add nuts like almonds or walnuts. You can even swap mango for other fruits, like bananas or berries. Try adding spices like cinnamon or nutmeg for warmth. For a protein boost, consider adding a scoop of yogurt or protein powder. These swaps can make your oats even more fun and tasty. Presentation is key to a great breakfast. Serve your oats in clear jars to show off the layers. Top each jar with the remaining shredded coconut for a nice look. Add extra diced mango for color and sweetness. A sprig of fresh mint makes it pop and adds a fresh taste. You can also sprinkle some chia seeds on top for texture. A beautiful presentation makes every bite more exciting. For the complete recipe, check the Full Recipe. {{image_4}} You can swap mango for other fruits. Try bananas, berries, or peaches for new flavors. Each fruit brings its own sweetness and taste. You could use ripe bananas for creaminess. Blueberries add a nice pop of color and flavor. Chopped apples give a crunchy texture. Feel free to mix fruits for a fun twist. Nuts and seeds boost nutrition and flavor. Add chopped almonds, walnuts, or pecans for crunch. Sunflower seeds or pumpkin seeds give healthy fats and protein. You can mix in 1-2 tablespoons for extra texture. These additions make the oats more filling and satisfying. Want to jazz up your oats? Add spices like cinnamon or nutmeg for warmth. A splash of maple syrup or agave makes it sweeter. You can also try adding cocoa powder for a chocolatey treat. If you love coconut, use coconut flakes or extract for a richer flavor. These little extras can make a big difference. For the complete recipe, check out the Full Recipe section. To keep your mango coconut overnight oats fresh, use airtight containers. This helps seal in moisture and flavor. If you make a big batch, store them separately. This way, you can take one jar out at a time. Avoid adding toppings like coconut or fruit until you're ready to eat. This keeps them crunchy and fresh. These oats can stay in the fridge for about 3 to 5 days. After this time, they may lose flavor or texture. Always check for any sour smell or off taste before eating. If they look or smell strange, it's best to toss them. Remember, fresh is always best! You can freeze leftover oats for up to 3 months. To freeze, place the mixture in freezer-safe containers. Leave some space for expansion as they freeze. When you’re ready to eat, move them to the fridge overnight. You can also heat them in the microwave. Just add a splash of coconut milk for creaminess. This helps bring back their original texture. For the full recipe, check out the earlier sections! Yes, you can use other types of milk. Almond milk, oat milk, or soy milk all work well. Use what you like best. Each milk adds a different flavor and texture. Let the oats soak for at least 4-6 hours. Overnight is best for the right texture. This time helps the oats absorb the liquid and become soft. Yes, overnight oats are very healthy! They are full of fiber, vitamins, and minerals. The oats provide energy, while the mango and coconut add nutrients. Plus, they are simple to make and can fit in your busy life. People often ask if they can add nuts or seeds. You sure can! Almonds, walnuts, or pumpkin seeds add crunch and healthy fats. You can also try different fruits. To spice things up, add spices like cinnamon or nutmeg. You could also mix in some cocoa powder for a chocolate twist. Want extra sweetness? Try adding more honey or maple syrup. Get creative! You can make this recipe your own. For the full recipe, check out the earlier section. Overnight oats are easy and fun to make. You learned about the right ingredients, measurements, and optional add-ins. I shared a step-by-step guide to help you prepare and present them well. You also found tips for perfecting your oats, exploring variations, and storing them properly. Try different fruits, nuts, and flavors to keep things fresh. Remember, these oats can be a healthy and tasty breakfast option. Enjoy making your own delicious versions of overnight oats!](https://dishtreats.com/wp-content/uploads/2025/07/b0d1874a-fab9-44f3-b7bd-b826e91d7bf0-768x768.webp)

 and [Tzatziki Recipe 2](#). Serve gyros with crispy fries or a fresh Greek salad. You can also add pickled vegetables for extra crunch. A glass of refreshing lemonade pairs well too. In this post, we explored making Greek Chicken Gyros. We looked at key ingredients like chicken thighs and fresh toppings. Following easy steps, you learned how to marinate and cook chicken perfectly. We shared tips for grilling and serving for the best taste. You can even try different proteins or vegetarian options. Now, you’re ready to make delicious gyros. Enjoy sharing this tasty dish with others!](https://dishtreats.com/wp-content/uploads/2025/07/f3d3865c-0788-4b9a-9d14-bf25eefe6fbb-768x768.webp)