Smoky Chipotle Black Bean Tacos Flavorful and Easy

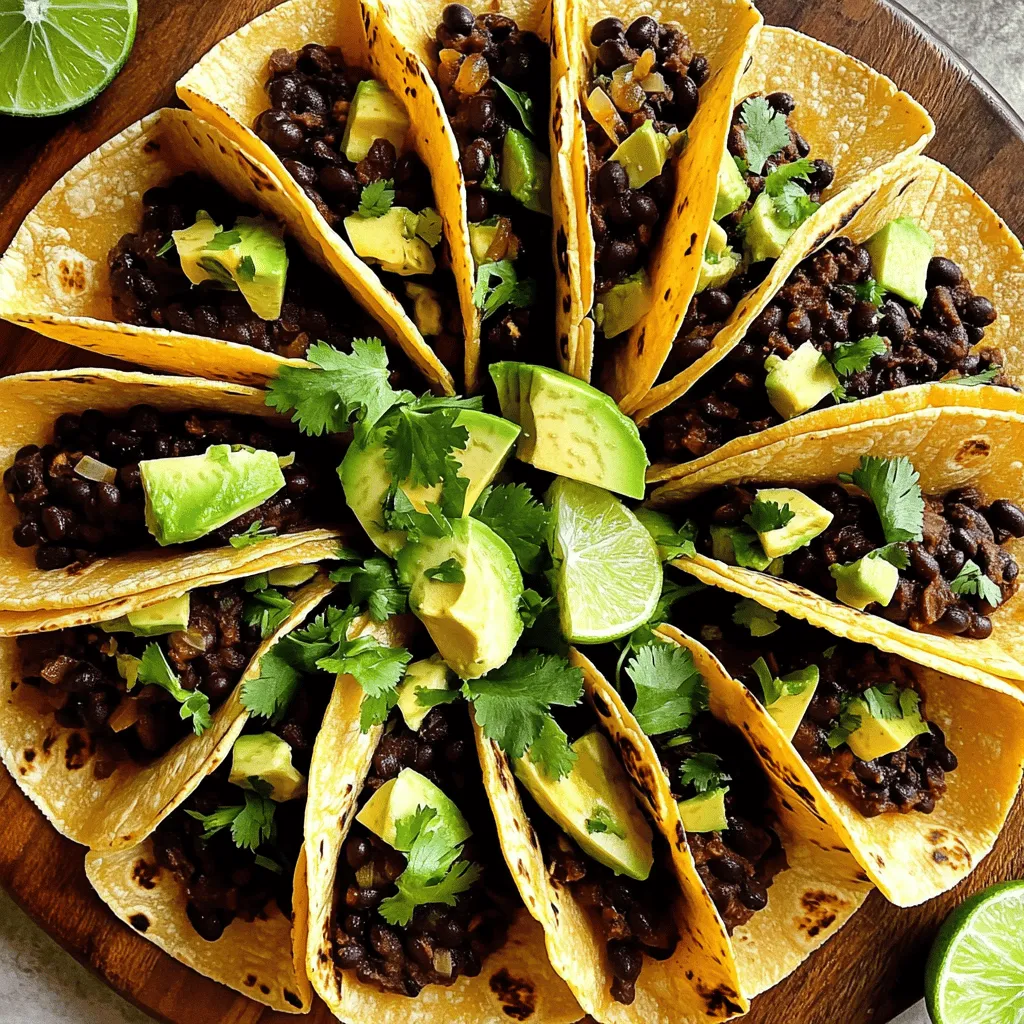
Looking for a quick and tasty meal? You’re in the right spot! Smoky Chipotle Black Bean Tacos are packed with bold flavors and easy to make. With just a few simple ingredients, you can whip up a delicious dish that everyone will love. Whether you want a weeknight dinner or something special, these tacos fit the bill. Let’s dive in and get cooking!
Ingredients
Main Ingredients for Smoky Chipotle Black Bean Tacos
- 2 cans black beans
- 1 medium onion, finely diced
- 3 cloves garlic, minced
- 2 tablespoons chipotle peppers in adobo sauce
- 1 teaspoon smoked paprika
- 1 teaspoon ground cumin
- 1 tablespoon extra virgin olive oil
- Sea salt and freshly ground black pepper
- 8 small corn tortillas
- 1 ripe avocado
- Fresh cilantro leaves
- Lime wedges
The main ingredients in these Smoky Chipotle Black Bean Tacos make them full of flavor. I use black beans for a hearty base. They are easy to find and packed with protein. The onion and garlic add depth and aroma. Chipotle peppers bring the heat and smokiness.
Smoked paprika and cumin warm up the flavor profile. You need olive oil for sautéing the onion and garlic. Sea salt and black pepper enhance the taste. Fresh toppings like avocado and cilantro add brightness. Lime wedges give a zesty kick to each bite.
Optional Toppings
- Crumbled queso fresco
- Sliced jalapeños
- Fresh salsa
Optional toppings can take your tacos to the next level. Queso fresco adds creaminess. Sliced jalapeños give extra heat for those who love spice. Fresh salsa adds a refreshing crunch and flavor. You can mix and match these toppings to suit your taste.
Step-by-Step Instructions
Preparation Steps
1. Heat one tablespoon of extra virgin olive oil in a large skillet over medium heat.
2. Once hot, add one medium onion, finely diced. Sauté until the onion is translucent, about five minutes.
3. Add three cloves of minced garlic to the skillet. Sauté until fragrant, about one minute.
Bean Mixture Steps
1. Next, incorporate two cans of rinsed black beans and two tablespoons of chopped chipotle peppers in adobo sauce.
2. Add one teaspoon each of smoked paprika and ground cumin. Sprinkle in sea salt and freshly ground black pepper to taste.
3. Using a potato masher, gently mash some of the black beans. Leave some whole for texture.
4. Cover the skillet and let the mixture simmer for about ten minutes. Stir occasionally to prevent sticking.
Taco Assembly Steps
1. While the bean mixture simmers, warm eight small corn tortillas in a separate skillet for about 30 seconds on each side.
2. Take a corn tortilla and spoon a generous amount of the smoky black bean mixture onto each one.
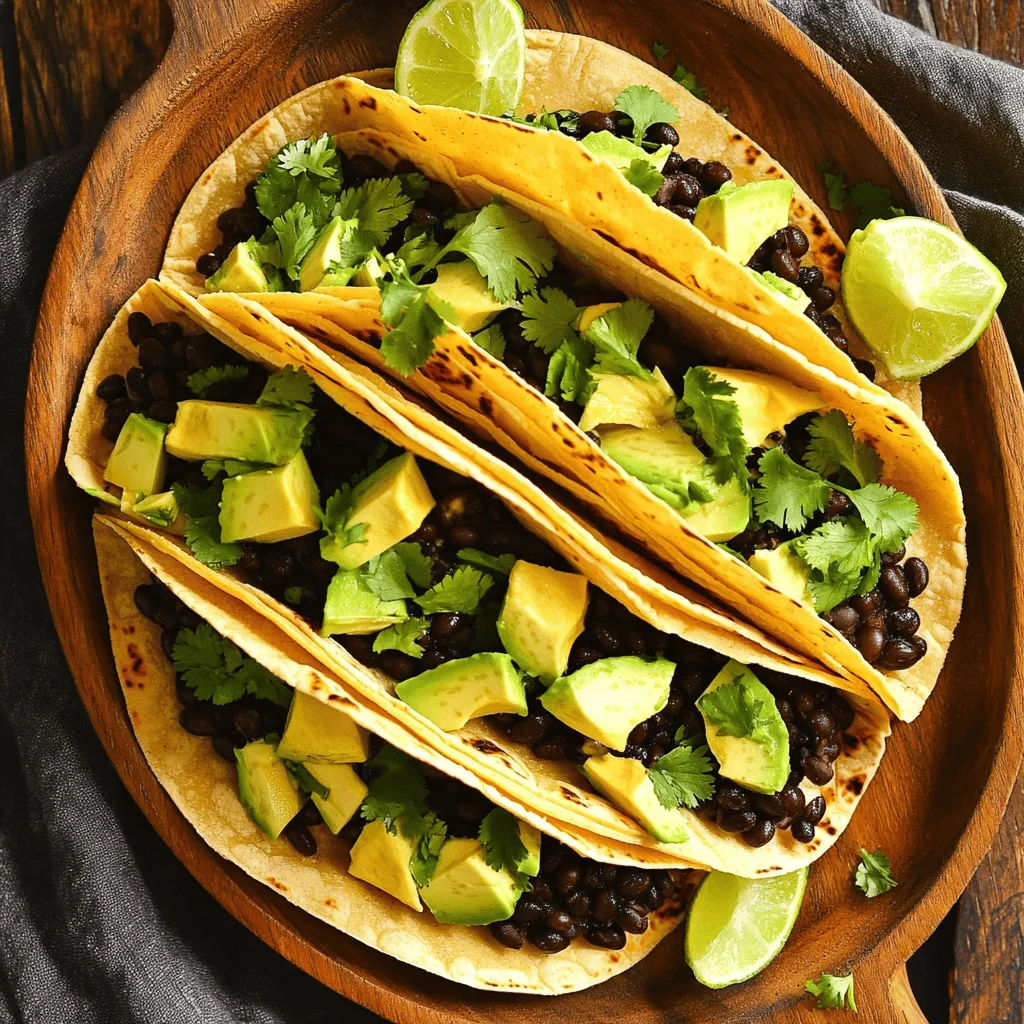
3. Top with slices of one ripe avocado and sprinkle fresh cilantro leaves on top.
4. Serve the tacos immediately with lime wedges on the side. Squeeze lime over the filling for an extra zing.Enjoy each bite!
Tips & Tricks
Cooking Tips
- Use fresh ingredients for the best flavor. Fresh herbs and ripe avocados make a difference.
- Ensure tortillas are warm for easy folding. This keeps them soft and prevents tearing.
Serving Suggestions
- Serve tacos with lime wedges for enhanced flavor. The acidity brightens every bite.
- Pair with a side of Mexican rice or a fresh salad. This adds a nice crunch and balance.
Presentation Tips
- Arrange tacos on a vibrant platter. A colorful display makes the meal inviting.
- Garnish with additional cilantro and lime for color. This adds freshness and visual appeal.

Variations
Ingredient Variations
You can switch things up with these ideas. Substitute black beans with pinto or kidney beans. This change will give your tacos a new taste and texture. You can also add grilled vegetables like bell peppers or zucchini. These veggies bring extra flavor and crunch to your tacos.
Dietary Variations
If you need a gluten-free option, use corn tortillas instead of flour. Corn tortillas work great and keep the dish tasty. To make your tacos vegan, simply leave out any dairy toppings like cheese or sour cream. This way, you can still enjoy the smoky flavors without any animal products.
Flavor Variations
Want more heat? Spice it up with extra chipotle peppers. This adds a deeper smoky flavor and more heat. You can also add more smoked paprika for an even smokier taste. Adjusting the spices lets you make the tacos just how you like them.
Storage Info
Refrigeration
Store any leftover bean mixture in an airtight container. This keeps it fresh for later. Keep the tortillas separate. This helps maintain their texture and prevents them from getting soggy.
Freezing Tips
You can freeze the bean mixture for up to 3 months. Just make sure to use a freezer-safe container. When you’re ready to enjoy them, thaw the mixture overnight in the fridge. Reheat it on the stove before serving.
Reheating Instructions
To reheat, warm the bean mixture in a skillet over low heat. Stir gently until it’s warmed through. For the best results, rewarm the tortillas just before serving. A quick heat will make them soft and pliable, perfect for your tacos.
FAQs
How long does it take to make Smoky Chipotle Black Bean Tacos?
It takes only 10 minutes to prep and 30 minutes to cook. You can enjoy your tacos quickly.
Can I make these tacos ahead of time?
Yes, you can prepare the bean mixture in advance. Store it in the fridge until you’re ready to use.
What can I serve with Smoky Chipotle Black Bean Tacos?
You can serve these tasty tacos with rice, beans, or a fresh salad. These sides add great flavor and texture.
These Smoky Chipotle Black Bean Tacos are easy to make and full of flavor. You start by cooking tasty beans with spices and blending them onto warm tortillas. Don’t forget to add fresh toppings to make each bite special. Remember, you can change up ingredients, like using different beans or adding veggies. Storage is simple, too; just keep leftovers safe. Enjoy this quick meal and share with friends. You’ll love how these tacos brighten your day.


![- 4 bone-in, skin-on chicken thighs - 1/4 cup honey - 4 cloves garlic, finely minced - 2 tablespoons soy sauce - 1 tablespoon apple cider vinegar - 1 tablespoon extra virgin olive oil - 1 teaspoon freshly grated ginger - 1/2 teaspoon ground black pepper - Salt, to taste - Chopped green onions and toasted sesame seeds For this recipe, I focus on fresh ingredients. The chicken thighs give a rich flavor. Honey and garlic bring sweetness and zest. Soy sauce adds depth, while apple cider vinegar provides a nice tang. Extra virgin olive oil keeps everything moist and tasty. I love the hint of ginger in this dish. It adds a warm note that enhances the glaze. The black pepper gives a slight kick, balancing the sweetness. For the finishing touch, green onions and sesame seeds add color and crunch. These ingredients work together to create a delightful meal. You can find the full recipe for Honey Garlic Glazed Chicken Thighs at the end of this article. Enjoy cooking! In a medium bowl, whisk together the honey, minced garlic, soy sauce, apple cider vinegar, olive oil, grated ginger, black pepper, and a pinch of salt. Make sure the mixture is smooth and well-blended. This marinade is the key to great flavor. Next, place the chicken thighs in a large zip-lock bag or a shallow dish. Pour the marinade over the chicken. Ensure each piece is well coated. Seal the bag or cover the dish tightly. Refrigerate for at least 1 hour, though overnight is best for deep flavor. Preheat your oven to 400°F (200°C). This heat ensures a crispy skin. Remove the chicken from the marinade, saving some for later. Place the chicken skin-side up on a baking tray lined with parchment paper. Bake for 30-35 minutes. The chicken is ready when its internal temperature hits 165°F (74°C) and the skin is golden and crispy. To get that perfect crispy skin, you need to start with dry chicken. Pat the chicken thighs dry with paper towels. This helps remove excess moisture. Also, make sure your oven is hot before baking. Preheat it to 400°F (200°C). Place the chicken skin-side up on a lined baking tray. This position allows the skin to crisp up nicely. Finally, don't cover the chicken while it bakes. This keeps the skin exposed to the heat for better crispiness. Marinating time is key for flavor. I recommend at least one hour for good taste. If you have time, let the chicken marinate overnight. This allows the flavors to soak in deeply. Use a zip-lock bag for easy marinating. Just remember to seal it well, so the marinade doesn’t leak. A longer marinating time helps tenderize the meat, making it juicy and flavorful. For the glaze, you want a syrupy texture. After baking, take the leftover marinade and heat it in a saucepan. Simmer it over medium heat for about 5-7 minutes. Stir it occasionally to prevent sticking. The goal is to reduce the liquid until it thickens. This will create a lovely glaze that clings to the chicken. If it’s too thick, add a splash of water to loosen it. {{image_4}} You can easily boost flavor with fresh herbs. Use rosemary, thyme, or parsley. Chop them finely and mix them into the marinade. This adds a vibrant taste that pairs well with the honey and garlic. Fresh herbs also add a nice pop of color to your dish. Just remember to adjust the amount based on your taste. For a kick, add red pepper flakes into your marinade. Start with a pinch and taste as you go. This small change can take your dish from sweet to spicy. The heat balances well with the honey's sweetness. Serve with a side of cooling yogurt or sour cream to tame the spice. It creates a fun contrast. Grilling gives this dish a smoky flavor that is hard to beat. Before grilling, marinate the chicken as usual. Preheat your grill to medium heat. Cook the thighs skin-side down for the first few minutes. Flip them for an even char. Use the reserved marinade to baste while grilling. This method ensures a tasty glaze that sticks to the chicken. Enjoy the delicious, crispy skin with that smoky flavor! For the complete recipe, check the [Full Recipe]. To keep your honey garlic glazed chicken thighs fresh, store them promptly. Place the cooled chicken in an airtight container. This will help keep the flavors intact. Be sure to eat the leftovers within three to four days for the best taste and safety. To freeze your chicken thighs, first let them cool completely. Wrap each thigh tightly in plastic wrap, then place them in a freezer-safe bag. This method helps avoid freezer burn. You can keep them frozen for up to three months. When ready to eat, thaw the chicken in the fridge overnight for best results. To reheat chicken thighs, use the oven to keep them juicy. Preheat your oven to 350°F (175°C). Place the chicken on a baking sheet and cover it with foil. This will trap steam and keep the meat moist. Heat for about 15 to 20 minutes, or until the chicken is warm. Enjoy the great taste all over again! For more details, check the Full Recipe. For the best flavor, you should marinate chicken thighs for at least 1 hour. But if you can, marinate them overnight. This allows the flavors to soak deep into the meat. A longer marination time helps the chicken become tender and full of taste. Yes, you can use other cuts of chicken. Chicken breasts work well, but they may dry out faster. If you prefer, you can also use bone-in chicken legs. These alternatives will still absorb the honey garlic flavor, making your dish just as tasty. You can pair this dish with many sides. Here are some great options: - Steamed rice or jasmine rice - Roasted vegetables, like broccoli or carrots - A fresh garden salad with a light vinaigrette - Mashed potatoes for a creamy side - Quinoa for a healthy grain option These sides will complement the savory taste of the chicken and make your meal more satisfying. For the full recipe, check out the [Full Recipe] section. This blog post covered how to make delicious Honey Garlic Glazed Chicken Thighs. You learned about the key ingredients, step-by-step cooking methods, and helpful tips for the best results. We also explored tasty variations and safe storage advice. Enjoying this dish can add flavor to your meals. Whether you choose to grill it or try a spicy twist, these chicken thighs will impress. Keep experimenting, and make this recipe your own!](https://dishtreats.com/wp-content/uploads/2025/07/b9cba3e0-ee7f-4dbf-9eac-9b8411a1c4fd-768x768.webp)


![To make Classic Sloppy Joes, you need some simple, fresh ingredients. Here’s what you will need: - 1 lb ground beef (or turkey) - 1 small onion, finely chopped - 1/2 green bell pepper, finely chopped - 2 cloves garlic, minced - 1 cup tomato sauce - 2 tablespoons ketchup - 1 tablespoon brown sugar - 1 tablespoon Worcestershire sauce - 1 teaspoon mustard - Salt and pepper to taste - 4 hamburger buns - 1 cup shredded cheddar cheese (optional) - Fresh parsley for garnish These ingredients come together to create a rich and tasty filling. The ground beef or turkey serves as a hearty base. The onion and bell pepper add a nice crunch and sweetness. Garlic gives it a punch of flavor. You can also adjust the recipe. If you want a lighter dish, use turkey. For a cheesy twist, add cheddar on top. Fresh parsley adds color and a hint of freshness. This Classic Sloppy Joes recipe is quick and easy. You can find the full recipe [Full Recipe]. Enjoy cooking! First, heat a large skillet over medium heat. This step is key to getting a nice sear. Once the skillet is hot, add 1 lb ground beef or turkey. Use a wooden spoon to break the meat apart as it cooks. This helps it brown evenly. Cook until the meat is browned throughout. Be sure to drain any excess fat from the pan. This keeps your Sloppy Joes from being greasy. Next, add 1 small finely chopped onion, 1/2 green bell pepper, and 2 cloves minced garlic to the skillet. Stir the mixture well. Cook for about 5 minutes or until the veggies soften and smell great. They add a nice flavor to your dish. Now it’s time to make the sauce. Stir in 1 cup tomato sauce, 2 tablespoons ketchup, 1 tablespoon brown sugar, 1 tablespoon Worcestershire sauce, and 1 teaspoon mustard. Mix everything well until the sauce blends with the meat and veggies. Bring the mixture to a gentle simmer. This step helps all the flavors meld together. Lower the heat to maintain a gentle simmer. Let the mixture cook for about 10 minutes, stirring occasionally. If it gets too thick, add a splash of water. This keeps it from becoming dry. Stirring helps prevent sticking and keeps the mixture smooth. Taste the mixture and season it with salt and pepper to your liking. This is your chance to adjust the flavors. While the sloppy joe filling simmers, toast 4 hamburger buns. You can use a hot skillet or toaster. Toast them until they are golden brown and slightly crisp. This adds a nice crunch to your meal. To serve, take a toasted bun and spoon the savory filling onto it. For a cheesy twist, add 1 cup shredded cheddar cheese on top. Finish with a sprinkle of chopped parsley for a pop of color and flavor. This makes your Sloppy Joes look and taste amazing. Enjoy this delightful dish with your family! For the full recipe, check the recipe section above. To enhance flavor, try adjusting the ketchup or brown sugar. If you like it sweeter, add more brown sugar. For a tangy kick, a splash of vinegar works wonders. The sauce should be rich but not too thick. If it gets too thick, add a little water or extra tomato sauce. This keeps it juicy and fun to eat. You can cook Sloppy Joes on the stovetop or in a slow cooker. The stovetop is quick and easy. Sauté the meat and veggies, then let it simmer. In a slow cooker, mix everything and let it cook for hours. This method deepens the flavor. You can also swap the meat. Ground turkey or chicken are great lighter options. For a twist, try lentils for a vegetarian dish. Sloppy Joes pair well with crispy fries or a fresh coleslaw. The crunch of the coleslaw balances the softness of the sandwich. For drinks, a cold soda or iced tea is perfect. You can also enjoy them with a light beer if you prefer. These pairings make your meal fun and complete. {{image_4}} You can spice up your Sloppy Joes with fun twists. For a veggie option, try lentils or black beans instead of meat. They give a hearty texture and soak up the sauce well. Another twist is BBQ Sloppy Joes. Just add your favorite BBQ sauce to the meat mixture for a sweet and tangy flavor. Toppings can make your Sloppy Joes even more amazing. You might want to add different types of cheese. Try provolone or pepper jack for a kick. You can also mix in various sauces. A drizzle of ranch or hot sauce adds a nice touch. Different places have their own takes on Sloppy Joes. In Mexico, they use spices and jalapeños for a spicy version. In the Philippines, they might add sweet sauce and serve it with rice. Exploring these options shows how versatile this dish can be. To keep your Sloppy Joes fresh, store them in an airtight container. Place the cooled mixture in the fridge. Make sure to separate any extra buns to avoid sogginess. You can keep the leftovers for up to three days. If you want to keep them longer, freezing is a great option. When you reheat Sloppy Joes, the stovetop is best. Place the mixture in a skillet over low heat. Stir often to keep it juicy. If using the microwave, cover it with a damp paper towel to keep moisture in. For buns, you can toast them lightly on a skillet or wrap them in foil and warm them in the oven. This way, they stay soft and tasty. To freeze the Sloppy Joe mixture, let it cool first. Then, transfer it to a freezer-safe bag. Remove as much air as possible before sealing. This helps prevent freezer burn. You can freeze it for up to three months. When ready to eat, thaw it in the fridge overnight. Reheat on the stove until hot. Enjoy your Sloppy Joes just like the first time! Making Classic Sloppy Joes is quick and easy. You need about 10 minutes for prep. Cooking takes another 15 minutes. In total, you can have dinner ready in just 25 minutes. Yes, you can use ground turkey as a lighter choice. Turkey has fewer calories and less fat than beef. The flavor will be milder, so you might want to adjust your spices. It’s a great way to make a healthier Sloppy Joe. Sloppy Joes pair well with many sides. Here are some tasty options: - French fries - Coleslaw - Potato chips - Corn on the cob - Salad These sides add nice crunch and freshness to your meal. You can definitely make Sloppy Joes ahead of time. Just cook the meat and sauce, then store it in the fridge. It will last for three days. When you’re ready to eat, heat it up and serve on toasted buns. This makes meal prep easy and saves time. For longer storage, you can freeze the mixture. Just thaw and reheat when ready. You’ll still enjoy great flavor! In this blog post, we covered how to make Classic Sloppy Joes. We explored the ingredients, cooking steps, and tips for flavoring. I also shared variations and storage methods. Sloppy Joes are simple to make, versatile, and fun to eat. Don't hesitate to explore your options by trying new ingredients or toppings. Enjoy your meal and share it with friends for a delicious time!](https://dishtreats.com/wp-content/uploads/2025/06/3a095a95-3efb-4397-8f70-4189d4d50cab-768x768.webp)