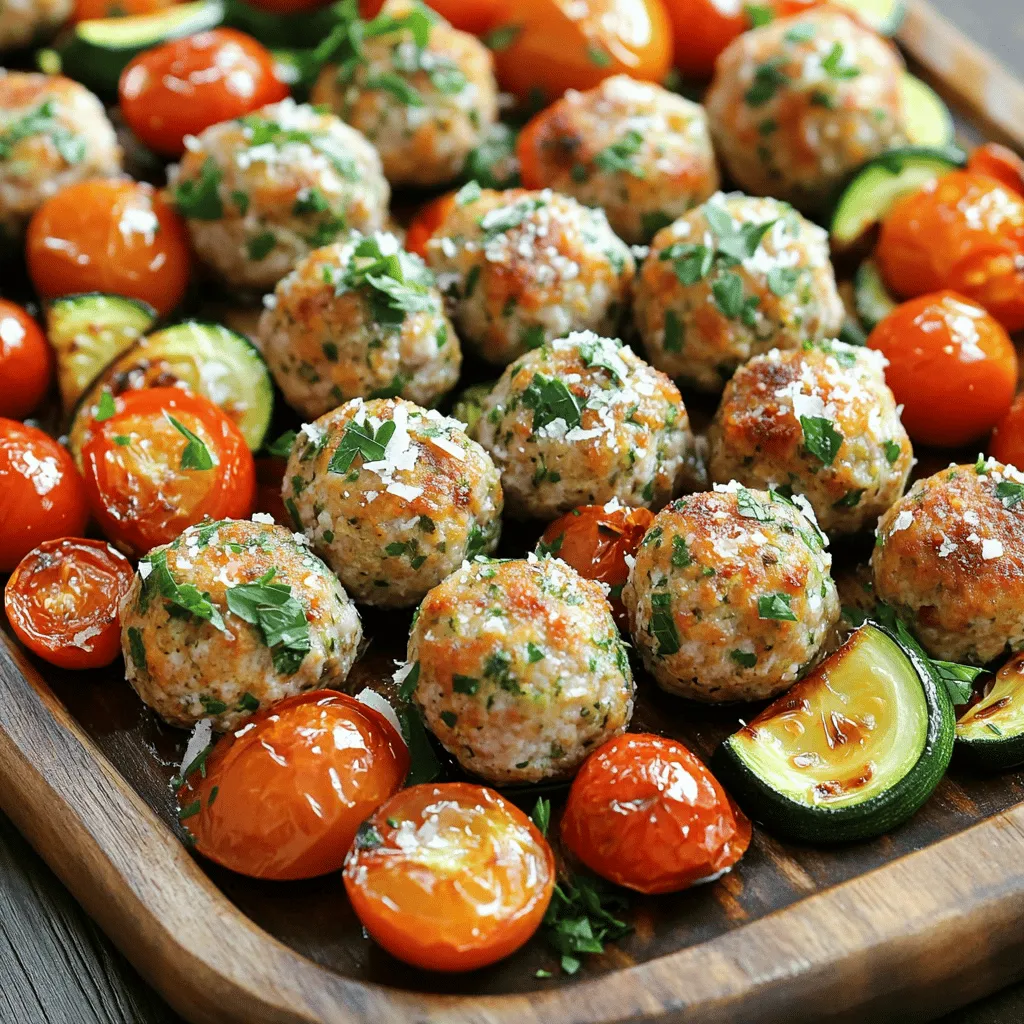
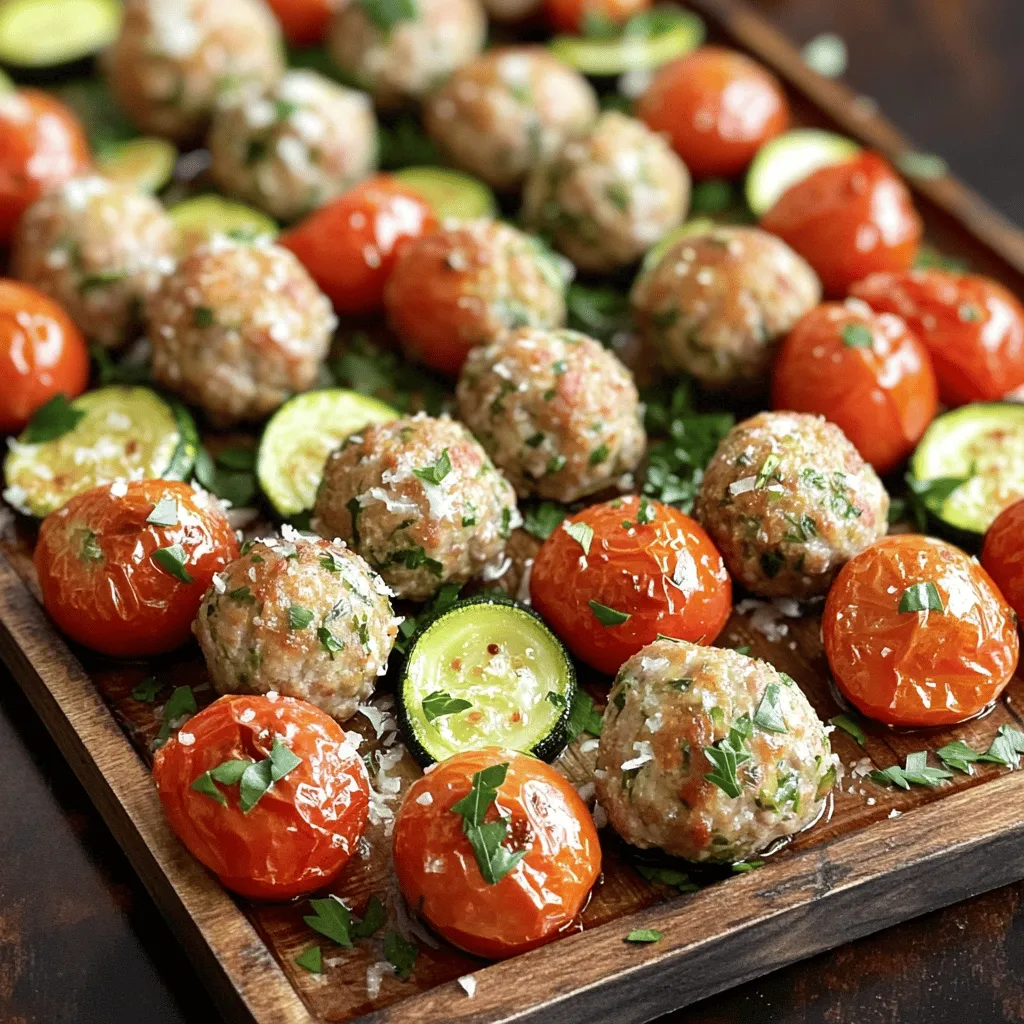
Ready to elevate your dinner game? These Sheet Pan Garlic Herb Turkey Meatballs are the answer! Juicy, bold, and just the right amount of savory, they’re packed with flavors that everyone will love. Plus, they roast alongside vibrant veggies for a complete meal in one pan. Let’s dive into how to make these tasty meatballs that will have your family asking for seconds!
Ingredients
Main ingredients for meatballs
To make the perfect meatballs, start with these key ingredients:
– 1 pound ground turkey
– 1/2 cup breadcrumbs, preferably Italian seasoned
– 1/4 cup freshly grated Parmesan cheese
– 1/4 cup fresh parsley, finely chopped
– 3 cloves garlic, minced
– 1 large egg, lightly beaten
These main ingredients provide a good balance of flavor and texture. The ground turkey is lean and helps keep the meatballs moist. The breadcrumbs bind everything together. Parmesan adds a deep, rich flavor, while parsley and garlic give freshness.
Seasonings and herbs
Seasonings elevate the flavor of your meatballs. Here’s what you need:
– 1 teaspoon dried oregano
– 1 teaspoon dried basil
– 1/2 teaspoon salt
– 1/4 teaspoon freshly ground black pepper
The oregano and basil add warmth and depth. Salt enhances all the flavors, while black pepper gives a slight kick. Use fresh herbs if you can; they have a brighter taste.
Ingredients for roasted vegetables
Roasted veggies add color and nutrition. You will need:
– 1 cup cherry tomatoes, halved
– 1 cup zucchini, sliced into half-moons
– 1 tablespoon olive oil
– 1 tablespoon balsamic vinegar
Cherry tomatoes are sweet and juicy, while zucchini has a mild taste. Olive oil helps them roast nicely, and balsamic vinegar adds a tangy touch. Tossing these veggies with the meatballs makes a tasty meal.
Step-by-Step Instructions
Preparing the oven and baking sheet
First, heat your oven to 400°F (200°C). This high heat helps the meatballs cook and brown nicely. Next, grab a baking sheet and line it with parchment paper. This will make cleanup easy and stop the meatballs from sticking.
Mixing the meatball ingredients
In a large bowl, mix the ground turkey with breadcrumbs, Parmesan cheese, parsley, garlic, oregano, basil, salt, and black pepper. The egg helps bind the mix. I often use my hands for this part. Just make sure everything is mixed well, so each bite is tasty.
Forming and placing the meatballs on the sheet pan
Take a small amount of the turkey mix and roll it into a ball about 1.5 inches wide. I like to roll them gently in my palms to make them smooth. Spread the meatballs evenly on the sheet pan, leaving space between them. This helps them cook evenly.
Preparing and adding the vegetables
In a separate bowl, place the halved cherry tomatoes and sliced zucchini. Drizzle them with olive oil and balsamic vinegar. Sprinkle some salt and black pepper over the veggies. Toss them around until they are well coated. Spread the veggies around the meatballs on the pan.
Baking and checking for doneness
Now, place your sheet pan in the oven. Bake for 20-25 minutes. Keep an eye on the meatballs. Use a meat thermometer to check if they reach 165°F (74°C). The veggies should be soft and slightly caramelized. Once done, take the pan out and let it rest for a few minutes. This helps the flavors blend before serving.
Tips & Tricks
How to achieve the best flavor and texture
To get the best flavor, use fresh herbs like parsley. They add a bright taste. Mix the meatball ingredients well. This helps them stick together and makes a nice texture. Don’t overwork the meat. Gently form the meatballs for a tender bite. Bake them until golden brown. This gives a nice crisp outside while keeping them juicy inside.
Substitutions for ingredients
You can swap ground turkey for lean ground beef or chicken. This will change the taste a bit but still work well. If you don’t have Italian breadcrumbs, plain ones are fine. Just add a bit more seasoning. For cheese, you can use mozzarella or Pecorino. If you want a vegan option, try using lentils or chickpeas instead of turkey.
Serving suggestions and presentation
Serve the meatballs on a large, colorful platter. Add roasted veggies around them for a bright look. Garnish with fresh parsley and a sprinkle of Parmesan. This makes the dish pop. You can also drizzle a bit of balsamic vinegar over the top for extra flavor.
For sides, consider serving with pasta or a fresh salad. These pair well with the meatballs and add variety to your meal.
Variations
Alternative ingredients for meatballs
You can switch up the ground turkey for ground chicken or lean beef. If you want a meatless option, try using lentils or chickpeas. You can also replace breadcrumbs with crushed crackers or oats. For a spicy kick, add red pepper flakes or diced jalapeños. Mixing in different cheeses, like feta or mozzarella, will add a creamy touch.
Different vegetables to include
Feel free to mix and match veggies based on what you like. Bell peppers add sweetness and color. Broccoli florets bring a nice crunch. You can also use carrots for a bit of earthiness. If you want something unique, try asparagus or cauliflower. Just remember to cut everything into similar sizes to ensure even cooking.
Serving styles and sauces
Serve the meatballs on a bed of rice or pasta for a hearty meal. You can place them in soft pita bread for a fun twist. Drizzle them with marinara sauce or a tangy yogurt sauce for extra flavor. A sprinkle of fresh herbs like basil or cilantro will brighten up the dish. Don’t forget a squeeze of lemon juice for a fresh finish!
Storage Info
How to store leftovers
After enjoying your meal, let the meatballs cool. Place them in an airtight container. Seal it well to keep the flavors fresh. Store in the fridge for up to three days. If you have leftover veggies, store them in a separate container. This keeps everything tasty.
Best practices for reheating
When you are ready to eat, reheating is easy. Preheat your oven to 350°F (175°C). Place the meatballs and veggies on a baking sheet. Heat for about 10-15 minutes. Check that the meatballs are warm inside. You can also reheat them in the microwave. Use a microwave-safe dish and cover it. Heat in short bursts, checking often.
Freezing recommendations
If you want to save some for later, freezing works well. Place the cooled meatballs and veggies in a freezer bag. Squeeze out extra air before sealing. They can stay in the freezer for up to three months. When you’re ready to eat them, thaw in the fridge overnight before reheating. This keeps the taste and texture just right.
FAQs
How do I know when the meatballs are done?
You can check if the meatballs are done by using a meat thermometer. They should reach 165°F (74°C). This ensures they are safe to eat. The outside should be golden and the inside firm. You can also cut one in half; it should be no longer pink.
Can I use ground chicken instead of turkey?
Yes, you can use ground chicken instead of turkey. Ground chicken has a similar texture and taste. It will still give you a tasty meatball. Just follow the same steps in the recipe.
What can I serve with garlic herb turkey meatballs?
Garlic herb turkey meatballs pair well with many sides. You can serve them with pasta, rice, or a fresh salad. Roasted potatoes or crusty bread also make great options. Try adding a light sauce or gravy for extra flavor.
How long do leftovers last in the fridge?
Leftovers of garlic herb turkey meatballs last about 3 to 4 days in the fridge. Make sure to store them in an airtight container. This keeps them fresh and safe to eat later.
Can I prepare the meatballs ahead of time?
Yes, you can prepare the meatballs ahead of time. Mix the ingredients and shape them into balls. Then, place them in the fridge for a few hours or overnight. You can also freeze them for later use. Just thaw before baking!
This post covered making tasty meatballs and roasted veggies. I shared how to mix, shape, and cook the meatballs. You learned about ingredients, tips, and variations. These tips help you get great flavor and texture. Don’t forget to try different veggies and sauces for fun. Storing and reheating leftovers is easy with my advice. Now you’re ready to create a fun meal. Enjoy your cooking!


