Sheet Pan Cajun Shrimp & Turkey Sausage Veggies Delight

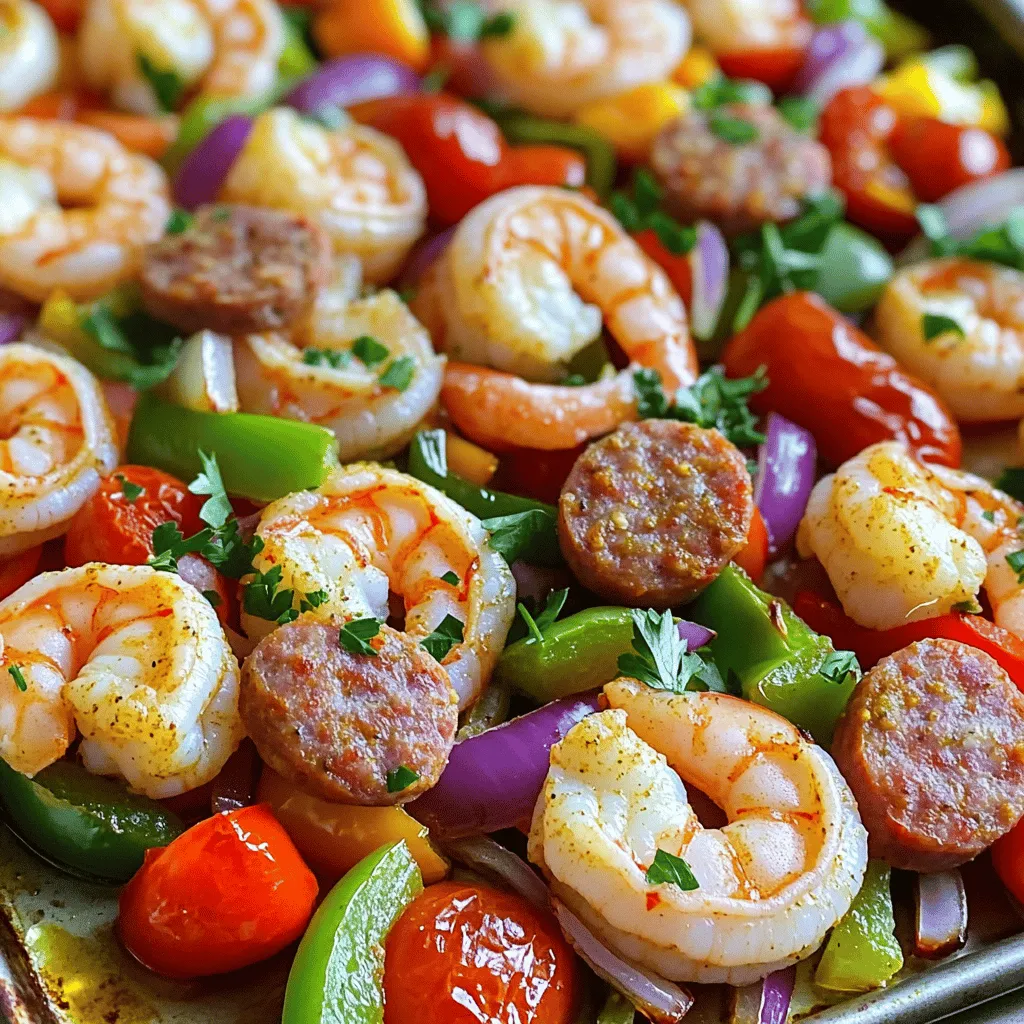
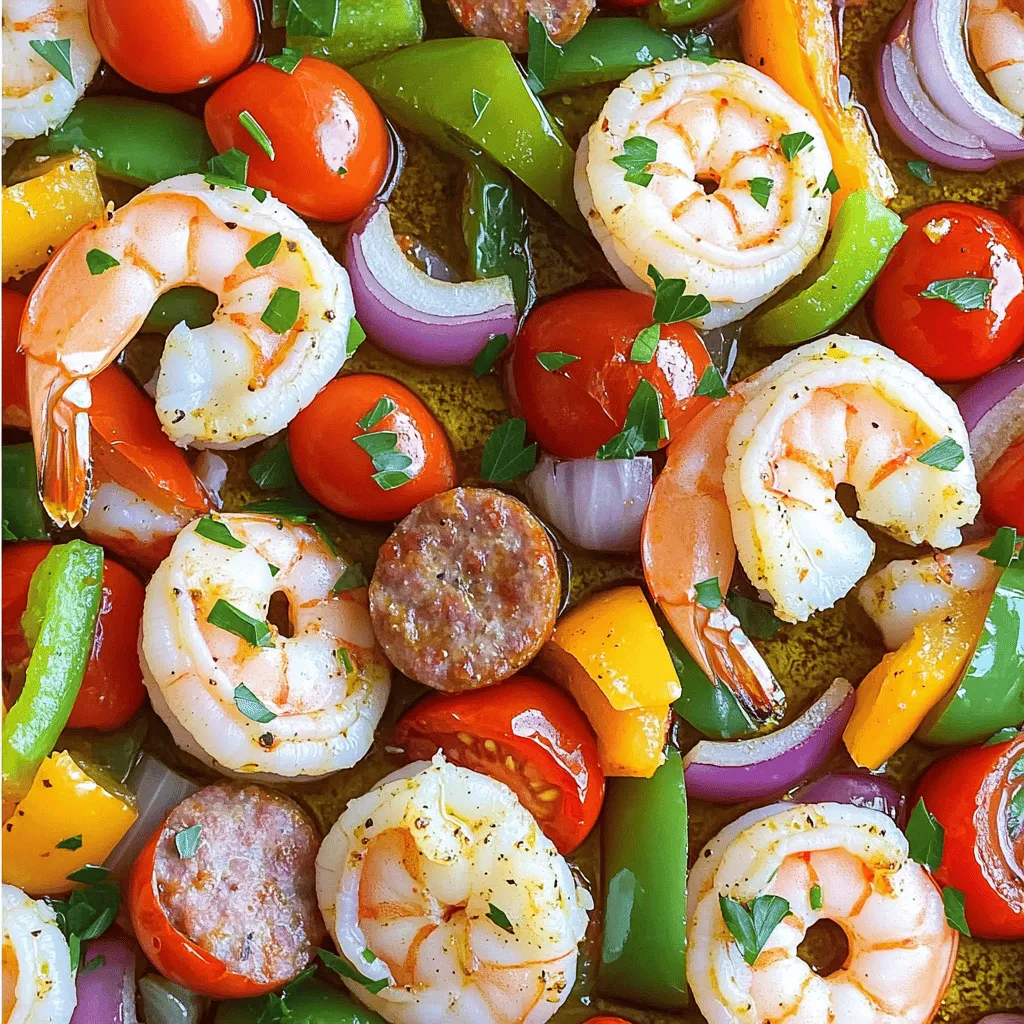
Get ready to savor a dish that bursts with flavor! My Sheet Pan Cajun Shrimp & Turkey Sausage Veggies Delight makes dinner easy and delicious. With just one pan, you can enjoy juicy shrimp and savory turkey sausage paired with vibrant veggies. It’s quick, healthy, and perfect for a busy weeknight. Let’s dive into this simple recipe and elevate your next meal!
Ingredients
List of Ingredients
- 1 pound large shrimp, peeled and deveined
- 1 pound turkey sausage, sliced into half-inch rounds
- 1 red bell pepper, chopped
- 1 green bell pepper, chopped
- 1 medium red onion, chopped
- 2 cups cherry tomatoes, halved
- 3 tablespoons extra-virgin olive oil
- 2 tablespoons Cajun seasoning
- 1 teaspoon garlic powder
- Salt and freshly cracked black pepper, to taste
- Fresh parsley, finely chopped for garnish
Measurement and Substitution Tips
Alternative ingredients
You can swap turkey sausage for chicken sausage or a plant-based option. Try using shrimp with tails on for a nice look.
Gluten-free options
All the ingredients here are gluten-free. Always check the labels of your sausage and seasoning to be sure.
Adjusting spice levels
If you prefer less heat, use less Cajun seasoning. For more spice, add cayenne pepper or hot sauce.
Step-by-Step Instructions
Preparation Steps
1. Preheat your oven to 400°F (200°C). This hot temperature helps cook the shrimp and sausage well.
2. Line a large sheet pan with parchment paper. This makes cleanup easy.
3. In a big mixing bowl, add 1 pound of shrimp, 1 pound of turkey sausage, 1 red bell pepper, 1 green bell pepper, 1 medium red onion, and 2 cups of cherry tomatoes.
4. Drizzle 3 tablespoons of extra-virgin olive oil over the mix.
5. Add 2 tablespoons of Cajun seasoning, 1 teaspoon of garlic powder, salt, and pepper to taste.
6. Toss all items together. Make sure everything gets covered with oil and spices.
Cooking Instructions
1. Spread the mixture evenly on the sheet pan. Lay it in a single layer for even cooking.
2. Place the pan in the oven and roast for about 15-20 minutes. The shrimp should turn opaque when done.
3. Stir the mixture halfway through cooking. This step ensures even roasting and flavor.
Garnishing and Serving Suggestions
1. After taking the pan out of the oven, let it rest for a few minutes.
2. Garnish with fresh parsley. This adds color and brightness.
3. You can serve directly from the pan. It makes for a great family-style meal.
4. Pair it with crusty bread for a delightful meal experience.
Tips & Tricks
Perfecting Your Cajun Shrimp & Turkey Sausage
To get great shrimp, cook them until they turn opaque. This means they are done. It usually takes about 15 to 20 minutes in the oven. The shrimp should not feel soft or mushy. If they do, they are overcooked.
Cook the turkey sausage until it is warm throughout. This will happen at the same time as the shrimp. Stir the mixture halfway through cooking for even heat. This helps both the shrimp and sausage cook well.
Adjusting seasonings is key to making this dish your own. If you like it spicy, add more Cajun seasoning. For a milder taste, use less. Taste the mixture before cooking. This way, you can add more salt or pepper if needed.
Cleanup and Cooking Efficiency
Using parchment paper is a smart choice. It keeps the food from sticking to the pan. It also makes cleanup much easier. You won’t have to scrub the pan hard after cooking. Just toss the paper when you are done.
For a quick cleanup, gather all your tools before cooking. Keep a trash bowl nearby for scraps. This saves you time when you finish cooking.
Prep your ingredients ahead of time. Chop the veggies and slice the sausage before you start. This makes everything flow smoothly when you cook. You will enjoy the cooking process more when you are prepared.

Variations
Ingredient Swaps for Different Flavors
You can easily change this dish’s flavor with simple swaps. Try using different types of sausage, like chicken or pork. Each type gives a new taste and texture. You can also add seasonal vegetables. For fall, use butternut squash. In spring, go for asparagus or snap peas. These veggies keep the dish fresh and interesting.
If you want more heat, add different spices. Consider smoked paprika or cayenne pepper. You can also mix in a bit of hot sauce for a kick. Just remember to adjust the seasoning to your taste. These swaps let you customize the dish to fit your cravings.
Cooking Methods Beyond Sheet Pan
You don’t have to stick to the sheet pan method. Grilling is a fun way to cook this dish. It gives your shrimp and sausage a smoky flavor. Just toss the seasoned ingredients on a grill. Cook until the shrimp are opaque and the sausage is heated through.
A skillet version works well too. Heat a bit of olive oil in a large skillet. Add shrimp and sausage, then cook over medium heat. Stir often until everything is cooked. This method is quicker and still delicious.
For a slow cooker adaptation, combine all ingredients in the slow cooker. Cook on low for 4-6 hours. This method allows the flavors to meld beautifully. You get a tender, flavorful meal without much effort. Each method keeps the meal tasty and fun!
Storage Info
Storing Leftovers
To keep your tasty sheet pan Cajun shrimp and turkey sausage fresh, follow these tips:
- Refrigeration: Place leftover shrimp and sausage in an airtight container. Make sure to cool it to room temperature first. It can stay in the fridge for up to three days.
- Freezing: For longer storage, you can freeze the dish. Use freezer-safe bags or containers. Remove as much air as possible. It can last for up to three months in the freezer.
Reheating Methods
When it’s time to enjoy your leftovers, here are the best ways to reheat:
- Oven: Preheat your oven to 350°F (175°C). Spread the shrimp and sausage on a baking sheet. Heat for about 10-15 minutes. This helps keep them juicy.
- Microwave: Use a microwave-safe dish. Cover it loosely to avoid splatters. Heat for 1-2 minutes, checking every 30 seconds.
To avoid rubbery shrimp, do not overheat. Shrimp cooks quickly, so keep an eye on it. Enjoy your meal!
FAQs
Common Questions
How long to cook shrimp on a sheet pan?
You should cook shrimp for about 15 to 20 minutes. The shrimp will turn opaque when done. This shows they are cooked through and safe to eat.
Can I use frozen shrimp for this recipe?
Yes, you can use frozen shrimp. Just thaw them first before cooking. This keeps the shrimp tender and flavorful.
What side dishes pair well with Cajun shrimp and sausage?
Great sides are rice or crusty bread. You can also serve a fresh salad. These add nice contrast to the dish.
How to adjust cooking time for larger shrimp?
If you use larger shrimp, add a few extra minutes. Check them at around 20 minutes to see if they’re done. Larger shrimp may need up to 25 minutes.
Is this recipe suitable for meal prep?
Yes, it’s perfect for meal prep. You can store leftovers in the fridge for up to three days. Reheat them for a quick, tasty meal.
This blog post covered a tasty Cajun shrimp and turkey sausage recipe. You learned about the key ingredients, cooking steps, and helpful tips. It’s easy to adapt, so you can add your own twist. Remember to manage your cooking times and don’t skip the seasoning adjustments. Proper storage and reheating methods keep your meal fresh. Now, you can impress friends and family with this tasty dish. Enjoy the cooking process and have fun exploring flavor variations!


![- 4 cups fresh spinach - 1 cup mixed berries - 1/2 cup feta cheese - 1/4 cup sliced almonds or walnuts - 1/4 red onion - 1 tablespoon honey - 2 tablespoons balsamic vinegar - 2 tablespoons extra virgin olive oil - Salt and pepper to taste The heart of a great Summer Berry Spinach Salad lies in its fresh ingredients. Start with 4 cups of fresh spinach. Choose vibrant, crisp leaves for the best flavor. Next, add 1 cup of mixed berries. I love using strawberries, blueberries, and raspberries together. They add sweetness and color. For creaminess, include 1/2 cup of feta cheese. Crumble it into small pieces for easy mixing. You can also try goat cheese if you prefer. Then, toss in 1/4 cup of sliced almonds or walnuts for crunch. Toasting them adds extra flavor. Finally, slice 1/4 of a red onion. Its sharpness balances the sweetness of the berries. Now, let’s move to the dressing. Combine 1 tablespoon of honey with 2 tablespoons of balsamic vinegar. This mix gives a sweet and tangy kick. Add 2 tablespoons of extra virgin olive oil for richness. Season with salt and pepper to taste. This dressing brings all the flavors together. For the full recipe, check the details above. Each ingredient plays a role in making this salad a fresh and tasty delight! - First, wash and dry the spinach. Make sure it's clean and free of dirt. - Next, add the spinach to a large mixing bowl. This is your fresh salad base. - Rinse the mixed berries under cool water. This helps keep them fresh and tasty. - Slice the strawberries if needed. Halve or quarter them to match other berries. - Gently add the berries to the bowl with the spinach. - Finely slice the red onion. Sprinkle it over the salad for a nice crunch. - In a small bowl, combine honey, balsamic vinegar, olive oil, salt, and pepper. - Whisk until the mixture is smooth. This dressing will bring the salad to life. - Carefully drizzle the dressing over the salad. Make sure every part gets a light coat. - Top with crumbled feta cheese and toasted sliced almonds or walnuts. This adds creaminess and crunch. - Gently toss the salad. Be careful not to mush the berries; you want them whole. For the full recipe, check out the vibrant Summer Berry Spinach Salad. Enjoy every bite! For this salad, I love using strawberries, blueberries, and raspberries. They add sweet flavors and vibrant colors. Choose berries that are firm and bright. Avoid any that feel squishy or have dark spots. In summer, you’ll find these berries at their best. They are fresh and full of flavor. If you can, buy them locally for the best taste. To make your salad stand out, serve it in a wide, shallow bowl. This lets the colors shine. Arrange the spinach first, then place the berries artistically on top. A sprinkle of feta cheese adds a touch of white. You can even drizzle a bit of extra dressing on top for a glossy finish. This makes the dish look fancy and appetizing. When mixing the salad, be gentle. You don’t want to squish the berries. Use your hands or two large spoons. Lift the spinach from the bottom and turn it over. This way, all the ingredients blend well. Toss just enough to coat everything with the dressing. It should look fresh and colorful, not mushy. Enjoy the beautiful mix of flavors! {{image_4}} You can change the nuts or cheese in this salad to suit your taste. If you want a creamier texture, try goat cheese instead of feta. For nuts, walnuts add a rich flavor, while pecans give a sweet crunch. You can also skip the nuts if you have a nut allergy. If you prefer different greens, kale or arugula work well. Kale adds a hearty bite, while arugula brings a peppery flavor. Both options will keep your salad fresh and exciting. While the balsamic dressing is tasty, many other dressings pair well. A lemon vinaigrette adds brightness. A poppy seed dressing can bring a sweet touch. You can also try a yogurt-based dressing for creaminess without the extra calories. You can make your dressing at home or buy it from the store. Homemade dressings let you control the flavor. Store-bought options save time and still taste great. Always check the labels for added sugars or preservatives. You can adapt this salad for fall or winter by changing the ingredients. In the fall, swap out berries for roasted apples or pears. Add some crumbled blue cheese for a bold taste. For winter, add sliced citrus fruits like oranges or grapefruits. They add a lovely color and refreshing taste during cold months. For a heartier salad, consider adding roasted butternut squash or cooked quinoa. This gives you a filling meal while keeping it seasonal and delicious. For the full recipe, click [Full Recipe]. To store leftovers, place the salad in an airtight container. This keeps it fresh and crisp. Avoid mixing the dressing in if you plan to eat it later. The dressing can make the salad soggy. Instead, store the dressing in a separate small jar. Use glass or BPA-free plastic containers. They help keep flavors intact and prevent leaks. If you have extra berries or nuts, store them in separate bags. This way, they stay fresh for longer. Serve the salad within two hours after making it. This keeps the greens bright and the berries juicy. If you need to hold it longer, store it in the fridge. Just remember to add the dressing right before serving. To keep ingredients fresh, cover the salad tightly. Use plastic wrap or a lid. You can also place a damp paper towel on top. This helps maintain moisture without making everything soggy. You cannot freeze the entire salad. Freezing will ruin the texture of the spinach and berries. However, you can freeze some components. For example, freeze extra berries for smoothies later. To freeze components separately, wash and dry the berries first. Spread them out on a baking sheet and freeze until solid. After that, transfer them to a freezer bag. This way, you can enjoy them later without losing flavor. You can easily add protein to your salad. Here are some great ideas: - Grilled chicken, sliced thin - Shrimp, cooked and peeled - Quinoa, cooked and cooled - Chickpeas, drained and rinsed - Hard-boiled eggs, sliced or quartered These additions make the salad heartier. They also give you extra nutrients. Adding protein turns a light dish into a full meal. Yes, you can prepare this salad ahead of time. Here are some tips for meal planning: - Wash and dry the spinach one day before serving. - Store it in a sealed bag with a paper towel to absorb moisture. - Prepare the berries and onion. Keep them separate in the fridge. - Make the dressing a day ahead and store it in a jar. Just mix everything together when you're ready to eat. This keeps the salad fresh and crunchy. This salad is packed with nutrition. Here are some key benefits: - Spinach is rich in vitamins A, C, and K. - Berries are full of antioxidants, which help fight free radicals. - Feta cheese adds calcium and protein. - Nuts provide healthy fats and fiber. Eating this salad supports good health. It boosts your energy and keeps you feeling full. Get creative with your toppings! Here are some fun ideas: - Croutons for added crunch - Avocado slices for creaminess - Sunflower seeds for a nutty flavor - Fresh herbs like basil or mint for a fresh twist - Dried fruits like cranberries or apricots for sweetness Feel free to mix and match. You can make each salad unique! This salad is best when fresh. Here’s how to store it: - Keep it in the fridge for up to two days. - Store the dressing separately to prevent sogginess. - Use an airtight container for the salad. If you want to keep it longer, avoid adding wet ingredients. This helps maintain freshness. This blog post covers how to make a delicious Summer Berry Spinach Salad. We explored the fresh ingredients, simple steps, and helpful tips for making it special. You learned how to pick the best berries, create an easy dressing, and suggest variations. Remember, this salad is not just tasty; it's also packed with nutrients. Whether you serve it fresh or store leftovers, it's a dish you can enjoy many ways. Try it out and make it your own!](https://dishtreats.com/wp-content/uploads/2025/07/5f6f3c08-a552-4e10-ab55-3c96ca32b52c-768x768.webp)


![To make delicious grilled veggie kabobs, gather these fresh ingredients: - 1 bell pepper (any color), cut into 1-inch pieces - 1 zucchini, sliced into rounds - 1 yellow squash, sliced into rounds - 1 red onion, cut into wedges - 8 cherry tomatoes - 1 cup mushrooms, cleaned and stems removed - 3 tablespoons olive oil - 2 cloves garlic, finely minced - 1 teaspoon smoked paprika - 1 teaspoon dried oregano - Salt and freshly ground black pepper to taste - 8 skewers (wooden or metal) Fresh vegetables make a big difference in flavor. You can swap in seasonal veggies, like asparagus or eggplant, based on what you find at the market. This keeps your kabobs fresh and exciting. If you have frozen vegetables, use those too! Just remember to thaw and drain them well. Fresh veggies often taste better but frozen can be a great backup. Using fresh ingredients ensures better taste and texture. Fresh veggies hold their shape and crunch better on the grill. When you bite into a grilled kabob, you want that satisfying crunch. Plus, fresh produce packs more nutrients and flavor. So, always try to choose fresh when you can! For the full recipe, check the section above. Cutting vegetables evenly ensures they cook at the same rate. Aim for 1-inch pieces for bell peppers and wedges for onions. Slice zucchini and yellow squash into rounds. If using wooden skewers, soak them in water for at least 30 minutes. This step prevents burning and keeps them strong. Marinating vegetables adds rich flavor. Combine olive oil, minced garlic, smoked paprika, and oregano. Toss in salt and pepper, then mix well. Add your veggies and coat them with the marinade. Let them sit for 15 minutes to soak up the flavors. Preheat your grill to medium-high heat. A hot grill helps create nice grill marks and a good sear. Place the kabobs on the grill grates. Arrange them evenly for better cooking. Cook for about 10-15 minutes. Turn them occasionally to ensure even cooking. Look for tender veggies with nice grill marks. To serve kabobs, use a rustic platter for a warm touch. Garnish with fresh herbs for added color. Serve with tzatziki or yogurt dip for a creamy contrast. Pair with a light salad or grilled protein for a complete meal. Enjoy your delicious creation! For the full recipe, check out the Grilled Veggie Kabobs details above. To boost the taste of your grilled veggie kabobs, try different marinades. Balsamic vinegar adds a sweet tang. Citrus juices like lemon or lime give a bright kick. You can also add spices or herbs. Consider rosemary, thyme, or cayenne pepper for extra flavor. Smoking the veggies adds depth too. If you have a grill with a smoker box, use it. Wood chips like hickory or mesquite can make a big difference. When you assemble your kabobs, think about color and texture. Alternate your veggies for a pretty look. Start with a bell pepper, then add a mushroom, followed by a cherry tomato. This keeps the kabob interesting. To prevent veggies from falling apart, push them snugly together on the skewer. Avoid overloading them; a little space helps. You can also add proteins like chicken or shrimp, or even cheese cubes for variety. This makes your kabobs more filling and tasty. For a twist, try marinating the protein in the same mix as the veggies. If you want to dive deeper into the recipe, check out the Full Recipe for more details! {{image_4}} You can easily customize grilled veggie kabobs by using seasonal vegetables. Here are some ideas: - Summer: Try corn on the cob, eggplant, and asparagus. - Fall: Use butternut squash, Brussels sprouts, and sweet potatoes. - Winter: Consider root veggies like carrots, turnips, and beets. You can also grill fruits alongside your veggies. Fruits add sweetness and a nice contrast. Pineapple, peaches, and bell peppers work well. Skewer them together for fun color and taste. For a great look and texture, combine different colors and shapes. Mix round cherry tomatoes with long zucchini slices. Use bright peppers with earthy mushrooms. This creates visual interest on your plate. You can make grilled veggie kabobs vegan by omitting any animal products. The recipe is already plant-based, so it’s a perfect choice. If you want a gluten-free version, ensure your marinade is gluten-free. Most spices and oils are safe, but check labels. You can enhance nutrition by adding grains or legumes. Try adding cooked quinoa or chickpeas to your kabobs. This gives extra protein and fiber. If you follow a low-carb diet, focus on non-starchy vegetables. Zucchini, bell peppers, and mushrooms are great picks. You can skip the starchy veggies like corn or potatoes. Check out the Full Recipe for more ideas on how to adapt these kabobs! To keep your leftover kabobs fresh, store them in the fridge. Place them in an airtight container. They can last up to three days. For longer storage, freeze them. Wrap each kabob in plastic wrap, then place them in a freezer bag. They can stay frozen for up to three months. When reheating kabobs, use the oven or grill. Preheat the oven to 350°F. Place the kabobs on a baking sheet. Heat them for about 10 minutes. This method keeps the veggies tender. You can also grill them for 5 minutes on medium heat. Avoid microwaving, as it makes them soggy. The freshness of your ingredients matters. Bell peppers and zucchini last well in the fridge for about a week. Tomatoes and mushrooms are best if used within three days. Always check for signs of spoilage before using leftovers. You can prep veggies ahead of time for easy grilling. Cut your bell pepper, zucchini, and onion in advance. Store them in the fridge in sealed bags. This saves time when you're ready to grill. Kabobs are great for meal plans. You can mix and match different veggies throughout the week. Pair them with grains or salads for a full meal. They also work well for lunch boxes. Just make sure to keep them cool until you eat. If you have a gathering, kabobs are a hit! You can set up a kabob station. Guests can choose their favorite veggies. This adds fun and personalization to your meal. Kabobs not only taste great but also look colorful and inviting on the table. For the complete recipe, check out the [Full Recipe]. Can I make these kabobs in the oven? Yes, you can! Set your oven to 400°F. Place the kabobs on a baking sheet. Bake for about 20 minutes, turning halfway through. This gives you a tasty option when grilling isn't possible. What are the best vegetables for grilling? The best vegetables for grilling include: - Bell peppers - Zucchini - Yellow squash - Red onion - Cherry tomatoes - Mushrooms These veggies hold up well on the grill and taste great! How to know when the vegetables are done cooking? Look for nice grill marks and tenderness. You can pierce them with a fork. If they are soft but still firm, they are ready to eat. How to make grilled veggie kabobs more flavorful? Use a good marinade with olive oil, garlic, and spices. Let the veggies soak in the marinade for at least 15 minutes. This step really boosts their taste. Why should you marinate vegetables? Marinating adds flavor and helps keep them juicy. The oil and spices soak into the veggies, making each bite delicious. What type of skewers work best for grilling? Both wooden and metal skewers work well. If using wooden skewers, soak them first. This prevents burning. Metal skewers can be reused and do not need soaking. Can I use tofu or tempeh in veggie kabobs? Yes, tofu or tempeh can add protein. Cut them into cubes and marinate like the veggies. They grill nicely and taste great with the other flavors. How do I prevent vegetables from burning on the grill? Start with a clean grill and preheat it. Keep an eye on the kabobs while grilling. Turn them often to ensure even cooking and avoid burning. What can I serve alongside grilled veggie kabobs? Serve kabobs with dips like tzatziki or hummus. They also pair well with rice, quinoa, or a fresh salad. Adding some bread can complete the meal nicely. You now have all the tools to create delicious grilled veggie kabobs. We covered essential ingredients, preparation methods, grilling tips, and serving ideas. Remember, fresh ingredients make a big difference. You can also customize with various vegetables and flavors. Don’t forget to store leftovers properly for future meals. Enjoy your grilling adventure, and get creative with your kabob variations. With practice, you'll master this fun cooking method that delights everyone!](https://dishtreats.com/wp-content/uploads/2025/06/56cc5cbd-3bee-4e7d-a92f-dff27107e6fe-768x768.webp)
