Savory Spinach Ricotta Stuffed Shells Easy Recipe
![To make delicious spinach ricotta stuffed shells, gather these key ingredients: - 20 jumbo pasta shells - 2 cups fresh spinach, finely chopped - 1 cup creamy ricotta cheese - 1 cup shredded mozzarella cheese, divided - ½ cup grated Parmesan cheese - 1 large egg, lightly beaten - 2 cups marinara sauce, divided - 1 teaspoon garlic powder - 1 teaspoon onion powder - Salt and pepper, to taste - Fresh basil leaves, for garnish These ingredients create a rich and tasty filling. The spinach adds color and nutrition. The ricotta provides creaminess, while the mozzarella and Parmesan give a cheesy, savory flavor. While ricotta is the star, you can try other cheeses too. Here are some tasty options: - Cottage cheese: It’s similar to ricotta but a bit lighter. - Goat cheese: This adds a tangy flavor. - Cream cheese: It gives a rich, creamy texture. Feel free to mix and match! This lets you customize the taste to your liking. A good marinara sauce makes your dish shine. You can use store-bought or homemade. Here are some options: - Classic marinara: A simple, tomato-based sauce for a traditional taste. - Marinara with herbs: Look for added basil or oregano for extra flavor. - Spicy marinara: If you like heat, go for a sauce with red pepper flakes. You can find a perfect sauce that matches your style. The right sauce ties the whole dish together and makes it even more delicious. For the full recipe, check here: [Full Recipe]. Start by preheating your oven to 375°F (190°C). This heat will help cook the stuffed shells just right. Next, take a big pot and fill it with salted water. Bring the water to a boil. Once boiling, gently add the jumbo pasta shells. Cook them for 8-10 minutes until they are al dente. Be careful not to overcook them, or they will break. After cooking, drain the shells and let them cool for a bit. This step is vital for easy handling later. In a large bowl, mix the following ingredients for the filling: - 2 cups fresh spinach, finely chopped - 1 cup creamy ricotta cheese - ½ cup grated Parmesan cheese - 1 large egg, lightly beaten - 1 teaspoon garlic powder - 1 teaspoon onion powder - Salt and pepper, to taste Stir these ingredients until they blend well. The spinach should be evenly mixed with the cheeses and spices. This filling will give your shells a rich taste. Take a spoon and fill each jumbo shell with the spinach-ricotta mixture. Place the filled shells in a greased baking dish. Make sure they sit nicely side by side. After all shells are filled, pour half of the marinara sauce over them. This sauce keeps the shells moist and adds flavor. Next, sprinkle the remaining mozzarella cheese on top. Pour the rest of the marinara sauce over the shells. Cover the dish with aluminum foil to keep moisture in. Bake for 25 minutes. After that, remove the foil and bake for another 10-15 minutes. You want the cheese to be golden brown and bubbly. Let the shells cool a bit before serving. Garnish with fresh basil leaves for a pop of color and flavor. For the full recipe, check it out [Full Recipe]. When making spinach ricotta stuffed shells, some common mistakes can ruin the dish. First, avoid overcooking the pasta shells. They should be al dente, or firm. If you cook them too long, they may break apart when you fill them. Also, do not skimp on seasoning. Salt and pepper in the filling enhance the flavors. Lastly, ensure your filling is well mixed. Uneven filling can lead to bland bites. You can easily make this dish ahead of time. Prepare the stuffed shells as normal, but do not bake them. Instead, cover the dish with plastic wrap and foil. You can freeze them for up to three months. When you are ready to eat, bake them straight from the freezer. Just add an extra 10-15 minutes to the cooking time. This way, you have a delicious meal ready to go! To serve these stuffed shells, try pairing them with a simple salad or garlic bread. A fresh green salad adds a nice crunch. You can also sprinkle extra cheese or crushed red pepper on top for more flavor. For a touch of color, add fresh basil leaves as a garnish. It makes the dish look vibrant and appetizing. These little details make your meal special and enjoyable! For the full recipe, check the section above. {{image_4}} You can easily add meat to your spinach ricotta stuffed shells. Ground beef, turkey, or chicken work well. Just cook the meat in a skillet until it turns brown. Mix it into your filling of spinach and ricotta. This adds flavor and protein. It makes the dish heartier. If you want a vegetarian twist, try using different cheeses. Feta or goat cheese can add a nice tang. You can also mix in more veggies. Chopped mushrooms, bell peppers, or zucchini will enhance the filling. These options keep the dish fresh and exciting while still being meat-free. For gluten-free stuffed shells, look for gluten-free pasta shells. Many brands offer great options made from rice or corn. Cook them according to the package instructions. This way, you can enjoy delicious stuffed shells without gluten. The taste and texture remain satisfying, making it a great choice for everyone. You can find the full recipe [here](#). Store any leftover spinach ricotta stuffed shells in an airtight container. Allow them to cool first. This way, you keep the flavors fresh. You can also wrap them in plastic wrap if you prefer. To reheat, use your oven for the best results. Preheat your oven to 350°F (175°C). Place the stuffed shells in a baking dish. Cover with foil to keep them moist. Bake for about 20 minutes, or until warm. If you want to use a microwave, heat in short bursts. Stir gently between each burst to avoid hot spots. In the fridge, the stuffed shells last about 3-5 days. If you want to keep them longer, freeze them. In the freezer, they can last up to 3 months. To freeze, wrap them tightly in plastic wrap and then foil. This prevents freezer burn. When ready to eat, thaw in the fridge overnight before reheating. For the full recipe, check out the details above. You can use cottage cheese as a substitute for ricotta cheese. Blend it until smooth for a similar texture. Another option is cream cheese mixed with a bit of milk. This mix gives a rich flavor. If you want a dairy-free choice, try tofu blended with lemon juice and nutritional yeast. Each of these options works well in the recipe. You can use both fresh and frozen spinach. Fresh spinach gives you a bright taste. Just wash and chop it finely. Frozen spinach is easy and saves time. Make sure to thaw it and squeeze out the water. Too much water will make your filling soggy. Either choice will work well in your stuffed shells. The stuffed shells are done when the cheese is golden brown and bubbly. Bake them covered for the first 25 minutes. Then, remove the foil and bake for an extra 10-15 minutes. Check the edges of the sauce to see if it’s bubbling. If you see that, your stuffed shells are ready to enjoy. For more details, refer to the Full Recipe. In this post, we covered how to make spinach ricotta stuffed shells. We explored main ingredients, cheese choices, and marinara sauce options. I shared step-by-step instructions for cooking, filling, and baking. You learned tips to avoid mistakes and how to serve and store leftovers. Spinach ricotta stuffed shells are versatile and fun to make. With the right ingredients and techniques, you can enjoy a delicious meal that suits your taste. So, gather your ingredients, and get cooking!](https://dishtreats.com/wp-content/uploads/2025/07/1fe149c7-a7b6-44ce-beb5-3366f3dded82.webp)
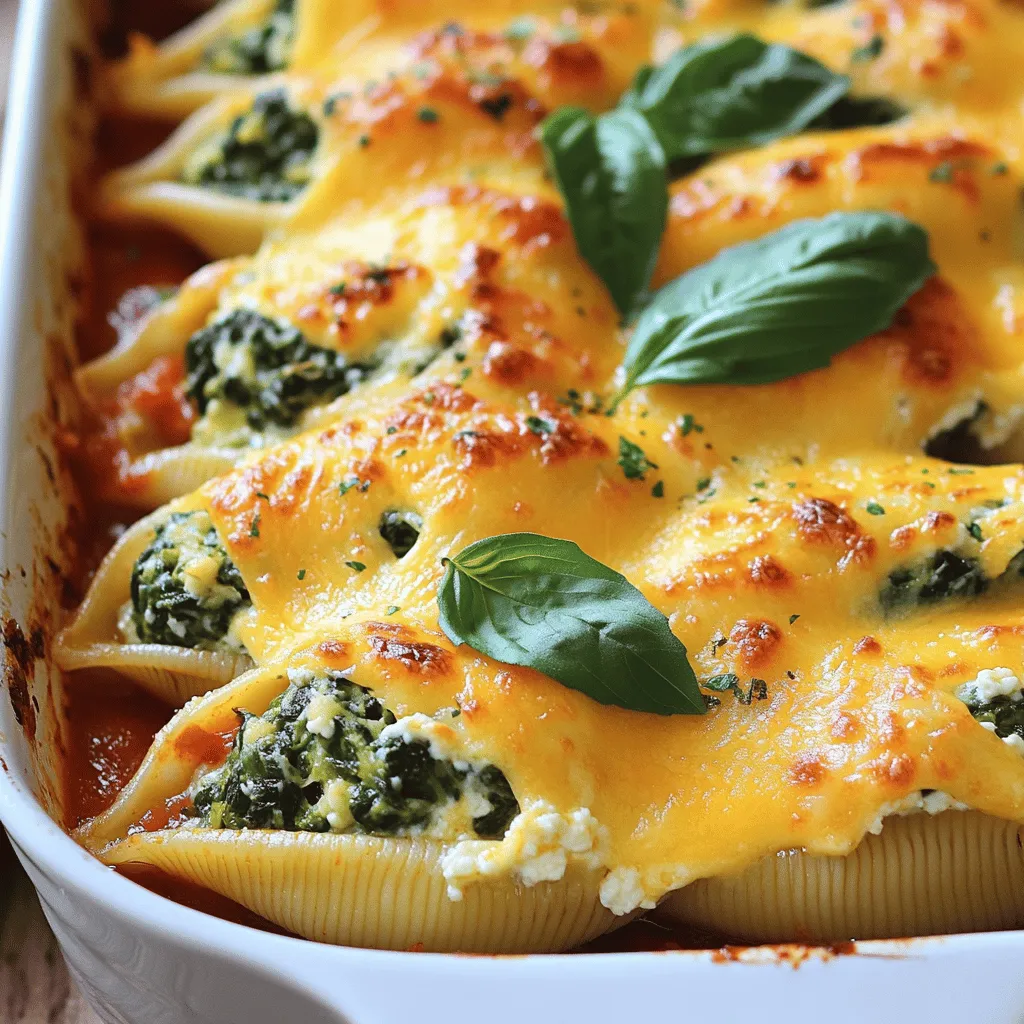
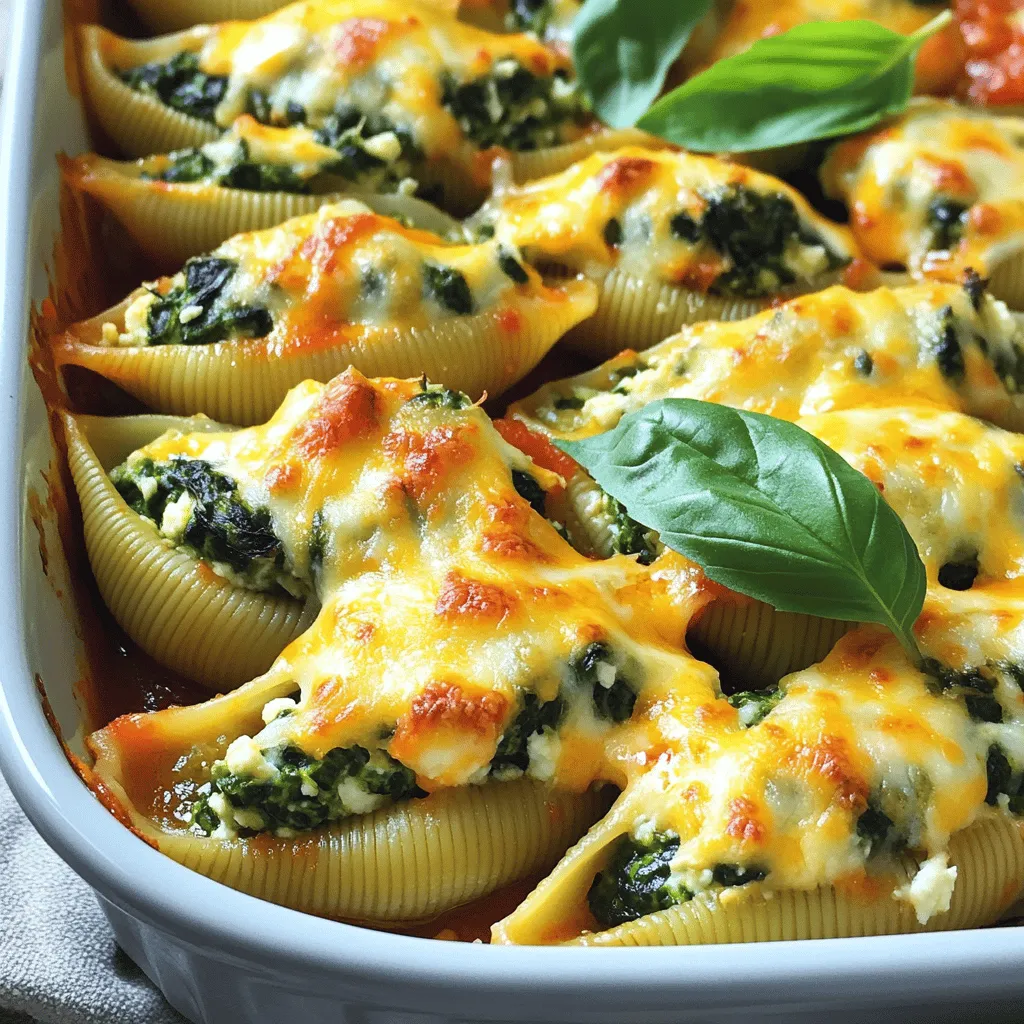
Are you ready to impress your family with an easy and tasty meal? My Savory Spinach Ricotta Stuffed Shells recipe is perfect for dinners or special occasions. With creamy ricotta, fresh spinach, and the right marinara sauce, you’ll create a dish that’s hearty and delicious. Let’s dive into the simple steps to make this crowd-pleaser and discover fun tips to tweak it to your taste!
Ingredients
Main Ingredients for Spinach Ricotta Stuffed Shells
To make delicious spinach ricotta stuffed shells, gather these key ingredients:
- 20 jumbo pasta shells
- 2 cups fresh spinach, finely chopped
- 1 cup creamy ricotta cheese
- 1 cup shredded mozzarella cheese, divided
- ½ cup grated Parmesan cheese
- 1 large egg, lightly beaten
- 2 cups marinara sauce, divided
- 1 teaspoon garlic powder
- 1 teaspoon onion powder
- Salt and pepper, to taste
- Fresh basil leaves, for garnish
These ingredients create a rich and tasty filling. The spinach adds color and nutrition. The ricotta provides creaminess, while the mozzarella and Parmesan give a cheesy, savory flavor.
Cheese Options for Filling
While ricotta is the star, you can try other cheeses too. Here are some tasty options:
- Cottage cheese: It’s similar to ricotta but a bit lighter.
- Goat cheese: This adds a tangy flavor.
- Cream cheese: It gives a rich, creamy texture.
Feel free to mix and match! This lets you customize the taste to your liking.
Suggested Marinara Sauce Choices
A good marinara sauce makes your dish shine. You can use store-bought or homemade. Here are some options:
- Classic marinara: A simple, tomato-based sauce for a traditional taste.
- Marinara with herbs: Look for added basil or oregano for extra flavor.
- Spicy marinara: If you like heat, go for a sauce with red pepper flakes.
You can find a perfect sauce that matches your style. The right sauce ties the whole dish together and makes it even more delicious.
Step-by-Step Instructions
Preparing the Pasta Shells
Start by preheating your oven to 375°F (190°C). This heat will help cook the stuffed shells just right. Next, take a big pot and fill it with salted water. Bring the water to a boil. Once boiling, gently add the jumbo pasta shells. Cook them for 8-10 minutes until they are al dente. Be careful not to overcook them, or they will break. After cooking, drain the shells and let them cool for a bit. This step is vital for easy handling later.
Making the Spinach-Ricotta Filling
In a large bowl, mix the following ingredients for the filling:
- 2 cups fresh spinach, finely chopped
- 1 cup creamy ricotta cheese
- ½ cup grated Parmesan cheese
- 1 large egg, lightly beaten
- 1 teaspoon garlic powder
- 1 teaspoon onion powder
- Salt and pepper, to taste
Stir these ingredients until they blend well. The spinach should be evenly mixed with the cheeses and spices. This filling will give your shells a rich taste.
Assembling the Dish and Baking
Take a spoon and fill each jumbo shell with the spinach-ricotta mixture. Place the filled shells in a greased baking dish. Make sure they sit nicely side by side. After all shells are filled, pour half of the marinara sauce over them. This sauce keeps the shells moist and adds flavor.
Next, sprinkle the remaining mozzarella cheese on top. Pour the rest of the marinara sauce over the shells. Cover the dish with aluminum foil to keep moisture in. Bake for 25 minutes. After that, remove the foil and bake for another 10-15 minutes. You want the cheese to be golden brown and bubbly. Let the shells cool a bit before serving. Garnish with fresh basil leaves for a pop of color and flavor.
Tips & Tricks
Common Mistakes to Avoid
When making spinach ricotta stuffed shells, some common mistakes can ruin the dish. First, avoid overcooking the pasta shells. They should be al dente, or firm. If you cook them too long, they may break apart when you fill them. Also, do not skimp on seasoning. Salt and pepper in the filling enhance the flavors. Lastly, ensure your filling is well mixed. Uneven filling can lead to bland bites.
How to Make Ahead and Freeze
You can easily make this dish ahead of time. Prepare the stuffed shells as normal, but do not bake them. Instead, cover the dish with plastic wrap and foil. You can freeze them for up to three months. When you are ready to eat, bake them straight from the freezer. Just add an extra 10-15 minutes to the cooking time. This way, you have a delicious meal ready to go!
Serving Suggestions for Spinach Ricotta Stuffed Shells
To serve these stuffed shells, try pairing them with a simple salad or garlic bread. A fresh green salad adds a nice crunch. You can also sprinkle extra cheese or crushed red pepper on top for more flavor. For a touch of color, add fresh basil leaves as a garnish. It makes the dish look vibrant and appetizing. These little details make your meal special and enjoyable!

Variations
Adding Meat to the Filling
You can easily add meat to your spinach ricotta stuffed shells. Ground beef, turkey, or chicken work well. Just cook the meat in a skillet until it turns brown. Mix it into your filling of spinach and ricotta. This adds flavor and protein. It makes the dish heartier.
Vegetarian Alternatives
If you want a vegetarian twist, try using different cheeses. Feta or goat cheese can add a nice tang. You can also mix in more veggies. Chopped mushrooms, bell peppers, or zucchini will enhance the filling. These options keep the dish fresh and exciting while still being meat-free.
Gluten-Free Options for Pasta
For gluten-free stuffed shells, look for gluten-free pasta shells. Many brands offer great options made from rice or corn. Cook them according to the package instructions. This way, you can enjoy delicious stuffed shells without gluten. The taste and texture remain satisfying, making it a great choice for everyone.
Storage Info
How to Store Leftovers
Store any leftover spinach ricotta stuffed shells in an airtight container. Allow them to cool first. This way, you keep the flavors fresh. You can also wrap them in plastic wrap if you prefer.
Reheating Instructions
To reheat, use your oven for the best results. Preheat your oven to 350°F (175°C). Place the stuffed shells in a baking dish. Cover with foil to keep them moist. Bake for about 20 minutes, or until warm. If you want to use a microwave, heat in short bursts. Stir gently between each burst to avoid hot spots.
Shelf Life in the Refrigerator and Freezer
In the fridge, the stuffed shells last about 3-5 days. If you want to keep them longer, freeze them. In the freezer, they can last up to 3 months. To freeze, wrap them tightly in plastic wrap and then foil. This prevents freezer burn. When ready to eat, thaw in the fridge overnight before reheating.
FAQs
What can I substitute for ricotta cheese?
You can use cottage cheese as a substitute for ricotta cheese. Blend it until smooth for a similar texture. Another option is cream cheese mixed with a bit of milk. This mix gives a rich flavor. If you want a dairy-free choice, try tofu blended with lemon juice and nutritional yeast. Each of these options works well in the recipe.
Can I use fresh or frozen spinach?
You can use both fresh and frozen spinach. Fresh spinach gives you a bright taste. Just wash and chop it finely. Frozen spinach is easy and saves time. Make sure to thaw it and squeeze out the water. Too much water will make your filling soggy. Either choice will work well in your stuffed shells.
How do I know when the stuffed shells are done baking?
The stuffed shells are done when the cheese is golden brown and bubbly. Bake them covered for the first 25 minutes. Then, remove the foil and bake for an extra 10-15 minutes. Check the edges of the sauce to see if it’s bubbling. If you see that, your stuffed shells are ready to enjoy.
In this post, we covered how to make spinach ricotta stuffed shells. We explored main ingredients, cheese choices, and marinara sauce options. I shared step-by-step instructions for cooking, filling, and baking. You learned tips to avoid mistakes and how to serve and store leftovers.
Spinach ricotta stuffed shells are versatile and fun to make. With the right ingredients and techniques, you can enjoy a delicious meal that suits your taste. So, gather your ingredients, and get cooking!
![To make delicious spinach ricotta stuffed shells, gather these key ingredients: - 20 jumbo pasta shells - 2 cups fresh spinach, finely chopped - 1 cup creamy ricotta cheese - 1 cup shredded mozzarella cheese, divided - ½ cup grated Parmesan cheese - 1 large egg, lightly beaten - 2 cups marinara sauce, divided - 1 teaspoon garlic powder - 1 teaspoon onion powder - Salt and pepper, to taste - Fresh basil leaves, for garnish These ingredients create a rich and tasty filling. The spinach adds color and nutrition. The ricotta provides creaminess, while the mozzarella and Parmesan give a cheesy, savory flavor. While ricotta is the star, you can try other cheeses too. Here are some tasty options: - Cottage cheese: It’s similar to ricotta but a bit lighter. - Goat cheese: This adds a tangy flavor. - Cream cheese: It gives a rich, creamy texture. Feel free to mix and match! This lets you customize the taste to your liking. A good marinara sauce makes your dish shine. You can use store-bought or homemade. Here are some options: - Classic marinara: A simple, tomato-based sauce for a traditional taste. - Marinara with herbs: Look for added basil or oregano for extra flavor. - Spicy marinara: If you like heat, go for a sauce with red pepper flakes. You can find a perfect sauce that matches your style. The right sauce ties the whole dish together and makes it even more delicious. For the full recipe, check here: [Full Recipe]. Start by preheating your oven to 375°F (190°C). This heat will help cook the stuffed shells just right. Next, take a big pot and fill it with salted water. Bring the water to a boil. Once boiling, gently add the jumbo pasta shells. Cook them for 8-10 minutes until they are al dente. Be careful not to overcook them, or they will break. After cooking, drain the shells and let them cool for a bit. This step is vital for easy handling later. In a large bowl, mix the following ingredients for the filling: - 2 cups fresh spinach, finely chopped - 1 cup creamy ricotta cheese - ½ cup grated Parmesan cheese - 1 large egg, lightly beaten - 1 teaspoon garlic powder - 1 teaspoon onion powder - Salt and pepper, to taste Stir these ingredients until they blend well. The spinach should be evenly mixed with the cheeses and spices. This filling will give your shells a rich taste. Take a spoon and fill each jumbo shell with the spinach-ricotta mixture. Place the filled shells in a greased baking dish. Make sure they sit nicely side by side. After all shells are filled, pour half of the marinara sauce over them. This sauce keeps the shells moist and adds flavor. Next, sprinkle the remaining mozzarella cheese on top. Pour the rest of the marinara sauce over the shells. Cover the dish with aluminum foil to keep moisture in. Bake for 25 minutes. After that, remove the foil and bake for another 10-15 minutes. You want the cheese to be golden brown and bubbly. Let the shells cool a bit before serving. Garnish with fresh basil leaves for a pop of color and flavor. For the full recipe, check it out [Full Recipe]. When making spinach ricotta stuffed shells, some common mistakes can ruin the dish. First, avoid overcooking the pasta shells. They should be al dente, or firm. If you cook them too long, they may break apart when you fill them. Also, do not skimp on seasoning. Salt and pepper in the filling enhance the flavors. Lastly, ensure your filling is well mixed. Uneven filling can lead to bland bites. You can easily make this dish ahead of time. Prepare the stuffed shells as normal, but do not bake them. Instead, cover the dish with plastic wrap and foil. You can freeze them for up to three months. When you are ready to eat, bake them straight from the freezer. Just add an extra 10-15 minutes to the cooking time. This way, you have a delicious meal ready to go! To serve these stuffed shells, try pairing them with a simple salad or garlic bread. A fresh green salad adds a nice crunch. You can also sprinkle extra cheese or crushed red pepper on top for more flavor. For a touch of color, add fresh basil leaves as a garnish. It makes the dish look vibrant and appetizing. These little details make your meal special and enjoyable! For the full recipe, check the section above. {{image_4}} You can easily add meat to your spinach ricotta stuffed shells. Ground beef, turkey, or chicken work well. Just cook the meat in a skillet until it turns brown. Mix it into your filling of spinach and ricotta. This adds flavor and protein. It makes the dish heartier. If you want a vegetarian twist, try using different cheeses. Feta or goat cheese can add a nice tang. You can also mix in more veggies. Chopped mushrooms, bell peppers, or zucchini will enhance the filling. These options keep the dish fresh and exciting while still being meat-free. For gluten-free stuffed shells, look for gluten-free pasta shells. Many brands offer great options made from rice or corn. Cook them according to the package instructions. This way, you can enjoy delicious stuffed shells without gluten. The taste and texture remain satisfying, making it a great choice for everyone. You can find the full recipe [here](#). Store any leftover spinach ricotta stuffed shells in an airtight container. Allow them to cool first. This way, you keep the flavors fresh. You can also wrap them in plastic wrap if you prefer. To reheat, use your oven for the best results. Preheat your oven to 350°F (175°C). Place the stuffed shells in a baking dish. Cover with foil to keep them moist. Bake for about 20 minutes, or until warm. If you want to use a microwave, heat in short bursts. Stir gently between each burst to avoid hot spots. In the fridge, the stuffed shells last about 3-5 days. If you want to keep them longer, freeze them. In the freezer, they can last up to 3 months. To freeze, wrap them tightly in plastic wrap and then foil. This prevents freezer burn. When ready to eat, thaw in the fridge overnight before reheating. For the full recipe, check out the details above. You can use cottage cheese as a substitute for ricotta cheese. Blend it until smooth for a similar texture. Another option is cream cheese mixed with a bit of milk. This mix gives a rich flavor. If you want a dairy-free choice, try tofu blended with lemon juice and nutritional yeast. Each of these options works well in the recipe. You can use both fresh and frozen spinach. Fresh spinach gives you a bright taste. Just wash and chop it finely. Frozen spinach is easy and saves time. Make sure to thaw it and squeeze out the water. Too much water will make your filling soggy. Either choice will work well in your stuffed shells. The stuffed shells are done when the cheese is golden brown and bubbly. Bake them covered for the first 25 minutes. Then, remove the foil and bake for an extra 10-15 minutes. Check the edges of the sauce to see if it’s bubbling. If you see that, your stuffed shells are ready to enjoy. For more details, refer to the Full Recipe. In this post, we covered how to make spinach ricotta stuffed shells. We explored main ingredients, cheese choices, and marinara sauce options. I shared step-by-step instructions for cooking, filling, and baking. You learned tips to avoid mistakes and how to serve and store leftovers. Spinach ricotta stuffed shells are versatile and fun to make. With the right ingredients and techniques, you can enjoy a delicious meal that suits your taste. So, gather your ingredients, and get cooking!](https://dishtreats.com/wp-content/uploads/2025/07/1fe149c7-a7b6-44ce-beb5-3366f3dded82-300x300.webp)


![- 4 boneless, skinless chicken thighs - 2 cups long-grain rice - 4 tablespoons unsalted butter, divided - 5 cloves garlic, finely minced - 1 medium onion, finely chopped - 1 teaspoon dried oregano - 1 teaspoon paprika - Salt and freshly ground black pepper, to taste - 3 cups chicken broth - 1 cup frozen peas - Fresh parsley, chopped (for garnish) When I prepare Garlic Butter Chicken and Rice, I love the way the flavors mix. The chicken thighs bring a juicy texture. Long-grain rice soaks up all the savory chicken broth. Unsalted butter adds a rich taste. Aromatics play a big role here. Garlic cloves and onion give a sweet aroma. Dried oregano and paprika add warmth and depth. I always use fresh black pepper and salt to make the dish pop. For a splash of color, I toss in frozen peas. They keep their bright green shade when cooked. Fresh parsley adds a nice finish. It makes the dish look inviting and fresh. If you want to try this dish, check the Full Recipe for all the steps! You'll enjoy making it, and even more, eating it. 1. Start by melting 2 tablespoons of butter in a large skillet over medium heat. This will create a rich base for your dish. 2. Once the butter melts, add the chopped onion. Sauté it for about 5 minutes until it turns soft and fragrant. 3. Next, add 5 cloves of minced garlic to the skillet. Cook it for 1 minute, just until the garlic smells good but isn’t browned. 4. While the onion and garlic are cooking, season 4 chicken thighs on both sides. Use 1 teaspoon of oregano, 1 teaspoon of paprika, salt, and pepper. This will add a lot of flavor. 5. Move the onion and garlic to one side of the skillet. Place the seasoned chicken thighs in the center. Cook each side for 6-7 minutes until they turn golden brown. Once done, take the chicken out and set it aside. 1. In the same skillet, add the remaining 2 tablespoons of butter. Let it melt completely. 2. Now, stir in 2 cups of long-grain rice. Toast the rice for 2-3 minutes, stirring often. This step brings out the nutty flavor. 3. Pour 3 cups of chicken broth over the toasted rice. Gently stir to coat all the grains. Increase the heat to bring the mixture to a boil. 1. Once the broth is boiling, lower the heat to a simmer. Nestle the cooked chicken thighs on top of the rice. Cover the skillet with a lid and let it cook for 15-20 minutes. The rice should absorb most of the broth and become tender. 2. For the last 5 minutes of cooking, sprinkle 1 cup of frozen peas directly over the rice. Do not stir. This will keep the peas bright and fresh. 3. After cooking, remove the skillet from the heat. Leave it covered for an extra 5 minutes. This helps the rice fluff up nicely. 4. Finally, use a fork to fluff the rice and mix in the peas. Serve warm, with fresh parsley on top for color and flavor. This simple process makes Garlic Butter Chicken and Rice a fun and tasty comfort meal. For the complete recipe, check out the [Full Recipe]. To boost the flavor of your garlic butter chicken and rice, consider adding fresh herbs. Thyme, rosemary, or basil can bring new notes to the dish. You can also mix in some red pepper flakes for a little heat. Adjust the spices to fit your taste. If you like it spicy, add more paprika or even cayenne pepper. Remember, always taste as you go to find your perfect balance. Sautéing is key for great flavor. Start with a medium heat to avoid burning the garlic and onions. Stir them often to help them cook evenly. When cooking the chicken, ensure it's golden and cooked through. Use a meat thermometer to check the internal temperature. It should reach 165°F (75°C) for safe eating. This way, you get juicy chicken every time. For a beautiful presentation, serve your garlic butter chicken and rice on a large platter. Sprinkle fresh parsley on top for a pop of color. You can also add lemon wedges on the side. This adds a zesty touch when served. Pair your meal with a simple green salad or steamed vegetables. For drinks, try a light white wine or sparkling water with lemon. Enjoy your delicious creation! You can find the full recipe [here](#). {{image_4}} You can make this dish lighter by swapping rice for cauliflower rice. Cauliflower rice offers a low-carb option that still tastes great. It cooks quickly and absorbs flavors well. Using skinless chicken breasts instead of thighs is another healthy choice. Breasts have less fat but still provide protein. Spice things up by adding cayenne pepper for heat. A pinch can really enhance the dish. You can also try Italian seasoning for a different twist. Adding veggies like bell peppers or carrots boosts nutrition and color. They add crunch and sweetness that pairs well with garlic butter. If you need gluten-free options, use gluten-free chicken broth. It keeps the dish flavorful while meeting dietary needs. For those avoiding dairy, there are great butter substitutes. Look for dairy-free spreads made from plant oils. They work well in this recipe without losing taste. To keep your Garlic Butter Chicken and Rice fresh, store any leftovers in airtight containers. This helps lock in the flavor and moisture. Make sure to let the dish cool down before sealing it up. For longer storage, you can freeze it. Divide the dish into smaller portions to make thawing easier later. When it's time to reheat, use a skillet or a microwave. If using a skillet, add a splash of chicken broth to keep it moist. Heat it over low to medium heat, stirring gently. In the microwave, cover the dish with a damp paper towel. This keeps moisture in and avoids a dry result. Remember, you want your chicken and rice to stay tender. In the fridge, your Garlic Butter Chicken and Rice lasts about 3 to 4 days. Always check for signs before eating. Look for any off smells or changes in color. If it smells funny or looks slimy, it’s best to toss it. Always trust your senses to keep your meals safe and tasty. To amp up the flavor, try adding fresh herbs like thyme or rosemary. You can also mix in spices such as garlic powder or onion powder for extra depth. A splash of lemon juice at the end brightens the dish. For a spicy kick, consider adding crushed red pepper flakes. These little changes can make a big taste difference. Yes, you can! To adapt this recipe, first, brown the chicken thighs in a skillet. This step gives great flavor. Then, place the chicken, onions, garlic, and rice into the slow cooker. Add chicken broth and spices. Cook on low for 4-6 hours. Check the rice for doneness. Slow cooking makes this dish very tender and delicious. This dish pairs well with a side of steamed vegetables like broccoli or green beans. A fresh salad with vinaigrette is also nice. For drinks, consider serving iced tea or a light white wine. These choices balance the rich flavors of the chicken and rice. Absolutely! You can make this dish ahead of time. Store the chicken and rice in separate containers to keep them fresh. It lasts up to four days in the fridge. When ready to eat, simply reheat in the microwave or on the stovetop. This makes it a perfect option for busy weekdays. For the full recipe, check out the link above. This article guides you through making Garlic Butter Chicken and Rice. You learned about key ingredients like chicken thighs, long-grain rice, and garlic. I shared easy steps for cooking flavorful meals, plus tips to enhance taste and presentation. In conclusion, this dish is tasty and versatile. You can adjust it to fit your diet or mood. Enjoy experimenting with flavors and make it your own! Happy cooking!](https://dishtreats.com/wp-content/uploads/2025/05/2b69aced-7351-4258-8c9e-dc4a3c9f0304-768x768.webp)


