Savory Breakfast Burritos Simple and Flavorful Treat

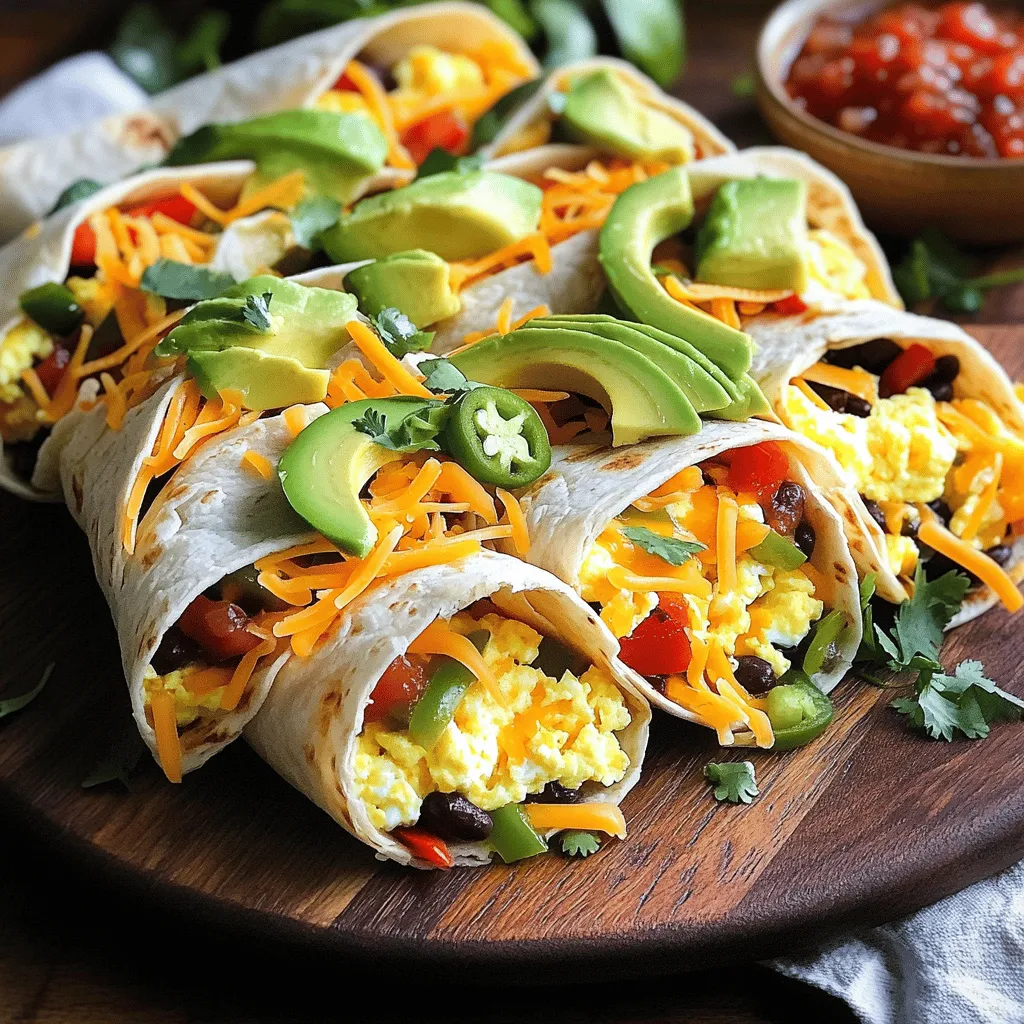
Do you crave a quick and tasty start to your day? Savory breakfast burritos might be your new favorite treat! Packed with simple ingredients like eggs, cheese, and fresh veggies, these burritos are both easy to make and full of flavor. In this guide, I’ll show you how to whip them up in no time. Get ready to elevate your breakfast game with mouthwatering burritos that everyone will love!
Ingredients
Main Ingredients
- 4 large flour tortillas
- 6 large eggs
- 1 cup canned black beans, rinsed and drained
- 1 cup shredded sharp cheddar cheese
Vegetables & Seasonings
- 1 small red bell pepper, diced
- 1 small green bell pepper, diced
- 1/2 cup red onion, finely diced
- 1 ripe avocado, sliced
- 2 tablespoons extra virgin olive oil
- 1 teaspoon ground cumin
- 1/2 teaspoon smoked paprika
- Salt and black pepper, to taste
Serving Suggestions
- Fresh salsa
- Optional garnishes
When I make savory breakfast burritos, I focus on fresh, simple ingredients. The flour tortillas serve as a soft wrap for all the tasty fillings. Eggs provide protein and a fluffy texture. Black beans add fiber and a hearty feel. Cheese ties everything together with a creamy layer.
For the vegetables, I love using vibrant bell peppers and red onion. They bring a sweet crunch and color. Adding ripe avocado gives a rich flavor and creamy texture. Olive oil is perfect for sautéing the veggies and spices. Ground cumin and smoked paprika add warmth and depth to each bite.
When serving, fresh salsa on the side brightens the dish. A sprinkle of chopped cilantro or a slice of lime can enhance it even more.
Step-by-Step Instructions
Preparing the Vegetables
To start, heat 2 tablespoons of olive oil in a large non-stick skillet over medium heat. Add 1/2 cup of finely diced red onion, 1 small green bell pepper, and 1 small red bell pepper. Sauté these veggies for about 5-7 minutes. Stir them often until they soften and turn fragrant. You want them to caramelize slightly, which gives a nice sweet flavor. They should be tender but still have a bit of crunch. This texture adds a great bite to your burrito.
Cooking the Eggs
In a medium bowl, crack 6 large eggs. Whisk them well with 1 teaspoon of ground cumin, 1/2 teaspoon of smoked paprika, and a pinch of salt and black pepper. This step is key for flavor. Pour the egg mix into the skillet with the veggies. Stir gently and let them cook for about 3-4 minutes. You want the eggs to be fluffy, fully cooked, and not runny. If you overcook them, they become dry, so keep an eye on them.
Assembling the Burritos
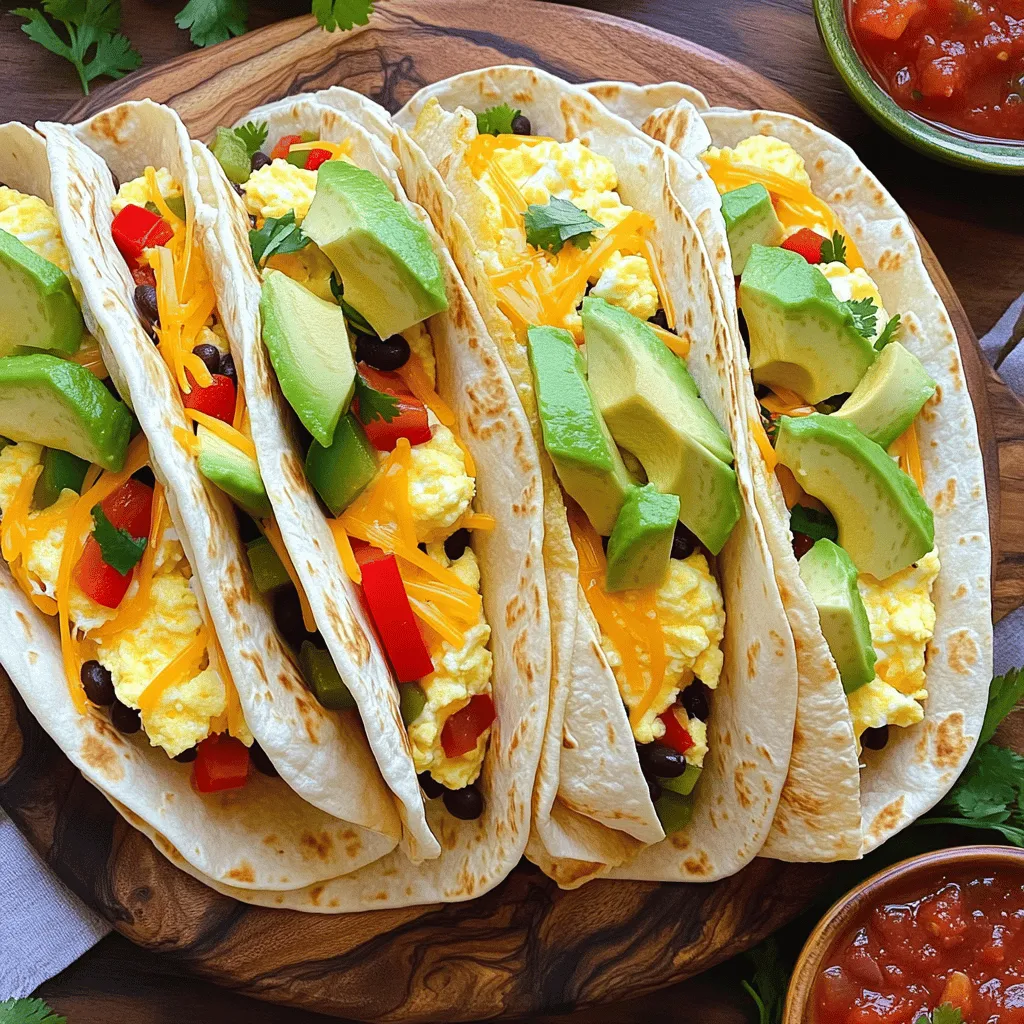
Now, grab a large flour tortilla. Place it flat on your counter. Spoon a generous portion of the egg and veggie mix into the center. Then, sprinkle a handful of shredded sharp cheddar cheese on top, followed by a few slices of fresh avocado. To fold, gently pull the sides of the tortilla inward over the filling. Start from the bottom and roll it tightly upwards. Be sure to seal the filling inside. If you want a crispy burrito, place them seam side down back in the skillet. Toast for 2-3 minutes on each side until they’re golden brown. This adds a nice crunch!Enjoy your savory breakfast burritos!
Tips & Tricks
Perfecting the Flavor
To make your breakfast burritos pop, focus on the seasonings. I like to start with ground cumin and smoked paprika. They add warmth and depth. If you want more heat, try adding cayenne pepper. Adjust the salt to your taste, too. Don’t be afraid to experiment. A dash of hot sauce can bring your burrito to life.
Timing and Texture
Timing is key. Cook the veggies for 5-7 minutes until they soften. This step builds flavor. For the eggs, whisk them well before cooking. Pour them into the skillet and stir gently. Cook for about 3-4 minutes until they are fluffy. Fluffiness is a must for great eggs. If overcooked, they become rubbery.
Presentation Enhancements
Make your burritos look as good as they taste. Use a colorful serving platter. Neatly arrange the burritos side by side. Garnish with extra avocado slices. It adds color and freshness. A small bowl of salsa on the side makes it inviting. For extra flair, sprinkle chopped cilantro over the top. It brightens the dish and adds flavor too.

Variations
Dietary Modifications
You can easily adapt savory breakfast burritos to meet different dietary needs. For vegetarians, simply skip the meat. Use extra beans or add more veggies. This keeps the burrito hearty and satisfying.
For a gluten-free option, switch to corn tortillas. They hold the filling well and add a nice flavor. Make sure your beans and cheese are also gluten-free.
Flavor Variations
You can mix up the flavors in your burritos. Try different meats like chorizo or sausage for a heartier bite. If you want a lighter option, use turkey bacon or ham.
Cheese choices can also change the taste. Go for pepper jack for a kick or feta for a tangy touch. Each type of cheese will give you a new flavor experience.
You can draw inspiration from regional dishes. Make it spicy with jalapeños or chipotle. If you love cheesy flavors, add nacho cheese or queso. Each variation offers a fun twist.
Breakfast vs. Dinner Options
Breakfast burritos can also serve as a great dinner meal. For dinner, swap out eggs for grilled chicken or steak. This gives a fresh take on the classic burrito.
You can also use different veggies, like roasted zucchini or sautéed mushrooms. This adds depth to the dish. Don’t forget to include your favorite sauces for extra flavor.
Storage Info
Storing Leftovers
To keep your savory breakfast burritos fresh, store them in the fridge. Use an airtight container. They will last about 3 to 4 days. If you want to keep them longer, freezing is a great option. Wrap each burrito tightly in plastic wrap and place them in a freezer bag. This way, they can last for up to 3 months.
Reheating Instructions
When you’re ready to enjoy your burritos again, reheating is easy. The microwave works well. Heat them for 1 to 2 minutes on high. You can also use the oven. Wrap them in foil and heat at 350°F for about 15 minutes. This keeps the burritos crispy and warm.
Shelf Life Expectations
These breakfast burritos are best when eaten fresh. In the fridge, they last around 3 to 4 days. If you freeze them, they will stay good for up to 3 months. Look for signs of spoilage like a bad smell or mold. If you see any of these signs, it’s best to toss them.
FAQs
How do I make breakfast burritos ahead of time?
To make breakfast burritos ahead of time, first prepare the filling.Let the mixture cool. Once cool, fill the tortillas and roll them up. Wrap each burrito in plastic wrap or foil. Store them in the fridge for up to three days.
Can I freeze breakfast burritos?
Yes, you can freeze breakfast burritos! After rolling them, wrap each burrito in foil or plastic wrap. Place them in a freezer-safe bag or container. They can last up to three months in the freezer. When ready to eat, thaw in the fridge overnight. Heat them in the microwave or oven until warm.
What are some good toppings for breakfast burritos?
You can add a variety of toppings to enhance your burrito. Here are some tasty ideas:
- Fresh salsa
- Sliced jalapeños
- Sour cream
- Chopped cilantro
- Shredded lettuce
- Diced tomatoes
- Hot sauce
These toppings can add flavor and texture to your burrito.
Can I customize the fillings in breakfast burritos?
Absolutely! You can personalize your breakfast burrito filling. Here are some suggestions:
- Add cooked sausage or bacon for meat lovers
- Include spinach or kale for a green boost
- Swap black beans for pinto or refried beans
- Use different cheese, like pepper jack or feta
- Try adding cooked potatoes or sweet potatoes
These options let you create a burrito that suits your taste.
How do I make breakfast burritos spicier?
To spice up your breakfast burritos, consider these ingredients:
- Add diced jalapeños or serrano peppers to the filling
- Use spicy salsa as a topping
- Sprinkle in some cayenne pepper or chili powder
- Choose pepper jack cheese instead of cheddar
- Mix in hot sauce to the egg mixture
These spicy additions will elevate the flavor of your breakfast burrito.
You’ve learned how to make delicious breakfast burritos from scratch. We covered the key ingredients like tortillas, eggs, and seasonings. You now know how to prepare and cook everything step-by-step. Tips helped you perfect flavors and presentation. We also explored dietary options and storage methods.
Take this knowledge and create your own tasty variations. Don’t be afraid to experiment with fillings and spices. Enjoy your meal and impress your family!


![- 1 lb (450g) chicken breast, thinly sliced - 1 cup fresh Thai basil leaves, packed - 3 cloves garlic, minced - 2 red Thai chili peppers, thinly sliced (adjust based on your spice preference) For this dish, I prefer chicken breast. It cooks quickly and stays juicy. Fresh Thai basil gives this meal its unique flavor. Garlic adds a nice aroma, and Thai chili peppers bring heat. You can control the spice by adding more or less chili. - 2 tablespoons soy sauce - 1 tablespoon oyster sauce (or substitute with mushroom sauce for vegetarian) - 1 tablespoon fish sauce (or an extra tablespoon of soy sauce for vegetarian) - 1 teaspoon sugar (to balance flavors) - 1 tablespoon vegetable oil (for frying) These sauces are key to great taste. Soy sauce offers saltiness, while oyster and fish sauces add depth. Sugar balances the salty flavors, making everything taste better. - 1 bell pepper, sliced (your choice of color for visual appeal) - 1 small onion, sliced into thin wedges - Optional: other vegetables for added nutrition I like using bell pepper and onion for color and crunch. You can add other veggies like carrots or snap peas. They bring more nutrition and flavor, making the dish more vibrant. For the full recipe, refer to the [Full Recipe]. To start, you need to combine the chicken with the sauces. In a medium bowl, add the sliced chicken breast, soy sauce, oyster sauce, fish sauce, and sugar. Mix these ingredients well so the chicken gets all the flavor. Let it marinate for 15 minutes. This short time helps the chicken absorb the tasty sauces. Next, heat the vegetable oil in a large skillet or wok over medium-high heat. You want the oil to shimmer before adding anything. Then, add the minced garlic and sliced Thai chili peppers. Stir-fry them for about 30 seconds until they smell amazing. Be careful not to burn the garlic. Now, add the marinated chicken to the pan. Spread it out evenly for even cooking. Stir-fry for about 5 to 7 minutes. Cook until the chicken is no longer pink and has a nice brown color. After that, toss in the sliced bell pepper and onion. Stir-fry for another 3 to 4 minutes. This will make the vegetables tender but still crisp. Once the chicken and veggies are done, take the skillet off the heat. Gently fold in the fresh Thai basil leaves. They will wilt quickly from the heat and add a lovely aroma. Serve the dish hot, over a bed of fluffy jasmine rice. This rice complements the stir-fry well. Enjoy your Thai Basil Chicken Stir-Fry! For the full recipe, check out the details above. Using fresh ingredients makes a big difference. Fresh Thai basil gives a sweet and fragrant flavor to the dish. Always choose bright green basil leaves. They should smell strong and sweet. The chicken should be fresh, too. This keeps your stir-fry tasty and safe to eat. For the best flavor, cook on high heat. A hot pan helps to sear the chicken. This adds a nice caramel color and enhances the taste. When you add garlic and chili, cook them quickly. This brings out their strong flavors without burning them. You can change the heat level easily. If you want it milder, remove the seeds from the chili peppers. You can also use fewer peppers or substitute with sweet bell peppers. If you like a kick but want it less spicy, try adding sugar. It balances the heat. You can also use a bit of honey for sweetness without heat. Pair your Thai basil chicken stir-fry with jasmine rice. The rice absorbs the sauce well. You can also add a side of steamed veggies for extra nutrition. For garnishes, consider adding lime wedges or crushed peanuts. They add color and crunch. Fresh cilantro or extra basil leaves also make it pop. Enjoy your meal with these simple touches! For the full recipe, check out the details above. {{image_4}} For a vegetarian or vegan version, you can swap chicken for tofu or tempeh. These options give a nice texture. Use mushroom sauce instead of oyster sauce. It brings depth and umami flavor. For the fish sauce, simply add an extra tablespoon of soy sauce. This keeps the taste bold. To maintain flavor, marinate the tofu or tempeh just like chicken. Allow it to soak up the sauces. When cooking, make sure to press out excess moisture. This helps achieve that nice, crispy texture we all love. If you want to try something new, switch the chicken for shrimp or beef. Shrimp cooks quickly, so cut down the cooking time to about 3-4 minutes. Beef takes longer. Slice it thin and cook it for about 6-8 minutes. Remember, cooking times change based on what protein you use. Always make sure your protein is fully cooked before adding in the veggies. Want to shake things up? Add sauces like teriyaki or sriracha for an exciting twist. Teriyaki gives a sweet flavor, while sriracha adds heat. You can even mix both for a sweet and spicy kick. Feel free to experiment with herbs and spices too. Adding cilantro or mint can brighten the dish. Try a sprinkle of lime juice for an extra zest. These tiny changes can create a whole new taste experience. For the full recipe, check the section above. Enjoy cooking! To keep your Thai basil chicken stir-fry fresh, store it in an airtight container. Refrigerate the leftovers within two hours of cooking. If you want to save it longer, freeze the stir-fry. Make sure to cool it completely before freezing. This method helps retain flavor and texture. When you reheat your stir-fry, use a skillet for the best results. Heat it over medium warmth and stir often. This keeps the chicken juicy and prevents it from drying out. For rice, add a splash of water and cover it. This helps the rice steam and become fluffy again. In the fridge, your Thai basil chicken stir-fry lasts up to four days. If frozen, it can last for about three months. Always check for off smells or changes in color. If you see these, it's best to discard it for safety. Thai Basil Chicken Stir-Fry has roots in Thai street food. This dish reflects the vibrant flavors of Thai cuisine. It showcases fresh herbs, bold spices, and simple cooking techniques. Thai basil, known for its unique flavor, is key to this dish. It adds a sweet and slightly spicy note that enhances the chicken. This meal represents the balance of sweet, salty, and spicy tastes typical in Thai dishes. Each bite transports you to bustling markets in Thailand. Yes, you can prepare Thai basil chicken stir-fry in advance. Cook and store it in the fridge for up to three days. To keep it fresh, store it in an airtight container. When you are ready to eat, simply reheat it on the stove. This dish tastes even better the next day as flavors meld. Serve it over freshly cooked jasmine rice for a quick meal. If you cannot find Thai basil, you have options. Sweet basil or holy basil works well as a substitute. Sweet basil offers a milder flavor, while holy basil is spicier. You can also mix in a bit of mint for a fresh twist. While these substitutes change the taste slightly, they still create a tasty dish. Just remember, the flavor will differ from the original recipe. The spice level of Thai Basil Chicken Stir-Fry can vary. It depends on the number of Thai chili peppers you use. Typically, this dish has a mild to medium heat. If you prefer a milder dish, use fewer chilis or remove the seeds. For those who love heat, add extra chilis or a dash of hot sauce. Adjusting spice levels allows everyone to enjoy this flavorful meal. Thai Basil Chicken Stir-Fry is a simple yet flavorful dish. You learned about the key ingredients, like fresh basil and chicken. The step-by-step instructions make cooking easy, even for beginners. We explored tips to enhance flavor and adjust spice levels to suit your taste. You can even try fun variations with different proteins or herbs. Enjoy making it your own, and savor the fresh flavors. Every bite will bring joy to your table.](https://dishtreats.com/wp-content/uploads/2025/06/20a2f9de-1755-4b6a-ade1-393123d10e24-768x768.webp)


![To make a healthy sweet potato hash, you need these ingredients: - 2 large sweet potatoes, peeled and cut into small cubes - 1 red bell pepper, cut into small cubes - 1 green bell pepper, cut into small cubes - 1 small red onion, finely diced - 3 cloves of garlic, minced - 1 teaspoon smoked paprika - 1 teaspoon ground cumin - ½ teaspoon cayenne pepper (optional, for a spicy kick) - 2 tablespoons olive oil - Sea salt and freshly cracked black pepper, to taste - 4 large eggs (optional, for topping) - Fresh cilantro or parsley, finely chopped (for garnish) These ingredients work well together. Sweet potatoes bring a natural sweetness. Bell peppers add crunch and color. Onions and garlic give a lovely aroma and flavor. Spices like smoked paprika and cumin make this dish really pop. If you want extra protein, you can add eggs on top. Fresh herbs add a nice touch at the end. For the full recipe, you can check the detailed instructions I provided earlier. 1. First, heat 2 tablespoons of olive oil in a large skillet over medium heat. Wait until it shimmers, which means it’s ready. 2. Next, add 2 large sweet potatoes, cut into small cubes. Spread them out in a single layer. Let them cook for about 5 minutes without stirring. This helps them get crispy. 3. After 5 minutes, stir the sweet potatoes. Cook until they are soft and golden, about another 10 minutes. 1. Now, it’s time to add flavor! Stir in 1 small red onion, finely diced. Keep cooking for about 3-4 minutes until the onion is soft and clear. 2. Then, mix in 3 cloves of minced garlic, 1 red bell pepper, and 1 green bell pepper, both cut into small cubes. 3. Add spices: 1 teaspoon smoked paprika, 1 teaspoon ground cumin, and ½ teaspoon cayenne pepper if you want heat. Stir well and let it cook for 5-7 minutes. The peppers should be tender, and the sweet potatoes should be fork-tender. Season with sea salt and black pepper to taste. 1. If you want to add eggs, create 4 small wells in the hash mixture. Crack an egg into each well. 2. Cover the skillet with a lid and cook for about 5 minutes. This cooks the eggs to your liking. For runny yolks, 5 minutes is perfect. This vibrant sweet potato hash is not just easy to make; it’s also packed with flavor. For the full recipe, refer to the earlier sections. To get the best sweet potato hash, focus on the cooking process. Start with small cubes of sweet potato. This helps them cook faster and evenly. Cook them in a hot skillet so they get crispy. I recommend using a cast-iron skillet. It holds heat well and gives a nice sear to your veggies. Spices can really boost the flavor. I love using smoked paprika and cumin. These spices add warmth and depth. If you like heat, add cayenne pepper too. You can adjust the spice levels based on your taste. Start with a small amount and add more if needed. Serving matters! For a pretty look, use shallow bowls. Place the hash in the center, and if you added eggs, make sure they sit on top. This highlights them nicely. A sprinkle of fresh herbs like cilantro or parsley adds color. A slice of creamy avocado on the side makes it even better. For the complete recipe, check out the [Full Recipe]. {{image_4}} Sweet potatoes are packed with nutrients. They are high in vitamins A and C. These vitamins help keep your skin healthy and boost your immune system. One medium sweet potato gives you over 400% of your daily vitamin A needs. This vitamin is great for your eyes and skin. Sweet potatoes also contain fiber. Fiber helps your digestion and keeps you feeling full. By adding sweet potatoes to your breakfast, you get a tasty way to start your day. You include a healthy veggie that fills you with energy. To make this sweet potato hash a balanced meal, add proteins and healthy fats. Protein keeps you strong and satisfied. You can top your hash with eggs for extra protein. Eggs also add a creamy texture. If you want healthy fats, consider adding avocado. This will give your dish a smooth, rich flavor. You can also use nuts or seeds for crunch. Integrating this hash into your diet is easy. It suits different meals, not just breakfast. Serve it for lunch or dinner too. This flexibility makes it a great choice for any day. Enjoy this delicious dish while knowing you are eating well. Check out the Full Recipe for more details! You can change the flavors in your sweet potato hash easily. Adding different vegetables makes it fun. Try adding zucchini or spinach for a fresh twist. Both add great taste and color. You can also use Italian herbs for a different flavor profile. Oregano and basil can enhance your dish. Don't be afraid to mix and match! Adding protein to your hash makes it more filling. You can use chicken or turkey for a hearty meal. Just cook the meat first, then add it to the hash. If you prefer a vegetarian option, tofu or beans work well. Tofu can soak up the flavors of the spices. Beans like black or kidney add fiber and protein. You can serve sweet potato hash in many ways. For breakfast, serve it with eggs on top. The runny yolks add creaminess to each bite. If you're having brunch, add a side salad for balance. You can also create a savory sweet potato bowl. Just layer the hash with your favorite toppings. Think avocado, salsa, or even a dollop of yogurt. Each of these changes keeps your meal exciting! For the full recipe, check out the detailed guide. You can store sweet potato hash in the fridge for up to four days. Make sure to place it in an airtight container. When you’re ready to eat, reheat it on the stove or in the microwave. For the best taste, add a splash of olive oil when reheating. This helps keep the hash moist and tasty. Yes, you can easily make this recipe vegan. Instead of eggs, you can use tofu or chickpea flour. Just scramble the tofu or mix chickpea flour with water to create a batter. You can also replace olive oil with avocado oil or coconut oil. This keeps the flavors rich while making it plant-based. Absolutely! Sweet potato hash is perfect for meal prep. You can cook a big batch and store it in the fridge. Divide it into portions for the week. Just reheat what you need each day. You can also add different proteins or veggies for variety throughout the week. To reheat the hash, use a skillet over medium heat. This helps keep its texture nice. Stir occasionally to ensure even heating. If using a microwave, heat it in short bursts of 30 seconds. Stir in between to avoid hot spots. This way, your hash stays tasty and not mushy. Yes, cheese can add great flavor! Try sharp cheddar or feta for a nice twist. You can sprinkle it on top while the hash is still hot. This lets the cheese melt nicely. If you prefer a creamier texture, consider adding cream cheese or goat cheese. This blog post covered a tasty sweet potato hash recipe from start to finish. We explored essential ingredients, cooking steps, and tips to enhance flavor. You also learned about nutritional benefits and variations to customize your dish. In the end, this recipe is not just easy to make; it’s also a great way to start your day. Try it and enjoy the burst of flavors and textures. You can make it your own with simple adjustments or serve it as is. Your breakfast just got better!](https://dishtreats.com/wp-content/uploads/2025/06/2729619c-b847-4f07-91dc-14d4acdaca85-768x768.webp)