Salted Caramel Apple Cider Cupcakes Delightful Treat

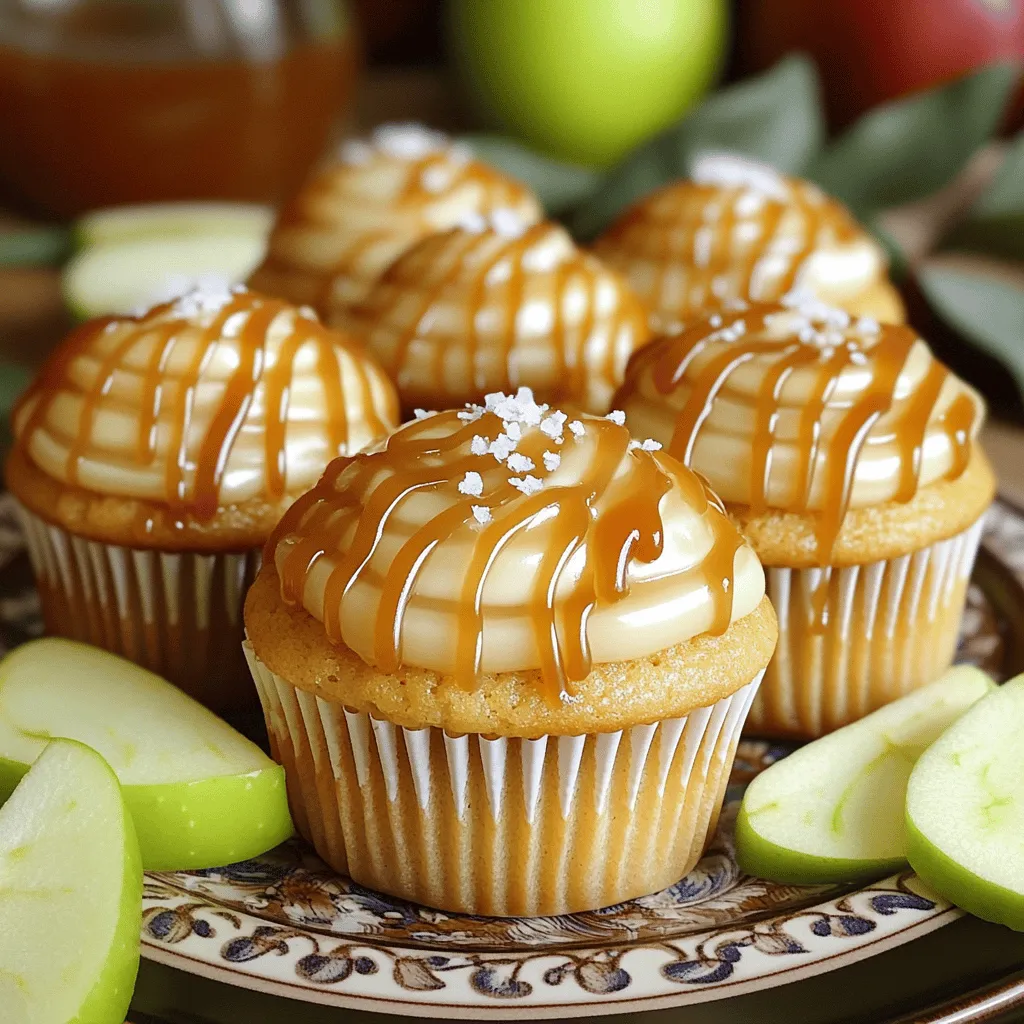
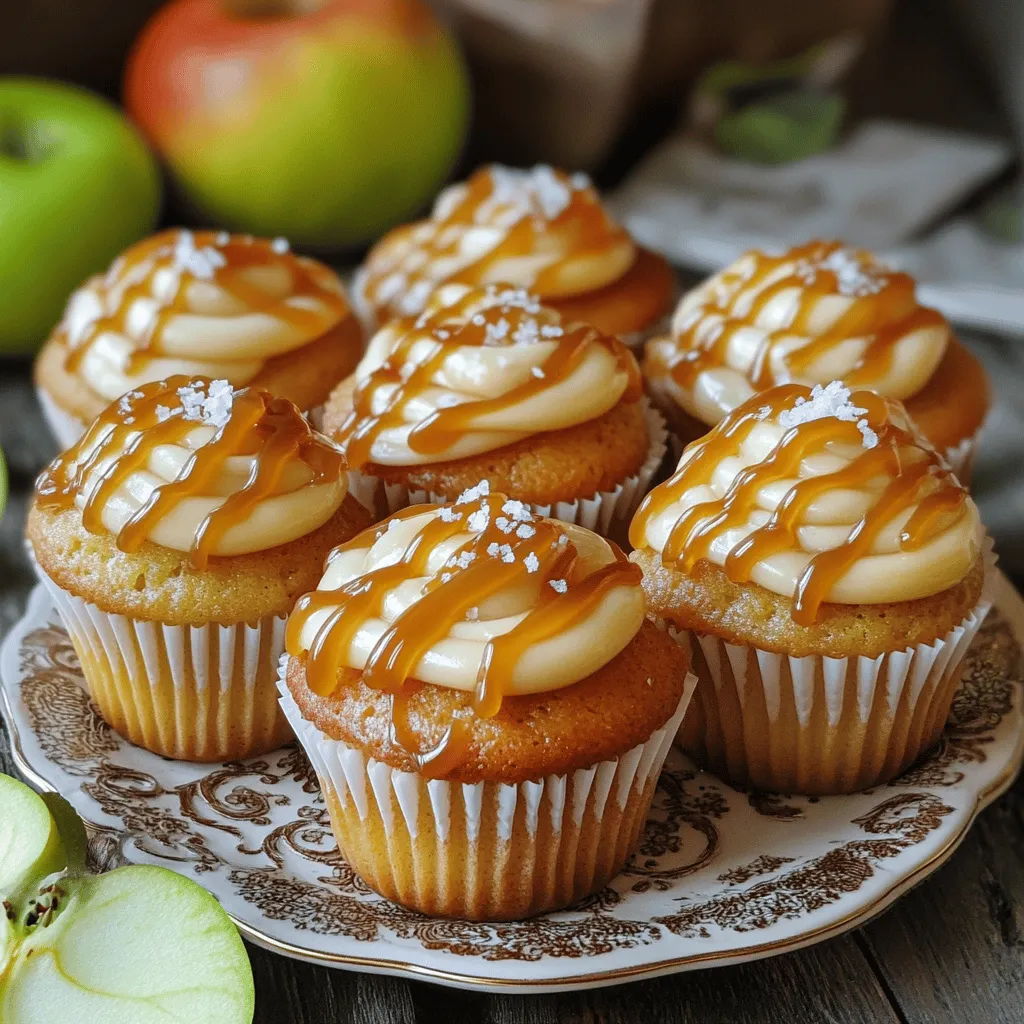
If you’re craving a tasty fall treat, look no further. My Salted Caramel Apple Cider Cupcakes are easy to make and packed with flavor. Imagine soft cupcakes bursting with apple cider, topped with rich caramel and a sprinkle of sea salt. In this post, I’ll share the step-by-step guide, tips for success, and fun variations. Get ready to impress friends and family with this delightful recipe!
Ingredients
Dry Ingredients
- 1 ½ cups all-purpose flour
- 1 cup granulated sugar
- ½ cup packed light brown sugar
- 1 teaspoon baking powder
- ½ teaspoon baking soda
- ½ teaspoon fine sea salt
- 1 teaspoon ground cinnamon
- ½ teaspoon ground nutmeg
Wet Ingredients
- ½ cup unsalted butter, softened
- 2 large eggs, at room temperature
- 1 cup apple cider (non-alcoholic)
- 1 teaspoon pure vanilla extract
- ½ cup caramel sauce
- Flaky sea salt for topping
Use fresh, high-quality ingredients for the best flavor. I love using fresh apple cider, as it adds a rich taste. You can find it in many stores during fall. The spices, like cinnamon and nutmeg, give warmth to each bite. Make sure your butter and eggs are at room temperature. This helps them mix in better.
The caramel sauce is key for those sweet bursts. You can make your own or buy it. If you want to get creative, consider using different types of caramel. Flaky sea salt adds a lovely crunch and balances the sweet. It’s important for that perfect salted caramel flavor.
When you gather all the ingredients, you set yourself up for success. Each component plays a role in creating a moist, flavorful cupcake. Trust me; these cupcakes will impress anyone who tries them!
Tips & Tricks
Achieving Perfect Cupcakes
To make your cupcakes light and fluffy, avoid overmixing. Mix just until combined. This keeps them airy and soft. For even baking, fill each liner about ¾ full. This allows room for rising without spilling over.
Enhancing Flavor and Texture
To boost flavor, use a caramel soaking technique. After baking, poke holes in the tops of each cupcake. This lets the caramel sauce soak in. The ideal room temperature for ingredients is key, too. Let butter and eggs sit out for about 30 minutes. This helps everything mix better and rise well.
Storage Info
Best Practices
- Storing at room temperature: Keep the cupcakes in an airtight container. They stay fresh for about 3 days. If you want to add a slice of bread, it helps keep them moist.
- Refrigeration tips: If you need them longer, place them in the fridge. They last about a week but may dry out. Before serving, let them sit at room temperature for better texture.
Freezing Cupcakes
- How to freeze properly: First, let the cupcakes cool completely. Wrap each one tightly in plastic wrap. Then, place them in a freezer-safe bag. They can stay frozen for up to 3 months.
- Thawing suggestions: When you’re ready to eat them, take them out of the freezer. Leave them in the fridge overnight or on the counter for a few hours. Avoid microwaving, as it can change the texture.
FAQs
Common Questions
- How long do these cupcakes stay fresh? They stay fresh for 3 days at room temperature and up to a week in the fridge.
- Can I use different types of apple cider? Yes! You can use spiced or even hard cider for a unique flavor.
- Is it possible to make these cupcakes gluten-free? Absolutely! Use a gluten-free flour blend. Just ensure it has a binding agent.
- How can I make homemade caramel sauce for the cupcakes? Combine sugar, butter, and cream in a pan. Cook until smooth and golden.
Troubleshooting
- Why did my cupcakes turn out dense? Overmixing can cause this. Mix until just combined to keep them light.
- What to do if the caramel isn’t soaking in? Make sure to poke holes deep enough in the cupcakes for the caramel to seep in.

This blog post covered all you need to know for perfect cupcakes. You explored the right ingredients, mixing methods, and baking tips. Remember, use fresh ingredients for better taste. Avoid overmixing to keep them fluffy. Adding your favorite toppings can make them special. For storage, keep them at room temp or freeze them for later. You can now enjoy delicious cupcakes any time you want! Happy baking!


![When making apple cinnamon overnight oats, you need simple and healthy ingredients. Here’s what you’ll need: - 1 cup rolled oats - 2 cups almond milk (or your preferred milk) - 1 medium apple, diced (a Granny Smith works great for a touch of tartness) - 1 tablespoon chia seeds - 1 tablespoon maple syrup (adjust based on your sweetness preference) - 1 teaspoon ground cinnamon - 1/2 teaspoon vanilla extract - A pinch of salt - Toppings: sliced almonds, additional apple slices, and a sprinkle of cinnamon These ingredients make a tasty breakfast that is full of fiber and nutrients. Rolled oats provide a solid base. Almond milk adds creaminess without extra calories. Diced apple brings natural sweetness and crunch. Chia seeds boost fiber and omega-3s. Maple syrup gives a touch of sweetness, while ground cinnamon adds warmth and flavor. A pinch of salt balances everything out. Feel free to adjust the ingredients to fit your taste. You can add more or less maple syrup, depending on how sweet you like it. I recommend using fresh apples for the best flavor. For a fun twist, try adding your favorite nuts or seeds on top. Check out the Full Recipe for all the details on making this delicious dish! To make apple cinnamon overnight oats, start with a clean space. Gather your ingredients first. This helps make the process smooth and quick. It only takes about ten minutes to prepare. You will need rolled oats, milk, chia seeds, and other tasty items. In a medium bowl, combine 1 cup of rolled oats and 2 cups of almond milk. Then, add 1 tablespoon of chia seeds, 1 tablespoon of maple syrup, and 1 teaspoon of ground cinnamon. Don't forget 1/2 teaspoon of vanilla extract and a pinch of salt. Whisk everything together until it’s mixed well. Next, fold in 1 diced apple. Make sure the apple pieces spread evenly through the mixture. This adds great flavor to every spoonful. Now, take two jars or airtight containers. Spoon the oat mixture evenly into them. Leave some space at the top. This space is important as the oats will expand. Seal the containers tightly and place them in the fridge. Let them chill overnight or for at least six hours. When you wake up, the oats will be ready! Just stir them, and if they are too thick, add a bit of almond milk to reach your desired creaminess. Enjoy! You can find the full recipe [here]. To get the best creamy oats, use the right milk. I like almond milk, but any milk will work. Soaking the oats overnight is key. This allows them to absorb the liquid. If your oats look too thick in the morning, add a splash of milk. Stir well to reach your perfect texture. Choosing the right apple makes a big difference. I recommend using Granny Smith apples for a nice tart flavor. They contrast well with the sweetness of the maple syrup. Other good choices are Honeycrisp or Fuji apples. Both add a sweet crunch and vibrant taste. For a beautiful presentation, use clear glass jars. Show off those lovely layers of oats, apples, and toppings. Just before serving, drizzle extra maple syrup on top. This adds shine and an extra touch of sweetness. Garnish with sliced almonds or apple slices for a pop of color. Enjoy the visual feast as much as the taste! {{image_4}} You can swap almond milk for any milk you like. Cow's milk gives a creamy taste. Cashew milk adds richness. Coconut milk brings a tropical twist. Each milk changes the flavor a bit, so try different ones to find your favorite. Maple syrup is the base for sweetness, but it’s not the only choice. You can use honey if you want a floral note. Agave syrup works well for a mild sweetness. If you prefer less sugar, try mashed bananas or stevia for a low-cal option. Adjust to your taste! Adding more ingredients is easy! You can mix in nuts or seeds for healthy fats. Try flax seeds for extra fiber. Some berries can add antioxidants and a pop of color. A spoonful of yogurt can make it creamy and add protein. Feel free to experiment with different add-ins to boost your overnight oats. Check the Full Recipe for more details on ingredients! You can store your apple cinnamon overnight oats in airtight containers. Glass jars work great. Make sure each jar is sealed tightly. This keeps the oats fresh and tasty. Place them in the fridge after making them. They last well in the cold. These oats are best when eaten within five days. After five days, their taste and texture change. If you see any mold, throw them away. Always check for a sour smell too. It’s better to be safe than sorry! You can freeze overnight oats if you want to keep them longer. Use freezer-safe containers or bags. Just leave some space to allow for expansion. When you're ready to eat, thaw them in the fridge overnight. You can also warm them in the microwave. This way, you enjoy a healthy breakfast boost anytime! For the full recipe, check out the details above. Yes, you can use instant oats, but the texture will change. Instant oats cook faster and may become mushy when soaked. If you want a creamier texture, stick with rolled oats. They absorb liquid well and hold their shape, giving you a better bite. You can change the flavor in many ways. Try different spices like nutmeg or ginger. Add a scoop of peanut butter or almond butter for creaminess. You can also mix in dried fruits, like raisins or cranberries, for a sweet touch. Experimenting with toppings can add crunch, too! Absolutely! This recipe is perfect for meal prep. Make a batch and store it in jars. It will last in the fridge for up to five days. Each morning, you can grab a jar, stir it up, and enjoy a healthy breakfast. Check the full recipe for more details on making these oats. This blog post showed you how to make delicious overnight oats. We covered the key ingredients and step-by-step instructions. Tips helped you achieve creamy texture and great flavor. Plus, I shared fun ways to personalize your oats. Remember, these oats store well, making them perfect for meal prep. Enjoy your tasty and healthy breakfast with ease. You can mix it up as you like and keep it fresh! Start experimenting today and make breakfast something you look forward to.](https://dishtreats.com/wp-content/uploads/2025/07/b5672784-8b9d-49df-af82-0a82d4d3c269-768x768.webp)

![To make your chocolate chip banana bread, you need these key ingredients: - 2 ripe bananas, thoroughly mashed - 1/3 cup coconut oil, melted - 1 teaspoon pure vanilla extract - 1/2 cup packed brown sugar - 1/4 cup granulated sugar - 2 large eggs at room temperature - 1 teaspoon baking soda - 1/4 teaspoon fine salt - 1 1/2 cups all-purpose flour - 1/2 cup semi-sweet or dark chocolate chips - 1/4 cup walnuts or pecans, chopped (optional) Each ingredient plays a vital role in crafting a moist and tasty loaf. Ripe bananas add sweetness and moisture. Coconut oil gives a rich flavor and a soft texture. The sugars create that perfect crust while the eggs help bind everything together. You can personalize your chocolate chip banana bread with fun add-ins. Here are some ideas: - Chopped nuts for crunch - Dried fruits like cranberries or raisins - A sprinkle of cinnamon for warmth - Peanut butter or nutella swirls for extra richness Feel free to mix and match! These add-ins can bring new flavors and textures to your bread. Using high-quality ingredients makes a big difference. Choose ripe bananas; they should be spotty and soft. Fresh eggs bring richness and flavor. Use pure vanilla extract for the best taste. For the oils, opt for organic coconut oil if possible. Quality flour helps create the right texture. Remember, great ingredients lead to great results! For the full recipe, check out the [Full Recipe]. Start by preheating your oven to 350°F (175°C). This step is crucial for even baking. Next, grab a 9x5 inch loaf pan. Lightly grease it with cooking spray or butter. You can also use parchment paper to line the pan. This makes removing the banana bread easier. In a large mixing bowl, take 2 ripe bananas and mash them well. You want them smooth with no lumps. Then, add 1/3 cup of melted coconut oil. Mix them together until they blend into a creamy base. This combination gives your bread moisture and flavor. Add 1 teaspoon of pure vanilla extract, 1/2 cup of packed brown sugar, and 1/4 cup of granulated sugar to the banana mix. Stir until it’s smooth. Now, crack in 2 large eggs. Mix well after each egg. Then, sprinkle 1 teaspoon of baking soda and 1/4 teaspoon of fine salt over the mix. Stir gently. Next, sift in 1 1/2 cups of all-purpose flour. Fold it in carefully. Don’t overmix; this keeps your loaf tender. Finally, gently fold in 1/2 cup of semi-sweet or dark chocolate chips. If you like, add 1/4 cup of chopped nuts too. Pour the batter into your prepared loaf pan. Smooth the top with a spatula. Place it in the oven and bake for 55-65 minutes. It’s done when a toothpick comes out clean or with a few crumbs. Let the bread cool in the pan for 10 minutes. Then, carefully move it to a wire rack to cool completely. This cooling step helps set the flavors. For the full recipe, refer to the section above. To get the best texture, use ripe bananas. The riper, the better! They must be soft and spotty. This way, you get a sweet and moist bread. Mash them well to avoid lumps. Mix ingredients gently after adding the flour. Over-mixing can make your bread tough. Aim for a light, fluffy loaf. Keep your banana bread fresh by wrapping it tightly. You can use plastic wrap or foil. Store it at room temperature for up to four days. If you want it to last longer, place it in the fridge for about a week. To keep it even longer, freeze it. Slice it before freezing for easy serving. Just make sure to wrap each slice well. Serve your chocolate chip banana bread warm. It tastes best right out of the oven! Add some butter on top for richness. You can also sprinkle powdered sugar for a sweet touch. For extra fun, top with fresh banana slices or more chocolate chips. This makes it look pretty and taste even better! For the complete recipe, check out the Full Recipe section in this article. {{image_4}} You can enjoy chocolate chip banana bread without gluten. Use a gluten-free flour blend. This blend works well as a one-to-one substitute. Make sure it has xanthan gum. This helps bind the ingredients. The flavor stays rich and delicious. Just follow the same steps as in the Full Recipe. You will love the texture and taste. For a vegan version, swap eggs for flax eggs. To make a flax egg, mix one tablespoon of flaxseed meal with three tablespoons of water. Let it sit for a few minutes to thicken. Use non-dairy milk and coconut oil as well. This keeps the bread moist and soft. You can still add chocolate chips, just choose dairy-free ones. You can add your favorite spices for extra flavor. Cinnamon and nutmeg pair well with bananas. A pinch of each can make a big difference. You can also try almond or coconut extract. These extracts add depth. Experiment to find your favorite combo. Each twist makes the bread unique and fun. To keep your chocolate chip banana bread fresh, store it at room temperature. Wrap it tightly in plastic wrap or foil. This helps keep moisture in. Place it in a cool, dry spot, away from direct sunlight. If you prefer, you can also use an airtight container. This will help maintain its soft texture and rich flavor. Freezing is a great option if you want to save some for later. First, let the banana bread cool completely. Then, wrap it tightly in plastic wrap, followed by aluminum foil. This extra layer prevents freezer burn. You can freeze it for up to three months. When you're ready to enjoy it, simply thaw it in the fridge overnight. Reheating banana bread can bring back its lovely warmth. You can use a toaster oven or a conventional oven. Preheat your oven to 350°F (175°C). Slice the bread and place it on a baking sheet. Heat for about 5-10 minutes. If you want a softer texture, cover it with foil. You can also pop a slice in the microwave for about 10-15 seconds. Enjoy it warm for a cozy treat! Your chocolate chip banana bread is done when a toothpick comes out clean. Insert it in the center. If it has a few crumbs, that is fine too. The bread usually bakes for 55-65 minutes. The top should look golden brown. Yes, you can substitute some ingredients. For example, use olive oil instead of coconut oil. You can also swap brown sugar for maple syrup. Make sure to adjust the amounts as needed for the best results. Chocolate chip banana bread lasts about 3-4 days at room temperature. Store it in an airtight container. For longer storage, keep it in the fridge for a week. You can also freeze it for up to 3 months. You can use applesauce or mashed bananas as egg substitutes. Use 1/4 cup of applesauce or 1/2 banana for each egg. Both options keep the bread moist and flavorful. This chocolate chip banana bread stands out because of its rich flavors. The combination of ripe bananas and chocolate chips creates a sweet treat. Using coconut oil adds a subtle depth to the taste. The option to add nuts gives extra texture. You can find the complete recipe in the Full Recipe section. This blog post covered how to make delicious chocolate chip banana bread. We discussed key ingredients, optional add-ins, and the importance of ingredient quality. I shared step-by-step instructions to guide you through the baking process. We explored tips for the perfect texture, storage methods, and fun variations like gluten-free and vegan options. With these insights, you can easily bake this treat and impress everyone. Enjoy your baking journey!](https://dishtreats.com/wp-content/uploads/2025/06/ff2d306f-7b8f-4bb2-a8a5-5e2882fba681-768x768.webp)

