Roasted Tomato Basil Soup Comforting and Flavorful Meal

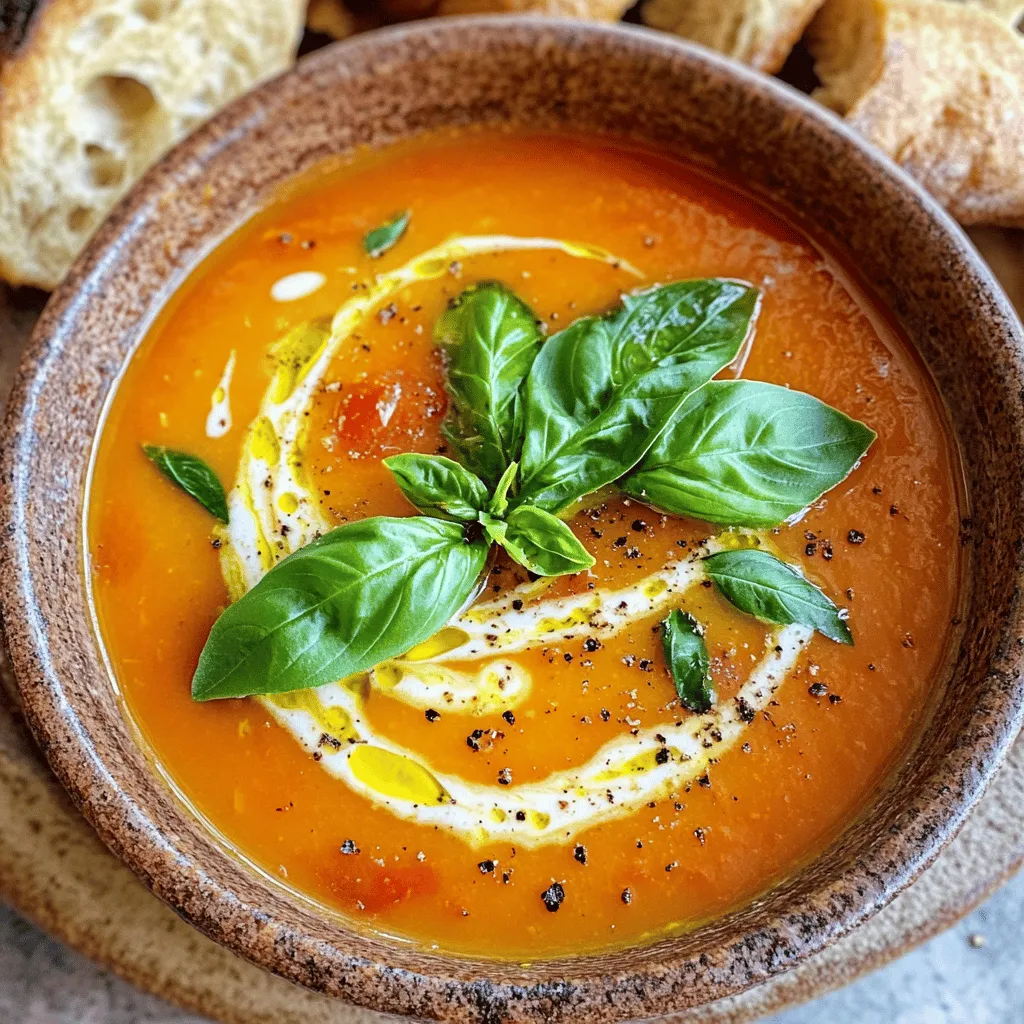
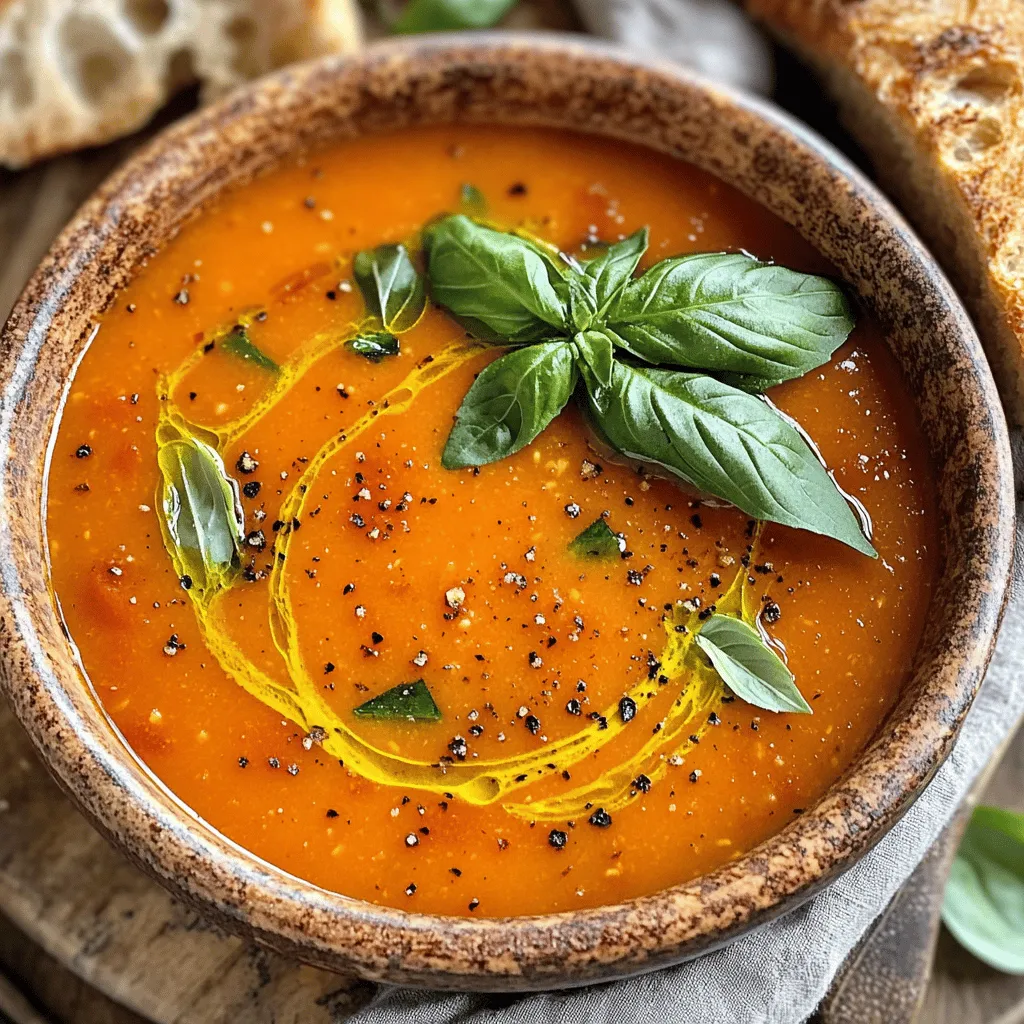
If you love cozy meals, then you’ll adore my Roasted Tomato Basil Soup. This dish is rich, warm, and packed with flavor. It’s the perfect way to enjoy fresh tomatoes and aromatic herbs. In this blog post, I will guide you step by step, sharing my best tips for making it creamy and delicious. Let’s dive in and create a comforting bowl of soup together!
Ingredients
List of Essential Ingredients
To make a delicious roasted tomato basil soup, you need the following ingredients:
- 2 lbs ripe tomatoes, halved
- 1 large onion, roughly chopped
- 4 cloves garlic, peeled
- 2 tablespoons extra-virgin olive oil
- Salt and freshly ground black pepper, to taste
- 4 cups vegetable broth
- 1 cup fresh basil leaves, tightly packed
- ½ cup heavy cream or coconut cream
Optional Ingredients for Enhanced Flavor
You can add these optional ingredients to boost the flavor:
- 1 teaspoon sugar (to balance acidity)
- 1 tablespoon balsamic vinegar (for added depth)
Nutritional Information per Serving
This soup is packed with nutrients. Here’s the approximate nutritional info per serving (1 cup):
- Calories: 180
- Protein: 3g
- Carbohydrates: 10g
- Dietary Fiber: 2g
- Fat: 15g
Roasted tomato basil soup is not just tasty; it’s also good for you! The fresh tomatoes and basil provide vitamins and antioxidants. Enjoy this warm bowl of comfort, knowing you’re treating yourself well!
Step-by-Step Instructions
Preparation: Prepping Ingredients and Oven
First, gather all your ingredients. You need ripe tomatoes, onion, garlic, olive oil, salt, pepper, and basil. Don’t forget the vegetable broth and cream! Next, preheat your oven to 400°F (200°C). This heat will help caramelize the tomatoes and enhance their sweetness.
Roasting: Step-by-Step Roasting Instructions
On a large baking sheet, lay the halved tomatoes cut-side up. Scatter the chopped onion and garlic cloves around them. This way, all the flavors mix during roasting. Drizzle the olive oil over everything. Add salt, black pepper, and sugar if you want to balance the acidity. Place the baking sheet in your hot oven and roast for 30 to 35 minutes. The tomatoes will turn juicy, and the onions will become soft and sweet.
Simmering and Blending: Transforming Ingredients into Soup
After roasting, take the baking sheet out of the oven. Let the vegetables cool for a few minutes. Then, transfer them into a large pot with a spatula. Pour in the vegetable broth and heat it on medium. Bring the mix to a gentle simmer and cook for 10 minutes. This helps meld all the wonderful flavors. Stir in the fresh basil leaves and balsamic vinegar if you’re using it. Let it simmer for another 5 minutes. Finally, use an immersion blender to puree the soup until it’s smooth and creamy. You can also use a traditional blender in batches if you prefer. Stir in the heavy cream or coconut cream for added richness. Taste and adjust the seasoning with more salt and pepper if needed.
Tips & Tricks
Suggestions for Perfect Roasting
To get the best flavor from your tomatoes, choose ripe ones. Look for tomatoes that feel heavy and smell sweet. Cut them in half and place them cut-side up. This helps the juices stay in. Use a high heat of 400°F for roasting. This makes the tomatoes caramelized and sweet. Don’t forget the onions and garlic! They add rich flavors. Roast them together for about 30 to 35 minutes. Keep an eye on them. They should look soft and slightly charred.
Blending Tips for Creamy Texture
For a smooth soup, use an immersion blender. This tool is easy and quick. If you don’t have one, a regular blender works too. Just be careful; blend in small batches. This prevents spills. Blend until the soup is silky. Add the cream after blending. Heavy cream gives a rich taste, but coconut cream works for a dairy-free option. Stir well to mix everything.
Seasoning Tips for Best Flavor
Start with salt and black pepper. They bring out the natural taste of the tomatoes. If your soup is too acidic, add a teaspoon of sugar. This balances the flavors. For extra depth, try balsamic vinegar. It adds a nice tang. Taste your soup before serving. Adjust the salt and pepper based on your preference. Don’t skip the fresh basil! It adds a great aroma and taste.

Variations
Dairy-Free Adjustments
To make this soup dairy-free, simply swap heavy cream for coconut cream. Coconut cream gives a rich taste without dairy. It also adds a hint of sweetness, which blends well with the roasted tomatoes. If you’re looking for a lighter option, you can use almond milk or cashew cream. These options will still keep your soup creamy and enjoyable.
Alternative Herb and Spice Options
While basil is the star, you can also try other herbs. Oregano or thyme can add a lovely twist. For a spicy kick, consider adding a pinch of red pepper flakes. If you want a more aromatic flavor, try adding a bay leaf while simmering. Just remember to remove it before blending. These herbs and spices can enhance the overall taste and give your soup a new life.
Different Tomato Varieties for Unique Flavor
The type of tomatoes you choose can change the flavor of your soup. Ripe Roma tomatoes are great for their sweetness and low water content. Heirloom tomatoes offer a robust taste and unique colors. Cherry tomatoes can bring a burst of sweetness. Each variety gives the soup a different character. Experiment with what you have or what you love to find your favorite mix.
Storage Info
How to Store Leftovers Properly
After you enjoy your roasted tomato basil soup, let it cool down. Then, pour the soup into airtight containers. Make sure to leave some space at the top of the container. This allows the soup to expand if it freezes. Label the containers with the date. Store in the fridge if you plan to eat it within a few days. If not, freezing is a great option.
Reheating Instructions
When you are ready to eat your soup again, you can reheat it easily. Pour your soup into a pot over medium heat. Stir it often to keep it smooth. Heat until it is hot, but do not let it boil. If the soup is too thick, you can add a splash of vegetable broth or water to thin it out. You can also use the microwave. Just heat in short bursts, stirring in between.
Freezing for Future Enjoyment
To freeze your soup, use the same airtight containers. It’s best to freeze it in smaller portions. This way, you can enjoy just what you need. The soup can last up to three months in the freezer. When you’re ready to eat it, let it thaw overnight in the fridge. Reheat it as mentioned above. Enjoy your comforting soup any time!
FAQs
What type of tomatoes are best for this soup?
I love using ripe, juicy tomatoes for this soup. Varieties like Roma or vine-ripened tomatoes work best. They have a rich flavor and fewer seeds. Choose tomatoes that feel heavy for their size. Avoid ones with blemishes or soft spots. Fresh tomatoes bring a sweet taste and vibrant color to your dish.
Can I use canned tomatoes instead of fresh?
Yes, you can use canned tomatoes! Look for whole or crushed tomatoes in good quality cans. Choose those packed in juice, not sauce. Canned tomatoes save time and still taste great. They can help you make soup even when fresh tomatoes are out of season. Just remember to adjust the seasoning since canned tomatoes can be saltier.
How do I make the soup vegan?
To make the soup vegan, skip the heavy cream or use coconut cream instead. This keeps it rich and creamy. Also, check your vegetable broth to ensure it is vegan-friendly. The rest of the recipe is already plant-based. You can still enjoy all the flavor without any animal products.
What can I serve with roasted tomato basil soup?
This soup pairs well with crusty bread or garlic toast. You can also serve it with a fresh salad for a full meal. Grilled cheese sandwiches are a classic choice too. They complement the soup’s warmth and flavor. For a fun twist, try adding a sprinkle of cheese or croutons on top of the soup.
This blog post provides all you need for making delicious roasted tomato basil soup. You learned about the key ingredients, cooking steps, and helpful tips for the best flavor. I also shared variations and storage tips to enjoy this soup later.
Roasting tomatoes enhances their taste, while blending gives it a creamy texture. With a few simple tweaks, you can make this dish suit your diet. Enjoy this warm, flavorful soup any time of the year. Happy cooking!


![To make delicious spinach ricotta stuffed shells, gather these key ingredients: - 20 jumbo pasta shells - 2 cups fresh spinach, finely chopped - 1 cup creamy ricotta cheese - 1 cup shredded mozzarella cheese, divided - ½ cup grated Parmesan cheese - 1 large egg, lightly beaten - 2 cups marinara sauce, divided - 1 teaspoon garlic powder - 1 teaspoon onion powder - Salt and pepper, to taste - Fresh basil leaves, for garnish These ingredients create a rich and tasty filling. The spinach adds color and nutrition. The ricotta provides creaminess, while the mozzarella and Parmesan give a cheesy, savory flavor. While ricotta is the star, you can try other cheeses too. Here are some tasty options: - Cottage cheese: It’s similar to ricotta but a bit lighter. - Goat cheese: This adds a tangy flavor. - Cream cheese: It gives a rich, creamy texture. Feel free to mix and match! This lets you customize the taste to your liking. A good marinara sauce makes your dish shine. You can use store-bought or homemade. Here are some options: - Classic marinara: A simple, tomato-based sauce for a traditional taste. - Marinara with herbs: Look for added basil or oregano for extra flavor. - Spicy marinara: If you like heat, go for a sauce with red pepper flakes. You can find a perfect sauce that matches your style. The right sauce ties the whole dish together and makes it even more delicious. For the full recipe, check here: [Full Recipe]. Start by preheating your oven to 375°F (190°C). This heat will help cook the stuffed shells just right. Next, take a big pot and fill it with salted water. Bring the water to a boil. Once boiling, gently add the jumbo pasta shells. Cook them for 8-10 minutes until they are al dente. Be careful not to overcook them, or they will break. After cooking, drain the shells and let them cool for a bit. This step is vital for easy handling later. In a large bowl, mix the following ingredients for the filling: - 2 cups fresh spinach, finely chopped - 1 cup creamy ricotta cheese - ½ cup grated Parmesan cheese - 1 large egg, lightly beaten - 1 teaspoon garlic powder - 1 teaspoon onion powder - Salt and pepper, to taste Stir these ingredients until they blend well. The spinach should be evenly mixed with the cheeses and spices. This filling will give your shells a rich taste. Take a spoon and fill each jumbo shell with the spinach-ricotta mixture. Place the filled shells in a greased baking dish. Make sure they sit nicely side by side. After all shells are filled, pour half of the marinara sauce over them. This sauce keeps the shells moist and adds flavor. Next, sprinkle the remaining mozzarella cheese on top. Pour the rest of the marinara sauce over the shells. Cover the dish with aluminum foil to keep moisture in. Bake for 25 minutes. After that, remove the foil and bake for another 10-15 minutes. You want the cheese to be golden brown and bubbly. Let the shells cool a bit before serving. Garnish with fresh basil leaves for a pop of color and flavor. For the full recipe, check it out [Full Recipe]. When making spinach ricotta stuffed shells, some common mistakes can ruin the dish. First, avoid overcooking the pasta shells. They should be al dente, or firm. If you cook them too long, they may break apart when you fill them. Also, do not skimp on seasoning. Salt and pepper in the filling enhance the flavors. Lastly, ensure your filling is well mixed. Uneven filling can lead to bland bites. You can easily make this dish ahead of time. Prepare the stuffed shells as normal, but do not bake them. Instead, cover the dish with plastic wrap and foil. You can freeze them for up to three months. When you are ready to eat, bake them straight from the freezer. Just add an extra 10-15 minutes to the cooking time. This way, you have a delicious meal ready to go! To serve these stuffed shells, try pairing them with a simple salad or garlic bread. A fresh green salad adds a nice crunch. You can also sprinkle extra cheese or crushed red pepper on top for more flavor. For a touch of color, add fresh basil leaves as a garnish. It makes the dish look vibrant and appetizing. These little details make your meal special and enjoyable! For the full recipe, check the section above. {{image_4}} You can easily add meat to your spinach ricotta stuffed shells. Ground beef, turkey, or chicken work well. Just cook the meat in a skillet until it turns brown. Mix it into your filling of spinach and ricotta. This adds flavor and protein. It makes the dish heartier. If you want a vegetarian twist, try using different cheeses. Feta or goat cheese can add a nice tang. You can also mix in more veggies. Chopped mushrooms, bell peppers, or zucchini will enhance the filling. These options keep the dish fresh and exciting while still being meat-free. For gluten-free stuffed shells, look for gluten-free pasta shells. Many brands offer great options made from rice or corn. Cook them according to the package instructions. This way, you can enjoy delicious stuffed shells without gluten. The taste and texture remain satisfying, making it a great choice for everyone. You can find the full recipe [here](#). Store any leftover spinach ricotta stuffed shells in an airtight container. Allow them to cool first. This way, you keep the flavors fresh. You can also wrap them in plastic wrap if you prefer. To reheat, use your oven for the best results. Preheat your oven to 350°F (175°C). Place the stuffed shells in a baking dish. Cover with foil to keep them moist. Bake for about 20 minutes, or until warm. If you want to use a microwave, heat in short bursts. Stir gently between each burst to avoid hot spots. In the fridge, the stuffed shells last about 3-5 days. If you want to keep them longer, freeze them. In the freezer, they can last up to 3 months. To freeze, wrap them tightly in plastic wrap and then foil. This prevents freezer burn. When ready to eat, thaw in the fridge overnight before reheating. For the full recipe, check out the details above. You can use cottage cheese as a substitute for ricotta cheese. Blend it until smooth for a similar texture. Another option is cream cheese mixed with a bit of milk. This mix gives a rich flavor. If you want a dairy-free choice, try tofu blended with lemon juice and nutritional yeast. Each of these options works well in the recipe. You can use both fresh and frozen spinach. Fresh spinach gives you a bright taste. Just wash and chop it finely. Frozen spinach is easy and saves time. Make sure to thaw it and squeeze out the water. Too much water will make your filling soggy. Either choice will work well in your stuffed shells. The stuffed shells are done when the cheese is golden brown and bubbly. Bake them covered for the first 25 minutes. Then, remove the foil and bake for an extra 10-15 minutes. Check the edges of the sauce to see if it’s bubbling. If you see that, your stuffed shells are ready to enjoy. For more details, refer to the Full Recipe. In this post, we covered how to make spinach ricotta stuffed shells. We explored main ingredients, cheese choices, and marinara sauce options. I shared step-by-step instructions for cooking, filling, and baking. You learned tips to avoid mistakes and how to serve and store leftovers. Spinach ricotta stuffed shells are versatile and fun to make. With the right ingredients and techniques, you can enjoy a delicious meal that suits your taste. So, gather your ingredients, and get cooking!](https://dishtreats.com/wp-content/uploads/2025/07/1fe149c7-a7b6-44ce-beb5-3366f3dded82-768x768.webp)


![- 8 oz. spaghetti or pasta of your choice - 1 cup cherry tomatoes, halved - 1 cup zucchini, sliced into half-moons - 1 cup mixed bell peppers, sliced - 1 cup broccoli florets - 1 cup fresh spinach - 2 tablespoons extra virgin olive oil - 3 cloves garlic, finely minced - Zest and juice from 1 medium-sized lemon - 1 teaspoon dried oregano - Salt and freshly ground black pepper, to taste - Fresh basil leaves and grated Parmesan cheese (optional) When I craft my Pasta Primavera, I focus on fresh and vibrant veggies. The cherry tomatoes burst with flavor, giving a sweet touch. Zucchini adds a nice crunch, while bell peppers bring color. Broccoli florets add a delightful bite, and fresh spinach wilts perfectly into the mix. I love using extra virgin olive oil for its rich taste. Garlic gives it a fragrant kick. The zest and juice of the lemon brighten the dish and enhance all the flavors. Dried oregano is my go-to herb here, adding warmth and depth. A pinch of salt and pepper brings it all together. For a finishing touch, I often sprinkle fresh basil on top. You can also add grated Parmesan cheese for creaminess. This recipe is simple yet packed with flavor, perfect for any meal. To see the full recipe, check out the details above. - Fill a large pot with salted water. - Bring to a boil and cook pasta until al dente. - Reserve pasta water and drain. To cook the pasta, I fill a big pot with water and add a good amount of salt. This helps to flavor the pasta. Once the water boils, I add my spaghetti or whatever pasta I choose. I cook it until it is al dente, which means it is firm but cooked. Before draining, I set aside about one cup of the pasta water. This water is full of starch and will help make my sauce creamy later. - Heat olive oil in a skillet. - Sauté minced garlic for fragrance. - Add broccoli and mixed bell peppers, sauté for 3-4 minutes. Next, I heat some olive oil in a large skillet over medium heat. Once the oil is hot, I add minced garlic and sauté it for about 30 seconds. The smell is amazing! I have to be careful not to burn it. After that, I toss in the broccoli and mixed bell peppers. I sauté these for 3-4 minutes until they soften a bit but still have some crunch. - Incorporate zucchini and cherry tomatoes. - Add reserved pasta water and seasonings. - Let simmer to create sauce. Now, I add my zucchini and cherry tomatoes to the skillet. I stir everything for about three minutes. The tomatoes will start to release their juices, making the dish juicy. I then pour in the reserved pasta water, followed by the lemon juice and zest, and dried oregano. This creates a light sauce. I let it simmer for two minutes to blend the flavors. - Add drained pasta and fresh spinach. - Toss until well mixed. - Season to taste and plate with garnishes. Finally, I gently add the drained pasta to the skillet along with fresh spinach. I toss everything well so the pasta gets coated in the sauce. The heat wilts the spinach just right. I taste the dish and season it with salt and black pepper. To serve, I plate the pasta in deep bowls and garnish with fresh basil and a sprinkle of Parmesan cheese if I want. This dish looks and tastes great. You can find the full recipe for this delightful dish to enjoy! To achieve al dente pasta, you need to watch the clock. Start checking your pasta a minute before the package time. It should be firm but not hard. The texture is key! Reserving pasta water is a must. Always save about one cup before you drain it. This water is starchy and helps create a silky sauce later. It can make your dish creamy without adding heavy cream. To boost flavor, think about adding fresh herbs like parsley or thyme. You can also sprinkle in some red pepper flakes for heat. These add extra layers of taste and excitement. When sautéing vegetables, keep the heat high but don’t overcook them. Stir them quickly to keep their crunch. A short cooking time keeps veggies bright and fresh. For a beautiful presentation, use deep bowls for serving. This allows the colors to pop. A splash of lemon zest on top adds brightness, too. Garnishing can elevate your dish. Scatter fresh basil leaves over the top. A sprinkle of grated Parmesan cheese adds a nice touch. It makes your dish look like it came from a restaurant! For the full recipe, check out the detailed instructions above. Enjoy your cooking adventure! {{image_4}} You can change up the veggies in your Pasta Primavera with Lemon. Seasonal veggies work best. Try using asparagus, snap peas, or carrots. These will add color and flavor. If fresh veggies aren't available, frozen ones are a great option too. Just remember to thaw them and drain any excess water before cooking. This keeps your dish from getting soggy. Want to make your Pasta Primavera heartier? You can add protein! Chicken, shrimp, or tofu are great choices. If you use chicken, cook it in the skillet first, and then add the veggies. For shrimp, toss them in when the veggies are almost done. They only need a few minutes to cook. If you prefer tofu, press it to remove moisture, then cube and sauté until golden before adding it to the mix. Pasta Primavera is very flexible with pasta types. You can choose gluten-free pasta if you need it. Options like brown rice or quinoa pasta work well. Whole grain pasta is another healthy choice, adding fiber to your meal. If you want something unique, try legume-based pasta made from lentils or chickpeas. These add a nice twist and extra protein. For the full recipe, check out the [Full Recipe]. To keep your Pasta Primavera fresh, refrigerate it right after cooling. Place it in airtight containers. This helps lock in flavors and keeps it safe to eat. Always store leftovers within two hours of cooking. The pasta will taste great for up to three days in the fridge. When you reheat your pasta, use a stove or microwave. For the stove, add a splash of water or olive oil. Stir gently to heat evenly. If using a microwave, cover it to keep moisture in. Avoid overheating to prevent soggy pasta. Heat just until warm. To freeze Pasta Primavera, let it cool first. Transfer it to freezer-safe containers, leaving space for expansion. This dish can be frozen for up to three months. When ready to eat, thaw it overnight in the fridge. Reheat it on the stove or microwave, adding a bit of water to help it steam. Enjoy your flavorful veggie delight later! For the full recipe, check out the details above. Pasta Primavera lasts about 3 to 5 days in the fridge. To keep it fresh, store it in an airtight container. It’s best to let the pasta cool before sealing. This helps prevent moisture buildup, which can make it soggy. Yes, you can make Pasta Primavera ahead of time. To prepare, cook the pasta and veggies as usual. Let everything cool completely before storing. When you are ready to eat, just reheat it in a skillet over low heat. Add a splash of water or extra olive oil to keep it moist. If you need a lemon substitute, try lime juice or vinegar. Use the same amount, about 2 tablespoons. You can also use orange juice for a sweeter flavor. Adjust to your taste, as different fruits can change the dish's profile. Pasta Primavera is healthy and full of nutrients. It has lots of veggies like broccoli, spinach, and bell peppers. These provide vitamins and fiber. The olive oil adds healthy fats. Overall, this dish is low in calories and high in flavor, making it a great choice. Pasta Primavera is a simple and tasty dish. We discussed the essential ingredients, like pasta, fresh vegetables, and seasonings. I shared step-by-step instructions for cooking and combining ingredients. You can enhance flavors with herbs and spices while following tips for perfect presentation. Consider variations with protein and different pasta types for more options. Lastly, I covered storage and reheating to keep leftovers fresh. This dish is not only delicious but also healthy, making it a great meal for everyone. Enjoy experimenting with it!](https://dishtreats.com/wp-content/uploads/2025/05/1202f33f-9285-4746-af91-946a78d77e80-768x768.webp)

