Roasted Red Pepper Hummus Flavorful and Simple Dip

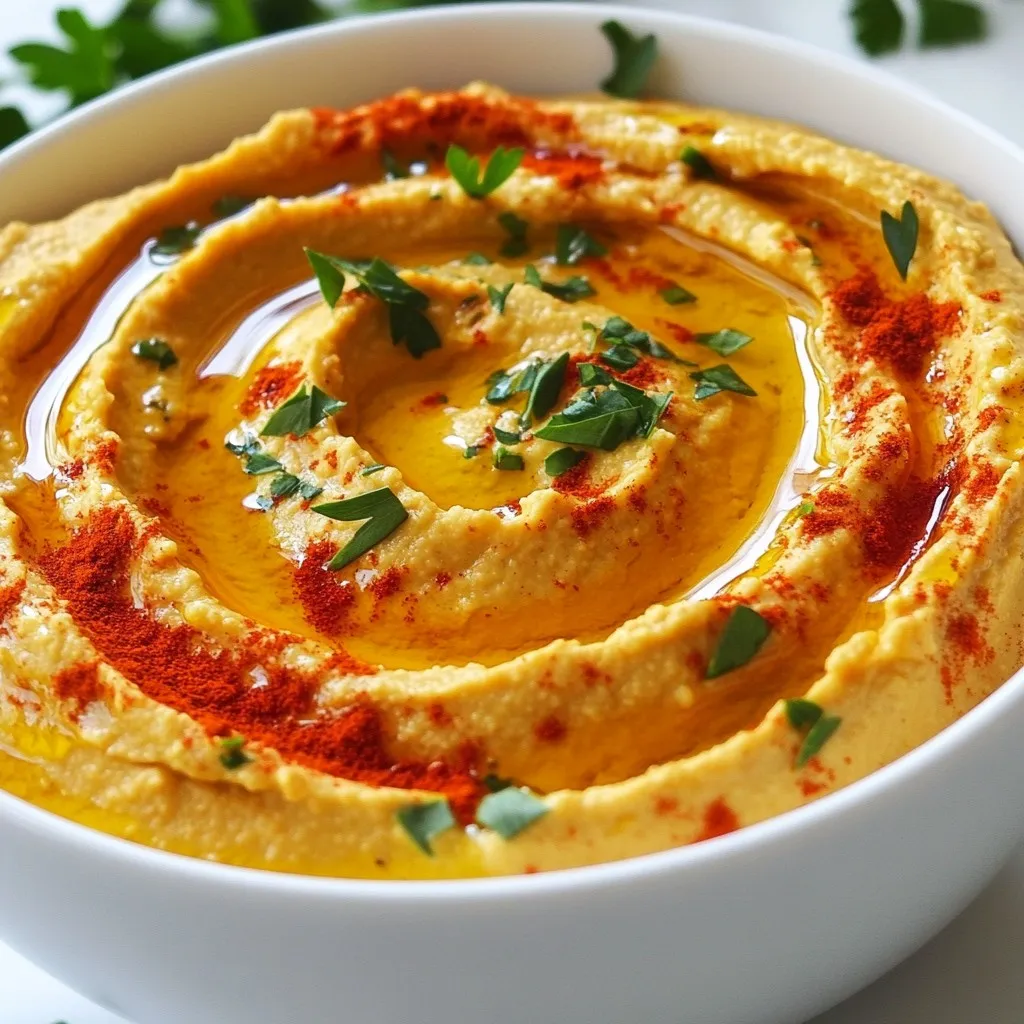
If you’re looking for a dip that’s simple yet bursting with flavor, you’ve found it! My Roasted Red Pepper Hummus is easy to make and perfect for any occasion. With just a few main ingredients, you can whip up a creamy, tasty spread that will wow your guests. Ready to dive into the world of savory goodness? Let’s get started on making this delightful dip!
Why I Love This Recipe
- Flavor Explosion: This hummus packs a punch with the sweet and smoky flavor of roasted red peppers, making it a deliciously unique dip.
- Easy to Make: With just a handful of ingredients and a few simple steps, you can whip up this delightful dish in no time!
- Healthy & Nutritious: Rich in protein and healthy fats, this hummus is a guilt-free snack that satisfies your cravings.
- Perfect for Sharing: This vibrant dip is not only tasty but also eye-catching, making it a fantastic choice for gatherings and parties.
Ingredients
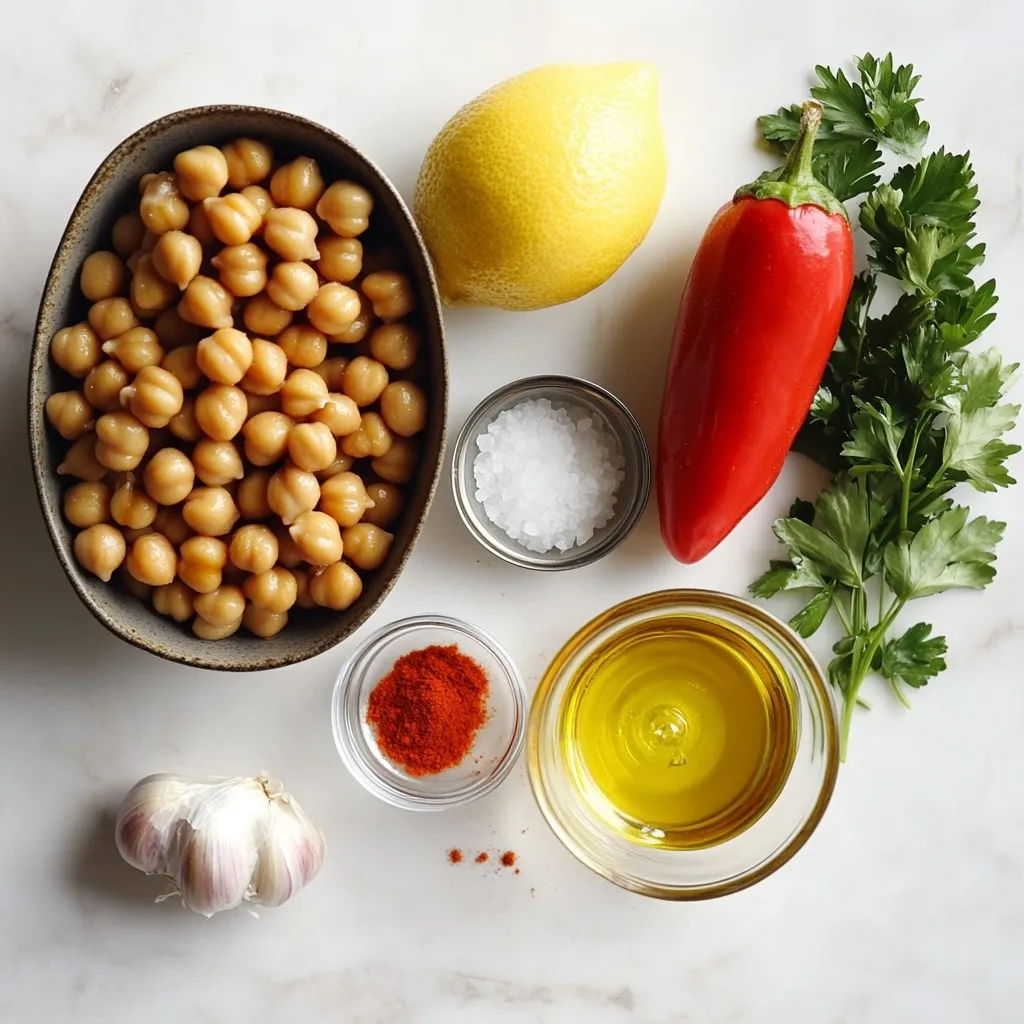
Main Ingredients for Roasted Red Pepper Hummus
- 1 can (15 oz) chickpeas, thoroughly drained and rinsed
- 1 large roasted red bell pepper (jarred or homemade)
- 2 tablespoons creamy tahini
- 2 tablespoons extra virgin olive oil
- 1 garlic clove, finely minced
- 2 tablespoons freshly squeezed lemon juice
- 1 teaspoon ground cumin
- Sea salt to taste
These ingredients form a creamy and rich base. The chickpeas give the dip its texture. Roasted red peppers add vibrant flavor and color. Tahini contributes creaminess, while olive oil adds richness. Garlic brings a nice kick, and lemon juice balances the flavors with a fresh zing. Cumin adds warmth and depth.
Optional Garnishes and Accompaniments
- Smoked paprika for a delightful garnish
- Fresh parsley, chopped, for a vibrant touch
- Crispy pita bread
- Crunchy veggie sticks
- Savory crackers
Garnishing your hummus makes it beautiful. Smoked paprika adds a smoky taste. Fresh parsley gives a pop of green and freshness. You can serve it with pita bread for dipping, crunchy veggies for a healthy option, or savory crackers for extra flavor.
Nutritional Information per Serving
- Calories: Approx. 150
- Protein: 6 grams
- Carbohydrates: 18 grams
- Dietary Fiber: 4 grams
- Total Fat: 7 grams
This hummus is healthy and filling. It has good protein and fiber, making it great for snacks or meals. You can enjoy it guilt-free while still getting a tasty treat.

Step-by-Step Instructions
How to Roast Red Peppers
To roast your red peppers, start by preheating the oven to 450°F (230°C). Next, place the peppers on a baking sheet. Roast them for about 25 to 30 minutes. You want the skin to be charred and blistered. Once roasted, move them to a bowl. Cover this bowl with plastic wrap. Let the peppers steam for 10 minutes. This step makes peeling the skin easy. After steaming, peel off the charred skin and remove the seeds. If using jarred peppers, simply drain and pat them dry.
Blending the Hummus Base
Now, grab a food processor. Add the rinsed chickpeas, the prepared roasted red pepper, two tablespoons of tahini, and two tablespoons of olive oil. Next, include one minced garlic clove, two tablespoons of lemon juice, and one teaspoon of cumin. Add a pinch of sea salt for flavor. Blend these ingredients until they form a smooth mixture.
Achieving the Perfect Consistency
While blending, check the texture. If the hummus seems thick, add a splash of water or more olive oil. This helps you reach your desired creaminess. After blending, taste the hummus. Adjust the salt as needed to bring out the flavors. The goal is a silky and smooth dip that is bursting with flavor.
Tips & Tricks
Best Practices for Creamy Hummus
To make your hummus creamy, start with warm chickpeas. Rinse them well and drain. Use a good tahini; it adds rich flavor. Blend all the ingredients until smooth. If it feels thick, add water or oil. This helps get the right texture you want.
Common Mistakes to Avoid
Don’t skip the garlic. It adds depth to the flavor. Also, watch the salt; too much can overpower your dip. Avoid using cold chickpeas, as they can make the dip grainy. Lastly, don’t rush the blending. Give it time to become silky and smooth.
Customizing Flavor Profiles
Feel free to play with flavors! Add a little chili powder for heat. A dash of lemon zest can brighten the taste. For a smoky touch, increase the smoked paprika. Fresh herbs like cilantro or basil can also change the vibe. Enjoy experimenting until you find your perfect blend!
Pro Tips
- Choose Your Peppers Wisely: For the best flavor, opt for fresh roasted red bell peppers. They provide a smoky sweetness that enhances the hummus.
- Adjusting Texture: If your hummus turns out too thick, adding water or more olive oil gradually will help achieve your preferred creaminess.
- Flavor Enhancements: Experiment with additional spices like cayenne pepper or roasted garlic for a unique twist on this classic recipe.
- Serving Suggestions: Serve with a variety of dippers, such as sliced cucumbers, bell peppers, or whole-grain pita chips for a colorful platter.

Variations
Spicy Roasted Red Pepper Hummus
To make your hummus spicy, add jalapeños. Use one or two, depending on how hot you like it. Blend the jalapeños into the mix with the chickpeas and red peppers. This adds heat and bold flavor, making it exciting for your taste buds. You can also sprinkle cayenne pepper or red pepper flakes on top for extra spice.
Mediterranean Twist with Olives
For a Mediterranean touch, chop up green or black olives. Stir them into the hummus after blending. This adds a salty, briny flavor that pairs well with the sweet red peppers. You can also blend in some olive brine for a hint of zest. It’s a great way to add depth and richness to your dip.
Herbed Versions with Fresh Ingredients
Fresh herbs can brighten your hummus. Try adding basil, cilantro, or dill. Blend them in for a fresh taste or sprinkle on top as a garnish. For a zesty twist, mix in lemon zest or use lemon thyme. These ingredients give your hummus a garden-fresh flavor that is perfect for summer gatherings.
Storage Info
How to Store Homemade Hummus
To keep your hummus fresh, use an airtight container. This seals in moisture and flavor. Place the hummus in the container and smooth the top. Drizzle a bit of olive oil over it. This helps prevent drying. Seal it well and store it in the fridge.
Recommended Shelf Life
Homemade hummus lasts about 4 to 7 days in the fridge. Always check for signs of spoilage before eating. If you see mold or an off smell, it’s best to throw it away.
Freezing Tips for Long-Term Storage
You can freeze hummus for later use. Portion it into small containers or freezer bags. Leave some space at the top to allow for expansion. It can last up to 3 months in the freezer. When you’re ready to eat, thaw it in the fridge overnight. Stir well before serving to restore its creamy texture.
FAQs
Can I use different types of peppers?
Yes, you can use other peppers. Green bell peppers add a fresh taste. Yellow or orange peppers give a sweet flavor. Each type changes the dip’s taste. Just roast them like red peppers. This gives them a nice smoky flavor.
What to serve with Roasted Red Pepper Hummus?
Roasted red pepper hummus pairs well with many items. Here are some ideas:
- Crispy pita chips
- Fresh veggie sticks, like carrots and cucumbers
- Savory crackers
- Warm pita bread
- Grilled meats or fish
These choices make a great spread for parties. They let everyone enjoy the dip.
How can I increase the protein content?
To add more protein, you can mix in extra chickpeas. Use a cup of chickpeas instead of one can. Another option is to add Greek yogurt. This not only boosts protein but also adds creaminess. You could also try adding nuts, like almonds or walnuts, for a crunch.
Roasted red pepper hummus is simple and tasty. We covered the key ingredients, from peppers to optional garnishes. You learned how to roast peppers and blend your hummus just right. I shared tips for creamy texture and common mistakes to avoid. You can even customize flavors or explore variations like spicy hummus. Remember to store it properly for freshness. Using different peppers or adding protein boosts the dish. Now, you have everything to make your own delicious hummus. Enjoy your cooking journe

Roasted Red Pepper Hummus Delight
Ingredients
- 1 can chickpeas, thoroughly drained and rinsed
- 1 large roasted red bell pepper
- 2 tablespoons creamy tahini
- 2 tablespoons extra virgin olive oil
- 1 clove garlic, finely minced
- 2 tablespoons freshly squeezed lemon juice
- 1 teaspoon ground cumin
- to taste sea salt
- for garnish smoked paprika
- for garnish fresh parsley, chopped
Instructions
- Roast the Red Peppers: If opting for fresh red bell peppers, preheat your oven to 450°F (230°C). Arrange the peppers on a baking sheet and roast for about 25-30 minutes until the skin is beautifully charred and blistered. Once roasted, transfer them to a bowl, cover with plastic wrap, and let them steam for approximately 10 minutes. This steaming will help loosen the skin for easy peeling. After steaming, peel off the charred skin and remove the seeds. If you are using jarred roasted red peppers, simply drain them and pat them dry with a paper towel.
- Blend the Base: In a food processor, combine the rinsed chickpeas, the prepared roasted red pepper, tahini, olive oil, minced garlic, lemon juice, ground cumin, and a pinch of sea salt.
- Achieve the Perfect Consistency: Blend the mixture until silky and smooth. If the hummus is too thick for your liking, feel free to add a splash of water or another drizzle of olive oil to reach your desired creaminess. Taste and adjust the salt accordingly to elevate the flavors.
- Serve with Style: Once the hummus is creamy and well-blended, carefully transfer it into a lovely serving bowl, creating a slight well in the center for added flair.
- Final Touches: Drizzle a generous amount of olive oil over the surface of the hummus. Finish with a sprinkling of smoked paprika and a handful of freshly chopped parsley to add a pop of color and flavor.


![To make Baked Garlic Parmesan Zucchini Fries, you need some simple and fresh ingredients. Here’s what you’ll need: - 2 medium zucchinis (cut into fry-shaped strips) - 1 cup whole wheat breadcrumbs - 1/2 cup grated Parmesan cheese - 2 cloves garlic (finely minced) - 1 teaspoon dried oregano - 1 teaspoon garlic powder - 1/2 teaspoon salt - 1/4 teaspoon freshly ground black pepper - 2 large eggs (beaten) - Cooking spray or light drizzle of olive oil These ingredients come together to create a tasty dish that is both healthy and satisfying. The zucchini offers a great crunch, while the garlic and Parmesan provide bold flavor. Using whole wheat breadcrumbs adds a nice texture and a bit of nuttiness. If you follow the recipe closely, you will get fries that are crispy on the outside and tender on the inside. You can check the Full Recipe for detailed instructions on how to bring this dish to life. - Set the temperature to 425°F (220°C). - Prepare a baking sheet with parchment paper. First, I like to get my oven hot. Preheating to 425°F helps the fries crisp nicely. Lining the baking sheet with parchment paper makes cleanup easy and keeps the fries from sticking. - Mix breadcrumbs, Parmesan cheese, minced garlic, oregano, garlic powder, salt, and pepper. In a shallow bowl, I mix the whole wheat breadcrumbs with grated Parmesan cheese. I add minced garlic for flavor, oregano for aroma, garlic powder, salt, and pepper. Mixing these ingredients well ensures that every fry gets a tasty coating. - Dip zucchini fries in beaten eggs and coat with breadcrumb mixture. I set another bowl with beaten eggs. Taking a zucchini fry, I dip it in the eggs, letting the extra drip off. Then, I coat it in the breadcrumb mixture. I press the crumbs on to make sure they stick well. This step is key for a crispy finish. - Place coated fries on the baking sheet and spray with cooking spray. Once breaded, I lay the fries in a single layer on the baking sheet. I like to spray the tops lightly with cooking spray. This helps them brown and adds crunch. - Bake for 20-25 minutes and turn halfway for even crisping. I slide the baking sheet into the oven and set a timer for 20 minutes. Halfway through, I flip the fries. This ensures they cook evenly and get that golden brown color we love. - Cool slightly before serving and add garnishes. After baking, I let the fries cool for a few minutes. This step helps them crisp even more. I like to serve them hot, sprinkled with extra Parmesan and a small bowl of marinara sauce on the side. You can find the full recipe above for more details. To get the best crispiness, I recommend using cooking spray or a light drizzle of olive oil. This helps the fries brown and stay crunchy. Make sure not to overcrowd the baking sheet. If the fries are too close, they can steam instead of bake. For extra crunch, try broiling them for the last few minutes. Just keep an eye on them to prevent burning. Serve the zucchini fries hot and sprinkle some extra Parmesan on top. This adds flavor and makes them look great. Pair them with marinara sauce for dipping. The rich sauce complements the garlic and cheese perfectly. You could also try ranch or a spicy aioli for a twist. Removing excess moisture from zucchinis is key to crispiness. Too much water makes them soggy. To dry zucchinis, slice them and place them on paper towels. Sprinkle a little salt on top and let them sit for about 10 minutes. The salt draws out moisture. Afterward, pat them dry with more paper towels. This simple step helps you achieve that perfect crunch in your baked garlic Parmesan zucchini fries. For the full recipe, check out the details above. {{image_4}} You can make your zucchini fries even better by adding spices. Try paprika for a smoky taste. Cayenne pepper adds a nice kick, too. Just sprinkle some into the breadcrumb mix before coating the zucchini fries. This small change can make a big difference in flavor. If you want to switch up the cheese, consider using mozzarella. It melts beautifully and adds a creamy texture. You can also try vegan cheese for a plant-based option. Just make sure it melts well to keep that crispy exterior intact. You can mix your zucchini fries with other veggies for more variety. Eggplant slices work well when cut into fry shapes. Sweet potatoes are another great choice. They will add a sweet flavor and vibrant color to your plate. Feel free to experiment with whatever veggies you have on hand. For the complete recipe, check out the [Full Recipe]. To keep your zucchini fries fresh, store them in an airtight container in the refrigerator. This helps prevent them from getting soggy. They will last for about three days. Make sure to let them cool down before sealing the container. The best way to reheat zucchini fries is in the oven. Preheat your oven to 400°F (200°C). Place the fries on a baking sheet. Heat them for about 10 minutes. This method keeps them crispy. You can also use an air fryer if you have one. Set it to 350°F (175°C) and heat for about 5 minutes. If you want to store them longer, you can freeze the zucchini fries. First, let them cool completely. Next, spread them out in a single layer on a baking sheet. Freeze them for about 1-2 hours. Once frozen, transfer them to a freezer bag. This way, they won’t stick together. When ready to eat, bake them straight from the freezer. Add a few extra minutes to the cooking time for best results. Yes, you can use regular breadcrumbs. The texture will be slightly different. Whole wheat breadcrumbs add a nutty flavor and more fiber. If you prefer a lighter taste, go for regular ones. Both will still give you a crispy finish. To make these fries gluten-free, use gluten-free breadcrumbs. You can find these at most stores. Another great option is to use crushed gluten-free crackers. They add a nice crunch. Just make sure to check the labels for gluten-free assurance. Many sauces go well with zucchini fries. Popular choices include marinara, ranch, or garlic aioli. You can also try a spicy sriracha mayo for a kick. For a homemade touch, mix Greek yogurt with herbs for a fresh dip. To make these fries vegan, substitute the eggs with flax eggs. Mix 1 tablespoon of flaxseed meal with 2.5 tablespoons of water. Let it sit for a few minutes until it thickens. For cheese, you can use nutritional yeast or a store-bought vegan cheese. These swaps keep the flavor while making it plant-based. Check out the Full Recipe for detailed steps to make these tasty Baked Garlic Parmesan Zucchini Fries! This blog post has covered the tasty journey of making zucchini fries. We explored key ingredients, step-by-step instructions, and helpful tips. You learned how to get crispy fries and about delicious variations. Now, you can enjoy this snack with great flavors and textures. Try out the ideas and personalize your dish. Whether it’s for a party or a snack, zucchini fries are a fun, healthy choice. Get cooking and taste the difference!](https://dishtreats.com/wp-content/uploads/2025/06/b228a051-b543-4822-a33a-588c5a943e46-768x768.webp)
![To make the best creamy buffalo chicken dip, you need the following key ingredients: - 2 cups shredded cooked chicken - 1/2 cup cream cheese, softened to room temperature - 1/2 cup sour cream - 1/2 cup plain Greek yogurt - 1/2 cup buffalo sauce (adjust based on desired heat level) - 1 cup shredded sharp cheddar cheese These ingredients create a rich and creamy base that is sure to please any crowd. The chicken adds protein and heartiness, while the cream cheese, sour cream, and Greek yogurt provide a smooth texture. Buffalo sauce gives it that spicy kick, and the sharp cheddar cheese adds a wonderful flavor. You can also enhance your dip with these optional ingredients for extra flavor: - 1/2 teaspoon garlic powder - 1/2 teaspoon onion powder - 1 tablespoon fresh chives, finely chopped (plus additional for garnishing) Garlic powder and onion powder add depth to the dip's flavor profile. Fresh chives bring a pop of color and a mild onion taste. Feel free to add your favorite seasonings to make it truly yours. For the full recipe, check out [Full Recipe]. To start, we need to mix the creamy base. In a large mixing bowl, combine the softened cream cheese, sour cream, and Greek yogurt. Use a hand mixer or spatula to blend until smooth. Make sure there are no lumps. This creamy base will give the dip its rich texture. Next, we add the chicken and buffalo sauce. Fold in the shredded cooked chicken and buffalo sauce gently. Add garlic powder, onion powder, salt, and pepper. Mix until everything is well combined. The buffalo sauce gives this dip its signature kick. Adjust the sauce to suit your taste. Now, we prepare to bake the dip. Spoon the creamy chicken mixture into a medium-sized baking dish. Spread it out evenly. For a cheesy finish, sprinkle some reserved cheddar cheese on top. Preheat your oven to 350°F (175°C). Place the baking dish in the oven and bake for about 20 minutes. The dip should be bubbling and the top lightly golden. After baking, let the dip cool for about 5 minutes. This helps prevent burns when serving. Garnish with fresh chopped chives for a pop of color. For dipping, I recommend using tortilla chips, crunchy celery sticks, or sweet carrot sticks. These dippers complement the creamy dip perfectly. Enjoy this dish at your next gathering or game day! For the complete recipe, check out the [Full Recipe]. To get the perfect creaminess, blend the cream cheese, sour cream, and Greek yogurt well. Use a hand mixer for a smooth texture. This step ensures your dip is rich and velvety. If it feels too thick, add a splash of buffalo sauce to loosen it up. When it comes to heat, buffalo sauce is your friend. Start with half a cup, then taste. If you want more heat, add a little more sauce. Remember, you can always add, but you can't take away! For mixing, I recommend a sturdy mixing bowl and a hand mixer. This combination makes it easy to achieve a smooth mix. If you prefer, a spatula works just as well. For baking, use a medium-sized baking dish. A glass or ceramic dish helps the dip bake evenly. You might also want a cookie sheet underneath for easy handling. Pair your dip with tortilla chips for crunch. Fresh celery and carrot sticks add a great veggie option. You can even set up a fun dip station with various dippers. Try serving the dip in individual ramekins for a party. It makes each serving special and easy to grab. A wooden cutting board adds a rustic touch, making it look even more inviting! {{image_4}} You can easily make this dip fit your needs. For a gluten-free option, use gluten-free buffalo sauce. Check labels to ensure all ingredients are safe. You can also swap regular sour cream with a gluten-free version. If you're watching carbs, try using cream cheese and Greek yogurt as they are lower in carbs. You can reduce the amount of buffalo sauce or serve with veggies instead of chips. Celery sticks and carrot sticks are great low-carb dippers! Want to shake things up? Add a twist with different cheeses. Blue cheese adds a bold flavor that many love. You can also use mozzarella or pepper jack for a creamy texture and a kick. Incorporate extra spices, like smoked paprika or cayenne, to enhance the flavor. Adding diced bell peppers or jalapeños gives it a crunchy texture. These simple changes make your dip unique and fun! No oven? No problem! You can make this dip in a slow cooker. Just mix all ingredients and cook on low for 2-3 hours. Stir occasionally for a creamy result. If you have an air fryer, you can use it too! Place the dip in a heat-safe dish and cook at 350°F for about 15-20 minutes. This method gives it a crispy top while keeping the inside gooey. For the full recipe, check out the link. To keep your creamy buffalo chicken dip fresh, store it in an airtight container. Make sure to let it cool completely before sealing. This helps lock in flavors. Place the container in the fridge. Your dip can last up to 3 days this way. If you have more leftovers, you can freeze it. Use freezer-safe bags or containers. Just be sure to remove as much air as possible. When properly stored, it can last up to 3 months in the freezer. When it comes time to enjoy your dip again, reheating it is key. The best method is to use the oven. Preheat the oven to 350°F (175°C). Place the dip in an oven-safe dish and cover it with foil. Heat for about 15-20 minutes. This keeps the dip creamy and prevents it from drying out. You can use the microwave if you're short on time. Place a portion in a microwave-safe bowl. Heat in 30-second bursts, stirring in between. This method may change the texture a bit, but it still tastes great. In the fridge, your dip stays fresh for about 3 days. After that, the flavor and texture may change. Signs that your dip has gone bad include an off smell, discoloration, or separation. If you see any of these signs, it's best to throw it away. Always trust your senses! For the full recipe, check out the Buffalo Bliss Chicken Dip section above. Can I make this dip ahead of time? Yes, you can prepare this dip ahead of time. Mix all the ingredients and store it in the fridge. Bake it just before serving. This makes it easy for parties. Is it possible to use canned chicken instead of shredded? Yes, you can use canned chicken. It saves time and is easy to mix in. Just drain and shred the chicken before adding it to the dip. The dip has about 300 calories per serving. Each serving is roughly 1/2 cup. If you want to lower calories, use low-fat cream cheese or Greek yogurt. This gives you a tasty dip without adding too many calories. Creamy Buffalo Chicken Dip is great for game day, parties, or family gatherings. It’s a crowd-pleaser! Pair it with cold drinks like beer or soda. You can also serve it with fresh veggies and chips for extra crunch. This article covered how to make creamy buffalo chicken dip, from ingredients to storage. We explored main and optional ingredients, easy step-by-step instructions, tips for a perfect dip, and variations. In the end, making this dip is all about fun and flavor. Enjoy experimenting with ingredients and serving ideas. Whether for game day or a gathering, this dip will impress your guests!](https://dishtreats.com/wp-content/uploads/2025/07/05957703-937f-462f-adea-92812be79973-768x768.webp)


