Roasted Garlic Hummus Flavorful and Simple Delight

If you’re craving a creamy, rich dip that’s easy to make, look no further! In this blog, I’ll share my simple recipe for Roasted Garlic Hummus. This tasty treat is packed with flavor from the perfect blend of chickpeas, roasted garlic, and tahini. Whether you’re hosting a gathering or just looking for a nutritious snack, this hummus will delight your taste buds. Let’s dive in and get started on this delicious journey!
Why I Love This Recipe
- Delicious Flavor: The roasted garlic adds a rich, sweet flavor that elevates the traditional hummus to new heights.
- Health Benefits: Made with chickpeas and tahini, this hummus is packed with protein and healthy fats, making it a nutritious snack.
- Versatile Dip: This hummus pairs perfectly with a variety of dippers, including veggies, pita bread, or crackers, making it great for any occasion.
- Easy to Make: With simple ingredients and quick steps, you can whip up this delicious hummus in no time!
Ingredients
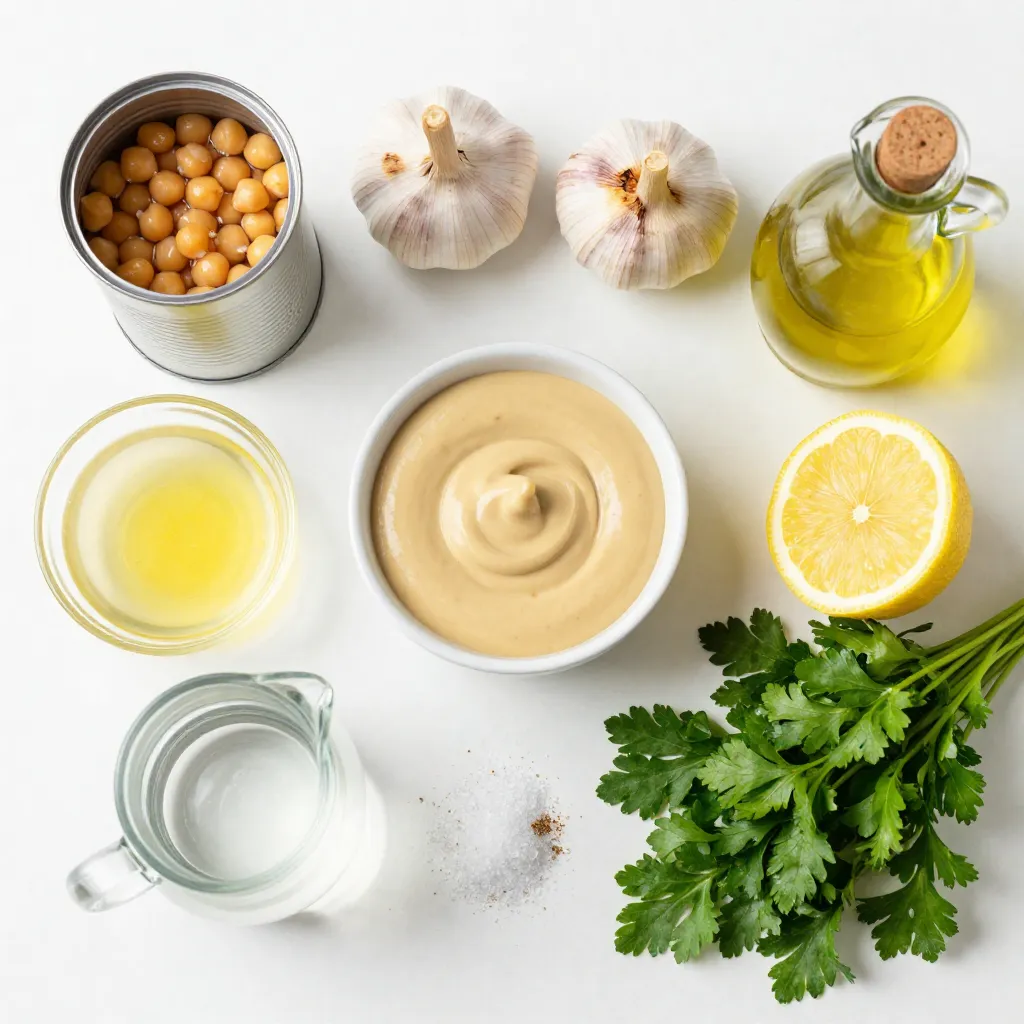
Main Ingredients for Roasted Garlic Hummus
- 1 can (15 oz) chickpeas, drained and rinsed
- 1 whole head of garlic
- 3 tablespoons tahini
- 3 tablespoons extra virgin olive oil
The chickpeas form the base of our hummus. They provide protein and creaminess. The roasted garlic adds a sweet, rich flavor that you will love. Tahini gives a nutty taste and smooth texture. Extra virgin olive oil brings a fruity note and helps blend everything well.
Additional Flavor Partners
- 3 tablespoons freshly squeezed lemon juice
- 1 teaspoon ground cumin
- Sea salt to taste
Lemon juice adds brightness to the hummus. It helps balance the richness of the tahini and oil. Ground cumin brings warmth and depth to the flavor. You can adjust sea salt to make it taste just right for you.
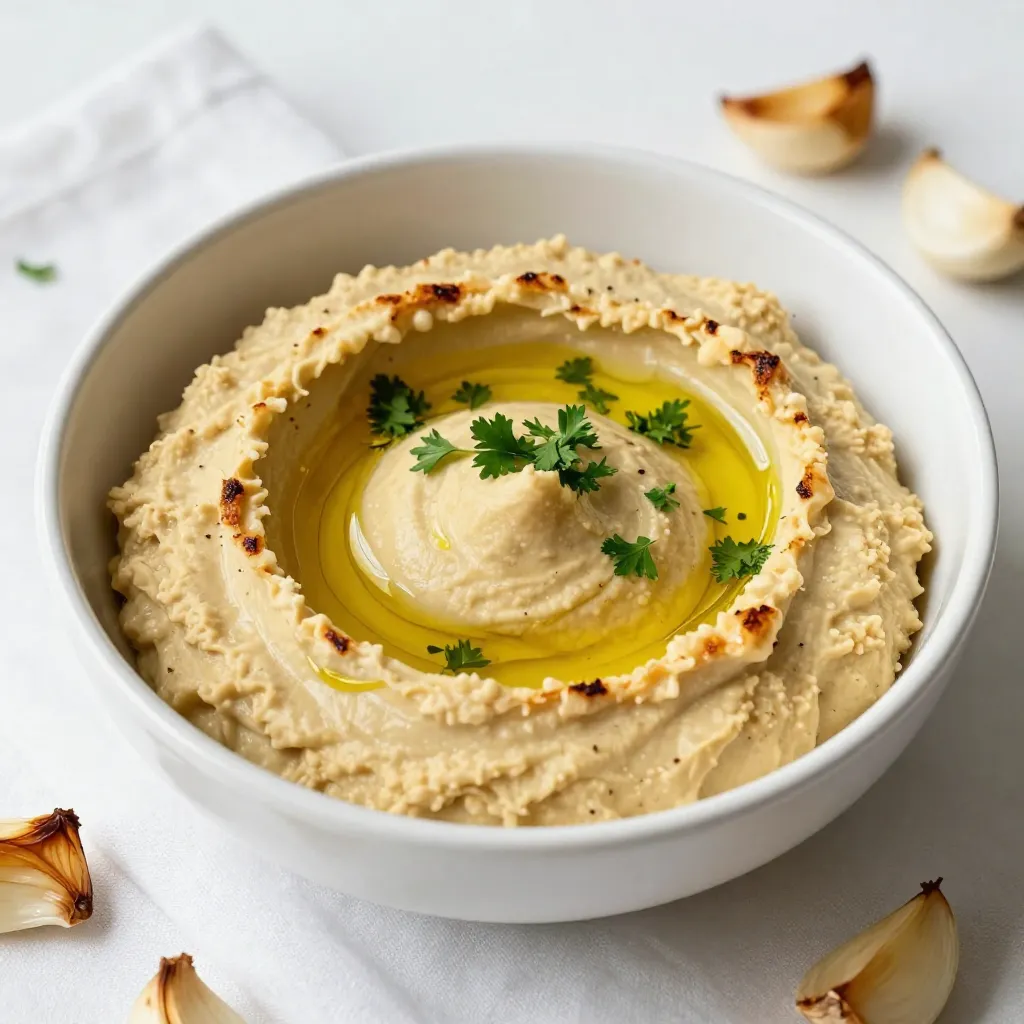
Garnishing Essentials
- Fresh parsley, finely chopped (for garnish)
- Extra drizzle of olive oil (for serving)
Fresh parsley adds color and a touch of freshness. It makes your hummus look pretty too. A drizzle of olive oil on top enhances the flavor and adds richness. You can use these garnishes to impress your guests or enjoy them yourself.

Step-by-Step Instructions
Roasting the Garlic
To roast the garlic, start by prepping the garlic head. Slice off the top to reveal the cloves. This helps them roast evenly. Drizzle a teaspoon of olive oil over the exposed cloves. Wrap the garlic in aluminum foil to keep it snug.
Next, set your oven to 400°F (200°C). Place the wrapped garlic in the oven and roast for 30-35 minutes. You want the cloves to be soft and fragrant. When done, let it cool a bit before handling.
Preparing the Base
Once the garlic cools, squeeze the cloves out of their skins. They should pop out easily. Add these sweet, roasted cloves to your food processor.
Now, combine the chickpeas, tahini, lemon juice, olive oil, ground cumin, and a pinch of sea salt. Make sure everything is in the bowl. This is where the magic starts.
Blending and Adjusting Consistency
For blending, pulse the mixture until it is smooth and creamy. Stop to scrape down the sides as needed. If the hummus is too thick, don’t worry! Gradually add water, one tablespoon at a time. Blend again until it reaches your desired creaminess.
Taste your hummus and adjust the seasoning if needed. You can add more salt or lemon juice for extra flavor.
Tips & Tricks
Perfecting the Hummus Texture
To get the best texture, blend your hummus for 2-3 minutes. This helps create a smooth and creamy dip. If your hummus feels thick, add water 1 tablespoon at a time. Blend after each addition until you reach your desired creaminess.
Storage Tips
Store your hummus in an airtight container. It will stay fresh in the fridge for up to a week. If you want to keep it longer, freezing is a great option. Just scoop it into ice cube trays. Once frozen, transfer the cubes to a bag. They can last for up to 3 months.
Pairing Suggestions
For dipping, veggie sticks like carrots and cucumbers work great. Pita bread and crackers are also excellent choices. If you want to impress, serve it with smoked paprika on top for color. You can even create a beautiful platter with various dips and fresh herbs.
Pro Tips
- Use Fresh Ingredients: Always opt for the freshest garlic and high-quality olive oil to enhance the flavor of your hummus.
- Adjust Consistency: If your hummus is too thick, add water gradually to reach your desired creaminess without overpowering the flavor.
- Experiment with Flavors: Feel free to add other spices like smoked paprika or a dash of cayenne for an extra kick in your hummus.
- Perfect Pairings: Serve with a variety of dippers like fresh veggies, pita chips, or even as a spread on sandwiches for a delicious twist.
Variations
Adding Spice
You can spice up your roasted garlic hummus in fun ways. One option is roasted red pepper hummus. Just add roasted red peppers to the mix. They bring a nice sweetness and a vibrant color. Another great choice is a spicy harissa variation. Mix in a spoonful of harissa paste for a kick. This adds depth and warmth to your hummus.
Herb-Infused Options
Herbs can take your hummus to the next level. Adding fresh basil or cilantro gives a bright flavor. Both herbs bring freshness that pairs well with garlic. You can also experiment with different nuts in your tahini. Try using cashews or almonds for a unique twist. This change can add a different texture and flavor to the hummus.
Alternative Ingredients
If you want vegan options, use a nut-based yogurt. It can replace tahini while still keeping your hummus creamy. For low-fat alternatives, swap olive oil with a bit of water. This keeps the taste while reducing calories. Adjusting your ingredients lets you enjoy hummus in many ways.
Storage Info
How to Store Hummus
To keep your hummus fresh, store it in the fridge. Use an airtight container. This will stop air from drying it out. If you don’t have one, a glass jar works too. Always make sure the lid is on tight.
Shelf Life
Roasted garlic hummus lasts about a week in the fridge. You can check for signs of spoilage. If it smells off or has mold, toss it out. Freshness is key for great flavor, so always use your best judgment.
Freezing Instructions
You can freeze hummus for longer storage. First, scoop it into a freezer-safe container. Leave some space at the top for expansion. Seal it tightly to avoid freezer burn. To thaw, place it in the fridge overnight. For the best texture, mix it well after thawing. You may need to add a bit of water or olive oil to restore creaminess.
FAQs
How do you make roasted garlic hummus from scratch?
To make roasted garlic hummus, start by roasting the garlic. Preheat your oven to 400°F (200°C). Cut off the top of a whole head of garlic and drizzle olive oil on it. Wrap it in foil and roast for 30-35 minutes. When done, let it cool, then squeeze the soft cloves into a food processor. Add one can of drained chickpeas, tahini, lemon juice, olive oil, ground cumin, and sea salt. Blend until creamy. If it’s too thick, add water one tablespoon at a time. Taste and adjust the salt or lemon juice as needed. Serve with olive oil and parsley on top.
Can store-bought hummus be flavored?
Yes, you can flavor store-bought hummus. Look for brands with simple ingredients, like Sabra or Tribe. You can mix in roasted garlic, herbs, or spices. Add a dash of lemon juice or olive oil for a fresh taste. This will enhance the flavor and make it your own.
What to serve with roasted garlic hummus?
Roasted garlic hummus pairs well with many foods. Serve it with colorful veggie sticks like carrots, cucumbers, and bell peppers. Pita bread or crackers are also great choices. For parties, consider adding a sprinkle of smoked paprika on top for a pop of color. You can even create a platter with olives and nuts for a fun touch. Enjoy the dip with friends or family!
Roasted garlic hummus is simple yet tasty. Start with chickpeas, roasted garlic, tahini, and olive oil. Mix in lemon juice, cumin, and salt for extra flavor. Follow the step-by-step guide to roast garlic, blend, and achieve the right texture. For variety, try adding spices or fresh herbs. Store it well to keep it fresh, and serve it with your favorite dippers. Enjoy this healthy snack that’s easy to make and share! Your next gathering will shine with this hummus on the tabl

Roasted Garlic Bliss Hummus
Ingredients
- 1 can chickpeas, drained and rinsed
- 1 head garlic
- 3 tablespoons tahini
- 3 tablespoons freshly squeezed lemon juice
- 3 tablespoons extra virgin olive oil
- 1 teaspoon ground cumin
- to taste sea salt sea salt
- as needed water water for consistency
- for garnish fresh parsley fresh parsley, finely chopped
- for serving extra drizzle extra drizzle of olive oil
Instructions
- Roast the Garlic: Preheat your oven to 400°F (200°C). Carefully slice the top off the head of garlic, exposing the individual cloves. Drizzle a teaspoon of olive oil over the exposed cloves, wrap the garlic snugly in aluminum foil, and place in the oven. Roast for 30-35 minutes or until the cloves are soft, fragrant, and caramelized.
- Prepare the Roasted Garlic: After roasting, remove the garlic from the oven and allow it to cool until manageable. Gently squeeze each clove to pop them out of their skins and into a food processor.
- Combine Ingredients: In the food processor with the roasted garlic, add the drained and rinsed chickpeas, tahini, lemon juice, olive oil, ground cumin, and a pinch of sea salt.
- Blend to Creaminess: Pulse the mixture until smooth and creamy, stopping to scrape down the sides of the bowl as necessary. If the hummus feels too thick, gradually add water, one tablespoon at a time, until you achieve your desired consistency.
- Season to Perfection: Taste your hummus and adjust the seasoning as needed, adding more salt or a splash of lemon juice for brightness.
- Serve and Garnish: Once the hummus is silky and well-blended, transfer it to a serving dish. Drizzle with a little more olive oil and sprinkle with the freshly chopped parsley for a touch of color and flavor.


![To make crispy baked sweet potato fries, you need just a few simple ingredients. Here’s what you’ll need: - 2 large sweet potatoes - 2 tablespoons extra-virgin olive oil - 1 teaspoon cornstarch - 1 teaspoon smoked paprika - 1/2 teaspoon garlic powder - 1/2 teaspoon onion powder - 1/4 teaspoon cayenne pepper (optional) - Salt and freshly ground black pepper - Fresh parsley for garnish These ingredients combine to create a flavorful and fun side dish. Sweet potatoes give a natural sweetness. Olive oil helps with that crispy texture. The cornstarch is the secret for extra crunch. Smoked paprika adds a nice depth of flavor. Garlic and onion powder bring warmth. Cayenne pepper can spice things up if you like it hot. Finally, salt and pepper enhance everything. Using fresh parsley on top not only looks nice but adds a fresh taste. This is the perfect mix for a tasty treat. You can find the full recipe in the recipe section to make it easy for you. 1. Preheat your oven to 425°F (220°C). It’s key for crispiness. 2. Line a large baking sheet with parchment paper. This helps fries not stick. 3. Take 2 large sweet potatoes. Rinse and cut them into even-sized fries. Try to keep them similar in size for even cooking. 4. Place the fries in a mixing bowl. Drizzle 2 tablespoons of olive oil over them. Mix well to coat each fry evenly. 1. Sprinkle 1 teaspoon of cornstarch over the fries. This helps them get that crispy texture. 2. Add spices: 1 teaspoon of smoked paprika, 1/2 teaspoon of garlic powder, 1/2 teaspoon of onion powder, and 1/4 teaspoon of cayenne pepper if you like spice. 3. Season with salt and black pepper to taste. Toss the fries gently to make sure they are all coated well with the seasonings. 1. Arrange the seasoned fries on your baking sheet. Make sure they are in a single layer. This allows air to flow and makes them crispy. 2. Bake in the preheated oven for 25 to 30 minutes. Flip the fries halfway through. This helps them brown evenly. 3. When they turn golden and crispy, they are ready. Let them cool for a few minutes before serving. Enjoy these crispy baked sweet potato fries with your favorite dips! For the full recipe, check out the detailed instructions. To get the best crispy fries, air circulation is key. When you spread the fries out on the baking sheet, make sure they aren't touching. This allows hot air to flow all around them. If your fries aren’t crispy enough, try adding a few extra minutes to the cooking time. Keep an eye on them to avoid burning. You can customize the spice levels based on your taste. If you like more heat, add more cayenne pepper. For a milder flavor, leave it out. You can also swap the spices for other favorites like chili powder or Italian herbs. Mix and match to find your perfect blend. An eye-catching way to serve your fries is in a cone or a basket with parchment paper. This makes them look fun and inviting. Pair your fries with tasty dipping sauces like spicy mayo, creamy ranch, or classic ketchup. It adds more flavor and makes the meal special. Enjoy your crispy baked sweet potato fries from the [Full Recipe]. {{image_4}} You can easily change the taste of your sweet potato fries. For a sweet and spicy option, drizzle them with maple syrup before baking. This will add a nice glaze and a kick of flavor. If you prefer herbs, try adding fresh rosemary or thyme. These herbs bring a savory touch that pairs well with the natural sweetness of the potatoes. Using an air fryer is a fantastic way to make crispy fries. Set your air fryer to 400°F (200°C) and cook them for about 15-20 minutes. Shake the basket halfway through to ensure even cooking. If you enjoy grilling, you can also grill sweet potato fries. Slice them thicker, brush with olive oil, and grill over medium heat for about 5-7 minutes on each side. This gives a nice smoky flavor. Sweet potato fries are great on their own, but you can elevate your meal. Pair them with grilled chicken, fish, or a fresh salad for a balanced dish. They also work well in meal prep. You can make a batch and store them in the fridge. Just reheat them for a quick snack or side dish. For a fun twist, serve them in a cone with a side of your favorite dipping sauce. Try creamy ranch, spicy mayo, or classic ketchup for added flavor. For the full recipe, check out the full recipe link! To keep your crispy baked sweet potato fries fresh, store them in the fridge. Place them in an airtight container. This helps maintain their flavor and texture. They can last for up to three days in the fridge. If you want to keep them longer, freezing is a great option. Place the fries in a freezer-safe bag. Remove as much air as you can before sealing. This prevents freezer burn and keeps them tasty. When you're ready to enjoy your leftovers, reheating is key. For crispy fries, use the oven. Preheat your oven to 400°F (200°C). Spread the fries in a single layer on a baking sheet. Heat for about 10 to 15 minutes, flipping halfway through. This method keeps the fries crispy. You can also use an air fryer. Set it to 380°F (193°C) and heat for about 5 to 7 minutes. Avoid using a microwave, as it can make the fries soggy. In the fridge, your fries can last about three days. In the freezer, they can last up to three months. When you store them correctly, you can enjoy them later without losing flavor or texture. Just remember to check for any signs of freezer burn if they are in the freezer for a while. How can I make sweet potato fries even crispier? To make your sweet potato fries crispier, soak them in cold water. Do this for at least 30 minutes. This helps remove excess starch. After soaking, dry them well with a towel. Also, use cornstarch before baking to create a crisp outer layer. Can I use regular potatoes instead? Yes, you can use regular potatoes. They will taste different but can still be delicious. You might need to adjust the cooking time. Regular potatoes may cook faster than sweet potatoes. What's the nutritional value of sweet potato fries? Sweet potato fries are high in vitamins A and C. They are also a good source of fiber. Compared to regular fries, they have fewer calories and more nutrients. This makes them a healthier choice for a snack or side dish. What is the optimal temperature for baking sweet potato fries? The best temperature for baking sweet potato fries is 425°F (220°C). This high heat helps them cook evenly and get crispy. How long should I bake them for the best results? Bake the fries for 25 to 30 minutes. Be sure to flip them halfway through to get an even golden color. They should look crispy and slightly browned when done. Can I use a different oil? Yes, you can use other oils like avocado oil or canola oil. Each oil has a different flavor, but all will work well for baking. What if I don't have cornstarch? If you don't have cornstarch, you can use potato starch or even flour. Both will help create a crisp texture. Just use the same amount as the cornstarch in the recipe. Making sweet potato fries is simple and fun. You learned the key ingredients and steps to create crispy fries. I shared tips for seasoning and presentation to elevate your meal. You can also explore variations and alternative cooking methods. Storing and reheating properly ensures you can enjoy leftovers without losing quality. Incorporate your favorite flavors and get creative. Remember, these fries are a tasty, healthy option for any meal. Enjoy your cooking adventure!](https://dishtreats.com/wp-content/uploads/2025/07/5c45319a-0858-4d48-b29a-502acd419023-768x768.webp)


