Raspberry White Chocolate Muffins Deliciously Easy Treat

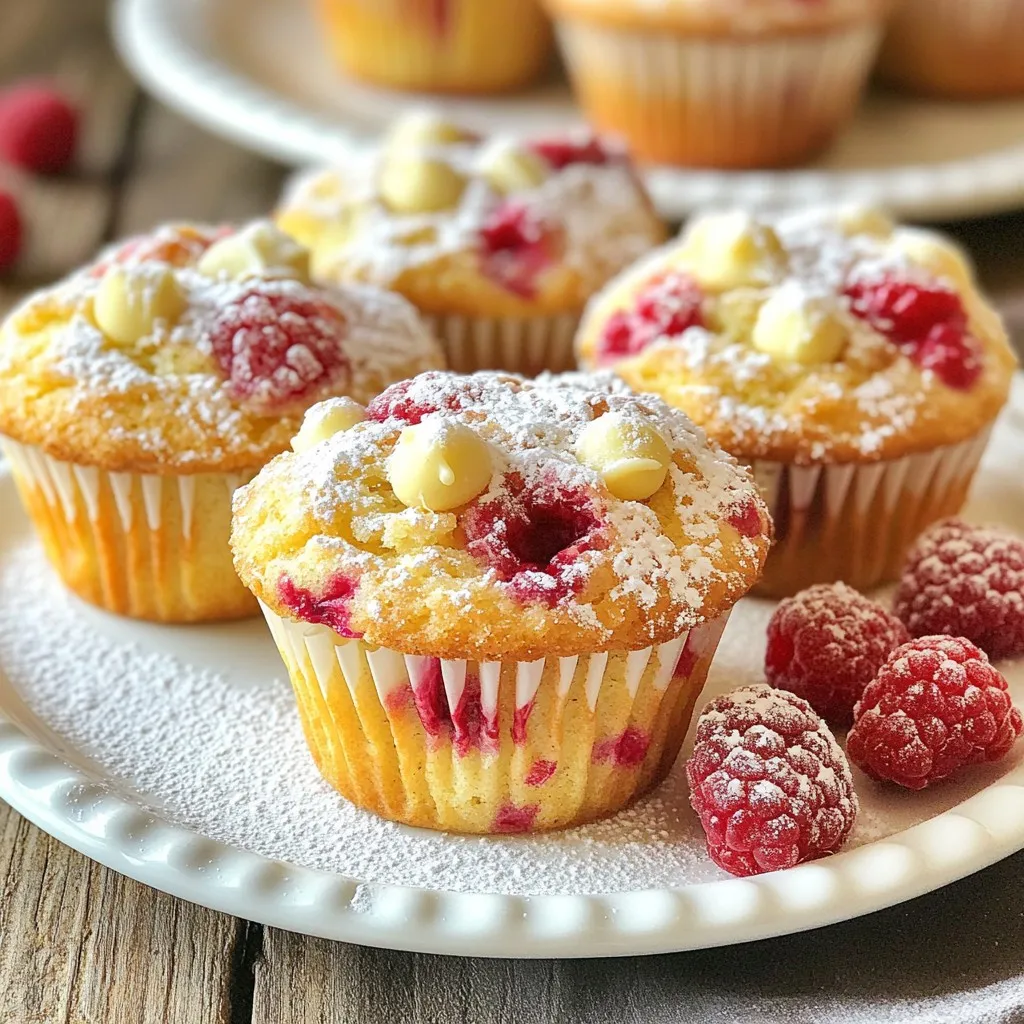
Raspberry White Chocolate Muffins are a delightful treat you can whip up in no time! Bursting with the sweet flavor of raspberries and creamy white chocolate, these muffins are perfect for any occasion. In this article, I’ll guide you through easy steps to create these mouthwatering muffins, ensuring they turn out just right. Ready to bake? Let’s dive into the ingredients and get started on this delicious journey!
Why I Love This Recipe
- Fresh Ingredients: The combination of fresh raspberries and creamy white chocolate creates a delightful burst of flavor in every bite.
- Easy to Make: This recipe is simple and quick, making it perfect for a weekday treat or a last-minute brunch addition.
- Perfectly Moist: The use of buttermilk and melted butter ensures that these muffins are moist and tender, just the way muffins should be.
- Customizable: You can easily swap out the raspberries and white chocolate for other fruits and chocolates, allowing for endless variations!
Ingredients
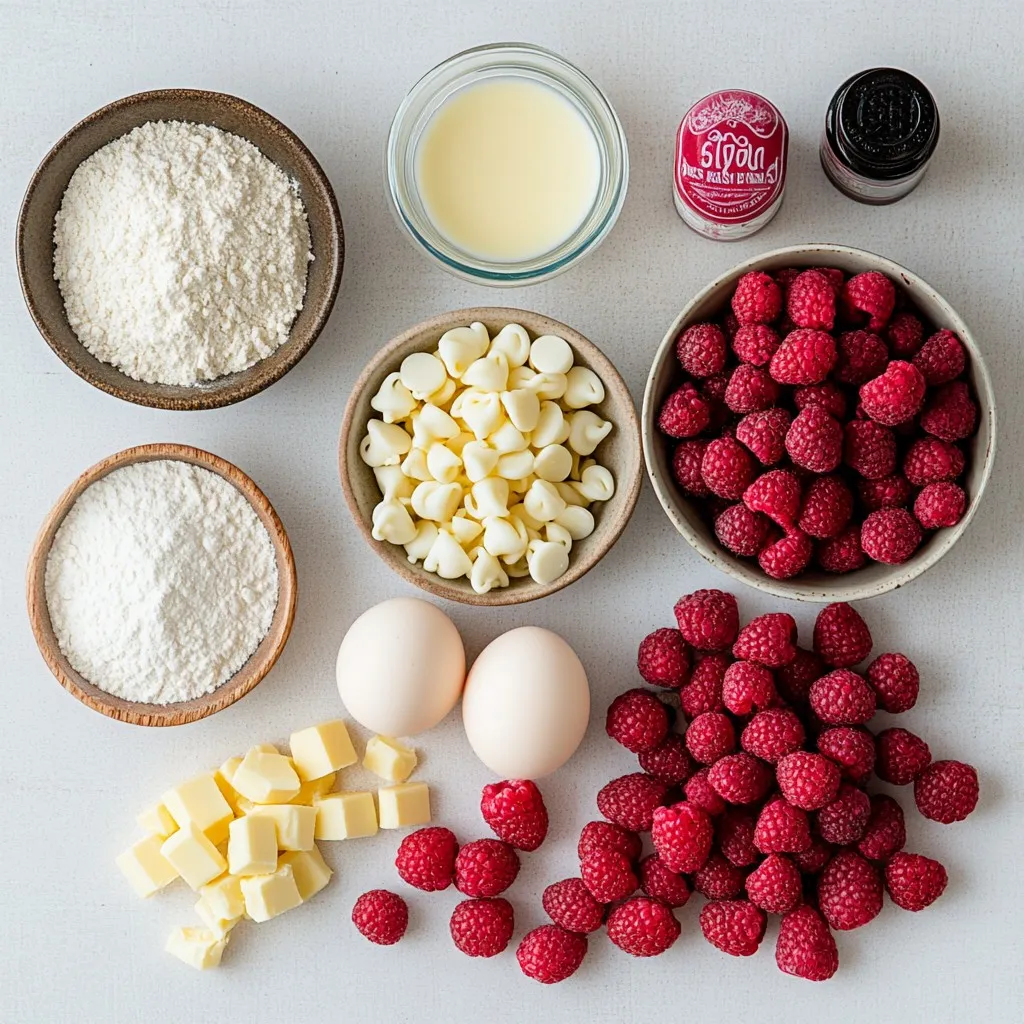
When making Raspberry White Chocolate Muffins, using the right ingredients is key. Here is what you need:
- 1 cup fresh raspberries (or frozen)
- 1 cup white chocolate chips
- 2 cups all-purpose flour
- 1 cup granulated sugar
- 1/2 cup unsalted butter, melted
- 1 cup buttermilk (or substitute)
- 2 large eggs, room temperature
- 1 tablespoon baking powder
- 1/2 teaspoon baking soda
- 1/4 teaspoon salt
- 1 teaspoon vanilla extract
Each ingredient plays an important role. Fresh or frozen raspberries add a burst of flavor. White chocolate chips bring sweetness and creaminess. All-purpose flour gives structure, while sugar adds sweetness. Melted butter keeps the muffins moist. Buttermilk makes them tender. Eggs provide richness and help with rising. Baking powder and baking soda are essential for fluffiness. Salt enhances all flavors. Finally, vanilla extract adds a warm note.
When you gather your ingredients, be sure they’re fresh. This way, your muffins will taste their best. If you can’t find buttermilk, you can make your own. Just mix 1 cup of milk with 1 tablespoon of vinegar. Let it sit for a few minutes before using. Enjoy baking these delightful treats!

Step-by-Step Instructions
Preheating the Oven and Preparing Muffin Tin
- Preheat oven to 375°F (190°C).
- Line or grease muffin tin.
Start by preheating your oven. This step is key for even baking. While the oven heats, prepare your muffin tin. You can use paper liners or grease it with butter or cooking spray. This keeps the muffins from sticking.
Mixing Wet Ingredients
- Whisk together melted butter, sugar, and eggs.
- Add buttermilk and vanilla extract.
In a large bowl, whisk the melted butter and sugar. Mix until smooth. Then add the eggs one at a time, blending well. Next, pour in the buttermilk and vanilla. Whisk until everything is combined. This creates a creamy base for your muffins.
Combining Dry Ingredients and Folding in Fillings
- Sift dry ingredients and incorporate into wet mixture.
- Gently fold in raspberries and white chocolate.
In another bowl, sift the flour, baking powder, baking soda, and salt. This helps to remove lumps. Gradually add this mixture to the wet ingredients. Stir gently until just combined. Do not overmix; this keeps the muffins light. Now, fold in the raspberries and white chocolate chips carefully. Ensure they are evenly distributed.
Baking the Muffins
- Divide batter into muffin cups.
- Bake for 18-20 minutes and check for doneness.
Using a spoon or scoop, fill each muffin cup about two-thirds full. This allows room for rising. Place the muffin tin in the oven. Bake for 18 to 20 minutes. To check for doneness, insert a toothpick into the center. It should come out clean or with a few moist crumbs. Once ready, remove the muffins and let them cool for a few minutes before transferring to a wire rack.
Tips & Tricks
Ensuring Muffin Texture
- Avoid overmixing the batter. This keeps the muffins light and fluffy. Mix just until you see no dry flour.
- Use room temperature ingredients. This helps the batter blend smoothly and rise better.
Presentation Suggestions
- Dust with powdered sugar. It adds a sweet touch and looks great.
- Garnish with fresh raspberries. They add color and a burst of flavor.
Baking Substitutions
- Use gluten-free flour options like almond flour or a gluten-free blend. This makes the muffins suitable for everyone.
- For vegan swaps, you can use flax eggs instead of regular eggs. Substitute buttermilk with almond milk and vinegar mix.
Pro Tips
- Use Fresh Raspberries: Fresh raspberries will provide the best flavor and texture. If using frozen, ensure they are thoroughly thawed and drained to avoid excess moisture in the batter.
- Room Temperature Ingredients: Allow your eggs and buttermilk to come to room temperature before mixing. This helps create a better emulsion and results in a lighter muffin.
- Don’t Overmix: When combining wet and dry ingredients, mix just until you see no dry flour. Overmixing can lead to tough muffins instead of light and fluffy ones.
- Check for Doneness: To ensure your muffins are perfectly baked, insert a toothpick into the center. If it comes out clean or with a few moist crumbs, they are ready!

Variations
Gluten-Free Raspberry White Chocolate Muffins
To make gluten-free muffins, start by swapping all-purpose flour for a gluten-free blend. Look for blends made with rice flour, almond flour, or oat flour. Each blend may change the texture. You might need to adjust the liquid in the recipe. Use a bit less buttermilk or add an extra egg for moisture. Always check the package instructions for specific tips.
Vegan Raspberry White Chocolate Muffins
For vegan muffins, replace the eggs with flaxseed meal or applesauce. Mix one tablespoon of flaxseed with three tablespoons of water. Let it sit for five minutes before adding. Substitute the buttermilk with a plant-based option. Almond milk or soy milk works well. Use dairy-free white chocolate chips for a complete vegan treat.
Seasonal Variations
You can switch up the berries in this recipe. Try blueberries, strawberries, or blackberries for a fun twist. Each berry brings its unique flavor. You can add spices like cinnamon or nutmeg for warmth. Orange or lemon zest adds a fresh touch too. This keeps your muffins exciting all year long.
Storage Info
How to Store Muffins
Store your muffins at room temperature for up to two days. Use an airtight container to keep them fresh. If you place them in a muffin tin, they may dry out quickly. The best choice is a sealed container. This method helps prevent staleness and keeps them soft. If you live in a humid area, refrigeration can help. However, it may make them a bit dry.
Freezing Muffins
To freeze your muffins, first cool them completely. Wrap each muffin in plastic wrap tightly. Then place them in a freezer-safe bag. This step protects them from freezer burn. You can store them for up to three months. When you want to enjoy one, remove it from the freezer. Let it thaw at room temperature for about an hour.
If you want to eat it warm, use the microwave. Heat it for 15-20 seconds. This method brings back the fresh-baked taste. Enjoy your muffins anytime!
FAQs
Can I use frozen raspberries in this recipe?
Yes, you can use frozen raspberries. Just make sure to thaw them first. This will help keep the muffins moist. Frozen raspberries may bleed a bit more color into the batter. This can add a nice pink hue to the muffins.
What can I substitute for buttermilk?
If you don’t have buttermilk, you can make a quick substitute. Mix 1 cup of milk with 1 tablespoon of vinegar. Let this sit for about five minutes. This will mimic the tangy taste of buttermilk, and it works well in this recipe.
How long do these muffins stay fresh?
These muffins stay fresh for about 2-3 days at room temperature. Store them in an airtight container to keep them moist. If you want them to last longer, you can freeze them. They freeze well and can last up to three months.
Can I make mini muffins instead of regular-sized ones?
Yes, you can make mini muffins! Just adjust the baking time. Bake them for about 10-12 minutes. Check for doneness by inserting a toothpick into the center. If it comes out clean, they are ready to enjoy!
In this article, we explored how to make delicious raspberry white chocolate muffins. We covered the ingredients, step-by-step instructions, helpful tips, and possible variations. Remember, use room temperature items for the best texture, and feel free to experiment with flavors. These muffins are easy to store and freeze, making them perfect for any time. Try this recipe, and enjoy the tasty results at home. You’ll impress family and friends with your baking skill

Raspberry White Chocolate Muffins
Ingredients
- 1 cup fresh raspberries (or use frozen raspberries that have been thawed)
- 1 cup white chocolate chips
- 2 cups all-purpose flour
- 1 cup granulated sugar
- 1/2 cup unsalted butter, melted and slightly cooled
- 1 cup buttermilk (or create a substitute using 1 cup of milk plus 1 tablespoon of vinegar)
- 2 large eggs, at room temperature
- 1 tablespoon baking powder
- 1/2 teaspoon baking soda
- 1/4 teaspoon salt
- 1 teaspoon vanilla extract
Instructions
- Begin by preheating your oven to 375°F (190°C). Prepare a muffin tin by lining it with paper liners or greasing it liberally with butter or cooking spray to prevent sticking.
- In a spacious mixing bowl, whisk together the melted butter, granulated sugar, and eggs until the mixture is creamy and well-blended.
- Pour in the buttermilk and add the vanilla extract, continuing to whisk until the batter is smooth and unified.
- In a separate bowl, sift together the all-purpose flour, baking powder, baking soda, and salt. This step ensures that there are no lumps and helps create a light texture.
- Gradually incorporate the dry ingredients into the wet mixture, stirring gently with a spatula or wooden spoon until just combined. Avoid overmixing, as this can lead to dense muffins.
- Carefully fold in the fresh raspberries and white chocolate chips, ensuring they are distributed evenly throughout the batter.
- Using a spoon or an ice cream scoop, divide the batter evenly into the prepared muffin cups, filling each about two-thirds full to allow room for rising.
- Place the muffin tin in the preheated oven and bake for 18-20 minutes. The muffins are ready when a toothpick inserted into the center comes out clean or with a few moist crumbs.
- Once baked, remove the muffin pan from the oven and let the muffins cool in the pan for about 5 minutes. Afterward, carefully transfer them to a wire rack to cool completely.


![- 1 cup rolled oats - 1/2 cup canned pumpkin puree - 1/4 cup almond butter (or your choice of nut butter) - 1/4 cup honey or maple syrup - 1/2 teaspoon vanilla extract - 1 teaspoon pumpkin pie spice - Pinch of salt - 1/4 cup chopped nuts (walnuts or pecans) - 1/4 cup mini chocolate chips or raisins - Calories per serving: About 100 - Protein content: 2 grams - Fiber content: 3 grams When you gather these ingredients, you set the stage for a tasty treat. Rolled oats serve as the base, giving each bite a hearty texture. Canned pumpkin puree brings moisture and a rich flavor that screams fall. Almond butter adds creaminess and healthy fats, while honey or maple syrup sweetens the mix. The vanilla extract rounds out the flavors, and pumpkin pie spice makes everything feel festive. Optional ingredients like chopped nuts and chocolate chips offer extra crunch and sweetness. You can mix and match to fit your taste. In terms of nutrition, these bites pack a punch. Each serving gives you about 100 calories, 2 grams of protein, and 3 grams of fiber. This makes them a great snack for energy and fullness. For the complete recipe, you can check out the Full Recipe section. - In a large mixing bowl, combine: - 1 cup rolled oats - 1/2 cup canned pumpkin puree - 1/4 cup almond butter (or your choice of nut butter) - 1/4 cup honey or maple syrup - 1/2 teaspoon vanilla extract - 1 teaspoon pumpkin pie spice - Pinch of salt Mix these ingredients well. Use a spatula to ensure everything blends together. You want a sticky dough. This sticky texture helps the bites hold their shape later. If you like, fold in some extras: - 1/4 cup chopped nuts (like walnuts or pecans) - 1/4 cup mini chocolate chips or raisins Make sure to distribute these evenly. This adds crunch and sweetness. The more you mix, the better the flavors combine. Now, it’s time to shape the bites. - Scoop small portions of the mixture. - Roll each portion into 1-inch balls. Place the balls on a plate or parchment paper. Leave space between them. After shaping, refrigerate the bites for at least 30 minutes. This helps them firm up. Enjoy these tasty bites chilled or at room temperature as a quick snack! For the full recipe, check out the details above. To make great energy bites, size matters. Aim for about 1 inch for each bite. This helps them cook evenly. Use a light touch when mixing the dough. Overworking it can make them tough. Gently blend the ingredients until they come together. Want more flavor? Try making your own pumpkin pie spice. Combine cinnamon, nutmeg, and ginger to find your perfect mix. You can also adjust sweetness. Use honey or maple syrup to make them sweeter or less sweet. Taste as you go! When it's time to serve, make it pretty! Arrange your energy bites on a decorative plate. This makes them look special. Add a sprinkle of pumpkin pie spice on top for a nice touch. It looks great and adds extra flavor. For the full recipe, check out [Full Recipe]. {{image_4}} You can make your pumpkin pie energy bites even more fun with flavor twists. Try adding toasted coconut for a tropical vibe. The sweet and crunchy texture makes each bite delightful. You can also switch your nut butter. Use peanut or cashew butter instead of almond butter. Each nut brings its own taste, making the bites unique. If you need a gluten-free snack, use gluten-free oats in your mix. This small change keeps the bites delicious and safe for those with gluten sensitivities. For a vegan option, swap honey with agave nectar. This keeps your bites sweet while fitting a plant-based diet. You can tailor these bites to fit the seasons. For fall, mix in some spiced apple or cider. This adds a warm, cozy flavor that feels like autumn. For summer, a hint of citrus zest can brighten the bites. It gives them a fresh burst that’s perfect for hot days. For the full recipe, check the details above and make your own tasty energy bites! Store your pumpkin pie energy bites in an airtight container in the refrigerator. This keeps them fresh and tasty. If you plan to eat them soon, you can keep them at room temperature for short durations. Just remember, they may not last as long outside the fridge. These energy bites can last up to one week in the fridge. If you want to keep them longer, freeze them. They can stay fresh for up to three months in the freezer. Just make sure to label the container with the date you froze them. You can enjoy these bites chilled or at room temperature. They make a great snack either way! For a delightful treat, pair them with a cup of tea or coffee. The warm drink complements the tasty flavors of the bites perfectly. If you want to try a fun twist, serve them at a party on a festive plate. You can find the full recipe to make these delicious bites. To make pumpkin pie energy bites, follow these steps: 1. In a large bowl, mix rolled oats, canned pumpkin puree, almond butter, and honey. 2. Add vanilla extract, pumpkin pie spice, and a pinch of salt. 3. Stir until the mixture becomes a sticky dough. 4. Fold in chopped nuts and chocolate chips or raisins. 5. Scoop out small portions and roll them into balls, about 1 inch wide. 6. Place the bites on a plate with space between them. 7. Refrigerate for at least 30 minutes to firm up. Enjoy your tasty and healthy snack! For more details, check the Full Recipe. Yes, you can freeze these energy bites. To do this, place the bites on a baking sheet. Freeze them for about an hour until solid. Then, transfer them to a freezer bag or an airtight container. Label the bag with the date. These bites can last up to three months in the freezer. When you’re ready to eat them, just let them thaw in the fridge. Pumpkin pie energy bites have many health benefits. They are rich in fiber from the oats and pumpkin. Fiber helps with digestion and keeps you full. Almond butter provides healthy fats and protein. Honey or maple syrup adds natural sweetness without refined sugar. Pumpkin is packed with vitamins A and C, which support your immune system. Overall, these bites are a nutritious snack option. Yes, these energy bites are safe and nutritious for kids. They contain wholesome ingredients that provide energy without added sugar. Kids love the sweet taste and chewy texture. You can also let your children help make them. This way, they learn about healthy snacks. Just remember to check for any nut allergies before serving. These pumpkin pie energy bites are easy to make and fun to eat. You mix simple main ingredients like oats, pumpkin, and nut butter. Add some nuts or chocolate chips for a tasty twist. Remember to store them well to enjoy later. Whether for a snack, dessert, or lunchbox treat, these bites pack nutrition in every bite. Get creative with flavors and enjoy the flexible recipes. Healthy eating can be delicious and effortless. Make these energy bites today and see for yourself!](https://dishtreats.com/wp-content/uploads/2025/07/b18c9eee-ac7a-43cf-8a14-33dd9ccff863-768x768.webp)