Looking for a cool treat on hot summer days? This Raspberry Lemonade Sorbet is both refreshing and easy to make. With just a few fresh ingredients and simple steps, you can create a delightful dessert that packs a fruity punch. Perfect for gatherings or a quiet afternoon, let me guide you through making this tasty sorbet that everyone will love. Ready to dive in?
Ingredients
Fresh Ingredients for Raspberry Lemonade Sorbet
To make the best raspberry lemonade sorbet, gather these fresh ingredients:
– 2 cups fresh raspberries
– 1 cup freshly squeezed lemon juice (about 4-6 lemons)
– 1 cup granulated sugar
– 1 cup water
– 1 teaspoon lemon zest
– A pinch of salt
These simple, vibrant ingredients create a sorbet that bursts with flavor. Fresh raspberries add a sweet-tart taste, while the lemon juice gives a bright zing. The sugar balances the tartness and helps to create a smooth texture.
Essential Kitchen Tools Needed
You need a few tools to make this sorbet:
– Small saucepan
– Blender
– Fine-mesh strainer
– Mixing bowl
– Ice cream maker
– Airtight container
These tools are all easy to find in most kitchens. The blender helps mix the fruit, while the ice cream maker churns it into a lovely sorbet.
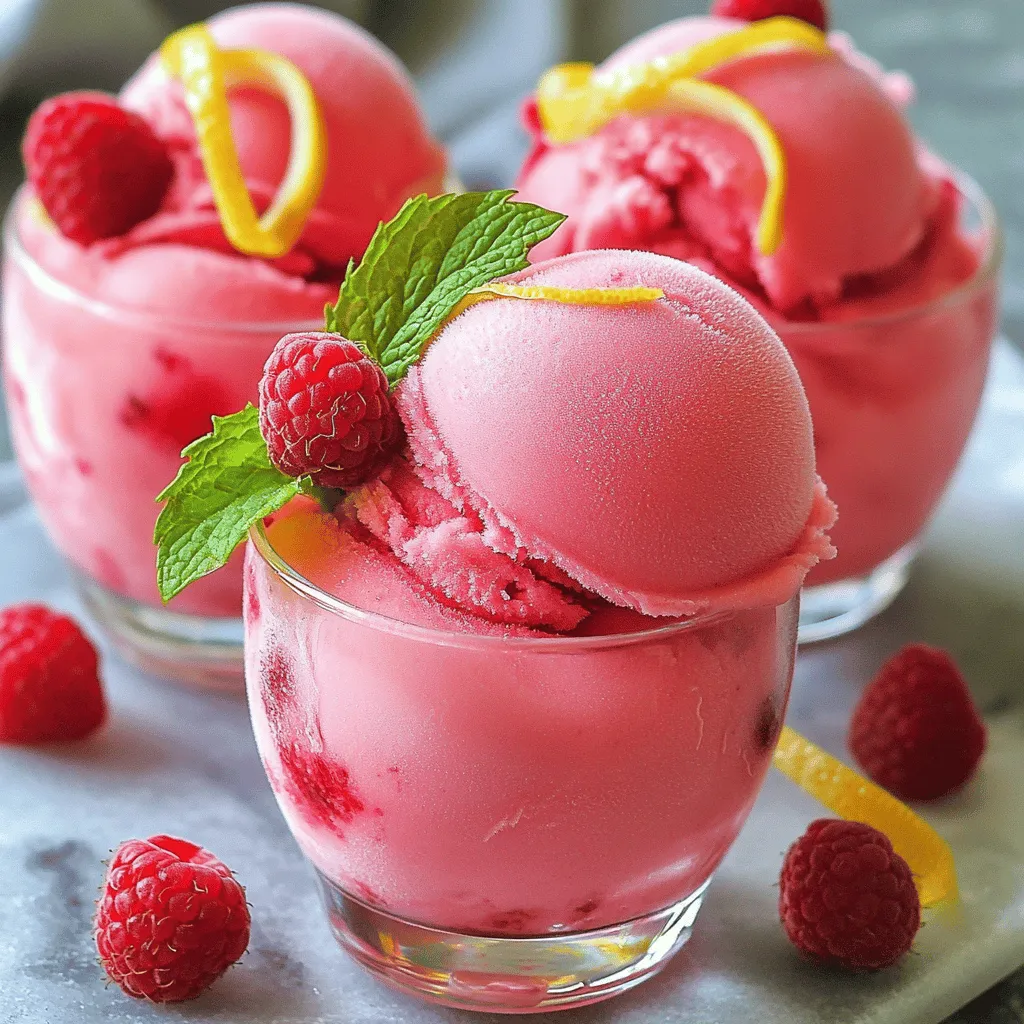
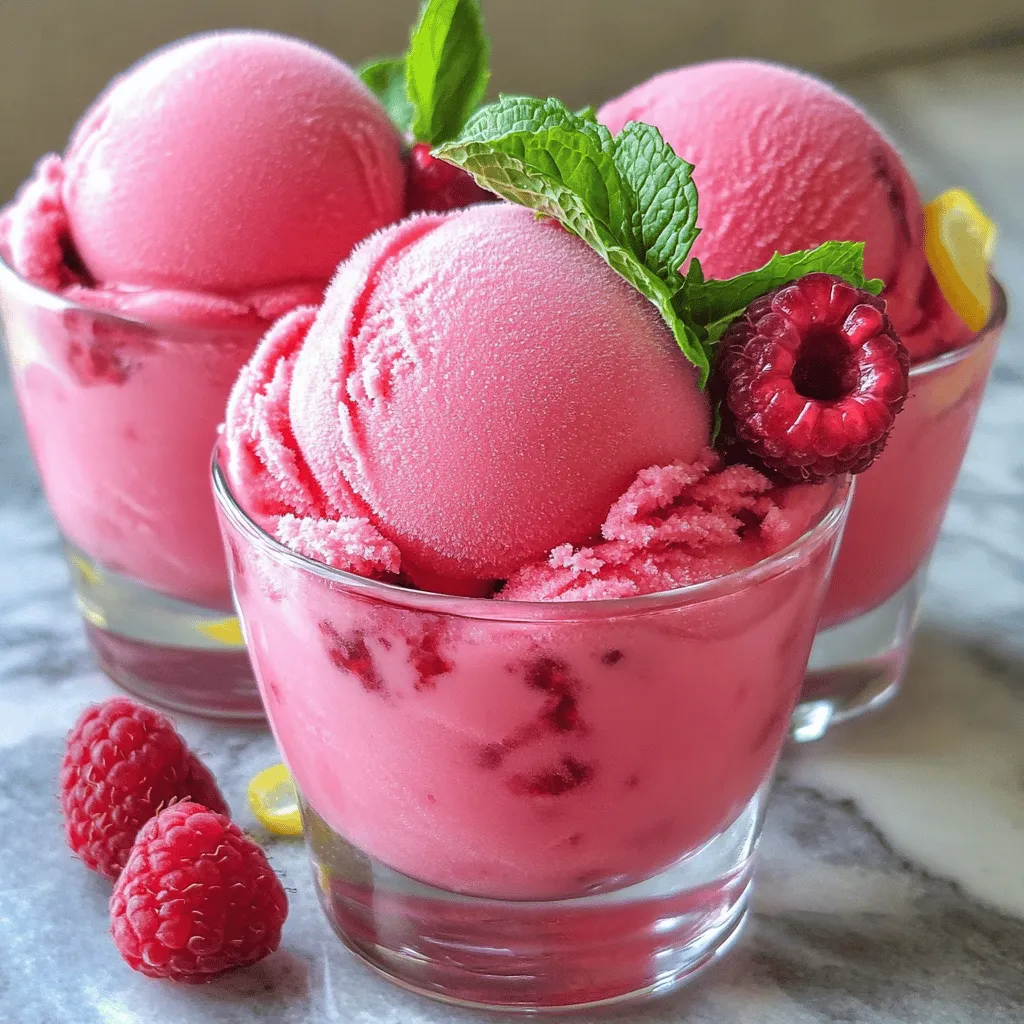
Suggested Garnishes for Serving
When serving your sorbet, think about these garnishes:
– Fresh raspberries
– Mint leaves
Adding fresh raspberries gives a colorful touch. A sprig of mint adds a nice aroma and enhances the flavor. Serve your sorbet in chilled glasses for an elegant look.
Step-by-Step Instructions
Preparing the Simple Syrup
To start, I prepare the simple syrup. I take a small saucepan and add 1 cup of granulated sugar and 1 cup of water. I place the pan on medium heat. While stirring, I wait until the sugar dissolves clearly into the water. This usually takes just a few minutes. Once it’s clear, I remove the pan from heat and let the syrup cool at room temperature. This syrup adds sweetness to our sorbet.
Making the Raspberry Mixture
Next, I make the raspberry mixture. In a blender, I combine 2 cups of fresh raspberries, 1 cup of freshly squeezed lemon juice, 1 teaspoon of lemon zest, and a pinch of salt. Blending on high speed, I watch as the mixture turns smooth and bright. After blending, I pour it through a fine-mesh strainer into a large bowl. I use a spatula to press down, ensuring I get all the tasty liquid while keeping the seeds behind. This step is key for a silky sorbet.
Churning to the Perfect Consistency
Now, it’s time to combine everything. Once the simple syrup cools, I add it to the raspberry mixture. I stir until well mixed, creating a lively blend. Then, I pour this mixture into my ice cream maker. Following the manufacturer’s instructions, I churn it until it reaches a soft-serve texture. This takes about 20-30 minutes, but it can vary. For a firmer sorbet, I transfer it to an airtight container and freeze it for at least 3 hours. When ready to serve, I let it sit out for 5 minutes. This makes scooping easy and fun.
Tips & Tricks
Achieving the Best Texture for Sorbet
To get the best texture for your sorbet, start with fresh ingredients. Fresh raspberries give a smooth and vibrant flavor. When you blend the raspberries, make sure they are pureed well. This helps create a creamy feel. Straining the mixture removes seeds, ensuring a silky finish. Churning your sorbet in an ice cream maker is key. This process adds air, making it fluffy. If you want a firmer sorbet, freeze it longer after churning.
How to Adjust Sweetness or Tartness
You can easily tweak the sweetness or tartness of your sorbet. Taste the raspberry mixture before you freeze it. If it’s too tart, add more sugar to the simple syrup. Mix it in until it fully dissolves. For a tangier kick, add a bit more lemon juice. Just remember to taste as you go. This way, you can find the perfect balance that you love.
Time-Saving Tips for Quick Preparation
To save time, prepare the simple syrup ahead of time. You can make it a day before and store it in the fridge. Another tip is to squeeze your lemons while you heat the water for the syrup. This multitasking cuts down on prep time. Use frozen raspberries if fresh ones are not available. They can work just as well. Lastly, if you don’t have an ice cream maker, pour the mixture into a shallow dish. Stir it every 30 minutes until it freezes. This method takes more time but still gives you a tasty treat.
Variations
Adding Other Fruits for Flavor Enhancements
You can make raspberry lemonade sorbet even better by adding other fruits. Try mixing in strawberries or blueberries. These fruits pair well with raspberries and add a new twist. You can also use peaches or mangoes for a tropical vibe. Just blend them with the raspberries for a colorful mix.
Incorporating Herbs or Spices
Herbs and spices can give your sorbet a unique taste. Adding fresh mint gives a cool flavor that brightens the sorbet. You can also try basil for an unexpected twist. If you like spice, a pinch of ginger adds warmth and zest. Just mix these into the raspberry blend for a refreshing kick.
Options for Dairy-Free Sorbet
This raspberry lemonade sorbet is already dairy-free, making it perfect for everyone. If you want a creamier texture, use coconut milk instead of water. This adds richness without any dairy. You can also use almond or cashew milk for a nutty flavor. Both options keep this treat light and refreshing.
Storage Info
Best Practices for Freezing Sorbet
To keep your raspberry lemonade sorbet fresh, start with an airtight container. Choose one that fits the sorbet snugly. This helps prevent ice crystals from forming. Before you freeze, smooth the top with a spatula. Cover it tightly with plastic wrap. This extra layer helps lock in flavor.
How Long Does Raspberry Lemonade Sorbet Last?
Raspberry lemonade sorbet stays good for about two weeks in the freezer. After that, the taste may fade. To ensure the best flavor, try to enjoy it within that time frame. If you notice ice crystals or a change in texture, it may be time to toss it out.
Repacking Sorbet for Optimal Freshness
If you have leftover sorbet, consider repacking it. Move it to a smaller container if it’s half full. Less air means less chance of freezer burn. Always remember to cover it well. Use plastic wrap or a lid to seal it tight. This helps keep your sorbet tasting fresh and delicious.
FAQs
Can I make Raspberry Lemonade Sorbet without an ice cream maker?
Yes, you can. If you don’t have an ice cream maker, don’t worry. Pour the blended mixture into a shallow dish. Place it in the freezer. Stir it every 30 minutes with a fork. This helps break up ice crystals. Continue until it is fluffy and frozen. This method works well and gives you tasty sorbet.
What are the best ways to serve raspberry sorbet?
Serving raspberry sorbet is fun and simple. You can use chilled dessert glasses for an elegant look. Add fresh raspberries on top for color. A sprig of mint adds a nice touch too. For a twist, try serving it with a splash of soda. This creates a fun float. You can also pair it with a slice of lemon or lime for brightness.
Where can I buy pre-made Raspberry Lemonade Sorbet?
You can find pre-made raspberry lemonade sorbet at many grocery stores. Check the frozen dessert aisle. Some local ice cream shops may offer it too. If you’re feeling adventurous, visit artisanal ice cream shops. They often make unique flavors, including raspberry sorbet. Online retailers may also carry it, so you can order it for delivery.
This blog post covered how to make Raspberry Lemonade Sorbet. We started with fresh ingredients and the right tools. Then, we walked through the steps, from making simple syrup to churning the sorbet. I shared tips for the best texture and sweetness, along with some fun variations. Finally, we discussed how to store your dessert for the best taste. Remember, making sorbet can be simple and fun. Enjoy experimenting with flavors and serving it at your next gathering. Your homemade sorbet will impress everyone!


