Raspberry Lemon Thumbprint Cookies Delightful Treat

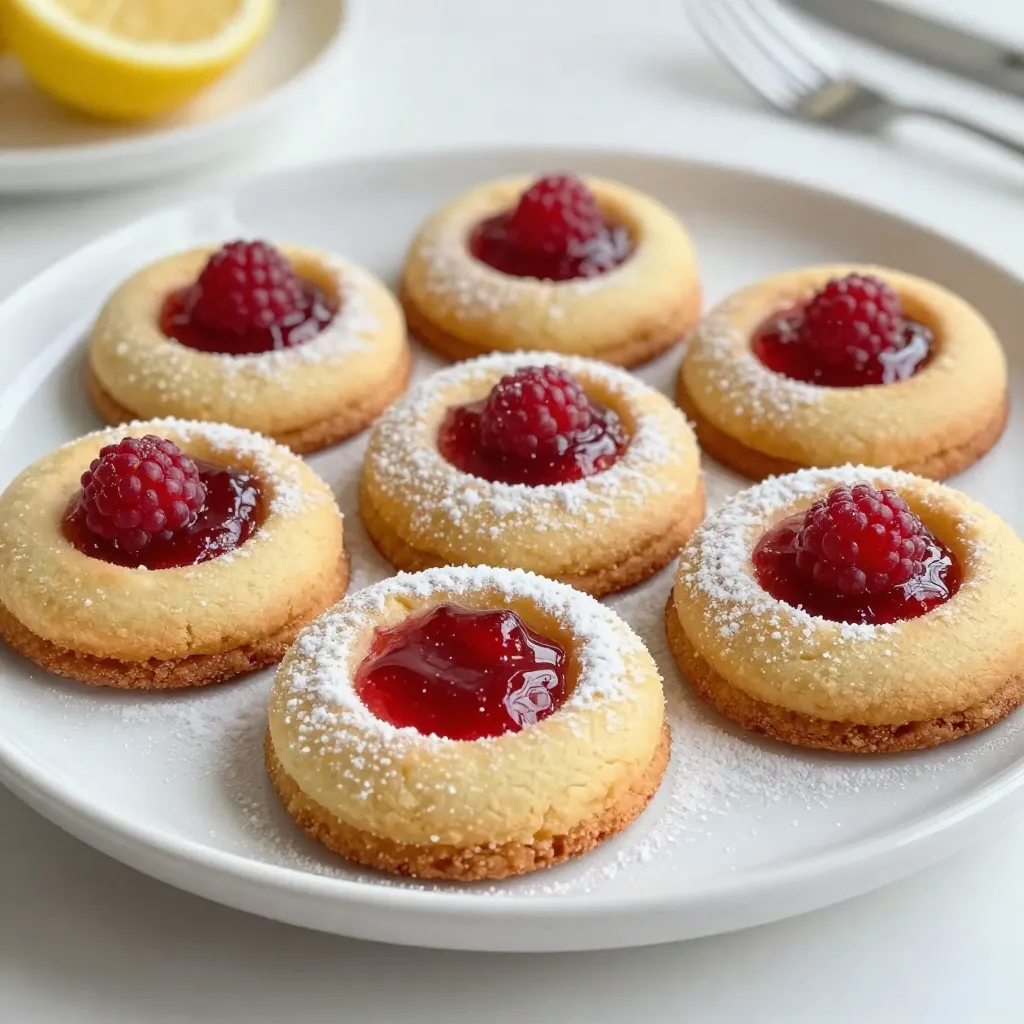
If you love cookies that burst with flavor, you’re in for a treat! These Raspberry Lemon Thumbprint Cookies combine tart raspberries with zesty lemon for a delightful snack. In this article, I’ll share a simple recipe, step-by-step instructions, and tips to make them perfect every time. Whether you’re baking for a special occasion or just for yourself, these cookies will impress everyone. Let’s get started on these sweet delights!
Why I Love This Recipe
- Delightful Flavor Combination: The tangy lemon zest pairs beautifully with the sweet raspberry jam, creating a refreshing and delicious treat.
- Easy to Make: This recipe is straightforward and requires minimal ingredients, making it perfect for bakers of all skill levels.
- Perfect for Any Occasion: Whether it’s a casual gathering or a festive celebration, these cookies are sure to impress your guests.
- Customizable: You can easily swap out the raspberry jam for your favorite fruit preserves, making this recipe versatile and fun to experiment with!
Ingredients
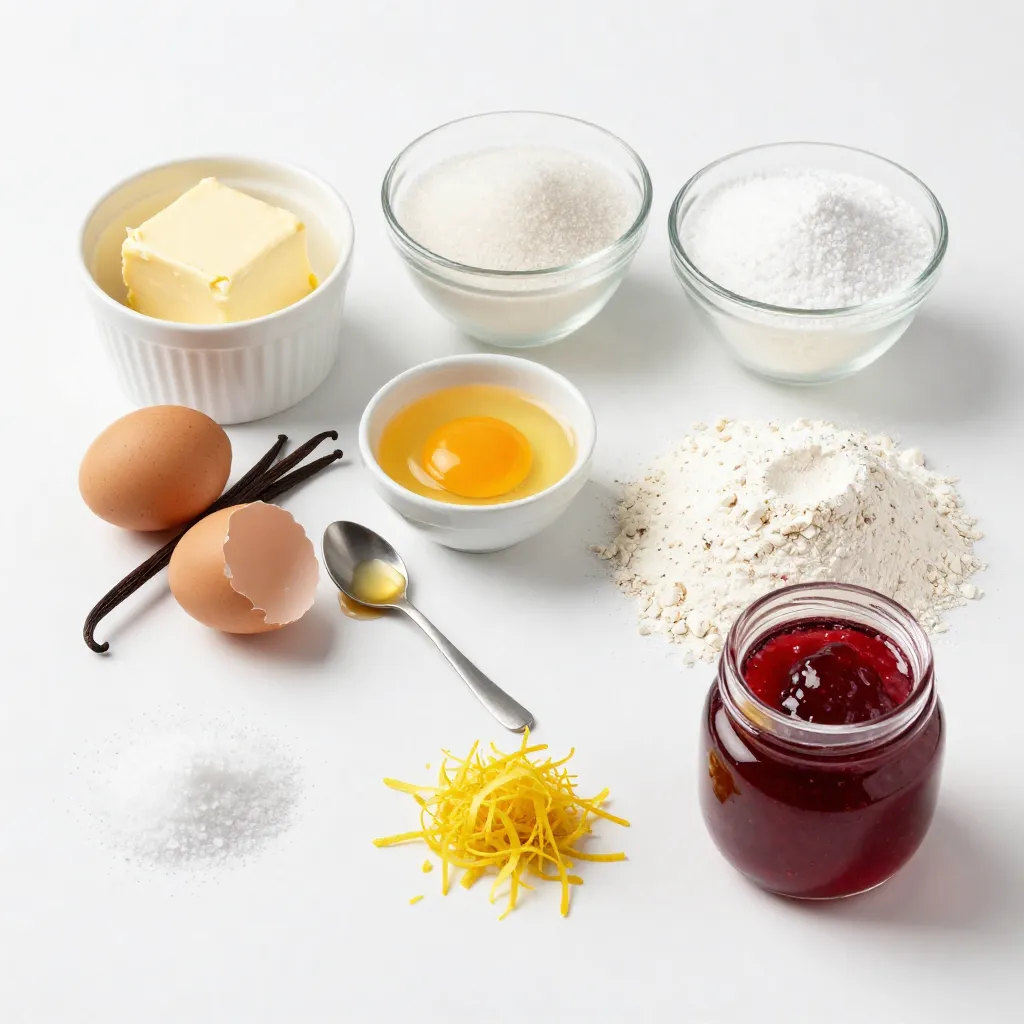
To make Raspberry Lemon Thumbprint Cookies, you need the following ingredients:
- 1 cup unsalted butter, softened
- 1/2 cup granulated sugar
- 1/2 cup powdered sugar, plus extra for dusting
- 1 large egg yolk
- 1 teaspoon pure vanilla extract
- 2 cups all-purpose flour
- 1/2 teaspoon baking powder
- 1/4 teaspoon fine sea salt
- Zest of 1 large lemon
- 1/2 cup seedless raspberry jam
These simple ingredients come together to create a treat that is both sweet and tart. The butter gives the cookies a rich flavor. The sugars add sweetness and a nice texture. The egg yolk helps bind everything together. Vanilla and lemon zest boost the flavor, making each bite bright. Using seedless raspberry jam gives you a smooth, fruity filling that contrasts well with the buttery cookie. Each element plays a role. They work together to create a delightful experience for your taste buds.

Step-by-Step Instructions
Preheat and Prepare
- Preheat oven to 350°F (175°C)
- Line baking sheets with parchment paper
Start by preheating your oven to 350°F. This step is key for baking. While the oven warms up, grab two baking sheets. Line them with parchment paper. This helps keep the cookies from sticking.
Creaming the Mixture
- Cream together butter, granulated sugar, and powdered sugar
In a large bowl, place the softened butter. Add the granulated sugar and powdered sugar. Use an electric mixer on medium speed. Mix until the mixture is light and fluffy. This usually takes about 3-4 minutes.
Combine Ingredients
- Add egg yolk, vanilla extract, and lemon zest
- Mix until smooth
Now, it’s time to add more flavor! Put in the egg yolk, vanilla extract, and lemon zest. Mix on low speed until everything is smooth.
Prepare Dry Ingredients
- Whisk together flour, baking powder, and salt
In a separate bowl, whisk together the flour, baking powder, and salt. Make sure they are well mixed. This step helps the cookies rise and taste great.
Forming the Dough
- Combine wet and dry ingredients
- Refrigerate the dough for 30 minutes
Next, add the dry mixture to the wet mixture. Stir until just combined. Don’t over-mix! You want a soft dough. Once it’s mixed, cover the bowl with plastic wrap. Place it in the fridge for about 30 minutes. This makes the dough easier to handle later.
Shape and Bake
- Roll dough into balls and create thumbprints
- Fill with raspberry jam and bake
After chilling, take the dough out. Scoop small portions and roll them into 1-inch balls. Place these balls on the baking sheets, spaced 2 inches apart. Use your thumb or a teaspoon to make a small indent in each ball. Be gentle! Fill each thumbprint with raspberry jam.
Now, bake the cookies for 12-15 minutes. They are done when the edges are lightly golden brown.
Cooling Process
- Let cookies cool on baking sheets and then transfer to wire rack
Once baked, pull the cookies out of the oven. Let them cool on the baking sheets for about 5 minutes. After that, carefully move them to a wire rack to cool completely. Enjoy the lovely smell as they cool!
Tips & Tricks
Perfecting the Texture
To make great raspberry lemon thumbprint cookies, avoid over-mixing the dough. Over-mixing can make cookies tough. You want a soft, tender texture. When you mix, stop as soon as the flour disappears. This keeps the cookies light and fluffy.
Chilling the dough is key. After mixing, wrap the dough and chill it for 30 minutes. This makes it easier to handle. Chilled dough also helps cookies hold their shape.
Serving Suggestions
For a lovely presentation, dust the cookies with powdered sugar. This adds a sweet touch and makes them look beautiful. You can also garnish the plate with fresh raspberries and lemon slices. This not only adds color but also hints at the fresh flavors inside.
Common Mistakes to Avoid
Avoid overfilling the thumbprints with raspberry jam. If you add too much, it may spill over while baking. A spoonful is just right.
Check your oven temperature. An oven that is too hot or too cold can affect baking time. Use an oven thermometer for accuracy. This helps ensure your cookies bake perfectly every time.
Pro Tips
- Chilling the Dough: Refrigerating the dough for 30 minutes helps to solidify the butter, making it easier to handle and ensuring the cookies maintain their shape while baking.
- Avoiding Over-Mixing: When incorporating dry ingredients, mix just until combined. Over-mixing can lead to tough cookies instead of tender ones.
- Using Quality Jam: Opt for a high-quality, seedless raspberry jam for the best flavor. Homemade jam can elevate the taste even more!
- Perfect Indentations: To create a perfect thumbprint, use a teaspoon or your thumb but be mindful not to press too deep to avoid breaking through the bottom.
Variations
Flavor Alternatives
You can change the flavor of these cookies easily. Instead of raspberry jam, try strawberry or blueberry jam. Both choices add a sweet twist. You can also add nuts like chopped almonds or walnuts for crunch. For a richer taste, mix in chocolate chips. They will melt slightly and bring a new flavor to your cookies.
Dietary Substitutions
If you need gluten-free cookies, use a gluten-free flour blend. This swap works well and keeps the texture nice. For those seeking vegan options, replace the butter with coconut oil or vegan butter. Instead of the egg yolk, use a flax egg made from ground flaxseed and water. These substitutions ensure everyone can enjoy these cookies.
Seasonal Twists
Make these cookies special by adding seasonal fruits. In summer, try using fresh berries like blueberries or cherries. In fall, add spices like cinnamon or nutmeg for a warming flavor. You can also add zests from other fruits, like orange or lime, to brighten the taste. Each season brings a chance to create something new.
Storage Info
Short-term Storage
Store your Raspberry Lemon Thumbprint Cookies at room temperature. Use an airtight container. This keeps them soft and tasty. A cookie jar also works well. If you stack them, place parchment paper between layers.
Long-term Storage
You can freeze these cookies for long-term storage. Place them in a freezer-safe bag. Make sure to remove as much air as possible. They can last up to three months in the freezer. To thaw, take them out and let them sit at room temperature. You can also warm them in the oven for a few minutes for a fresh taste.
Shelf Life
When stored right, these cookies stay fresh for about one week. If you freeze them, they last longer. Always check for signs of spoilage before eating. Keeping them sealed helps maintain their yummy flavor and texture.
FAQs
What are thumbprint cookies?
Thumbprint cookies are small, round cookies. They have an indent in the center. This spot usually holds jam or other spreads. This fun shape makes them easy to fill. The cookies are soft and buttery. They are a treat everyone loves. You can find many flavors. Raspberry lemon is one of my favorites!
Can I use frozen raspberries instead of jam?
Yes, you can! Frozen raspberries work well. Just thaw and mash them first. You may want to add some sugar for sweetness. This makes a nice filling. Keep in mind, the texture may change. It may be a bit runnier than jam. Adjust the amount you use to fit the cookie’s shape.
How can I make these cookies ahead of time?
You can prepare the dough a day early. Just cover it and chill in the fridge. When ready to bake, scoop and shape the cookies. You can also shape them and freeze the dough. Just place them on a baking sheet and freeze until firm. Then, transfer to a bag. This way, you can bake them fresh later.
Can I substitute lemon zest?
Absolutely! If you don’t have lemon zest, use orange zest. It gives a sweet and bright flavor. You can also try lime zest for a tangy twist. Each option brings a unique taste to the cookies. Don’t hesitate to get creative with flavors!
In this post, we explored how to make delicious thumbprint cookies. We covered ingredients, step-by-step instructions, and tips for perfect cookies. Remember to chill the dough and avoid over-filling the thumbprints for the best results. Feel free to experiment with different jams and flavors to make them your own. Store them correctly, and they will stay fresh for days. Get baking and enjoy these tasty treats with family or friend

Raspberry Lemon Thumbprint Cookies
Ingredients
- 1 cup unsalted butter, softened to room temperature
- 1/2 cup granulated sugar
- 1/2 cup powdered sugar, plus extra for dusting
- 1 large egg yolk
- 1 teaspoon pure vanilla extract
- 2 cups all-purpose flour
- 1/2 teaspoon baking powder
- 1/4 teaspoon fine sea salt
- 1 large lemon zest
- 1/2 cup seedless raspberry jam
Instructions
- Begin by preheating your oven to 350°F (175°C). Prepare two baking sheets by lining them with parchment paper to prevent sticking.
- In a large mixing bowl, use an electric mixer to cream together the softened butter, granulated sugar, and powdered sugar. Beat the mixture on medium speed until it becomes light and fluffy, which should take about 3-4 minutes.
- Add the egg yolk, vanilla extract, and freshly grated lemon zest to the butter mixture. Mix on low speed until all ingredients are combined smoothly and evenly.
- In a separate medium bowl, whisk together the all-purpose flour, baking powder, and fine sea salt until well mixed. Gradually incorporate the dry ingredients into the wet mixture, stirring until just combined. Avoid over-mixing; you want a soft dough to form.
- To make the dough easier to handle, cover the bowl with plastic wrap and refrigerate for approximately 30 minutes.
- After chilling, take the dough out and scoop out small portions using your hands. Roll each portion into a ball about 1-inch in diameter. Arrange the dough balls on the prepared baking sheets, ensuring they are spaced about 2 inches apart for even baking.
- Using your thumb or the back of a teaspoon, gently create an indentation in the center of each dough ball. Be careful not to press all the way through.
- Generously fill each thumbprint with a spoonful of raspberry jam, allowing it to settle into the indentations.
- Place the baking sheets in the preheated oven and bake for 12-15 minutes, or until the edges of the cookies are lightly golden brown.
- Once baked, remove the cookies from the oven and let them cool on the baking sheets for 5 minutes. Then, carefully transfer the cookies to a wire rack to cool completely.


![To make Peanut Butter Chocolate Overnight Oats, you will need the following: - 1 cup rolled oats - 2 cups almond milk (or your preferred milk variety) - 2 tablespoons natural creamy peanut butter - 2 tablespoons unsweetened cocoa powder - 2 tablespoons maple syrup (or honey for sweetness) - 1/2 teaspoon pure vanilla extract - A pinch of salt - 1 ripe banana, sliced (for topping) - Chopped peanuts and dark chocolate shavings (for garnish) You can swap some ingredients to fit your taste. If you want a nut-free option, use sunflower seed butter instead of peanut butter. For a dairy-free choice, almond milk is great, but soy or oat milk works well too. You can replace maple syrup with agave nectar or any other sweetener you like. If cocoa powder is not your thing, try carob powder for a different flavor. Each serving of these overnight oats has around 350 calories. They provide a good mix of protein, carbs, and healthy fats. You get about 10 grams of protein and 7 grams of fiber, which helps keep you full. The oats give you energy, while the peanut butter adds creaminess and taste. Plus, the dark chocolate shavings offer a little indulgence without too much guilt. Enjoy every spoonful knowing it’s a balanced meal! First, gather your ingredients. You need rolled oats, almond milk, peanut butter, cocoa powder, maple syrup, vanilla extract, salt, a banana, chopped peanuts, and dark chocolate shavings. Start by measuring out one cup of rolled oats and two cups of almond milk. This forms the base of your overnight oats. In a medium bowl, combine the oats and almond milk. Next, add two tablespoons of peanut butter, two tablespoons of cocoa powder, and two tablespoons of maple syrup. Include half a teaspoon of vanilla extract and a pinch of salt. This mix gives your oats a rich flavor. Using a whisk, mix everything until it’s smooth and well blended. Make sure the peanut butter is fully mixed in. Once your mixture is ready, divide it into two jars or airtight containers. Fill them to your desired level. Seal the jars tightly and place them in the fridge overnight. This helps the oats absorb the liquid and soften. When you wake up, take the jars out of the fridge. Stir the oats to make them creamy. They should be thick and delicious. Top each jar with fresh banana slices. Add chopped peanuts and dark chocolate shavings for a tasty finish. You can enjoy your oats cold or warm them in the microwave for about one minute. For a lovely presentation, serve in clear jars to show off those yummy layers. Check out the Full Recipe for more tips! To get creamy oats, you need to use the right ratio of oats to liquid. I recommend using 1 cup of rolled oats with 2 cups of almond milk. This balance helps the oats soak up the milk overnight. Make sure to mix your ingredients well. If you want even creamier oats, you can add a little extra milk in the morning. Stir it in before you top your oats. This makes them smooth and easy to enjoy. Store-bought overnight oats can be quick, but they often lack fresh taste. Making your own lets you pick the best ingredients. Plus, you can control the sweetness and flavors. If you want to save time, consider making a big batch. You can store them in jars for the week. Homemade oats taste better and you can customize them to fit your needs. You can use many types of milk in this recipe. Almond milk is my go-to, but feel free to try oat milk, soy milk, or even coconut milk. Each type adds a unique flavor. If you choose unsweetened milk, adjust the sweetness with more maple syrup or honey. This way, you can still enjoy that rich taste of peanut butter and chocolate. {{image_4}} You can spice up your Peanut Butter Chocolate Overnight Oats in fun ways. Try adding a dash of cinnamon for warmth. A pinch of nutmeg adds a cozy vibe, too. For a kick, add cayenne pepper. It gives a surprising twist. If you love coffee, mix in a teaspoon of instant coffee. It pairs well with chocolate. Each addition makes the flavor unique and exciting. Toppings can change the whole dish. Fresh fruits are a great choice. Sliced strawberries or blueberries add color and taste. You can also use chopped nuts for crunch. They add healthy fats and protein. Try adding shredded coconut for a tropical flair. A drizzle of honey or maple syrup can sweeten things up. Get creative and mix and match! This recipe is easy to make vegan-friendly. Use almond milk or any plant-based milk. Choose a vegan peanut butter without added sugar. Maple syrup is already a vegan-friendly sweetener. You can skip the honey to keep it plant-based. With these simple swaps, everyone can enjoy this tasty dish. To keep your peanut butter chocolate overnight oats fresh, store them in airtight jars. This helps prevent spills and keeps the oats tasty. Always allow them to cool before sealing. If you plan to eat them later, make sure they are fully chilled. When stored properly, these oats last for up to five days in the fridge. After that, the oats may lose their texture and flavor. For the best taste, enjoy them within three days. Check for any signs of spoilage before eating. You can freeze your oats if you want to save them for later. To do this, place the mixture in freezer-safe containers. Make sure to leave some space at the top for expansion. They can last up to three months in the freezer. When ready to eat, thaw in the fridge overnight before serving. You can also reheat them in the microwave. This is a great way to enjoy a quick breakfast any day. For the full recipe, check out Peanut Butter Chocolate Dream Overnight Oats. Yes, you can make Peanut Butter Chocolate Overnight Oats in advance. In fact, I recommend it! Preparing them a day ahead lets the oats soak up the flavors. This also saves time in the morning. Just mix all your ingredients, store them in jars, and refrigerate overnight. You’ll wake up to a tasty breakfast ready to enjoy. If you need a substitute for peanut butter, there are great options. Almond butter works well and has a nice flavor. Sunflower seed butter is also a good choice for nut-free diets. You can even use tahini for a unique twist. Choose what fits your taste and dietary needs best. To make more servings, simply double or triple the ingredients. For example, if you want four servings, use 2 cups of rolled oats and 4 cups of almond milk. Just keep the proportions the same. This way, each batch stays creamy and delicious! Absolutely! This recipe is great for meal prep. You can make several jars at once and store them in the fridge. They last up to five days, so you can enjoy them throughout the week. Just make sure to top them with fresh fruits and nuts before serving for the best taste. If you want the full recipe, check it out here: [Full Recipe]. This blog post covers all you need to make delicious Peanut Butter Chocolate Overnight Oats. It details key ingredients, step-by-step methods, and handy tips for rich flavor. You learned how to customize your bowl to your taste and the best ways to store leftovers. In the end, making these oats is simple and rewarding. Enjoy experimenting with flavors. Your mornings will feel brighter and better!](https://dishtreats.com/wp-content/uploads/2025/07/2593ccab-01fc-4b79-821a-fa0cdb3949cb-768x768.webp)
![- 2 cups watermelon, diced into bite-sized cubes - 1 cup fresh pineapple, diced - 1 cup ripe mango, peeled and diced - 1 cup strawberries, hulled and sliced - 1 cup plump blueberries - 1 tablespoon pure honey - 2 tablespoons freshly squeezed lime juice - 1 teaspoon finely grated lime zest - Fresh mint leaves, for a lovely garnish When picking fruits, look for bright colors and firm textures. Choose watermelon that feels heavy for its size. Make sure the skin is smooth and free from blemishes. For pineapple, smell the base; a sweet scent means it's ripe. Ripe mangoes should yield slightly when you press them. Strawberries should be bright red, without white tips. Pick blueberries that are firm and plump, with a deep color. This fruit salad is not just tasty; it’s also packed with nutrients. Watermelon is hydrating and low in calories. Pineapple provides vitamin C and enzymes that aid digestion. Mango is rich in antioxidants and vitamins A and C. Strawberries boost heart health due to their high fiber and vitamin C content. Blueberries are known for their powerful antioxidants. The honey adds a natural sweetness, while lime juice helps with vitamin C and adds a zesty kick. Each bite not only delights your taste buds but also nourishes your body. First, gather all your fruits. You will need watermelon, pineapple, mango, strawberries, and blueberries. Wash each fruit well to remove any dirt. Dice the watermelon into cubes. Cut the pineapple and mango into small pieces. Hull and slice the strawberries. Finally, add the blueberries. Place all the fruit into a large mixing bowl. Be gentle while mixing to keep the fruit intact. In a separate small bowl, combine one tablespoon of honey with two tablespoons of freshly squeezed lime juice. Add one teaspoon of finely grated lime zest for extra flavor. Whisk the mixture together until it is smooth and well-blended. This honey lime dressing will add a sweet and tangy flavor to your salad. Now, drizzle the honey lime dressing over the fruit. Make sure to cover every piece of fruit for the best taste. Use a gentle motion to toss the salad. This helps the dressing coat all the fruit without mashing it. Let the salad sit for about 10 minutes. This resting time allows the flavors to blend well. When ready to serve, garnish with fresh mint leaves. This adds a lovely touch to your fruit salad. Enjoy your Honey Lime Fruit Salad Delight! For a full recipe, visit the [Full Recipe]. Cutting fruit can be fun and easy. Start with a sharp knife for safety. For watermelon, slice it in half. Then, cut each half into thick wedges. Remove the rind and dice the flesh into cubes. Pineapple is best peeled and cored first. Cut the fruit into thick slices, then dice. For strawberries, remove the green tops and slice them. Keep your cuts even for a pretty look. You can add more fun to the salad. Try adding a splash of orange juice. This will give it a citrus twist. You can also mix in a pinch of cinnamon for warmth. Chopped nuts like almonds or walnuts add crunch. If you like creamy, add a dollop of yogurt. These extra flavors make the salad pop! Make your fruit salad shine with great presentation. Use a clear glass bowl to show off the colors. You can layer the fruits for a rainbow effect. Garnish with mint leaves on top for a fresh touch. A few extra blueberries scattered around add visual flair. Serve with colorful spoons for added fun. Remember, we eat with our eyes first! {{image_4}} You can switch up fruits in your Honey Lime Fruit Salad. Try using peaches or nectarines for a juicy twist. Grapes add a nice pop, and kiwi brings a tart flavor. You might also add oranges for an extra citrus kick. Mix and match based on your taste! Change your fruit salad with the seasons. In summer, use berries and stone fruits for freshness. Fall is great for apples and pears, while winter calls for citrus fruits like clementines and grapefruits. Spring gives you the chance to add strawberries and rhubarb for a bright taste. Add nuts or seeds for a crunchy texture. Almonds and walnuts are perfect options. If you prefer seeds, sprinkle in some pumpkin or sunflower seeds. These additions not only improve texture, but they also boost the nutrition of your salad. Enjoy the added flavor and health benefits! Store leftover honey lime fruit salad in an airtight container. This keeps the fruit fresh and tasty. If you can, eat it within a day or two. The longer it sits, the softer the fruit may get. I recommend using glass or plastic containers with tight-fitting lids. These help lock in moisture and prevent spills. If you have smaller portions, use smaller containers for easy access. The salad stays fresh for about two days in the fridge. Keep it away from foods with strong odors. To refresh the taste, add a little more honey or lime juice before serving. If you notice any browning, remove those pieces before enjoying. For the full recipe, make sure to check the main article! Yes, you can make Honey Lime Fruit Salad a few hours ahead. However, I recommend serving it fresh. If you prepare it too early, the fruit may get soft and lose its crunch. If you decide to make it ahead, store it in the fridge. This keeps it cool and fresh. Just remember to add the dressing right before serving to keep the fruit juicy. The best fruits for Honey Lime Fruit Salad are those that are ripe and sweet. I love using: - Watermelon - Pineapple - Mango - Strawberries - Blueberries These fruits blend well together, creating a vibrant and tasty mix. You can also try using kiwi or grapes for extra flavor. The key is to choose fruits that you enjoy and that are in season. Yes, you can use another sweetener if you prefer. Options include agave syrup or maple syrup. These sweeteners work great in the dressing. Just keep in mind that the flavor may change slightly. I suggest starting with the same amount as the honey. You can always adjust it to your taste. For a sugar-free option, consider using a sugar substitute that you like. In this blog post, we explored how to make a tasty Honey Lime Fruit Salad. We discussed the key ingredients, tips for selecting fresh fruits, and the nutritional benefits they offer. You learned step-by-step instructions for preparation, dressing, and serving. We also shared tips for cutting fruits and enhancing flavor. Plus, variations for using different fruits and tips for storage were provided. Creating this salad is simple and rewarding. Enjoy it yourself or share it with friends. It’s a fun and healthy treat everyone will love.](https://dishtreats.com/wp-content/uploads/2025/07/a7fe8aa9-0619-4c4c-8a63-94d099c8a4d2-768x768.webp)