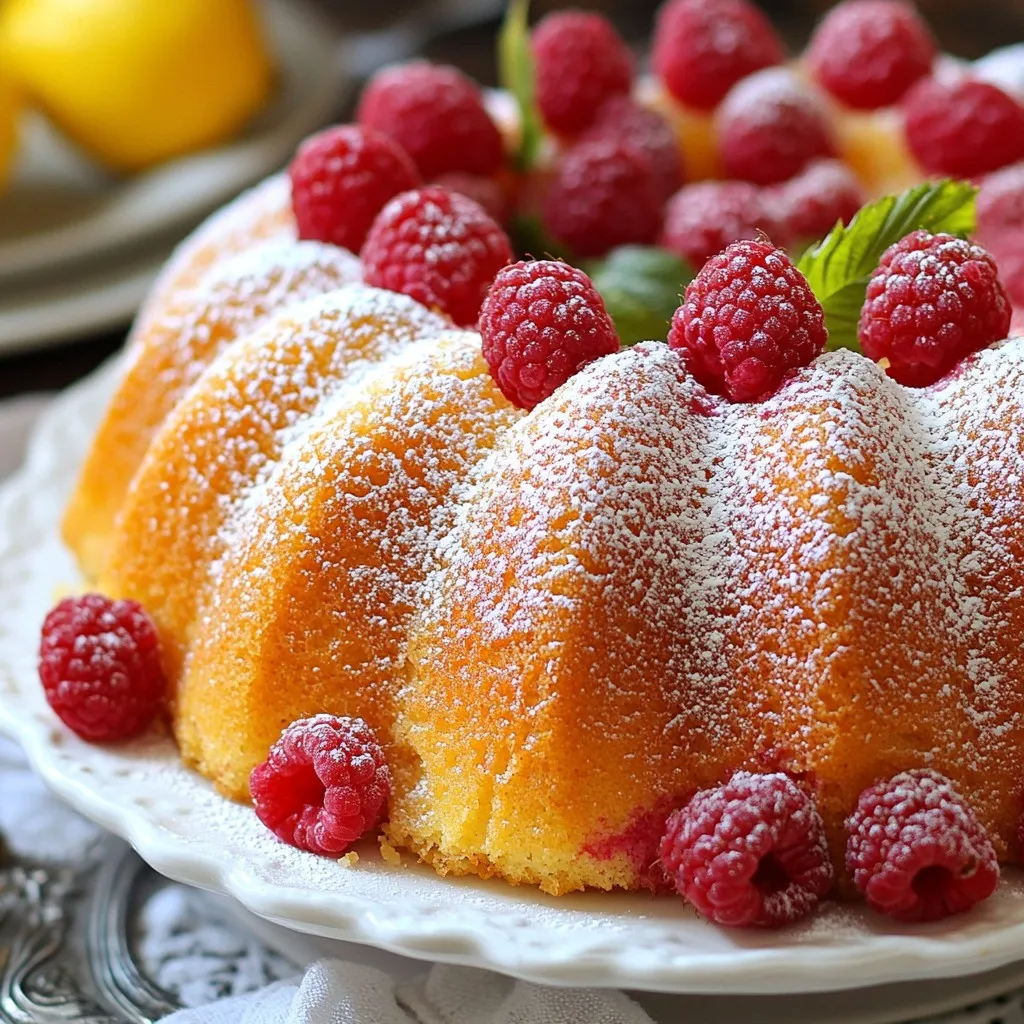
Looking for a bright and tasty treat? Dive into my Raspberry Lemon Bundt Cake! This recipe combines sweet raspberries and zesty lemon for a refreshing dessert. Whether you’re hosting a party or just want something special, this cake shines. With easy steps, tips, and variations, you’ll master baking it in no time. Let’s explore how to create this delightful cake that’s sure to impress your friends and family!
Why I Love This Recipe
- Bright and Zesty Flavor: This cake combines the tartness of raspberries with the refreshing zing of lemon, creating a delightful explosion of flavors in every bite.
- Moist and Tender Texture: The addition of sour cream ensures that the cake remains incredibly moist, while the creaming of butter and sugar adds an airy lightness.
- Perfect for Any Occasion: Whether it’s a summer gathering or a cozy family dessert, this Bundt cake is versatile enough to suit any celebration.
- Eye-Catching Presentation: The vibrant color of raspberries against the golden cake makes for a stunning centerpiece that will impress your guests.
Ingredients
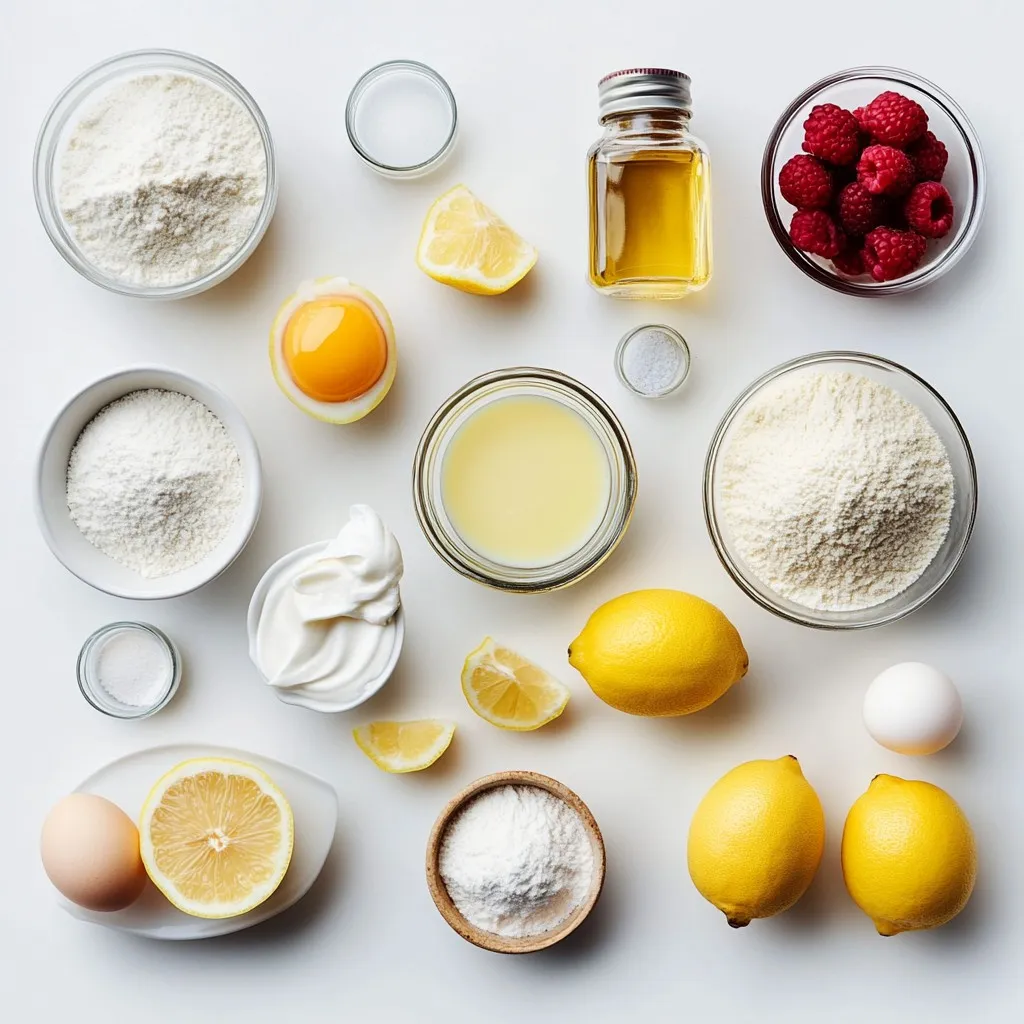
List of Ingredients
To make the Raspberry Lemon Bundt Cake, gather these ingredients:
– 2 cups all-purpose flour
– 1 ½ teaspoons baking powder
– ½ teaspoon baking soda
– ½ teaspoon salt
– 1 cup unsalted butter, softened
– 1 ½ cups granulated sugar
– 3 large eggs, at room temperature
– 2 teaspoons pure vanilla extract
– Zest of 1 medium lemon
– 1 cup sour cream, at room temperature
– 1 cup fresh raspberries (plus extra for garnish)
– ¼ cup freshly squeezed lemon juice
Optional Ingredients for Garnishing
You can add a special touch with these items:
– Powdered sugar for dusting
– Fresh raspberries for topping
– Mint sprigs for a pop of color
Recommended Baking Tools
To bake this cake perfectly, you will need:
– A 10-cup Bundt pan
– An electric mixer
– Mixing bowls (one large and one medium)
– A whisk for dry ingredients
– A spatula for folding in raspberries
– A wire rack for cooling
– A toothpick to check for doneness
Step-by-Step Instructions
Prepping the Oven and Bundt Pan
Preheat your oven to 350°F (175°C). Grease a 10-cup Bundt pan well. Use baking spray or butter. Make sure to coat all the nooks. This helps the cake come out easily later.
Preparing the Dry Ingredients
In a medium bowl, mix together the all-purpose flour, baking powder, baking soda, and salt. Use a whisk to blend it all well. Set this bowl aside for later.
Creaming the Butter and Sugar
In a large bowl, place the softened butter and granulated sugar. Use an electric mixer at medium speed. Mix for 3-4 minutes until it looks light and fluffy. This step is key for a soft cake.
Incorporating Eggs and Flavorings
Add the eggs one at a time. Mix well after each egg. Then, add the vanilla extract and lemon zest. Mix just until everything is combined.
Combining Wet and Dry Ingredients
Slowly fold the dry mixture into the wet mixture. Alternate with the sour cream. Start with some flour, then add sour cream. Keep mixing until just combined. This keeps the cake tender.
Adding Raspberries and Lemon Juice
Gently fold in the fresh raspberries and lemon juice. Use a spatula to mix. Be careful not to smash the raspberries. You want them spread out in the batter.
Baking and Cooling the Cake
Pour the batter into your prepared Bundt pan. Smooth the top with a spatula. Place the pan in the oven and bake for 45-55 minutes. The cake is ready when a toothpick comes out clean.
Finishing Touches and Serving
Once baked, take the pan out of the oven. Let it cool for 10 minutes in the pan. Then, invert it onto a wire rack. Once cool, dust the top with powdered sugar. Add more fresh raspberries on top before serving.
Tips & Tricks
Tips for Perfectly Baking Bundt Cakes
To bake a great Bundt cake, start with a hot oven. Preheat it to 350°F (175°C). Grease the pan well. Use baking spray or butter to coat all sides. This helps the cake slide out easily.
How to Ensure Even Baking
Check that your oven heats evenly. Place the Bundt pan in the center of the oven. This helps the cake bake evenly. Rotate the pan halfway through baking for best results.
Common Mistakes to Avoid
Avoid over-mixing your batter. Mix just until you see no dry flour. Over-mixing can make the cake tough. Also, don’t skip the resting time after baking. This helps it cool down and set properly.
Pro Tips
- Room Temperature Ingredients: Ensure that your butter, eggs, and sour cream are at room temperature before mixing. This helps create a smoother batter and a more evenly baked cake.
- Gentle Folding: When adding raspberries to the batter, fold gently to avoid breaking them apart. This preserves their shape and ensures bursts of flavor in every slice.
- Check for Doneness: Ovens can vary, so start checking for doneness a few minutes before the recommended baking time. A toothpick should come out clean or with a few moist crumbs.
- Cooling Time: Allow the cake to cool in the pan for at least 10 minutes before inverting. This helps prevent it from sticking and ensures a clean release.
Variations
Substituting Ingredients for Different Flavors
You can swap some ingredients to create new flavors. For a berry twist, try blueberries or blackberries. If you want something tropical, add coconut flakes. These changes will give your cake a unique taste. Just remember to keep the same amounts for the wet and dry ingredients.
Using Frozen Raspberries
If fresh raspberries are not available, frozen ones work great. Use them straight from the freezer. Do not thaw them first, as this can make the batter too wet. Fold them in gently to keep them whole. This will ensure that your cake still has bursts of raspberry flavor.
Adding a Lemon Glaze
A lemon glaze can add a sweet and tangy kick. To make it, mix powdered sugar and lemon juice until smooth. Drizzle the glaze over the cooled cake. This will make it shine and enhance the lemon flavor. You can also sprinkle some zest on top for extra flair.
Storage Info
How to Store Leftover Cake
To store leftover Raspberry Lemon Bundt Cake, wrap it tightly in plastic wrap. This keeps the cake moist and fresh. You can also place it in an airtight container. Store it at room temperature for up to three days. If you live in a hot climate, keep it in the fridge.
Freezing Bundt Cake
Freezing the Bundt cake is easy. First, let the cake cool completely. Then, wrap it in plastic wrap and foil. This helps prevent freezer burn. You can freeze it for up to three months. When ready to eat, thaw it overnight in the fridge.
Reheating Tips
If you want to enjoy the cake warm, you can reheat it. Preheat your oven to 350°F (175°C). Place the cake on a baking sheet. Cover it with foil to keep it moist. Heat for about 10-15 minutes. Check if it’s warm in the center before serving.
FAQs
Can I use a different fruit instead of raspberries?
Yes, you can swap raspberries for other fruits. Blueberries, blackberries, or chopped strawberries work well. Each fruit adds its own flavor and color. Just make sure to adjust the sweetness based on the fruit’s natural sugar.
How long does the cake last at room temperature?
The Raspberry Lemon Bundt Cake stays fresh for about 3 days at room temperature. Keep it in an airtight container to help it stay moist. If your kitchen is warm, consider refrigerating it to keep it fresh longer.
Is it necessary to use sour cream?
Sour cream adds moisture and richness. It helps create a tender crumb in your cake. If you don’t have sour cream, you can substitute with plain yogurt. Both options give the cake a nice taste and texture.
Can I make this cake in advance?
Yes, you can bake the cake a day or two ahead of time. Just let it cool completely before wrapping it tightly in plastic wrap. This keeps it fresh until you’re ready to serve.
What can I pair with Raspberry Lemon Bundt Cake for serving?
Pair the cake with whipped cream or a scoop of vanilla ice cream. Fresh mint leaves add a lovely touch, too. You can also drizzle some lemon glaze on top for extra zing. Enjoy!
You now have all the tools to make a delicious raspberry lemon Bundt cake. We covered the key ingredients, step-by-step baking instructions, and tips for perfect results. You also learned about tasty variations and how to store leftovers.
Remember, baking is fun, so don’t hesitate to try new flavors. Enjoy sharing your cake with family and friends. Happy bakin


