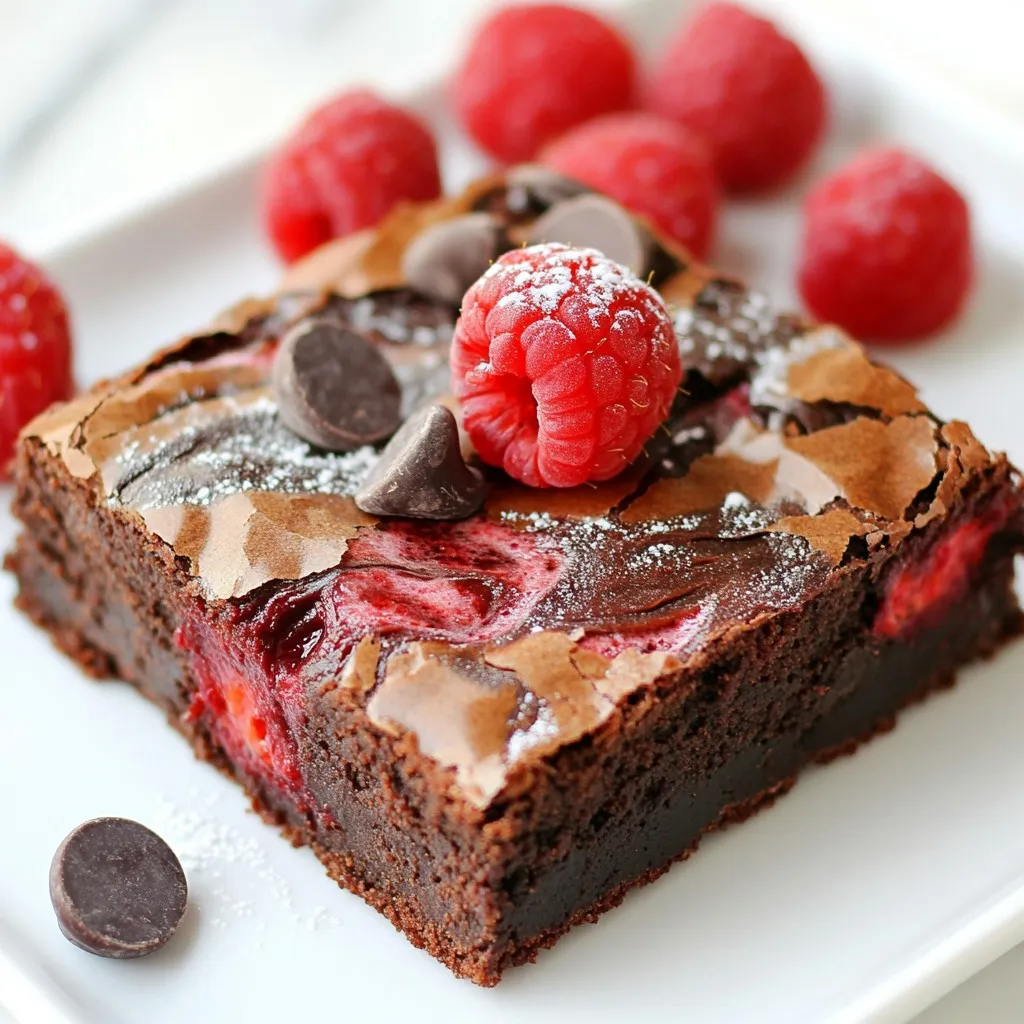
Craving a sweet treat that’s rich and fudgy? Look no further! These Raspberry Chocolate Swirl Brownies combine rich chocolate with fresh raspberries for a burst of flavor in every bite. In this post, I’ll guide you step-by-step, sharing tips for perfecting the texture and flavor. Get ready to delight your taste buds and impress your friends with this easy recipe that’s perfect for any occasion!
Why I Love This Recipe
- Decadent Flavor: The combination of rich chocolate and tart raspberries creates a perfectly balanced dessert that is both indulgent and refreshing.
- Easy Preparation: With simple ingredients and straightforward steps, these brownies are quick to whip up, making them ideal for both novice and experienced bakers.
- Beautiful Presentation: The marbled effect of the raspberries swirling through the chocolate batter not only looks stunning but also adds an artistic touch to your dessert table.
- Versatile Treat: These brownies are perfect for any occasion, whether it’s a family gathering, a picnic, or simply a cozy night in with a movie.
Ingredients
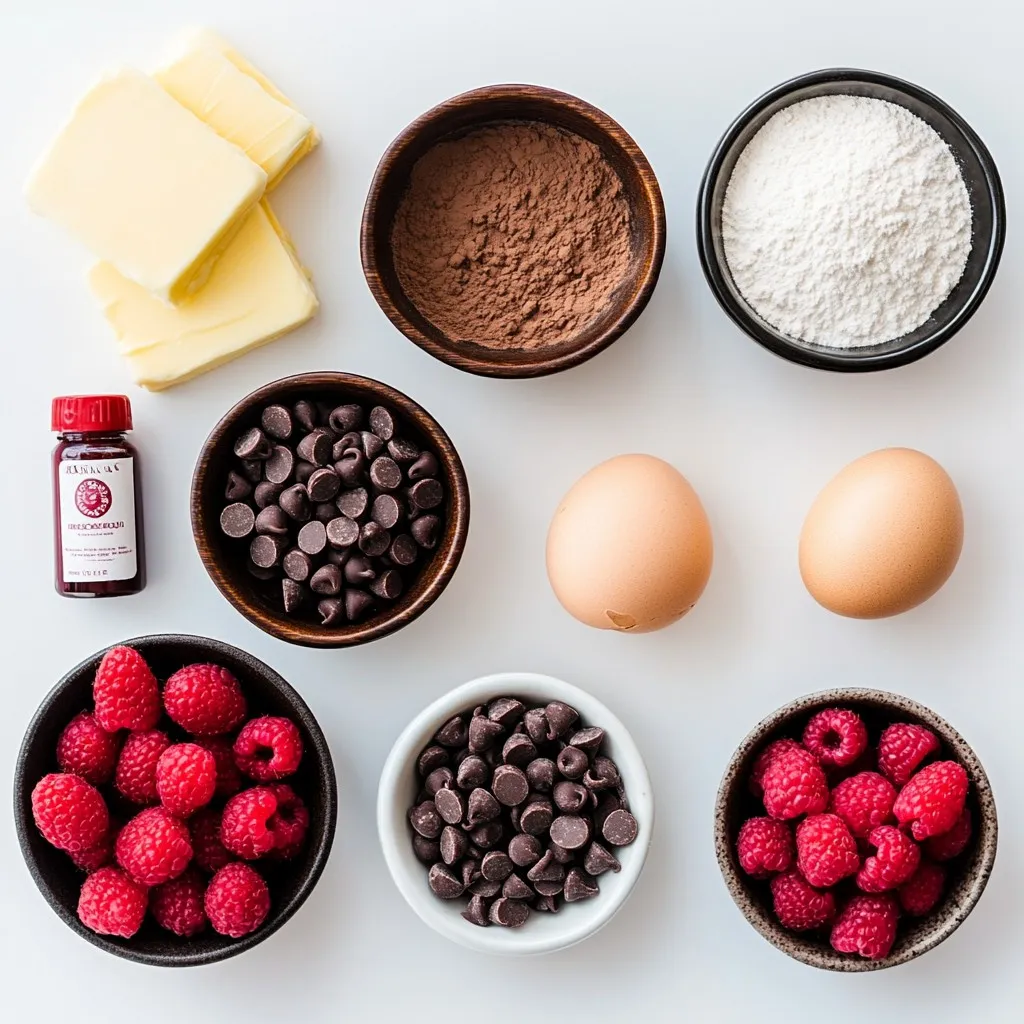
List of Ingredients
– 1 cup unsalted butter
– 2 cups granulated sugar
– 4 large eggs
– 1 teaspoon vanilla extract
– 1 cup all-purpose flour
– 1 cup unsweetened cocoa powder
– 1/2 teaspoon salt
– 1 cup fresh raspberries
– 1/2 cup semi-sweet chocolate chips
When I make these Raspberry Chocolate Swirl Brownies, I love using fresh raspberries. They add a burst of flavor and a lovely tartness. You can also use frozen raspberries if you can’t find fresh ones. Just remember to thaw and drain them first.
Ingredient Substitutions
– You can swap unsalted butter for coconut oil or margarine. Both work well in this recipe.
– If you want a healthier option, you can use coconut sugar or honey instead of granulated sugar.
– If you use frozen raspberries, make sure to thaw and drain them well. This helps keep the batter from getting too wet.
These substitutions can help you make the brownies fit your taste or dietary needs. Enjoy getting creative with the ingredients!
Step-by-Step Instructions
Preparation Tips
– Prepping the baking pan: Start by preheating your oven to 350°F (175°C). Then, get a 9×13-inch baking pan. Grease it lightly or line it with parchment paper. This helps the brownies come out easily.
– Melting butter correctly: Use a large saucepan to melt 1 cup of unsalted butter over medium heat. Stir it gently until it turns completely liquid. Remove it from heat right after it melts.
Mixing the Batter
– Combining wet and dry ingredients: In your melted butter, add 2 cups of granulated sugar. Stir it well until the mixture is smooth. Next, add 4 large eggs one at a time. Mix well after each egg. Then, add 1 teaspoon of vanilla extract for extra flavor.
– Ensuring the right consistency: In a separate bowl, sift together 1 cup of all-purpose flour, 1 cup of unsweetened cocoa powder, and 1/2 teaspoon of salt. Gradually fold this dry mix into your wet ingredients using a spatula. Mix gently until just combined. Be careful not to overmix.
Layering and Swirling
– Techniques for spreading batter: Spread half of the brownie batter evenly in the bottom of the prepared pan. This forms your first layer.
– Creating the marble effect with raspberries: In a small bowl, mash 1 cup of fresh raspberries lightly with a fork. Leave some whole for texture. Drizzle the mashed raspberries over the first layer of batter. Then, spoon the remaining batter over the raspberry layer. Use a spatula to spread it carefully.
Baking Details
– Best practices for accurate baking times: Bake your brownies in the preheated oven for 25-30 minutes.
– How to test for doneness: To see if they are done, insert a toothpick into the center. It should come out with a few moist crumbs, not wet batter.
Tips & Tricks
Perfecting the Brownies
To perfect your brownies, avoid overmixing. When you mix the dry and wet ingredients, do it gently. Mix just until you see no dry flour. This keeps your brownies nice and fudgy. Overmixing can make them tough and dry.
For that perfect fudgy texture, check your baking time. Bake until a toothpick comes out with a few moist crumbs. This means they are ready but still soft. Let them cool in the pan for the best results.
Additional Flavor Enhancements
You can enhance the flavor with extracts. Try almond or coffee for new tastes. Just a little goes a long way.
Adding nuts or more chocolate can change the game. Chopped walnuts or pecans add crunch. You can also fold in more chocolate chips for extra richness.
Serving Suggestions
For a beautiful presentation, serve the brownies warm. Drizzle some raspberry sauce or chocolate sauce on top. This adds color and flavor.
You can pair the brownies with ice cream. Vanilla or raspberry ice cream works great. A sprinkle of powdered sugar adds a nice touch, too!
Pro Tips
- Use Room Temperature Ingredients: Ensuring your eggs and butter are at room temperature helps create a smoother batter, which results in a more even bake and better texture.
- Don’t Overmix the Batter: Mixing just until combined will keep the brownies fudgy and prevent them from becoming tough. A few lumps are perfectly fine!
- Experiment with Different Berries: If raspberries aren’t your favorite, try substituting with blueberries or strawberries for a delicious twist on this brownie recipe.
- Cool Completely Before Cutting: Allowing the brownies to cool in the pan ensures they set properly, making it easier to cut them into neat squares without crumbling.
Variations
Flavor Combinations
You can make your Raspberry Chocolate Swirl Brownies even more fun. One great idea is to add peanut butter or caramel swirls. Just drop spoonfuls of peanut butter or caramel into the batter. Then, use a knife to swirl it in. This adds a rich, nutty taste or a sweet kick.
You can also mix in other fruits. Think about adding chopped strawberries or blueberries. They bring a fresh twist and color to your brownies. Just remember to adjust the amount of fruit so it fits well in the batter.
Dietary Adjustments
Making these brownies fit different diets is easy. For a gluten-free version, swap the all-purpose flour for a gluten-free blend. Look for blends that work well in baking. They help you keep that fudgy texture.
If you want a vegan treat, replace the eggs with flaxseed meal or applesauce. Use a vegan butter or coconut oil instead of regular butter. You can also choose dairy-free chocolate chips for a fully vegan option. This way, everyone can enjoy your delicious brownies.
Storage Info
Storing Leftovers
To keep your brownies fresh, store them in an airtight container. This helps prevent them from drying out. You can keep them at room temperature for up to three days. If you want them to last longer, refrigerate them. They can stay good in the fridge for about a week. For even longer storage, freeze the brownies. Wrap them tightly in plastic wrap and then place them in a freezer-safe bag. They can last for about three months in the freezer.
Reheating Techniques
When you’re ready to enjoy your brownies again, reheating is easy. You can use the microwave for quick warming. Heat them in 10-second bursts until warm. If you prefer a crispy edge, use the oven. Preheat it to 350°F (175°C). Place the brownies on a baking sheet and warm them for about 5-10 minutes.
After reheating, serve them warm. Adding a scoop of ice cream on top makes it even better. You can also drizzle some chocolate or raspberry sauce for an extra treat. Enjoy the rich and fudgy flavor!
FAQs
How long do Raspberry Chocolate Swirl Brownies last?
Raspberry Chocolate Swirl Brownies last about 3 to 5 days when stored correctly. Keep them in an airtight container at room temperature. If you want them to last longer, you can refrigerate them for up to a week. Just make sure to let them come to room temperature before serving.
Can I use frozen raspberries in the recipe?
Yes, you can use frozen raspberries! Just make sure to thaw and drain them first. This helps avoid excess moisture in your brownies. The flavor will still be great, and they will look lovely.
What can I substitute for cocoa powder?
If you need a substitute for cocoa powder, try using carob powder. It has a similar flavor and works well in brownies. Another option is to use unsweetened chocolate. Just melt it and add more sugar to balance the sweetness.
How do I know when my brownies are done baking?
To check if your brownies are done, insert a toothpick into the center. It should come out with a few moist crumbs but not wet batter. If it comes out clean, they may be overbaked.
Can I make these brownies in advance?
Yes, you can make Raspberry Chocolate Swirl Brownies in advance. Bake them, let them cool, and store them in an airtight container. They taste great after a day or two, allowing the flavors to meld. Enjoy them fresh or at room temperature!
Raspberry chocolate swirl brownies are easy and fun to make. We covered the key ingredients and offered substitutions for a healthier twist. I shared step-by-step instructions to help you mix, bake, and serve these brownies perfectly. You can even explore delicious variations and smart storage tips.
Enjoying these brownies with ice cream can elevate your treat. Don’t be afraid to experiment with flavors and tweaks. Now, go bake and savor these rich, fudgy delight


