Are you ready to brighten up your snack time? Rainbow Veggie Spring Rolls are not just fun to eat; they’re packed with fresh flavors and healthy goodness. With vibrant colors and crisp veggies like red cabbage, carrots, and avocado, these rolls are a feast for your eyes and your taste buds. In this post, I’ll guide you through every step to make these delightful snacks, perfect for any occasion!
Ingredients
List of Fresh Vegetables
– Red cabbage
– Carrots
– Cucumber
– Red bell pepper
– Avocado
Other Essential Ingredients
– Rice paper wrappers
– Fresh mint and cilantro leaves
– Peanut butter
– Soy sauce
– Lime juice
– Honey or agave syrup
– Sesame seeds for garnish
Step-by-Step Instructions
Preparing the Vegetable Filling
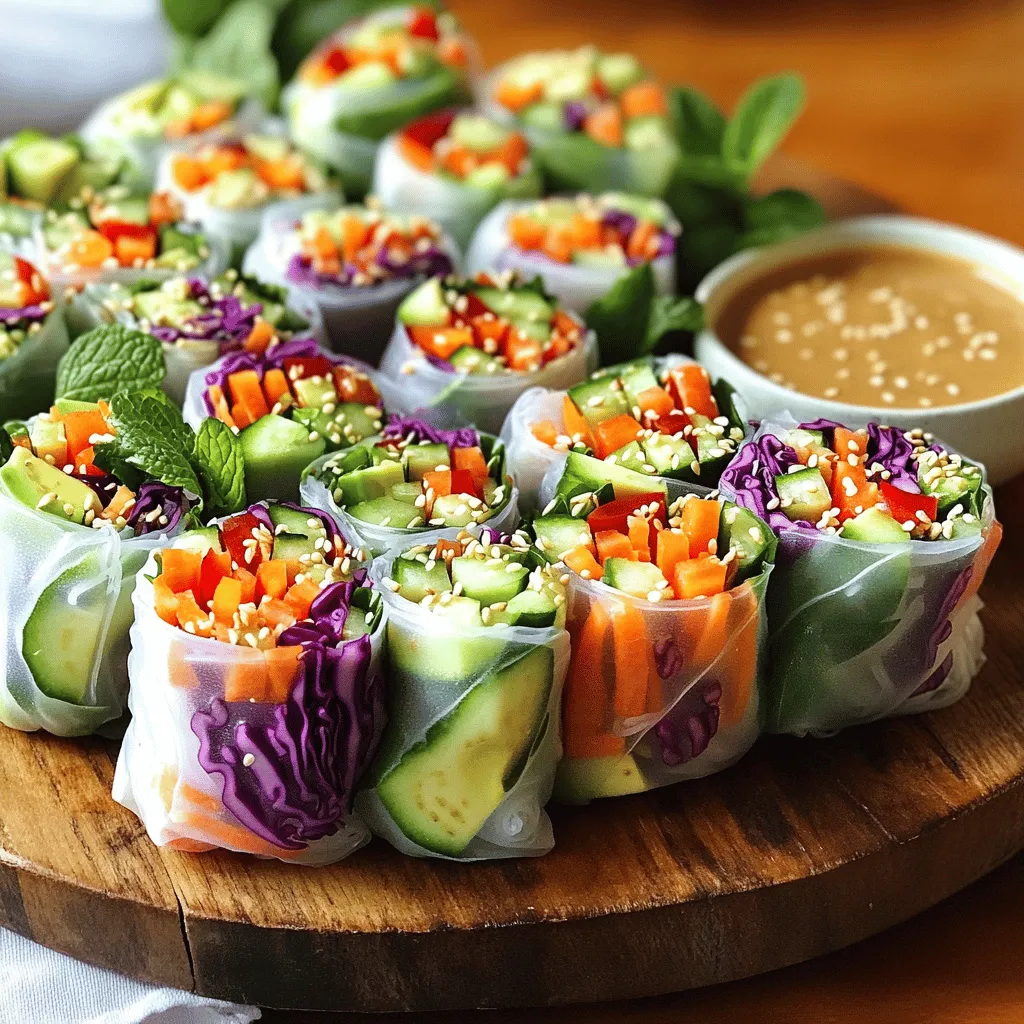
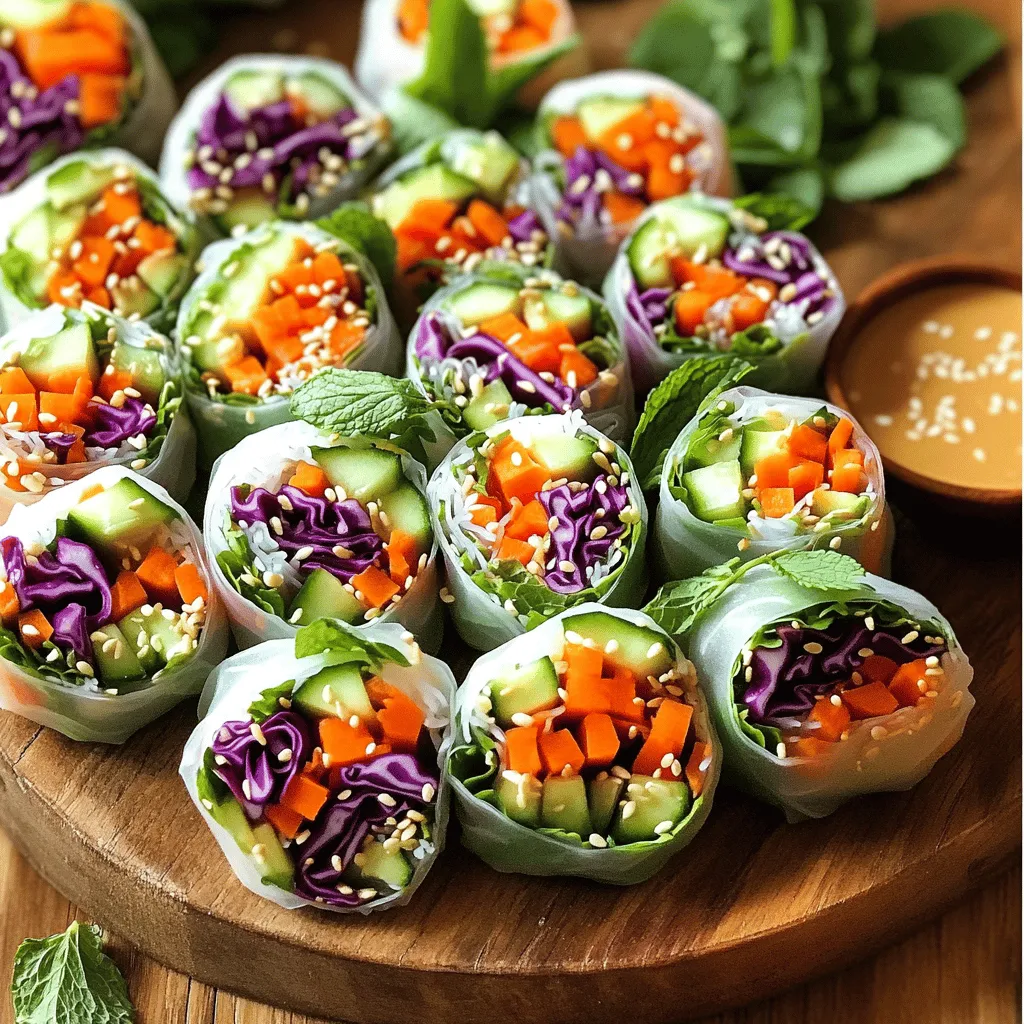
To start, prepare the vegetable filling. Take a large bowl and add all your fresh veggies. Use one cup of red cabbage, one cup of julienned carrots, one cup of julienned cucumber, and one cup of thinly sliced red bell pepper. Finally, add one ripe avocado, sliced. Gently toss these vibrant veggies together. This step mixes the colors and keeps your filling fresh and crunchy. For cutting veggies, use a sharp knife. Thin and even cuts make for a better roll.
Making the Dipping Sauce
Now, let’s make the dipping sauce. In a small bowl, whisk together a quarter cup of smooth peanut butter, two tablespoons of low-sodium soy sauce, and one tablespoon of fresh lime juice. If you want sweetness, add one tablespoon of honey or agave syrup. Mix until the sauce is smooth and creamy. Taste it. If you want more kick, add extra lime or soy sauce.
Soften and Assemble the Rice Paper
Next, we will soften the rice paper. Fill a shallow dish with warm water. Dip one rice paper wrapper into the water for about 10-15 seconds. You want it soft and pliable. Take it out and lay it flat on a clean cutting board. Near the bottom of the wrapper, add 2-3 tablespoons of the vegetable filling. Don’t forget to add a few fresh mint and cilantro leaves on top.
To roll it up, fold the bottom of the wrapper over the filling. Tuck it in, then fold the sides to secure everything. Roll it up tightly, like a burrito. Repeat with the remaining wrappers and filling. Each roll should look colorful and inviting.
Tips & Tricks
Rolling Techniques for Perfect Spring Rolls
To roll spring rolls well, you need tight seals. Start by placing the filling close to the bottom edge. Tuck the filling in and fold the bottom over it. Fold in the sides, then roll up firmly. This keeps everything inside. For size, aim for rolls about 1-1.5 inches wide. This size is easy to eat and looks nice.
Presentation Ideas
When you arrange spring rolls, use a nice platter. Place them in a line or a circle for a neat look. You can also serve them standing up in a cup. This adds height and makes them fun to grab. For garnish, sprinkle sesame seeds on top. Fresh herbs like mint or cilantro can also add color and charm.
Storing Leftover Dipping Sauce
To store leftover dipping sauce, put it in a clean jar with a lid. It will stay fresh in the fridge for about one week. Always check for bad smells or changes in color before using it again. If it looks good and smells fine, it’s safe to eat!
Variations
Adding Protein Options
You can add shrimp or tofu to your spring rolls for a protein boost. Shrimp cooks quickly. Just boil or sauté it lightly. Tofu is a great plant-based choice. Use firm tofu, cut into strips, and sauté until golden. Both options make the rolls more filling and satisfying.
For extra protein, consider chickpeas or edamame. These are tasty and packed with nutrients. You can mix them into your veggie filling or use them alone.
Creative Filling Ideas
Think outside the box with your veggie choices! You can swap in different vegetables like bell peppers or zucchini. Try radishes for a crunchy twist.
Herbs and spices add extra flavor. Consider using basil or dill for a fresh taste. A sprinkle of chili flakes can add a nice kick. You can even add fruits like mango or pineapple for sweetness.
Vegan and Gluten-Free Adjustments
If you need to avoid common allergens, there are easy swaps. Use tamari instead of soy sauce for gluten-free needs. There are also many brands that offer gluten-free rice paper wrappers.
For vegan options, ensure your honey is replaced with agave syrup. This keeps the recipe plant-based and sweet. You can also experiment with nut butters like almond or cashew for your dipping sauce.
Serving Suggestions
Pairing with Other Dishes
To enhance your rainbow veggie spring rolls, consider these pairings:
– Complementary side dishes:
– Serve with a light salad of mixed greens.
– Pair with a refreshing fruit salad.
– Offer a bowl of edamame for a nutty crunch.
– Beverage pairings:
– Enjoy with chilled green tea for a refreshing sip.
– Try coconut water for a tropical twist.
– A light, sparkling lemonade adds zest to your meal.
Best Occasions to Serve Spring Rolls
Rainbow veggie spring rolls fit many occasions:
– Ideal settings for serving:
– Perfect for casual gatherings with friends.
– Great as a starter for dinner parties.
– Ideal for picnic lunches in the park.
– Seasonal or festive ideas:
– Serve during summer barbecues for a colorful touch.
– Great for spring celebrations or holidays.
– Ideal for a new year’s gathering to symbolize new beginnings.
How to Make a Meal Out of Spring Rolls
You can easily turn spring rolls into a full meal:
– Ideas for combining with main dishes:
– Serve alongside grilled chicken or tofu for protein.
– Pair with a warm bowl of pho for a comforting combo.
– Add a rice bowl topped with veggies for a hearty meal.
– Portion suggestions for gatherings:
– Offer 2-3 rolls per person for appetizers.
– Serve 4-5 rolls for a light meal.
– Prepare extra for guests who may want seconds.
Storage Info
Storing Leftover Spring Rolls
To keep your leftover spring rolls fresh, use an airtight container. This helps to prevent them from drying out. Place a damp paper towel inside the container. It adds moisture and keeps the rolls soft. Your spring rolls should last about 2 to 3 days in the fridge.
Freezing Spring Rolls
You can freeze spring rolls before or after you make them. If you freeze them before assembly, place the cut veggies and rice paper wrappers in separate bags. For frozen assembled rolls, wrap them tightly in plastic wrap and then in foil. When you’re ready to eat, thaw them in the fridge overnight. To reheat, use a warm pan or oven. Avoid microwaving, as it can make them soggy.
FAQs
How long do fresh spring rolls last in the fridge?
Fresh spring rolls last about 2 to 3 days in the fridge. Keep them in a sealed container to maintain freshness.
Can I make spring rolls ahead of time?
Yes, you can make spring rolls ahead of time. Just store them in the fridge. This works well for meal prep and saves time.
What can I use instead of rice paper?
If you don’t have rice paper, you can use lettuce leaves. They add a nice crunch and are a great low-carb option. Other wrappers include nori sheets or thin tortillas.
We covered how to make fresh spring rolls with vibrant veggies and tasty dips. You learned about key ingredients like rice paper, fresh herbs, and protein options. Also, we explored rolling techniques, presentation ideas, and storing tips.
In the end, spring rolls are fun and simple to customize. They can be a healthy meal or snack for any occasion. Try different flavors and presentations to make them your own! Enjoy your cooking journey!


