Are you ready to take your meal prep to the next level? These Quinoa Black Bean Stuffed Peppers are not just a treat for your taste buds; they’re nutritious and easy to make! Packed with protein and flavor, this dish will impress your family and friends alike. Join me as I guide you through making these colorful, tasty delights that are sure to be a hit at your table. Let’s get started!
Ingredients
When making Quinoa Black Bean Stuffed Peppers, you need a mix of fresh ingredients. These flavors come together to create a colorful dish that is both tasty and filling.
List of Ingredients
– 4 large bell peppers (any color of your choice)
– 1 cup cooked quinoa
– 1 can (15 oz) black beans, thoroughly rinsed and drained
– 1 cup corn (can use fresh or frozen)
Seasoning Ingredients
– 1 medium onion, finely diced
– 2 cloves garlic, minced
– 1 teaspoon ground cumin
– 1 teaspoon smoked paprika
– 1/2 teaspoon chili powder
– Salt and pepper, to taste
Toppings and Garnishes
– 1 cup diced tomatoes (canned or fresh, with juices)
– 1 cup shredded cheese (your choice of cheddar or mozzarella)
– Fresh cilantro, chopped, for garnish
– 1 tablespoon olive oil
These ingredients are easy to find and can be adjusted based on your taste. You can swap out the cheese or add more spices. I often use these flavors to make my dishes pop.
Step-by-Step Instructions
Preparation of Peppers
– Preheat the oven to 375°F (190°C).
– Slice off the tops of the bell peppers, remove seeds and membranes.
– Arrange peppers upright in a baking dish and drizzle with olive oil.
First, you need to heat your oven. This step is key for even cooking. Next, grab your bell peppers. I love using different colors for a vibrant look. Cut off the tops and scoop out the seeds and membranes. Then, place them in a baking dish. Make sure they stand up straight. A light drizzle of olive oil will add flavor and help them roast nicely.
Cooking the Filling
– Sauté diced onion in a skillet for about 5 minutes.
– Add minced garlic and cook for 1 minute.
– Combine quinoa, black beans, corn, diced tomatoes, and seasonings in skillet.
Now, let’s make the filling! Heat some olive oil in a skillet over medium heat. Add the diced onion and sauté for about five minutes. Stir until the onion turns soft and clear. Then, toss in the minced garlic and cook for just one more minute. You want it fragrant but not burnt. Next, mix in the cooked quinoa, black beans, corn, diced tomatoes, and spices. Stir everything well and let it cook for another five minutes. This melds all the flavors together.
Stuffing the Peppers
– Mix in half of the shredded cheese into the filling.
– Spoon the mixture into each bell pepper and pack tightly.
– Sprinkle remaining cheese over the tops of the stuffed peppers.
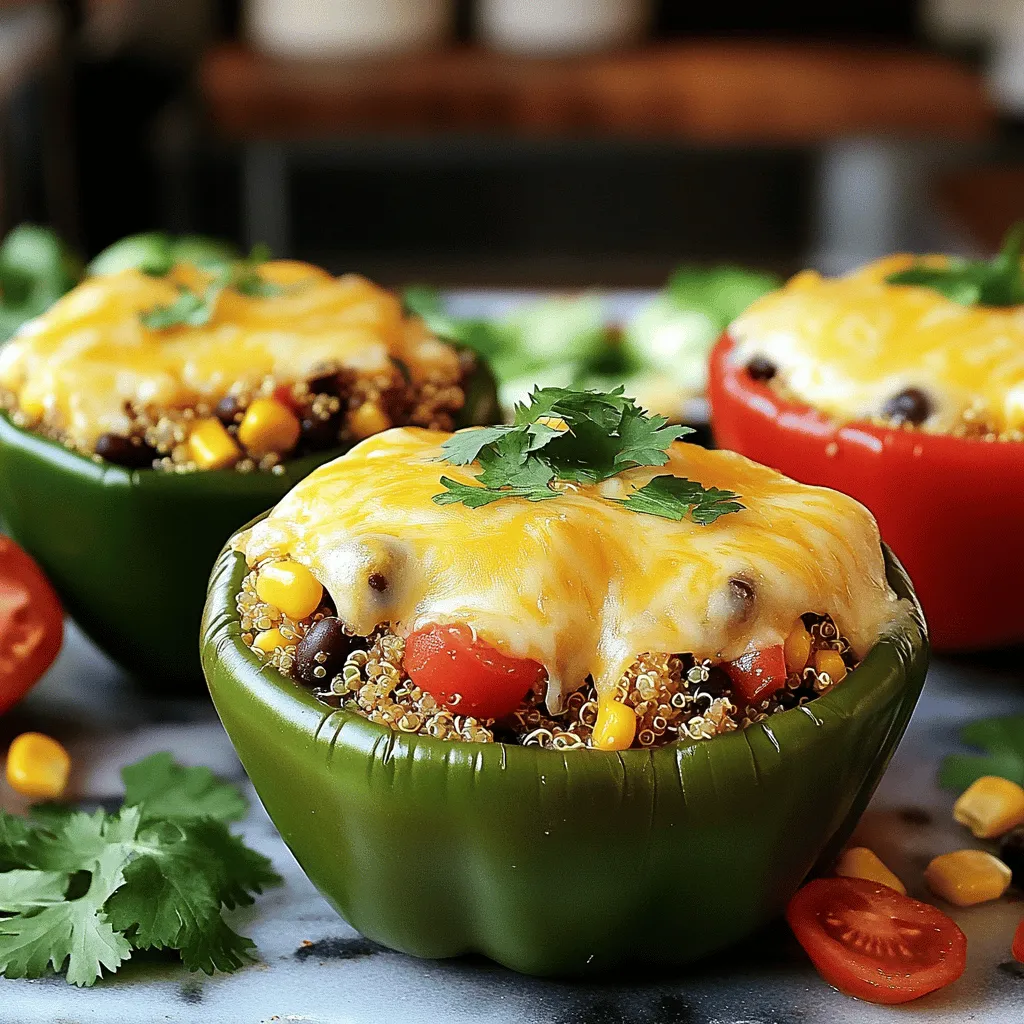
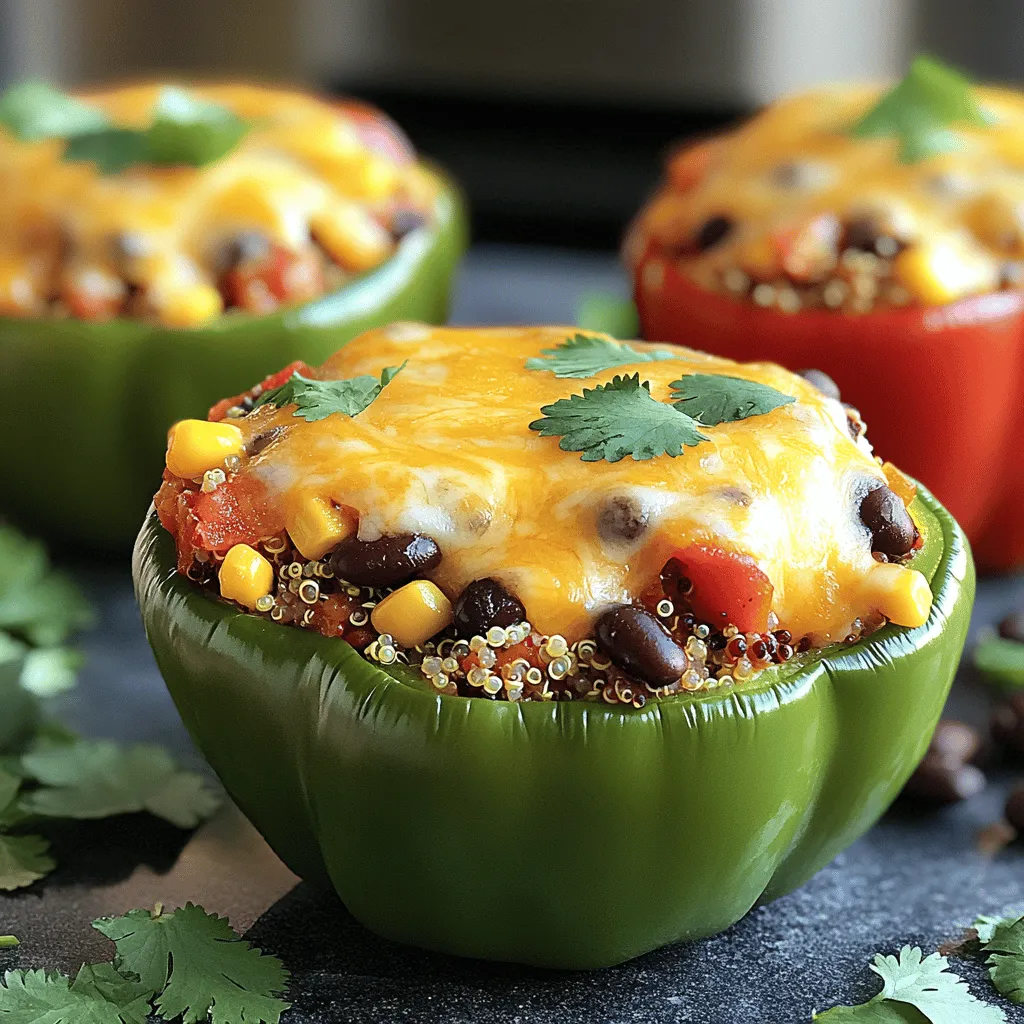
Time to stuff the peppers! Take the filling off the heat and fold in half of the shredded cheese. This helps to create a gooey texture. Now, use a spoon to fill each pepper tightly with the mixture. Pack it down so it holds its shape. Finally, sprinkle the remaining cheese on top. This will melt into a delicious crust when cooked.
Baking
– Cover baking dish with aluminum foil.
– Bake for 25 minutes, then remove foil and bake for an additional 10-15 minutes.
Cover your baking dish with aluminum foil to keep moisture in. Bake the peppers for 25 minutes. This cooks them through. After that, remove the foil and bake for another 10 to 15 minutes. You want the peppers to be tender and the cheese to be golden brown. When you pull them out, let them cool for a few minutes. Then, enjoy your flavorful quinoa black bean stuffed peppers!
Tips & Tricks
Cooking Tips
– Preheating the oven is key. It helps cook the peppers evenly. If you skip this step, your peppers might end up soggy or undercooked. Always set your oven to 375°F (190°C) before you start.
– When selecting bell peppers, look for ones that are firm and shiny. A ripe pepper should feel heavy for its size. Avoid any with soft spots or wrinkles. Different colors add fun and flavor, so choose your favorites!
Flavor Enhancements
– To boost flavor, consider adding spices like oregano or thyme. Fresh herbs like basil can also brighten the dish. A squeeze of lime juice at the end adds a nice tang.
– If you want heat, add chopped jalapeños or a dash of hot sauce. You can mix in red pepper flakes for an extra kick. Adjust the spice level to your taste!
Serving Suggestions
– These stuffed peppers pair well with a fresh salad or some rice. A side of guacamole or a dollop of sour cream can elevate the meal.
– For presentation, serve each pepper on a colorful plate. Drizzle extra diced tomatoes or salsa around the plate. This makes the dish look vibrant and inviting. Garnish with fresh cilantro to add a pop of color.
Variations
Protein Alternatives
You can swap in different plant-based proteins for this dish. Tofu or tempeh make great additions. They add texture and protein. You can also try lentils for a hearty option.
If you want to use other beans, kidney or pinto beans work well. They bring unique flavors and nutrients to the mix. You might also try chickpeas for a twist. Each option keeps the meal filling and nutritious.
Cheese Options
Cheese makes these stuffed peppers creamy and rich. You can use cheddar or mozzarella for classic flavors. However, don’t be afraid to experiment with pepper jack for some heat.
If you prefer vegan options, try cashew cheese or almond cheese. These can provide a creamy texture while keeping it plant-based. Nutritional yeast is another great choice; it adds a cheesy taste without dairy.
Additional Vegetable Options
Adding more vegetables enhances your filling. You can mix in zucchini or mushrooms for extra flavor and nutrients. Spinach or kale adds great color and vitamins too.
When you include other veggies, adjust cooking times. For denser veggies like carrots, chop them small and sauté longer. Softer veggies can go in later, just to avoid overcooking them. This way, your stuffed peppers stay bright and tasty.
Storage Info
Refrigeration
To store leftover stuffed peppers, place them in an airtight container. Make sure the peppers are completely cool before sealing. I recommend keeping them in the fridge for up to four days. This helps maintain their taste and texture. If you want to reheat them, just pop them in the microwave or oven until they are warm.
Freezing Guidelines
If you want to freeze your stuffed peppers, wrap each one tightly in plastic wrap. Then place them in a freezer-safe bag or container. They can last for up to three months in the freezer. When you are ready to eat them, thaw in the fridge overnight. Reheat in the oven at 350°F (175°C) for about 25-30 minutes for best results.
Serving After Storage
Before serving, check the peppers for freshness. If they seem dry, drizzle a bit of olive oil over them. This will help refresh their flavor. Always make sure to heat them until they are steaming hot. This ensures they are safe to eat. Enjoy your tasty Quinoa Black Bean Stuffed Peppers!
FAQs
Can I make Quinoa Black Bean Stuffed Peppers ahead of time?
Yes, you can prepare these stuffed peppers ahead of time. First, cook the filling and stuff the peppers. Then, cover and store them in the fridge for up to two days. When ready to eat, simply bake them straight from the fridge. You may need to extend the baking time by about five to ten minutes.
What can I substitute for quinoa in this recipe?
If you want to swap quinoa, consider using rice, farro, or couscous. Brown rice adds a nutty flavor. Farro is chewy and packed with nutrients. Couscous cooks quickly and is light. Each option gives the dish a different taste, so feel free to experiment.
Are these stuffed peppers gluten-free?
Yes, these stuffed peppers are gluten-free. The main ingredients, quinoa, black beans, and fresh veggies, do not contain gluten. Always check that any seasoning mixes you use are labeled gluten-free to ensure a safe meal for those with gluten sensitivity.
How can I make these stuffed peppers spicier?
To spice things up, add chopped jalapeños or serrano peppers to the filling. You can also increase the chili powder or use hot sauce. For a smoky flavor, try adding chipotle peppers in adobo sauce. Adjust the heat to your liking for a customized kick.
Can I use other types of peppers?
Absolutely! You can use poblano peppers for a deeper flavor or even mini sweet peppers for a fun appetizer. Zucchini halves also work well if you want a low-carb option. Get creative with your choice of peppers to find your favorite combination.
In this post, we covered how to make colorful quinoa black bean stuffed peppers. We discussed ingredients, cooking steps, tips for flavor, and storage options. You now have great ideas for customizations and serving suggestions.
Experiment with spices and toppings to make this dish unique. Enjoy your meal, and remember that cooking is all about having fun and sharing!


