Looking for a simple, nutritious snack? You’ve found it! These Pumpkin Protein Bites with Oats combine the warmth of pumpkin with the goodness of oats. They’re easy to make, packed with protein, and perfect for on-the-go munching. Whether you need a quick snack post-workout or a sweet treat to satisfy your cravings, this recipe has you covered. Let’s dive into the tasty details and whip up some delicious bites!
Ingredients
To make delicious pumpkin protein bites, you need simple and healthy ingredients. Here’s the list:
– 1 cup canned pumpkin puree
– 1 cup rolled oats
– 1/2 cup protein powder (you can choose vanilla or unflavored)
– 1/4 cup almond butter or peanut butter (pick your favorite)
– 1/4 cup honey or maple syrup (for natural sweetness)
– 1 teaspoon vanilla extract (pure is best)
– 1 teaspoon ground cinnamon (for warmth)
– 1/4 teaspoon ground nutmeg (for a hint of spice)
– A pinch of salt (to enhance flavors)
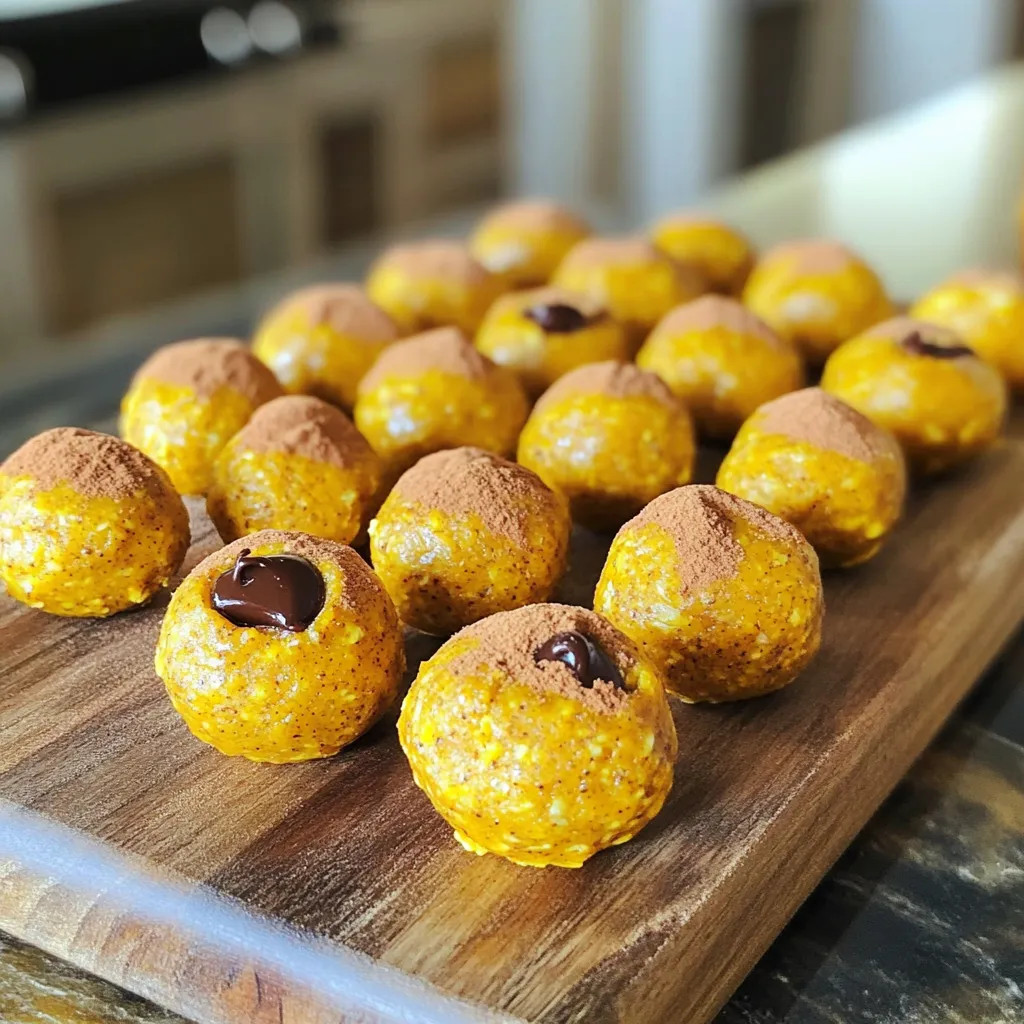
– Optional: 1/4 cup chocolate chips or chopped nuts (for extra crunch)
These ingredients come together to create a tasty snack. Each one plays a role to make these bites both nutritious and yummy. The pumpkin puree adds moisture and flavor. The oats provide fiber. The protein powder boosts the protein content. You can mix and match these ingredients to fit your taste!
Step-by-Step Instructions
Preparation of Pumpkin Mixture
– In a large bowl, mix 1 cup of canned pumpkin puree and 1/4 cup of almond or peanut butter.
– Stir them together until they blend smoothly.
– Next, add in 1/4 cup of honey or maple syrup and 1 teaspoon of vanilla extract.
– Mix everything until it is well combined and creamy.
Mixing Dry Ingredients
– In another bowl, combine 1 cup of rolled oats, 1/2 cup of protein powder, 1 teaspoon of ground cinnamon, 1/4 teaspoon of ground nutmeg, and a pinch of salt.
– Stir these dry ingredients together until they are evenly mixed.
Forming Pumpkin Bites
– Slowly add the dry mix to the pumpkin mixture.
– Stir continuously until you form a thick, uniform dough.
– If you want a crunch, fold in 1/4 cup of chocolate chips or nuts now.
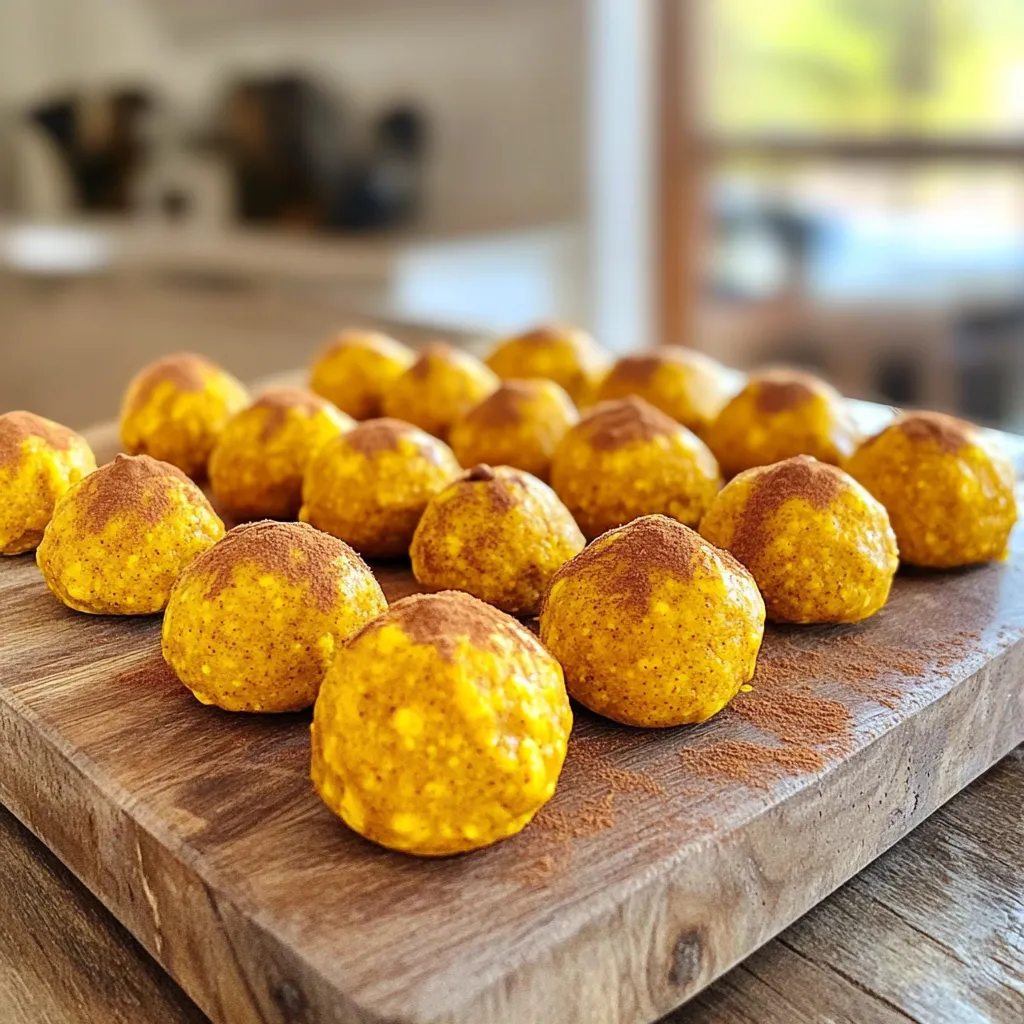
– Use your hands to shape the dough into small balls, about 1 inch wide.
– Place the formed bites on a baking sheet lined with parchment paper.
– Freeze them for about 30 minutes until firm.
– Store the bites in an airtight container. They last a week in the fridge or longer in the freezer.
Tips & Tricks
Storage Recommendations
– How to store in the fridge: Place your bites in an airtight container. They will stay fresh for up to a week. Keep them in a cool spot for best flavor.
– Freezing for longer shelf life: For longer storage, freeze the bites. Place them in a freezer-safe bag or container. They can last for up to three months in the freezer.
Serving Suggestions
– Ideas for snacking or post-workout fueling: Enjoy these bites as a quick snack. They are great after workouts for a boost of energy. You can also pack them for lunch or a road trip!
– Presentation tips for gifting: Wrap the bites in small cellophane bags. Tie with a ribbon for a thoughtful homemade gift. They look lovely and taste great, too!
Ingredient Substitutions
– Alternatives for nut butters: If you have nut allergies, use sunflower seed butter. This option works well and keeps the taste delicious.
– Sweetener options: You can swap honey for agave syrup or maple syrup. Both will keep the bites sweet and tasty without changing the texture.
Variations
Flavor Variations
You can easily change the taste of your pumpkin protein bites. Adding seeds or dried fruits boosts flavor and texture. Try sunflower seeds, chia seeds, or dried cranberries. These add a nice crunch and sweetness.
Using different spices can transform the bites. Instead of cinnamon, use ginger or allspice for a warm kick. A pinch of cloves also gives a nice twist. Don’t be afraid to experiment with flavors you love!
Dietary Adjustments
Making these bites vegan is simple. Substitute almond butter with sunflower seed butter. Use maple syrup instead of honey for sweetness. Choose a plant-based protein powder to keep it vegan.
For gluten-free bites, swap rolled oats for certified gluten-free oats. This ensures everyone can enjoy them. You can also add more protein by using hemp seeds or pea protein. These adjustments make the bites fit different diets while keeping them tasty!
Nutritional Information
Calories and Macros
These pumpkin protein bites are not only tasty but also healthy. A serving of two bites has about 150 calories. Each bite packs in:
– Protein: 5 grams
– Fat: 7 grams
– Carbohydrates: 18 grams
The protein comes from the protein powder and nut butter. The fat mainly comes from the nut butter. The oats provide complex carbs for energy.
Health Benefits
Pumpkin and oats hold many health benefits. Pumpkin is low in calories and rich in vitamins. It is high in fiber, which helps with digestion. Pumpkin also has antioxidants that support your immune system. Oats give you steady energy and keep you full longer. They help lower cholesterol and control blood sugar levels.
Serving Size Analysis
Serving size matters with snacks. Each bite is about one inch wide. It is best to eat two bites as a serving. This gives you a good mix of nutrients without overdoing it. If you want a snack, keep it to two bites. This helps with portion control, making healthy choices easier.
FAQs
How long do pumpkin protein bites last in the fridge?
Pumpkin protein bites last about one week in the fridge. Store them in an airtight container. This keeps them fresh and tasty.
Can I use fresh pumpkin instead of canned?
Yes, you can use fresh pumpkin. Cook and puree it until smooth. Make sure it isn’t too watery. Canned pumpkin is more convenient, but fresh adds great flavor.
What’s the best way to freeze pumpkin protein bites?
To freeze pumpkin protein bites, first chill them in the fridge. Once firm, place them in a single layer on a baking sheet. After they freeze, transfer them to a freezer bag. Label the bag with the date. They can last for about three months.
– Are there gluten-free options for this recipe?
Yes, you can make gluten-free pumpkin protein bites. Just choose gluten-free rolled oats. Ensure your protein powder is also gluten-free. This way, everyone can enjoy them.
– Can I make these without protein powder?
Yes, you can skip the protein powder. The bites will still taste great. You may want to add more oats or nut butter for texture. This keeps them filling and delicious.
This blog covered how to make tasty pumpkin protein bites. We looked at the key ingredients, step-by-step instructions, and helpful tips. You can store these bites and even change flavors to suit your taste. These snacks are nutritious and perfect for fueling your day. Now you’re ready to create these healthy bites and enjoy them anytime. Remember, you can make these your own by adding your favorite flavors or ingredients. Happy snacking!


