Pumpkin Pie Energy Bites Simple and Healthy Snack
![- 1 cup rolled oats - 1/2 cup canned pumpkin puree - 1/4 cup almond butter (or your choice of nut butter) - 1/4 cup honey or maple syrup - 1/2 teaspoon vanilla extract - 1 teaspoon pumpkin pie spice - Pinch of salt - 1/4 cup chopped nuts (walnuts or pecans) - 1/4 cup mini chocolate chips or raisins - Calories per serving: About 100 - Protein content: 2 grams - Fiber content: 3 grams When you gather these ingredients, you set the stage for a tasty treat. Rolled oats serve as the base, giving each bite a hearty texture. Canned pumpkin puree brings moisture and a rich flavor that screams fall. Almond butter adds creaminess and healthy fats, while honey or maple syrup sweetens the mix. The vanilla extract rounds out the flavors, and pumpkin pie spice makes everything feel festive. Optional ingredients like chopped nuts and chocolate chips offer extra crunch and sweetness. You can mix and match to fit your taste. In terms of nutrition, these bites pack a punch. Each serving gives you about 100 calories, 2 grams of protein, and 3 grams of fiber. This makes them a great snack for energy and fullness. For the complete recipe, you can check out the Full Recipe section. - In a large mixing bowl, combine: - 1 cup rolled oats - 1/2 cup canned pumpkin puree - 1/4 cup almond butter (or your choice of nut butter) - 1/4 cup honey or maple syrup - 1/2 teaspoon vanilla extract - 1 teaspoon pumpkin pie spice - Pinch of salt Mix these ingredients well. Use a spatula to ensure everything blends together. You want a sticky dough. This sticky texture helps the bites hold their shape later. If you like, fold in some extras: - 1/4 cup chopped nuts (like walnuts or pecans) - 1/4 cup mini chocolate chips or raisins Make sure to distribute these evenly. This adds crunch and sweetness. The more you mix, the better the flavors combine. Now, it’s time to shape the bites. - Scoop small portions of the mixture. - Roll each portion into 1-inch balls. Place the balls on a plate or parchment paper. Leave space between them. After shaping, refrigerate the bites for at least 30 minutes. This helps them firm up. Enjoy these tasty bites chilled or at room temperature as a quick snack! For the full recipe, check out the details above. To make great energy bites, size matters. Aim for about 1 inch for each bite. This helps them cook evenly. Use a light touch when mixing the dough. Overworking it can make them tough. Gently blend the ingredients until they come together. Want more flavor? Try making your own pumpkin pie spice. Combine cinnamon, nutmeg, and ginger to find your perfect mix. You can also adjust sweetness. Use honey or maple syrup to make them sweeter or less sweet. Taste as you go! When it's time to serve, make it pretty! Arrange your energy bites on a decorative plate. This makes them look special. Add a sprinkle of pumpkin pie spice on top for a nice touch. It looks great and adds extra flavor. For the full recipe, check out [Full Recipe]. {{image_4}} You can make your pumpkin pie energy bites even more fun with flavor twists. Try adding toasted coconut for a tropical vibe. The sweet and crunchy texture makes each bite delightful. You can also switch your nut butter. Use peanut or cashew butter instead of almond butter. Each nut brings its own taste, making the bites unique. If you need a gluten-free snack, use gluten-free oats in your mix. This small change keeps the bites delicious and safe for those with gluten sensitivities. For a vegan option, swap honey with agave nectar. This keeps your bites sweet while fitting a plant-based diet. You can tailor these bites to fit the seasons. For fall, mix in some spiced apple or cider. This adds a warm, cozy flavor that feels like autumn. For summer, a hint of citrus zest can brighten the bites. It gives them a fresh burst that’s perfect for hot days. For the full recipe, check the details above and make your own tasty energy bites! Store your pumpkin pie energy bites in an airtight container in the refrigerator. This keeps them fresh and tasty. If you plan to eat them soon, you can keep them at room temperature for short durations. Just remember, they may not last as long outside the fridge. These energy bites can last up to one week in the fridge. If you want to keep them longer, freeze them. They can stay fresh for up to three months in the freezer. Just make sure to label the container with the date you froze them. You can enjoy these bites chilled or at room temperature. They make a great snack either way! For a delightful treat, pair them with a cup of tea or coffee. The warm drink complements the tasty flavors of the bites perfectly. If you want to try a fun twist, serve them at a party on a festive plate. You can find the full recipe to make these delicious bites. To make pumpkin pie energy bites, follow these steps: 1. In a large bowl, mix rolled oats, canned pumpkin puree, almond butter, and honey. 2. Add vanilla extract, pumpkin pie spice, and a pinch of salt. 3. Stir until the mixture becomes a sticky dough. 4. Fold in chopped nuts and chocolate chips or raisins. 5. Scoop out small portions and roll them into balls, about 1 inch wide. 6. Place the bites on a plate with space between them. 7. Refrigerate for at least 30 minutes to firm up. Enjoy your tasty and healthy snack! For more details, check the Full Recipe. Yes, you can freeze these energy bites. To do this, place the bites on a baking sheet. Freeze them for about an hour until solid. Then, transfer them to a freezer bag or an airtight container. Label the bag with the date. These bites can last up to three months in the freezer. When you’re ready to eat them, just let them thaw in the fridge. Pumpkin pie energy bites have many health benefits. They are rich in fiber from the oats and pumpkin. Fiber helps with digestion and keeps you full. Almond butter provides healthy fats and protein. Honey or maple syrup adds natural sweetness without refined sugar. Pumpkin is packed with vitamins A and C, which support your immune system. Overall, these bites are a nutritious snack option. Yes, these energy bites are safe and nutritious for kids. They contain wholesome ingredients that provide energy without added sugar. Kids love the sweet taste and chewy texture. You can also let your children help make them. This way, they learn about healthy snacks. Just remember to check for any nut allergies before serving. These pumpkin pie energy bites are easy to make and fun to eat. You mix simple main ingredients like oats, pumpkin, and nut butter. Add some nuts or chocolate chips for a tasty twist. Remember to store them well to enjoy later. Whether for a snack, dessert, or lunchbox treat, these bites pack nutrition in every bite. Get creative with flavors and enjoy the flexible recipes. Healthy eating can be delicious and effortless. Make these energy bites today and see for yourself!](https://dishtreats.com/wp-content/uploads/2025/07/b18c9eee-ac7a-43cf-8a14-33dd9ccff863.webp)
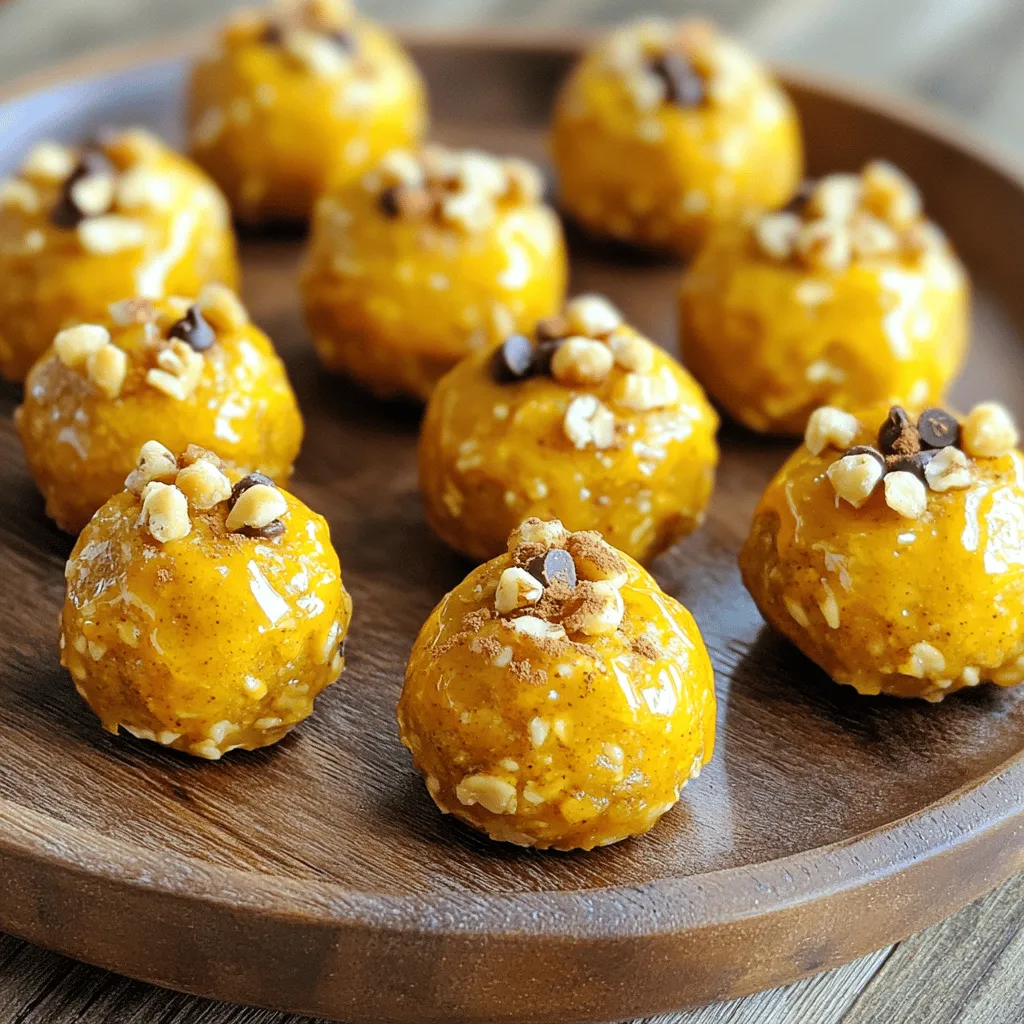
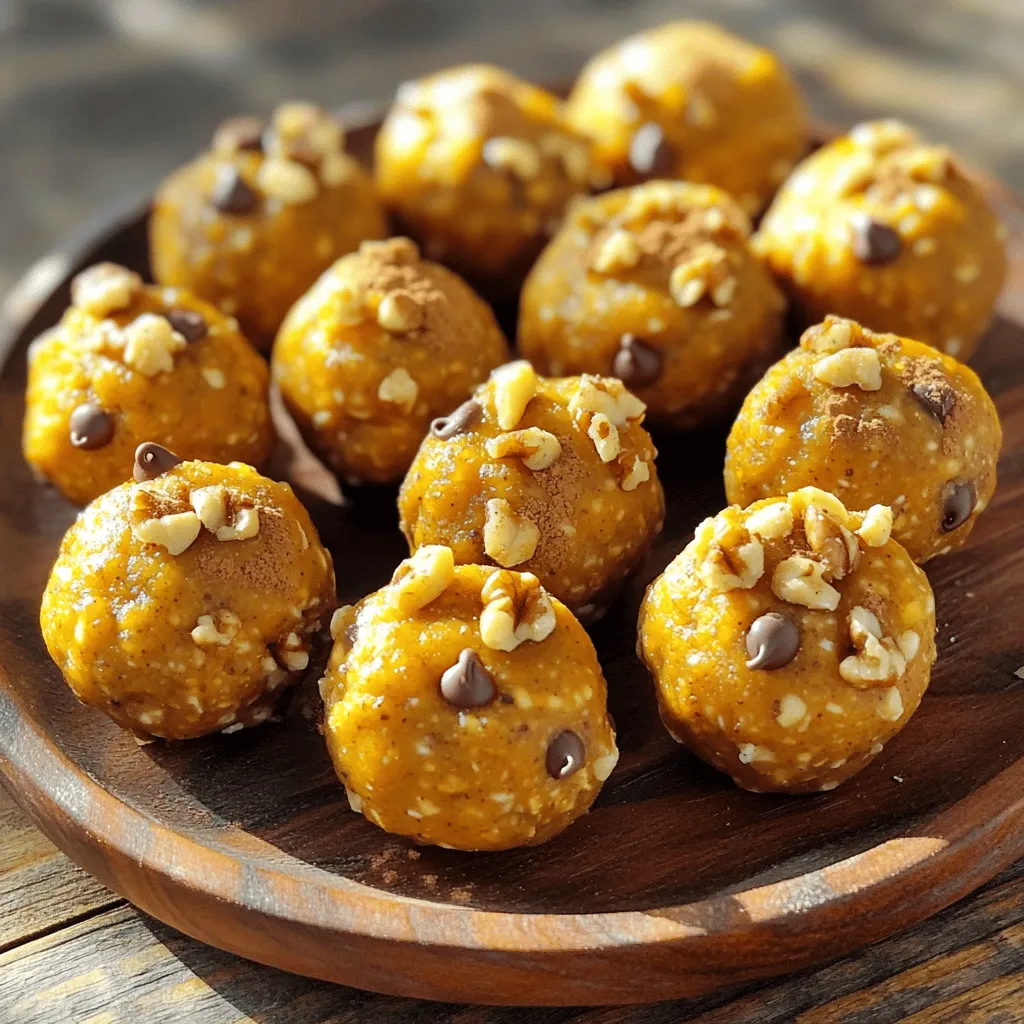
Looking for a quick snack that packs a punch? You’ll love these Pumpkin Pie Energy Bites! They’re simple to make, healthy, and delicious. With just a few ingredients, you’ll create a treat that satisfies your sweet tooth without the guilt. Whether you need a post-workout boost or an afternoon pick-me-up, these bites are perfect for any time. Let’s get started on this tasty and nutritious recipe!
Ingredients
Main Ingredients
- 1 cup rolled oats
- 1/2 cup canned pumpkin puree
- 1/4 cup almond butter (or your choice of nut butter)
- 1/4 cup honey or maple syrup
- 1/2 teaspoon vanilla extract
- 1 teaspoon pumpkin pie spice
- Pinch of salt
Optional Additions
- 1/4 cup chopped nuts (walnuts or pecans)
- 1/4 cup mini chocolate chips or raisins
Nutritional Information
- Calories per serving: About 100
- Protein content: 2 grams
- Fiber content: 3 grams
When you gather these ingredients, you set the stage for a tasty treat. Rolled oats serve as the base, giving each bite a hearty texture. Canned pumpkin puree brings moisture and a rich flavor that screams fall. Almond butter adds creaminess and healthy fats, while honey or maple syrup sweetens the mix. The vanilla extract rounds out the flavors, and pumpkin pie spice makes everything feel festive.
Optional ingredients like chopped nuts and chocolate chips offer extra crunch and sweetness. You can mix and match to fit your taste.
In terms of nutrition, these bites pack a punch. Each serving gives you about 100 calories, 2 grams of protein, and 3 grams of fiber. This makes them a great snack for energy and fullness.
Step-by-Step Instructions
Preparing the Mixture
- In a large mixing bowl, combine:
- 1 cup rolled oats
- 1/2 cup canned pumpkin puree
- 1/4 cup almond butter (or your choice of nut butter)
- 1/4 cup honey or maple syrup
- 1/2 teaspoon vanilla extract
- 1 teaspoon pumpkin pie spice
- Pinch of salt
Mix these ingredients well. Use a spatula to ensure everything blends together. You want a sticky dough. This sticky texture helps the bites hold their shape later.
Adding Optional Ingredients
If you like, fold in some extras:
- 1/4 cup chopped nuts (like walnuts or pecans)
- 1/4 cup mini chocolate chips or raisins
Make sure to distribute these evenly. This adds crunch and sweetness. The more you mix, the better the flavors combine.
Shaping and Refrigerating
Now, it’s time to shape the bites.
- Scoop small portions of the mixture.
- Roll each portion into 1-inch balls.
Place the balls on a plate or parchment paper. Leave space between them. After shaping, refrigerate the bites for at least 30 minutes. This helps them firm up. Enjoy these tasty bites chilled or at room temperature as a quick snack!
Tips & Tricks
Making the Perfect Energy Bites
To make great energy bites, size matters. Aim for about 1 inch for each bite. This helps them cook evenly. Use a light touch when mixing the dough. Overworking it can make them tough. Gently blend the ingredients until they come together.
Enhancing Flavor
Want more flavor? Try making your own pumpkin pie spice. Combine cinnamon, nutmeg, and ginger to find your perfect mix. You can also adjust sweetness. Use honey or maple syrup to make them sweeter or less sweet. Taste as you go!
Presentation Ideas
When it’s time to serve, make it pretty! Arrange your energy bites on a decorative plate. This makes them look special. Add a sprinkle of pumpkin pie spice on top for a nice touch. It looks great and adds extra flavor.

Variations
Flavor Variations
You can make your pumpkin pie energy bites even more fun with flavor twists. Try adding toasted coconut for a tropical vibe. The sweet and crunchy texture makes each bite delightful. You can also switch your nut butter. Use peanut or cashew butter instead of almond butter. Each nut brings its own taste, making the bites unique.
Dietary Substitutions
If you need a gluten-free snack, use gluten-free oats in your mix. This small change keeps the bites delicious and safe for those with gluten sensitivities. For a vegan option, swap honey with agave nectar. This keeps your bites sweet while fitting a plant-based diet.
Seasonal Adaptations
You can tailor these bites to fit the seasons. For fall, mix in some spiced apple or cider. This adds a warm, cozy flavor that feels like autumn. For summer, a hint of citrus zest can brighten the bites. It gives them a fresh burst that’s perfect for hot days.
Storage Info
Proper Storage Methods
Store your pumpkin pie energy bites in an airtight container in the refrigerator. This keeps them fresh and tasty. If you plan to eat them soon, you can keep them at room temperature for short durations. Just remember, they may not last as long outside the fridge.
Shelf Life
These energy bites can last up to one week in the fridge. If you want to keep them longer, freeze them. They can stay fresh for up to three months in the freezer. Just make sure to label the container with the date you froze them.
Reheating and Serving Suggestions
You can enjoy these bites chilled or at room temperature. They make a great snack either way! For a delightful treat, pair them with a cup of tea or coffee. The warm drink complements the tasty flavors of the bites perfectly. If you want to try a fun twist, serve them at a party on a festive plate.
FAQs
How to make pumpkin pie energy bites from scratch?
To make pumpkin pie energy bites, follow these steps:
1. In a large bowl, mix rolled oats, canned pumpkin puree, almond butter, and honey.
2. Add vanilla extract, pumpkin pie spice, and a pinch of salt.
3. Stir until the mixture becomes a sticky dough.
4. Fold in chopped nuts and chocolate chips or raisins.
5. Scoop out small portions and roll them into balls, about 1 inch wide.
6. Place the bites on a plate with space between them.
7. Refrigerate for at least 30 minutes to firm up.
Enjoy your tasty and healthy snack!
Can I freeze pumpkin pie energy bites?
Yes, you can freeze these energy bites. To do this, place the bites on a baking sheet. Freeze them for about an hour until solid. Then, transfer them to a freezer bag or an airtight container. Label the bag with the date. These bites can last up to three months in the freezer. When you’re ready to eat them, just let them thaw in the fridge.
What are the health benefits of pumpkin pie energy bites?
Pumpkin pie energy bites have many health benefits. They are rich in fiber from the oats and pumpkin. Fiber helps with digestion and keeps you full. Almond butter provides healthy fats and protein. Honey or maple syrup adds natural sweetness without refined sugar. Pumpkin is packed with vitamins A and C, which support your immune system. Overall, these bites are a nutritious snack option.
Are these energy bites suitable for kids?
Yes, these energy bites are safe and nutritious for kids. They contain wholesome ingredients that provide energy without added sugar. Kids love the sweet taste and chewy texture. You can also let your children help make them. This way, they learn about healthy snacks. Just remember to check for any nut allergies before serving.
These pumpkin pie energy bites are easy to make and fun to eat. You mix simple main ingredients like oats, pumpkin, and nut butter. Add some nuts or chocolate chips for a tasty twist. Remember to store them well to enjoy later.
Whether for a snack, dessert, or lunchbox treat, these bites pack nutrition in every bite. Get creative with flavors and enjoy the flexible recipes. Healthy eating can be delicious and effortless. Make these energy bites today and see for yourself!
![- 1 cup rolled oats - 1/2 cup canned pumpkin puree - 1/4 cup almond butter (or your choice of nut butter) - 1/4 cup honey or maple syrup - 1/2 teaspoon vanilla extract - 1 teaspoon pumpkin pie spice - Pinch of salt - 1/4 cup chopped nuts (walnuts or pecans) - 1/4 cup mini chocolate chips or raisins - Calories per serving: About 100 - Protein content: 2 grams - Fiber content: 3 grams When you gather these ingredients, you set the stage for a tasty treat. Rolled oats serve as the base, giving each bite a hearty texture. Canned pumpkin puree brings moisture and a rich flavor that screams fall. Almond butter adds creaminess and healthy fats, while honey or maple syrup sweetens the mix. The vanilla extract rounds out the flavors, and pumpkin pie spice makes everything feel festive. Optional ingredients like chopped nuts and chocolate chips offer extra crunch and sweetness. You can mix and match to fit your taste. In terms of nutrition, these bites pack a punch. Each serving gives you about 100 calories, 2 grams of protein, and 3 grams of fiber. This makes them a great snack for energy and fullness. For the complete recipe, you can check out the Full Recipe section. - In a large mixing bowl, combine: - 1 cup rolled oats - 1/2 cup canned pumpkin puree - 1/4 cup almond butter (or your choice of nut butter) - 1/4 cup honey or maple syrup - 1/2 teaspoon vanilla extract - 1 teaspoon pumpkin pie spice - Pinch of salt Mix these ingredients well. Use a spatula to ensure everything blends together. You want a sticky dough. This sticky texture helps the bites hold their shape later. If you like, fold in some extras: - 1/4 cup chopped nuts (like walnuts or pecans) - 1/4 cup mini chocolate chips or raisins Make sure to distribute these evenly. This adds crunch and sweetness. The more you mix, the better the flavors combine. Now, it’s time to shape the bites. - Scoop small portions of the mixture. - Roll each portion into 1-inch balls. Place the balls on a plate or parchment paper. Leave space between them. After shaping, refrigerate the bites for at least 30 minutes. This helps them firm up. Enjoy these tasty bites chilled or at room temperature as a quick snack! For the full recipe, check out the details above. To make great energy bites, size matters. Aim for about 1 inch for each bite. This helps them cook evenly. Use a light touch when mixing the dough. Overworking it can make them tough. Gently blend the ingredients until they come together. Want more flavor? Try making your own pumpkin pie spice. Combine cinnamon, nutmeg, and ginger to find your perfect mix. You can also adjust sweetness. Use honey or maple syrup to make them sweeter or less sweet. Taste as you go! When it's time to serve, make it pretty! Arrange your energy bites on a decorative plate. This makes them look special. Add a sprinkle of pumpkin pie spice on top for a nice touch. It looks great and adds extra flavor. For the full recipe, check out [Full Recipe]. {{image_4}} You can make your pumpkin pie energy bites even more fun with flavor twists. Try adding toasted coconut for a tropical vibe. The sweet and crunchy texture makes each bite delightful. You can also switch your nut butter. Use peanut or cashew butter instead of almond butter. Each nut brings its own taste, making the bites unique. If you need a gluten-free snack, use gluten-free oats in your mix. This small change keeps the bites delicious and safe for those with gluten sensitivities. For a vegan option, swap honey with agave nectar. This keeps your bites sweet while fitting a plant-based diet. You can tailor these bites to fit the seasons. For fall, mix in some spiced apple or cider. This adds a warm, cozy flavor that feels like autumn. For summer, a hint of citrus zest can brighten the bites. It gives them a fresh burst that’s perfect for hot days. For the full recipe, check the details above and make your own tasty energy bites! Store your pumpkin pie energy bites in an airtight container in the refrigerator. This keeps them fresh and tasty. If you plan to eat them soon, you can keep them at room temperature for short durations. Just remember, they may not last as long outside the fridge. These energy bites can last up to one week in the fridge. If you want to keep them longer, freeze them. They can stay fresh for up to three months in the freezer. Just make sure to label the container with the date you froze them. You can enjoy these bites chilled or at room temperature. They make a great snack either way! For a delightful treat, pair them with a cup of tea or coffee. The warm drink complements the tasty flavors of the bites perfectly. If you want to try a fun twist, serve them at a party on a festive plate. You can find the full recipe to make these delicious bites. To make pumpkin pie energy bites, follow these steps: 1. In a large bowl, mix rolled oats, canned pumpkin puree, almond butter, and honey. 2. Add vanilla extract, pumpkin pie spice, and a pinch of salt. 3. Stir until the mixture becomes a sticky dough. 4. Fold in chopped nuts and chocolate chips or raisins. 5. Scoop out small portions and roll them into balls, about 1 inch wide. 6. Place the bites on a plate with space between them. 7. Refrigerate for at least 30 minutes to firm up. Enjoy your tasty and healthy snack! For more details, check the Full Recipe. Yes, you can freeze these energy bites. To do this, place the bites on a baking sheet. Freeze them for about an hour until solid. Then, transfer them to a freezer bag or an airtight container. Label the bag with the date. These bites can last up to three months in the freezer. When you’re ready to eat them, just let them thaw in the fridge. Pumpkin pie energy bites have many health benefits. They are rich in fiber from the oats and pumpkin. Fiber helps with digestion and keeps you full. Almond butter provides healthy fats and protein. Honey or maple syrup adds natural sweetness without refined sugar. Pumpkin is packed with vitamins A and C, which support your immune system. Overall, these bites are a nutritious snack option. Yes, these energy bites are safe and nutritious for kids. They contain wholesome ingredients that provide energy without added sugar. Kids love the sweet taste and chewy texture. You can also let your children help make them. This way, they learn about healthy snacks. Just remember to check for any nut allergies before serving. These pumpkin pie energy bites are easy to make and fun to eat. You mix simple main ingredients like oats, pumpkin, and nut butter. Add some nuts or chocolate chips for a tasty twist. Remember to store them well to enjoy later. Whether for a snack, dessert, or lunchbox treat, these bites pack nutrition in every bite. Get creative with flavors and enjoy the flexible recipes. Healthy eating can be delicious and effortless. Make these energy bites today and see for yourself!](https://dishtreats.com/wp-content/uploads/2025/07/b18c9eee-ac7a-43cf-8a14-33dd9ccff863-300x300.webp)


![To make the best pumpkin spice muffins, you need the following key ingredients: - 1 cup pumpkin puree - 1/2 cup brown sugar - 1/2 cup granulated sugar - 1/3 cup vegetable oil - 2 large eggs - 1 teaspoon vanilla extract - 1 1/2 cups all-purpose flour - 1 teaspoon baking soda - 1 teaspoon baking powder - 2 teaspoons pumpkin pie spice - 1/2 teaspoon salt These ingredients create a fluffy, moist muffin that bursts with autumn flavor. The pumpkin puree adds natural sweetness and moisture. Brown sugar gives a rich, caramel taste, while the spices bring warmth and comfort to each bite. You can make your muffins even better with these optional ingredients: - 1/2 cup chopped walnuts or pecans - 1/2 cup chocolate chips Adding nuts gives a nice crunch, while chocolate chips add sweetness. Feel free to mix and match based on your taste. You can even leave them out for a classic muffin. Accurate measurement is key to great baking. Here’s how to measure your ingredients correctly: - Flour: Use a spoon to fill your measuring cup, then level it off with a knife. - Brown Sugar: Pack it firmly into the cup for proper measurement. - Liquid Ingredients: Use a liquid measuring cup and check at eye level for accuracy. Following these tips ensures your muffins turn out perfectly every time. For the full recipe, check out the details above and get ready to bake your delicious pumpkin spice muffins! Start by preheating your oven to 350°F (175°C). This step is key for even baking. Next, prepare a standard muffin tin. You can use paper liners or spray each cup with non-stick spray. This will make it easy to remove the muffins later. In a large bowl, combine the pumpkin puree, brown sugar, granulated sugar, and vegetable oil. Add in the eggs and vanilla extract. Whisk these together until smooth. Make sure there are no lumps. This mix gives your muffins their rich flavor. In another bowl, sift together the all-purpose flour, baking soda, baking powder, pumpkin pie spice, and salt. Sifting helps to mix and aerate the flour. It makes for a lighter muffin. This mix is important for texture. If you want to add some extra texture, gently fold in chopped walnuts or pecans. You can also add chocolate chips for a sweet touch. Be careful not to overmix; just combine until they’re evenly spread in the batter. Now, spoon the muffin batter into the prepared tin. Fill each cup about 3/4 full. This allows room for the muffins to rise. Bake for 18-20 minutes. Check if they’re ready by inserting a toothpick in the center. If it comes out clean, they’re done! Let them cool in the tin for 5 minutes before moving them to a wire rack. This cooling step is essential for the best texture. For the complete recipe, check out the [Full Recipe]. To keep muffins light and fluffy, don’t overmix the batter. When you combine wet and dry ingredients, mix just until you see no dry flour. A few lumps are okay. Overmixing makes muffins tough. Also, ensure your baking powder and baking soda are fresh. Old leavening agents won't help the muffins rise. Store your pumpkin spice muffins in an airtight container. This keeps them soft and moist. You can keep them at room temperature for up to three days. For longer storage, place them in the fridge for a week. If you want to save them for later, freeze them. Wrap each muffin in plastic wrap before placing them in a freezer-safe bag. They can last for up to three months in the freezer. Presentation makes any dish more inviting. For a lovely touch, sprinkle powdered sugar on top of each muffin. Serve them on a pretty platter. You can also add a small bowl of softened butter for easy spreading. This makes your muffins look even more delicious and inviting. {{image_4}} You can make gluten-free pumpkin spice muffins easily. To do this, swap regular flour with gluten-free flour. Look for blends that work well in baking. These blends often include almond flour or coconut flour. Check the package to ensure it has a good flavor. The muffins will still taste great! The texture may vary slightly, but they will remain soft and delicious. If you want vegan muffins, you can make some simple changes. Replace eggs with flax eggs. To make a flax egg, mix 1 tablespoon of ground flaxseed with 2.5 tablespoons of water. Let it sit for about 5 minutes until it thickens. Use plant-based oil instead of vegetable oil. You can also use almond milk or another plant-based milk instead of regular milk. These muffins will be light and fluffy, just like the classic recipe. You can jazz up your pumpkin spice muffins with extra flavors. Try adding maple syrup for a sweet twist. Just reduce the sugar a little to balance it out. You can also add orange zest for a fresh, bright taste. A teaspoon of orange zest will give the muffins a nice citrus kick. Feel free to get creative! You can mix and match these flavors to find your favorite combination. These variations can make your pumpkin spice muffins even more special. Check out the full recipe to get started! To keep your pumpkin spice muffins fresh, store them in an airtight container. Place a paper towel in the container to absorb moisture. This helps prevent sogginess. Store them at room temperature for up to three days. If you want to keep them longer, consider freezing. Freezing is a great way to save your muffins. Start by letting them cool completely. Then, wrap each muffin in plastic wrap. Place the wrapped muffins in a freezer-safe bag. Label the bag with the date. You can freeze them for up to three months. To enjoy your muffins warm, reheat them in the oven. Preheat your oven to 350°F (175°C). Place the muffins on a baking sheet. Heat for 10 to 15 minutes. You can also use a microwave for quick reheating. Just warm them for 15 to 20 seconds. Enjoy your pumpkin spice muffins fresh! Yes, you can use canned pumpkin. It saves time and gives great flavor. Make sure to choose 100% pure pumpkin, not pumpkin pie filling. This keeps the taste just right. Canned pumpkin is often smoother, which helps in mixing. It also has a longer shelf life. So, if you have a can, use it! For eggs, you can use several substitutes. Common options include: - 1/4 cup unsweetened applesauce - 1/4 cup mashed banana - 1 tablespoon ground flaxseed mixed with 2.5 tablespoons water These options keep your muffins moist and fluffy. They also add a hint of flavor. Choose what fits your taste best! Check your muffins after 18 minutes. Insert a toothpick into the center. If it comes out clean or with a few crumbs, they are done. If the toothpick is wet, bake for 1-2 more minutes. Keep an eye on them to avoid overbaking. Perfect muffins should be soft and lightly golden. Absolutely! To make mini muffins, use a mini muffin tin. Fill each cup about halfway. Bake them for 10-12 minutes. Keep checking with a toothpick until they are done. Mini muffins are great for snacks and sharing. They are just as tasty and fun! For the full recipe, check out the details above. In this post, we explored how to make delicious pumpkin spice muffins. I covered the essential and optional ingredients, along with measuring them for great results. The step-by-step instructions guide you through prepping, mixing, and baking. I also shared tips for light muffins and ways to store them well. Finally, I offered tasty variations like gluten-free and vegan options. Now you’re ready to enjoy these warm, flavorful treats any time! Your perfect pumpkin spice muffin awaits.](https://dishtreats.com/wp-content/uploads/2025/06/e45c4b1d-a4d2-42b5-b442-a33a757785ba-768x768.webp)


![- 1/2 cup rolled oats - 1 tablespoon cocoa powder - 1 tablespoon peanut butter - 1 cup almond milk - 1 tablespoon maple syrup - 1/2 teaspoon vanilla extract - A pinch of salt To create a bowl of chocolate peanut butter overnight oats, you need simple ingredients. Start with rolled oats; they act as the base. Cocoa powder adds rich chocolate flavor. Peanut butter gives a smooth, nutty taste. Use almond milk as a creamy liquid. Maple syrup sweetens the dish naturally. A touch of vanilla extract enhances the flavors. Finally, a pinch of salt brings everything together. - Sliced bananas - Chocolate chips - Crushed peanuts - Assorted fresh berries You can elevate your oats with fun toppings. Sliced bananas add sweetness and texture. Chocolate chips bring extra chocolate goodness. Crushed peanuts offer a nice crunch. Fresh berries brighten the dish with color and flavor. Choose your favorites or mix them up for a tasty treat. For the complete recipe, check out the [Full Recipe]. - Step 1: Combine dry ingredients in a bowl. In a medium mixing bowl, add 1/2 cup rolled oats and 1 tablespoon cocoa powder. Stir these together. This mix gives your oats a deep chocolate flavor. - Step 2: Whisk together wet ingredients separately. In another bowl, mix 1 cup almond milk, 1 tablespoon peanut butter, 1 tablespoon maple syrup, 1/2 teaspoon vanilla extract, and a pinch of salt. Make sure the peanut butter blends in well. - Step 3: Mix dry and wet ingredients thoroughly. Pour the wet mix over the dry oats. Stir with a spoon until every oat is coated. This step ensures creamy and rich oats. - Step 4: Transfer mixture to a jar or container. Carefully spoon the mixed oats into a clean jar. Choose a jar with a lid for best results. - Step 5: Seal and refrigerate overnight. Close the lid tightly. Place the jar in the fridge. Let it chill overnight or for at least 4 hours. The oats will soak up the flavors and soften. - Step 6: Stir before serving. When you’re ready to eat, take the jar out of the fridge. Stir the oats well. If they seem thick, add a little more milk to loosen them up. - Step 7: Add your choice of toppings. Top your oats with sliced bananas, chocolate chips, crushed peanuts, or fresh berries. These toppings add fun flavors and textures to your dish. Enjoy your creamy, chocolatey breakfast! For the full recipe, check out the complete guide. - For creamier oats, use whole milk or a milk alternative. - Allow oats to soak longer for a softer texture. Using whole milk adds richness. If you prefer a lighter option, almond or oat milk works well too. The key is to find what you love. Soaking longer lets the oats absorb more liquid. This makes them softer and more enjoyable to eat. - Try different nut butters like almond or cashew. - Experiment with sweeteners like agave or stevia. Feel free to swap peanut butter with almond or cashew butter for new flavors. Each nut butter brings its own taste. Use different sweeteners to find your perfect balance. Agave has a light flavor, while stevia is sugar-free. - Serve in a clear jar for visual appeal. - Drizzle extra peanut butter on top. Serving in a clear jar lets everyone see those delicious layers. It makes your dish look fancy! A drizzle of peanut butter on top adds a nice touch. It makes it more inviting and tasty. For an added twist, include colorful toppings like fresh berries or chocolate chips. Enjoy crafting your perfect chocolate peanut butter overnight oats! For the complete recipe, check the Full Recipe section. {{image_4}} You can switch up your chocolate peanut butter overnight oats with fun flavors. - Chocolate Banana Overnight Oats: Mash a ripe banana into the mix. The banana adds natural sweetness and a creamy texture. - Mocha Peanut Butter Overnight Oats: Add a teaspoon of instant coffee or espresso powder. This gives your oats a rich coffee flavor. Got dietary needs? No problem! You can easily modify this recipe. - Gluten-free option: Use certified gluten-free oats. This way, everyone can enjoy a tasty breakfast. - Vegan alternative: Swap regular milk for almond milk or oat milk. Use maple syrup or agave for sweetness. Change your oats with the seasons for exciting new tastes. - Adding pumpkin spice for fall: Mix in a teaspoon of pumpkin spice. This brings warmth and a cozy flavor to your oats. - Incorporating fresh berries in summer: Toss in some strawberries or blueberries. Fresh fruit brightens up your oats and adds nutrients. These variations keep your breakfast fun and exciting! You can find the full recipe here to make your own delicious creation. To keep your chocolate peanut butter overnight oats fresh, use an airtight container. This helps prevent moisture and odors from mixing in. Store the container in the refrigerator. Your oats will stay good for up to 5 days. This means you can make a batch and enjoy it throughout the week. Can you freeze overnight oats? Yes, you can freeze them! Freezing is a great way to save extra servings. Just make sure to use a freezer-safe container. How to thaw overnight oats for future use: To thaw, move the container to the fridge the night before you want to eat them. This will help them thaw slowly and evenly. You can also use the microwave if you’re in a hurry. Just heat it in short bursts, stirring in between. Best methods to reheat if desired: If you prefer warm oats, reheat them in the microwave. Place your oats in a microwave-safe bowl and cover it. Heat for 30 seconds, then stir. Repeat until warm enough. You can also reheat on the stove. Just add a splash of milk to a saucepan and warm it over low heat, stirring often. Enjoy your delicious oats however you like! What is the texture of overnight oats supposed to be? Overnight oats should be creamy and thick. They absorb the liquid overnight. This makes them soft but not mushy. You want a nice balance. If they seem too watery, add less milk next time. Can I use steel-cut oats instead of rolled oats? Yes, but steel-cut oats will need more time to soak. They take longer to soften. I recommend soaking them overnight to get a good texture. You may need to adjust the liquid and soaking time. How can I make my overnight oats thicker or creamier? To make your oats thicker, use less milk. You can also add chia seeds. They help absorb liquid and add fiber. Another tip is to let them sit longer in the fridge. Are overnight oats healthy? Yes, overnight oats are very healthy. They offer fiber and protein. This can help keep you full. They also provide vitamins and minerals. Plus, they are low in sugar if you control the toppings. What are the nutritional benefits of using peanut butter? Peanut butter adds healthy fats and protein. It helps keep your energy up. It also has vitamins like E and B. Just make sure to choose a natural peanut butter with no added sugar. What to pair with chocolate peanut butter overnight oats? You can pair them with fresh fruit. Bananas and berries taste great. Nuts or seeds also add a nice crunch. For extra sweetness, consider a drizzle of honey or maple syrup. Can overnight oats be eaten warm? Yes, you can eat them warm if you like. Just heat them gently in the microwave. Add a splash of milk to keep them creamy. Enjoy your warm treat any time of the day! You can create tasty and healthy overnight oats with simple ingredients. We discussed the main ingredients, preparation steps, and optional toppings. You learned tips for customization, serving, and storing your oats. Remember, you can adjust flavors and textures to suit your taste. Try different ingredients and enjoy your meals. Keep experimenting with toppings and variations. This way, overnight oats will always feel new and exciting. Enjoy every delicious bite and make it your own!](https://dishtreats.com/wp-content/uploads/2025/07/90d151b9-6d0c-4c1c-ba31-37512e57091e-768x768.webp)