Pumpkin Cupcakes Caramel Drizzle Delightful Treat

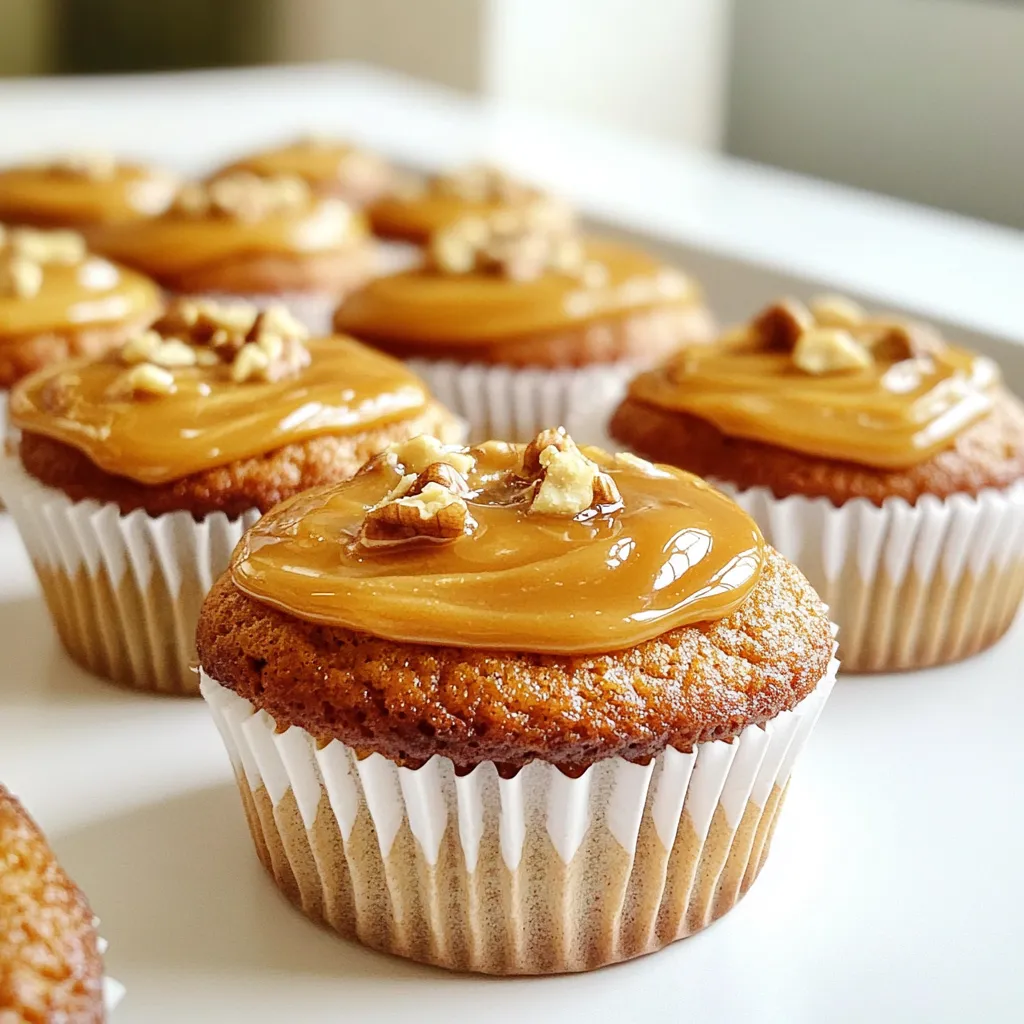
Pumpkin cupcakes with caramel drizzle are a must-try for any dessert lover! In this delightful treat, warm pumpkin spice meets sweet, gooey caramel for a perfect autumn flavor. Whether you’re baking for a holiday gathering or just to indulge yourself, these cupcakes are sure to impress. Read on to learn how you can create this delicious dessert step by step, plus tips for customizing and storing your treats!
Ingredients
Detailed Ingredient List
To make pumpkin cupcakes with caramel drizzle, gather these ingredients:
- 1 ½ cups all-purpose flour
- 1 teaspoon baking powder
- 1 teaspoon baking soda
- ½ teaspoon salt
- 1 teaspoon ground cinnamon
- ½ teaspoon ground nutmeg
- ½ teaspoon ground ginger
- ½ cup granulated sugar
- ½ cup packed brown sugar
- 1 cup pumpkin puree
- ½ cup vegetable oil
- 2 large eggs
- 1 teaspoon vanilla extract
- ½ cup chopped walnuts or pecans (optional)
- ½ cup caramel sauce (for drizzling)
- Whipped cream (for garnish, optional)
Optional Add-ins and Substitutes
You can personalize your cupcakes by adding ingredients. Here are some ideas:
- Use almond flour for a gluten-free version.
- Swap chopped walnuts with chocolate chips for a sweet twist.
- Substitute pumpkin puree with applesauce for a lighter taste.
- Add a teaspoon of cocoa powder for a chocolatey flavor.
Notes on Ingredient Quality
Using high-quality ingredients makes a big difference. Here are some tips:
- Choose fresh pumpkin puree for the best flavor.
- Use pure vanilla extract instead of imitation for a richer taste.
- Select organic sugar and spices when possible for better quality.
- Opt for fresh nuts instead of pre-packaged for crunchier texture.
Step-by-Step Instructions
Preheating the Oven and Preparing the Muffin Tin
First, set your oven to 350°F (175°C). This step is key for baking. While the oven warms up, grab a standard muffin tin. Line it with cupcake liners so the cupcakes don’t stick.
Mixing Dry Ingredients
Next, take a medium bowl and sift together the dry ingredients. You’ll need 1 ½ cups of flour, 1 teaspoon of baking powder, 1 teaspoon of baking soda, and ½ teaspoon of salt. Add in 1 teaspoon of ground cinnamon, ½ teaspoon of ground nutmeg, and ½ teaspoon of ground ginger. Sifting helps mix the spices and leavening agents well. Set this bowl aside.
Combining Wet Ingredients
In a large bowl, whisk together the sugars. Use ½ cup of granulated sugar and ½ cup of packed brown sugar. Then, add 1 cup of pumpkin puree, ½ cup of vegetable oil, and 2 large eggs. Pour in 1 teaspoon of vanilla extract for extra flavor. Whisk until the mix is smooth.
Folding in Dry and Wet Ingredients
Now, gently add the dry mix to the wet mix. Stir lightly until they just come together. It’s okay if the batter has some small lumps. If you like nuts, fold in ½ cup of chopped walnuts or pecans at this point.
Filling the Cupcake Liners
Use a spoon or an ice cream scoop to fill each cupcake liner. Aim for about two-thirds full. This gives the cupcakes room to rise and look fluffy.
Baking the Cupcakes
Place the muffin tin in your oven. Bake for 18-20 minutes. To check if they’re done, insert a toothpick into the center. If it comes out clean or with a few crumbs, they are ready!
Cooling and Drizzling with Caramel
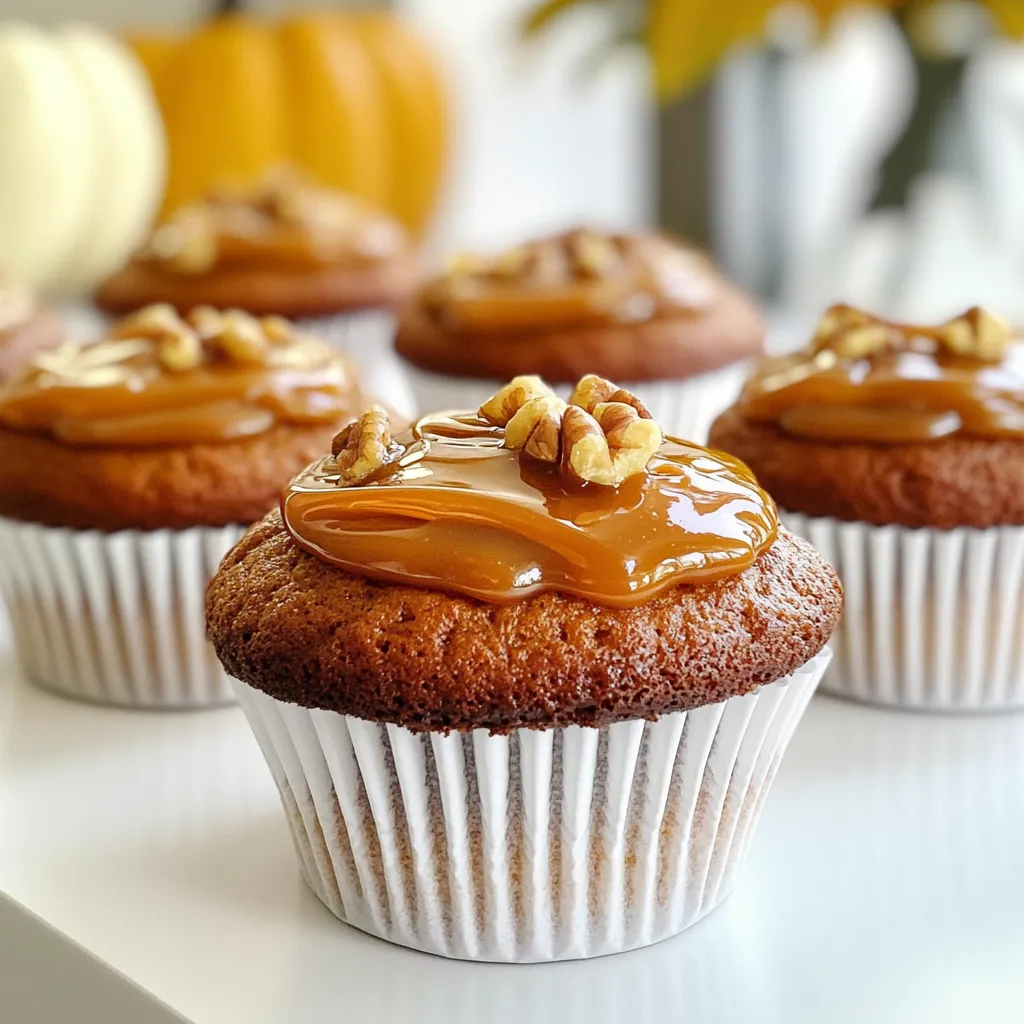
After baking, let the cupcakes cool in the tin for about 5 minutes. Then, move them to a wire rack to cool down completely. Once cool, drizzle each cupcake with caramel sauce. For a fun touch, add a dollop of whipped cream and some chopped nuts on top. Enjoy this sweet treat!
Tips & Tricks
How to Avoid Overmixing
To keep your cupcakes light and fluffy, mix gently. When you add the dry ingredients to the wet, stir just until you see no flour. A few lumps are okay. Overmixing makes the cupcakes dense. Remember, you want soft, airy bites.
Checking Cupcake Doneness
To check if your cupcakes are done, use a toothpick. Insert it in the middle of a cupcake. If it comes out clean or with just a few crumbs, they are ready. If it’s wet, bake a few more minutes. Timing is key, so keep an eye on them!
Decorating and Serving Suggestions
For a pretty display, use a nice platter. Drizzle caramel sauce over each cupcake. If you like, top with whipped cream and chopped nuts. To make it festive, sprinkle pumpkin spice or chocolate shavings on top. This makes your treat even more inviting!

Variations
Different Types of Caramel Drizzle
You can switch up your caramel drizzle easily. Try using salted caramel for a sweet and salty mix. This adds a nice twist. You can also use homemade caramel. It tastes rich and fresh. Just melt sugar and butter together, then add cream. This homemade version can take your cupcakes to a new level.
Alternative Flavors (e.g., Chocolate, Maple)
If you want to play with flavors, chocolate drizzle is a great option. Just melt dark or milk chocolate. Drizzle it over your cupcakes for a sweet touch. Maple syrup is another fun choice. It adds a warm, cozy flavor. Simply warm pure maple syrup and drizzle it on top. These options make your cupcakes unique.
Gluten-Free and Vegan Options
Making gluten-free cupcakes is simple. Swap all-purpose flour for a gluten-free blend. This keeps the cupcakes soft and tasty. For a vegan version, use flax eggs instead of regular eggs. Mix 1 tablespoon of ground flaxseed with 3 tablespoons of water. Let it sit until it thickens. Use plant-based milk and oil to replace dairy. These changes allow everyone to enjoy the treat.
Storage Info
Best Practices for Storing Cupcakes
To keep your pumpkin cupcakes fresh, store them in an airtight container. This helps maintain moisture. You can leave them at room temperature for up to two days. If you have leftovers, place them in the fridge. Just remember, they may dry out a bit in the fridge.
Freezing for Later Use
Freezing is a great way to save cupcakes for later. First, let them cool completely. Then, wrap each cupcake in plastic wrap. Place the wrapped cupcakes in a freezer-safe bag or container. They can last for about three months in the freezer. When you’re ready to enjoy them, thaw in the fridge overnight or at room temperature for a couple of hours.
Reheating Tips
To reheat your cupcakes, use the microwave. Heat them for about 10-15 seconds. Check to see if they are warm, but don’t overheat. Alternatively, you can place them in a preheated oven at 350°F for about 5 minutes. This will help restore their fresh-baked taste.
FAQs
Can I make these cupcakes in advance?
Yes, you can bake these cupcakes a day ahead. Let them cool completely. Store them in an airtight container. Just add the caramel drizzle before serving for the best taste.
What can I use instead of pumpkin puree?
If you can’t find pumpkin puree, consider using applesauce or sweet potato puree. Both give moisture and a nice flavor. You can also use butternut squash puree for a similar taste.
How do I make the caramel sauce from scratch?
To make caramel sauce, you need just sugar, butter, and cream. Start by heating 1 cup of sugar in a pan until it melts. Stir it until it becomes golden. Then, add 6 tablespoons of butter. Mix in ½ cup of heavy cream slowly. Stir until smooth.
Can I use a different frosting instead of caramel drizzle?
Yes! You can use cream cheese frosting or a simple vanilla buttercream. Both will add a nice touch to the cupcakes. You can even top them with chocolate ganache for a rich twist.
What other spices can I add for flavor?
You can add cloves or allspice for more warmth. A pinch of cardamom can also enhance the flavor. Feel free to experiment and find your favorite spice blend!
These cupcakes are easy to make and delicious. We covered ingredients, from quality to add-ins. You learned step-by-step how to bake, cool, and decorate. Tips helped you avoid mistakes and add flair. We explored fun variations, plus storage and FAQs.
Now you’re ready to create your own treats. Each bite can bring joy. Enjoy the process and the sweet results!


![To create this tasty dip, you will need key ingredients that bring out the fall flavors. Here’s what you’ll need: - 8 oz cream cheese, softened to room temperature - 1 cup pumpkin puree (not pumpkin pie filling) - 1/2 cup powdered sugar - 1 tablespoon packed brown sugar - 1 teaspoon pure vanilla extract - 1 teaspoon pumpkin pie spice (plus extra for garnish) - 1/2 teaspoon ground cinnamon - 1/2 cup whipped topping (such as Cool Whip) - Assorted dippers: graham crackers, fresh apple slices, or pretzels Using the correct measurements is vital for the best flavor and texture. Too much cream cheese can make the dip thick. Too little sugar can make it bland. I recommend sticking closely to these amounts. This balance creates a creamy dip that is not too sweet. When it comes to serving your dip, you need the right dippers. Here are my favorites: - Graham crackers give a nice crunch. - Fresh apple slices add a crisp and juicy touch. - Pretzels offer a salty contrast. Feel free to mix and match! These options will make your dip even more fun. For the full recipe, check the recipe section. Start by taking your softened cream cheese. Place it in a large mixing bowl. Use an electric mixer on medium speed. Beat the cream cheese until it is smooth. Make sure there are no lumps left. This step is key for a creamy dip. Next, add the pumpkin puree into the cream cheese. Mix it in well. Now, add the powdered sugar, brown sugar, and vanilla extract. Include the pumpkin pie spice and ground cinnamon. Continue mixing on low speed. Ensure everything is combined but still smooth. You want a uniform texture without any streaks. Take your whipped topping and gently fold it in. Use a spatula for this step. Be careful to keep the dip light and fluffy. Stop mixing as soon as the whipped topping is blended in. This lightness adds to the creamy texture of the dip. For the full recipe, you can refer back to the beginning. Enjoy your creamy pumpkin spice cheesecake dip! To boost the flavor of your Pumpkin Spice Cheesecake Dip, try adding a pinch of nutmeg. This spice adds depth and warmth. If you like it sweeter, add more powdered sugar or brown sugar. You can also swap in maple syrup for a rich twist. For a touch of tang, mix in a bit of cream cheese with a hint of lemon juice. Taste as you go for the best result. Serving your dip in a fun bowl can make it pop. Use a bright or themed bowl for special occasions. A light dusting of pumpkin pie spice on top looks nice and smells great. Arrange your dippers around the bowl for a colorful display. This not only makes it pretty but also invites guests to dig in. You can even use cookie cutters to shape apple slices for extra flair. Making this dip ahead of time is a smart move. Chill it for at least 30 minutes before serving. This helps the flavors mix well and taste better. You can prepare it a day in advance and keep it covered in the fridge. Just remember to add the whipped topping right before serving for that fluffy texture. For the full recipe, check out the details above. {{image_4}} You can make a lighter version of this dip. Use Greek yogurt instead of cream cheese. Greek yogurt adds protein and tang. It keeps the dip creamy and delicious. Just blend 1 cup of Greek yogurt with the other ingredients. This swap helps cut down on calories while keeping flavor intact. Want to try something different? You can change the flavor profile easily. Swap pumpkin puree for sweet potato puree. This gives a unique taste that is still rich. You can also add a splash of maple syrup for a sweet twist. Another fun option is to mix in some Nutella for a chocolatey delight. Use seasonal ingredients to enhance your dip. In fall, add a handful of chopped pecans or walnuts for crunch. In winter, try mixing in dried cranberries for a tart flavor. You can also sprinkle some fresh nutmeg on top for a fragrant touch. These seasonal additions make your dip even more inviting and festive. For the full recipe, check out the [Full Recipe]. To keep your pumpkin spice cheesecake dip fresh, store it in an airtight container. Make sure the lid is tight to prevent air from getting in. I recommend refrigerating it as soon as you're done serving. This dip stays creamy and flavorful when stored properly. You can freeze this dip, but keep in mind it may change texture. To freeze, place the dip in a freezer-safe container. Leave some space at the top for expansion. When you're ready to use it, let it thaw in the fridge overnight. Stir well before serving to help regain some creaminess. The dip lasts about 3 to 5 days in the fridge. Check for any off smells or changes in texture. If it looks or smells funny, it’s best to toss it. To enjoy its best flavor, eat it within the first couple of days. For full instructions, see the Full Recipe. Yes, you can use homemade pumpkin puree! It adds a fresh taste. To make it, roast a pumpkin until soft, then blend until smooth. Just ensure it is thick like store-bought puree. This helps your dip stay creamy. To cut the sweetness, reduce the powdered sugar. You can also add more cream cheese. Another option is to mix in a bit of plain yogurt. This gives a nice tang, balancing the sweet flavors. Taste as you go to find your perfect mix. Absolutely! If you want to make it dairy-free, try vegan cream cheese. For a lower sugar option, use a sugar substitute. If you need gluten-free dippers, serve with apple slices or gluten-free pretzels. Be creative and adapt the recipe to fit your needs! For the full recipe, check out the details above. This article explored how to make a delicious pumpkin spice cheesecake dip. We covered key ingredients, the steps for mixing and folding, and helpful tips for flavor enhancements. You learned about storage options and creative variations, like using Greek yogurt or seasonal ingredients. Remember, making this dip can be fun and easy. Use fresh ingredients for the best taste. Enjoy creating your own version, and don’t forget to share with friends!](https://dishtreats.com/wp-content/uploads/2025/07/05024715-abe0-47f7-b5fb-2040be13b0f2-768x768.webp)


![- 1 cup all-purpose flour - 1 cup whole wheat flour - 1 tablespoon baking powder - 1/2 teaspoon baking soda - 1/4 teaspoon salt I love using both all-purpose and whole wheat flour. The all-purpose flour gives the muffins a light texture. The whole wheat adds a nutty flavor and a bit of extra fiber. Mixing these flours helps balance taste and nutrition. - 1 cup plain Greek yogurt - 1/2 cup granulated sugar - 1/4 cup honey - 2 large eggs - 1 teaspoon vanilla extract - Zest of 1 lemon - Juice of 1 lemon Greek yogurt is key for moisture. It makes the muffins rich and creamy. The combination of sugar and honey gives a nice sweetness. The eggs help bind everything together. Lemon juice and zest brighten the flavor, making each bite fresh and zesty. - 1 cup fresh or frozen blueberries - 2 tablespoons melted coconut oil or butter Blueberries are the star of this recipe. They burst with flavor and add a great texture. You can use fresh or frozen. If you use frozen, they still work well! The melted coconut oil or butter adds richness, but you can skip it if you prefer a lighter muffin. You can find the full recipe for these delightful muffins online. Happy baking! First, preheat your oven to 375°F (190°C). This step is key for even baking. Next, prepare your muffin tin by lining it with paper liners or greasing the cups. This helps with easy muffin removal later. Now, let’s mix the dry ingredients. In a large bowl, combine: - 1 cup all-purpose flour - 1 cup whole wheat flour - 1 tablespoon baking powder - 1/2 teaspoon baking soda - 1/4 teaspoon salt Whisk these dry ingredients well. Make sure there are no lumps. In another bowl, add the wet ingredients. You will need: - 1 cup plain Greek yogurt - 1/2 cup granulated sugar - 1/4 cup honey - 2 large eggs - 1 teaspoon vanilla extract - Zest of 1 lemon - Juice of 1 lemon Whisk these until smooth. This helps blend all the flavors together. Now, it’s time to combine the two mixtures. Gently fold the wet ingredients into the dry ones using a spatula. Stir slowly. This helps keep your muffins light and fluffy. Don’t overmix! Overmixing makes the muffins dense. Once you see a few floury spots, stop mixing. Next, it’s time for the blueberries. Add: - 1 cup fresh or frozen blueberries - 2 tablespoons melted coconut oil or butter Fold these in gently. You want to keep the blueberries whole for bursts of flavor. Now, scoop the batter into your prepared muffin cups. Fill each cup about two-thirds full. This allows space for the muffins to rise. Place the muffin tin in your preheated oven. Bake for 18-20 minutes. To check for doneness, insert a toothpick into the center of a muffin. If it comes out clean, they are ready! After baking, let the muffins cool in the tin for about 5 minutes. This helps them set. Then, move them to a wire rack to cool completely. These steps will lead you to a batch of delicious Blueberry Lemon Yogurt Muffins. For the complete recipe, see [Full Recipe]. To get the best muffins, do not overmix the batter. Mixing too much can make the muffins tough. When you mix, just combine until you see no dry flour. This way, your muffins stay light and fluffy. When folding in the blueberries, do it gently. If you stir too hard, the berries will burst and color the batter. Just use a spatula and fold them in lightly. This keeps the berries whole and gives you lovely pops of flavor in each bite. You can add even more flavor to your muffins. Consider adding lemon zest for a bright taste. You might like to include nuts, like walnuts or pecans, for crunch. When it comes to blueberries, fresh berries taste great, but frozen ones work too. If you use frozen berries, do not thaw them first. This helps keep your batter cold, giving you a better rise. Using the right tools helps a lot. A non-stick muffin tin is your best bet. You can also use paper liners for easy cleanup. For mixing, a large bowl works well. I suggest a sturdy spatula for folding the batter. This combo makes mixing fun and easy. With the right tools, your baking will be smooth and enjoyable. For the full recipe, check out the details above. {{image_4}} You can make these muffins gluten-free. Simply replace the all-purpose flour with a gluten-free flour blend. Many blends work well, so pick one you like. Just ensure it has a good balance of starches and protein to mimic regular flour. This way, you can enjoy the same tasty muffins without the gluten. Want to mix it up? Try adding chocolate chips or walnuts for a delightful twist. They add a nice crunch and richness. You can also use other fruits like raspberries or cranberries. They pair well with the lemon and blueberry flavors. Each fruit adds its own unique taste, making each batch special. You can switch up the yogurt too. Use flavored yogurts like vanilla or lemon for extra taste. If you prefer dairy-free options, there are many great alternatives available. Look for coconut or almond-based yogurts. They keep the muffins moist and tasty, making it fun to experiment with flavors. For the full recipe, check out the details above. To keep your blueberry lemon yogurt muffins fresh, store them in an airtight container. This will keep them moist and tasty. You can keep them at room temperature for up to three days. If you want them to last longer, put them in the fridge. They can stay fresh for about a week in the refrigerator. Freezing muffins is a great way to keep them longer. To freeze, let the muffins cool completely. Then, wrap each muffin in plastic wrap. Place them in a freezer bag or container. This method helps prevent freezer burn. You can enjoy them for up to three months. When you're ready to eat a frozen muffin, take it out and let it sit at room temperature for about 30 minutes. For a warm treat, heat it in the microwave for 15-20 seconds. This will make it soft and delicious again. Blueberry lemon yogurt muffins are perfect for any time of day. I love having them for breakfast or as a snack. They also make a great dessert. To make it even better, try pairing these muffins with yogurt or a drizzle of honey. This adds a nice touch and enhances the flavor. Enjoy your muffins fresh from the oven or at room temperature! If you want to explore more recipes, check out the Full Recipe for even more delicious ideas. Blueberry lemon yogurt muffins stay fresh for about 2 to 3 days at room temperature. Keep them in an airtight container to maintain their moisture. If you store them in the fridge, they can last for up to a week. Just make sure to seal them well to prevent them from drying out. Yes, you can easily swap ingredients. If you want less sugar, use less granulated sugar or honey. For flour, you can mix all-purpose flour with whole wheat flour or use a gluten-free blend. You can also use flavored yogurt instead of plain yogurt for a fun taste twist. If your muffins turn out dense, check your mixing technique. Overmixing can cause this issue. Make sure to mix just until combined. You can also try adding a bit more baking powder or soda to lighten the texture. Lastly, ensure your ingredients are fresh, especially baking powder. To make these muffins healthier, reduce the sugar by a third. You can also replace some all-purpose flour with whole wheat flour to add fiber. Adding oats or ground flaxseed can boost nutrition without changing the flavor much. Enjoy these muffins while keeping health in mind! For the full recipe, refer to the earlier section. This blog post covered how to make delicious Blueberry Lemon Yogurt Muffins. We explored ingredients, step-by-step instructions, and tips for perfect texture. Variations like gluten-free options and different mix-ins add fun twists. Proper storage helps keep your muffins fresh. These muffins are a tasty way to enjoy healthy snacks or breakfast. Remember, baking is about having fun and experimenting. Enjoy every bite!](https://dishtreats.com/wp-content/uploads/2025/06/d36ee35c-287f-4b25-b661-333d5a68e192-768x768.webp)