Fall brings cozy vibes, and there’s no better way to celebrate than with Pumpkin Biscotti. This delightful treat blends soft pumpkin with warm spices, making it perfect for any occasion. Whether you’re hosting a gathering or just enjoying a quiet evening, these biscotti are easy to make and fun to share. Join me as we dive into this delicious recipe, and soon you’ll be baking your way into autumn bliss!
Ingredients
To make pumpkin biscotti, you’ll need the following ingredients:
– 1 cup canned pumpkin puree
– 1/2 cup granulated sugar
– 1/4 cup packed brown sugar
– 2 large eggs
– 1/2 cup vegetable oil
– 2 teaspoons vanilla extract
– 3 cups all-purpose flour
– 1 teaspoon baking powder
– 1/2 teaspoon baking soda
– 1 teaspoon ground cinnamon
– 1/2 teaspoon ground nutmeg
– 1/4 teaspoon ground ginger
– 1/4 teaspoon salt
– 1/2 cup chopped pecans (optional)
– 1/2 cup white chocolate chips (optional)
These ingredients come together to create a warm, cozy flavor. The pumpkin puree adds moisture and a subtle sweetness. The mix of sugars gives the biscotti a nice balance of flavor. I love the spices, too; they make your kitchen smell amazing! You can also customize your biscotti by adding pecans or white chocolate chips for more texture and taste.
Step-by-Step Instructions
Preparing the Oven and Baking Sheet
First, I preheat the oven to 350°F (175°C). This step is key for even baking. Next, I line a baking sheet with parchment paper. This helps the biscotti not to stick.
Mixing Wet Ingredients
In a large bowl, I combine the pumpkin puree, granulated sugar, brown sugar, eggs, vegetable oil, and vanilla extract. I whisk these ingredients together until smooth. This mix brings out the pumpkin’s rich flavor.
Mixing Dry Ingredients
In another bowl, I sift together the flour, baking powder, baking soda, cinnamon, nutmeg, ginger, and salt. Sifting helps break up lumps. It also ensures even mixing of the dry ingredients.
Combining Mixtures
I gradually mix the dry ingredients into the wet mixture. I do this gently to avoid tough biscotti. If I want extra flavor, I fold in chopped pecans and white chocolate chips.
Shaping and Baking the Logs
Next, I divide the dough into two equal parts. I shape each part into a log about 12 inches long and 2 inches wide. I place the logs on the prepared baking sheet, leaving space between them.
Slicing and Second Bake
After baking for 25-30 minutes, I check if the logs feel firm and golden. Once done, I let them cool for about 10 minutes. Then, I slice each log diagonally into 1-inch thick pieces. I return them to the baking sheet, cut side down. I bake them again for 10-12 minutes, flipping halfway. This makes them crisp and golden. Finally, I cool the biscotti on a wire rack for that perfect crunch.
Tips & Tricks
Baking Tips
To make perfect pumpkin biscotti, avoid overmixing your dough. Overmixing can lead to tough biscotti. Mix gently just until everything is combined. This keeps your treats light and crisp.
Choosing the right baking time is also key. Bake your logs for 25 to 30 minutes until they feel firm. They should have a light golden color. For extra crispiness, bake them a little longer during the second bake. This makes them crunchy and delightful.
Presentation Suggestions
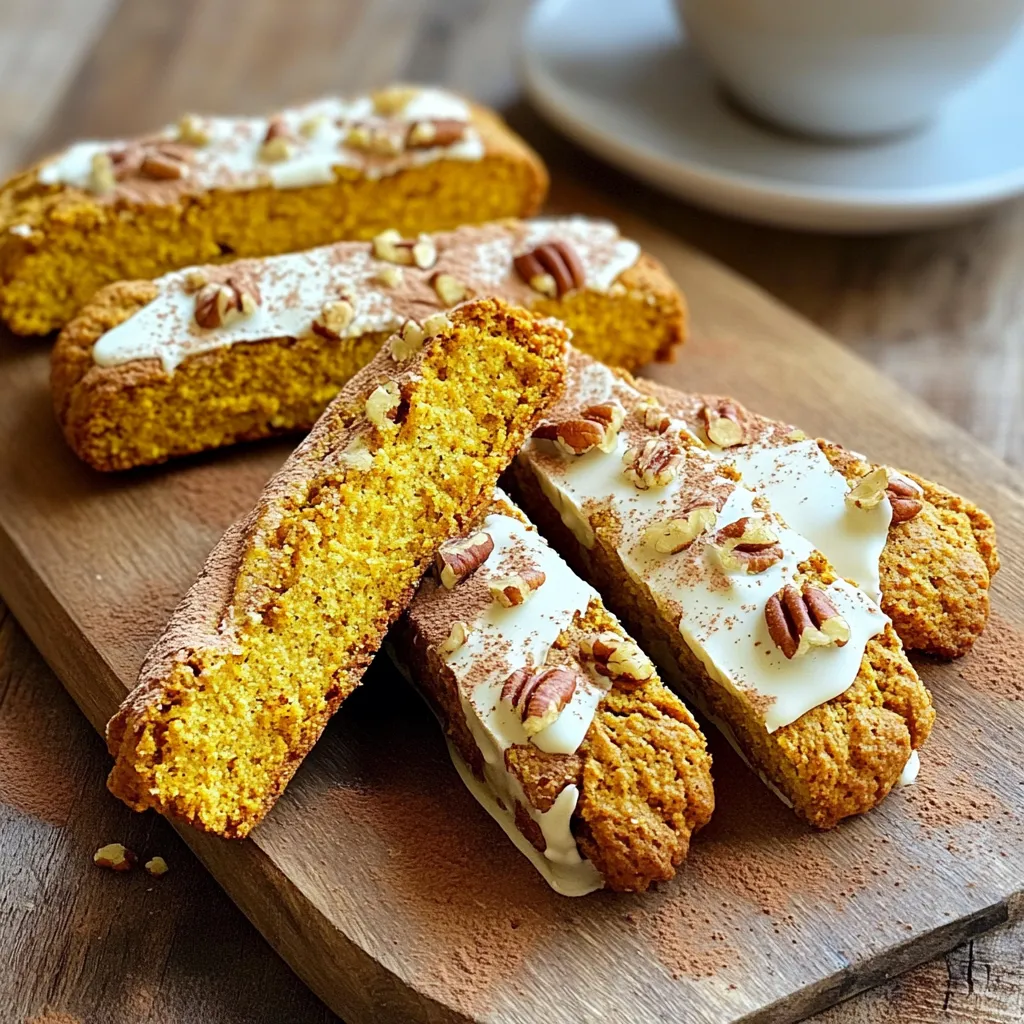
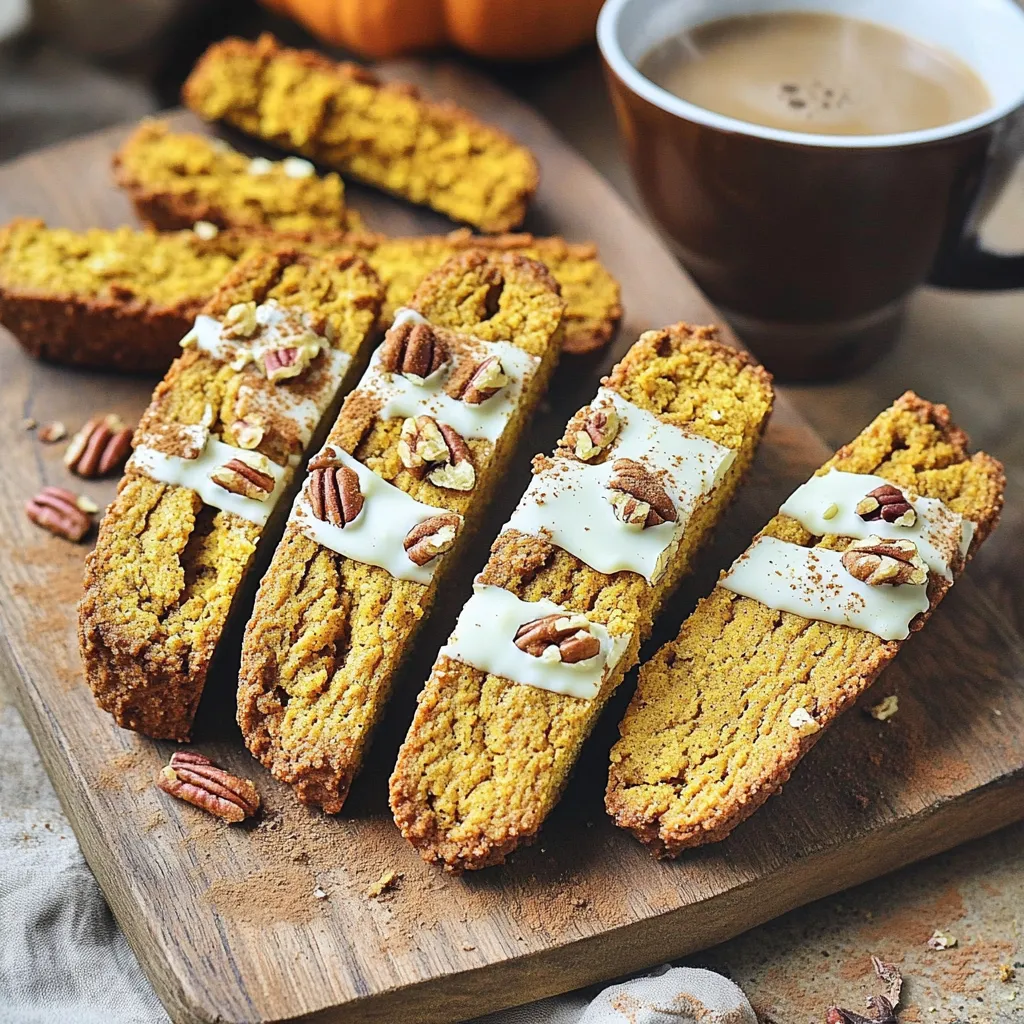
Serve your biscotti in a tall glass or on a rustic wooden board. This adds charm to your table. Pair them with a warm cup of coffee or tea. The rich flavors of the biscotti match perfectly with these drinks.
Enhance their visual appeal by dusting a little cinnamon on top. This adds a warm look and a lovely aroma. A few chocolate chips on top can also make them pop!
Flavor Enhancements
Experimenting with spices can bring new life to your biscotti. Try adding a pinch of allspice or clove for warmth. You can also mix in some dried fruit or nuts. Dried cranberries or walnuts would add great texture and flavor.
If you want a sweet twist, fold in white chocolate chips. They melt beautifully and add a creamy richness. Let your creativity shine in the kitchen!
Variations
Different Flavors
You can change the flavors of your pumpkin biscotti easily. For a twist, try adding dried cranberries or dark chocolate chips. These give a nice contrast to the pumpkin. You can also swap out spices. Instead of cinnamon, use cardamom for a unique taste. During the fall, add a touch of maple syrup for extra sweetness. For the winter holidays, consider using gingerbread spices. This makes them festive and fun.
Dietary Adjustments
If you need gluten-free biscotti, use a gluten-free flour blend. This works well and keeps the texture nice. For a vegan version, replace the eggs with flaxseed meal or applesauce. Use a plant-based oil instead of vegetable oil. These changes let everyone enjoy the biscotti, no matter their diet.
Serving Suggestions
Pair your pumpkin biscotti with a warm drink. They go well with coffee, tea, or hot chocolate. The flavors complement each other. You can also serve them as a snack or dessert. Try adding a scoop of ice cream alongside. This makes it a delightful treat for any occasion!
Storage Info
Best Storage Practices
To keep your pumpkin biscotti fresh, store them in an airtight container. This will help prevent them from becoming stale. Place a piece of parchment paper between layers if you stack them. Make sure they are completely cool before sealing. This keeps moisture away and maintains their crunch.
Freezing Instructions
If you want to save some for later, freezing is a great option. Place the cooled biscotti in a single layer on a baking sheet. Freeze them for about an hour. Once firm, transfer them to a freezer bag or an airtight container. They can last up to three months in the freezer. When you are ready to enjoy, thaw them at room temperature. You can also warm them briefly in the oven for extra crispiness.
Shelf Life
At room temperature, your pumpkin biscotti will stay fresh for about two weeks. Keep them in a cool, dry place, away from sunlight. If they start to lose their crunch, a quick bake in the oven can help revive them. Enjoy them with a hot drink or as a snack anytime!
FAQs
What is biscotti?
Biscotti are dry, crunchy cookies from Italy. They are often twice-baked, which gives them their hard texture. These treats are perfect for dipping in coffee or tea. Biscotti come in many flavors, but pumpkin is a favorite for fall. Their shape is usually long and thin, making them easy to hold.
Can I use fresh pumpkin instead of canned?
Yes, you can use fresh pumpkin. If you choose fresh, you need to cook it first. Roast or boil the pumpkin until soft, then mash it well. Canned pumpkin is easy, as it is ready to use. Both options work, but canned saves time.
How do I know when my biscotti is done baking?
Look for a light golden color. The logs should feel firm to the touch. You can also check by inserting a toothpick; it should come out clean. After slicing, bake them until they are crisp. They should snap when broken.
Can I make this recipe without eggs?
You can! Use flaxseed meal or applesauce as substitutes for eggs. For each egg, mix one tablespoon of flaxseed meal with three tablespoons of water. Let it sit until it thickens. Applesauce works well too; use 1/4 cup per egg. Both options keep your biscotti tasty and moist.
What can I dip biscotti in?
Biscotti pair well with many drinks. Coffee and tea are classics. Hot chocolate adds a sweet touch. You can also dip them in milk or almond milk. For a fun twist, try a flavored syrup or melted chocolate. Enjoy your biscotti with any of these delightful dips!
This blog covered making delicious pumpkin biscotti in easy steps. We explored key ingredients, mixing techniques, and baking instructions. I shared tips for perfect texture and tasty add-ins. You learned how to store and serve them, plus some fun variations.
In the end, pumpkin biscotti is versatile and fun to make. Get creative with flavors or try new serving ideas. Enjoy baking and sharing these delightful treats!


