Pesto Chicken Salad Lettuce Cups Fresh and Crisp Meal

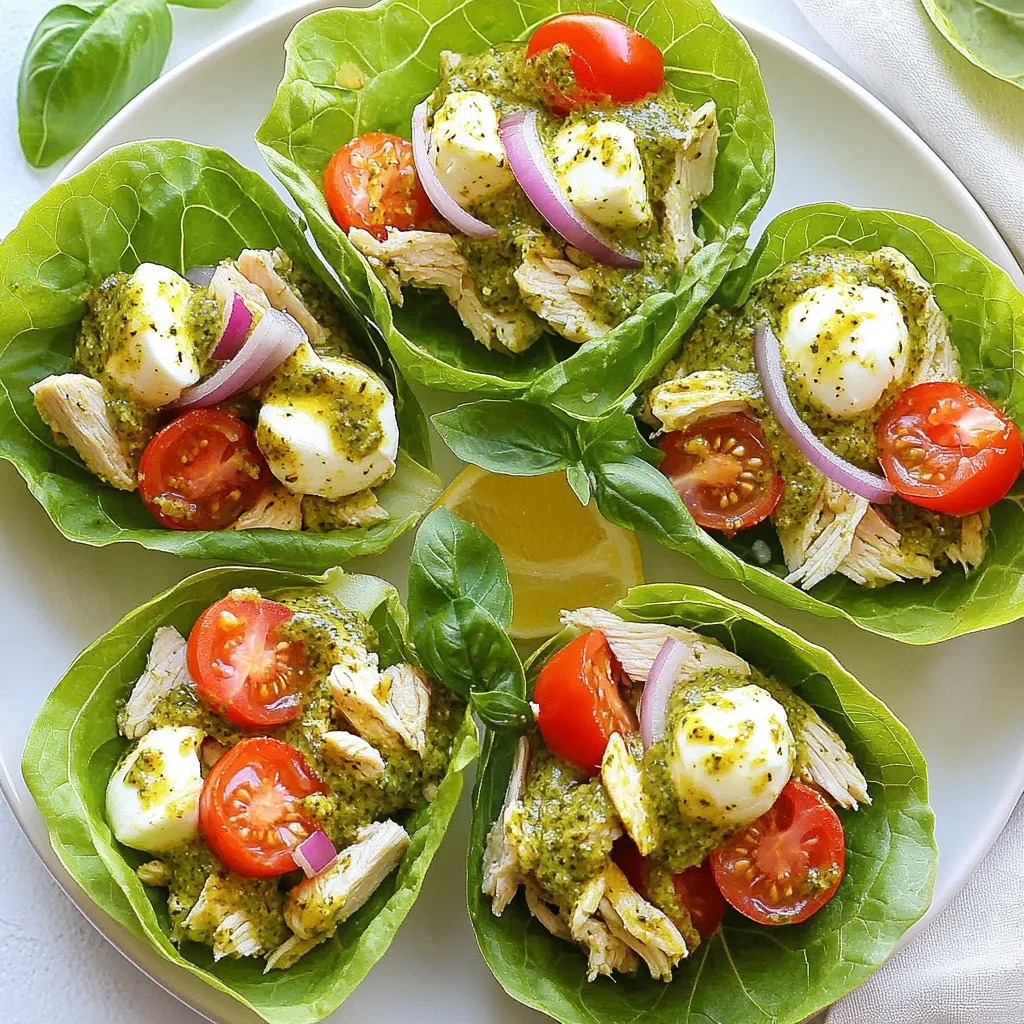
Looking for a fresh and crisp meal? Pesto Chicken Salad Lettuce Cups offer a delicious twist on classic flavors. You’ll love how simple they are to make and how great they taste. With juicy chicken, vibrant veggies, and creamy mozzarella all wrapped in crisp lettuce, these cups are perfect for a quick lunch or light dinner. Join me as I guide you through each step to create this delightful dish!
Why I Love This Recipe
- Quick and Easy: This recipe takes only 15 minutes to prepare, making it perfect for a busy weeknight or a last-minute gathering.
- Healthy and Fresh: Using lettuce cups instead of bread keeps this dish light and refreshing while packed with protein and nutrients.
- Flavorful Pesto: The basil pesto adds a rich, herby flavor that elevates the simple chicken salad to a gourmet level.
- Customizable: You can easily switch up the ingredients, adding your favorite veggies or nuts for extra crunch and nutrition.
Ingredients
Required Ingredients
- 2 cups cooked chicken, shredded
- 1/2 cup basil pesto (store-bought or homemade)
- 1/2 cup cherry tomatoes, halved
- 1/4 cup red onion, finely chopped
- 1/4 cup mozzarella cheese, diced
- 1 tablespoon fresh lemon juice
- Salt and pepper to taste
- 1 head of romaine or butter lettuce, leaves separated
- Fresh basil leaves for garnish (optional)
Gathering the right ingredients is key to making a great pesto chicken salad. Start with cooked chicken. You can use leftover rotisserie chicken or grill your own. The chicken should be shredded to mix well with other flavors.
Next, you need basil pesto. You can buy it or make your own. Fresh pesto adds a rich taste. If using store-bought, check the label for quality.
Cherry tomatoes bring sweetness and color. Halve them for easy mixing. Then, chop some red onion finely. It adds a nice crunch and a bit of bite.
Don’t forget mozzarella cheese. Diced cheese gives a creamy texture. A splash of lemon juice brightens all the flavors. Season with salt and pepper to suit your taste.
Finally, grab a head of romaine or butter lettuce. These leaves will hold the chicken salad well. Optionally, you can top each cup with fresh basil leaves for added flavor and a pretty look.
With these ingredients ready, you set the stage for a fresh and crisp meal. Each component plays a role in creating a balance of textures and flavors. Enjoy the process of assembling these tasty lettuce cups!

Step-by-Step Instructions
Preparing the Chicken Salad
First, gather your shredded chicken and place it in a large bowl. Next, add the basil pesto, halved cherry tomatoes, finely chopped red onion, and diced mozzarella. Use a spatula to mix everything well. You want each piece of chicken coated in pesto. Now, drizzle in some fresh lemon juice. This adds a bright flavor. Season with salt and pepper to your taste. Stir gently until all the ingredients are well combined.
Assembling the Lettuce Cups
Pick a fresh romaine or butter lettuce leaf. Make sure the leaves are clean and dry. Place a generous spoonful of the chicken salad in the center of the leaf. Carefully fold the sides of the lettuce over the filling. This makes a cute cup shape. Repeat this step for the rest of the leaves and filling.
Garnishing and Serving
For a nice touch, you can add fresh basil leaves on top of each cup. This makes them look pretty and adds more flavor. Arrange the finished cups on a colorful platter. You might also drizzle more pesto around the platter. This adds flair and extra taste. Enjoy your vibrant and tasty meal!
Tips & Tricks
Perfecting the Pesto Chicken Salad
To mix your ingredients well, start with a large bowl. Add the shredded chicken, basil pesto, cherry tomatoes, red onion, and mozzarella. Use a spatula or spoon to gently combine them. Make sure every piece gets coated with pesto. This will help you achieve an even flavor throughout.
When it comes to pesto, you can choose store-bought or homemade. For a vibrant taste, homemade pesto often shines. It gives a fresh and rich flavor that store-bought might lack. Look for basil that is bright green and fragrant for the best results.
Making Ahead and Time-Saving Suggestions
You can save time by using pre-cooked chicken. Rotisserie chicken works great and saves you cooking time. Make sure to shred it into bite-sized pieces. Store your ingredients separately in the fridge until you are ready to mix. This keeps everything fresh and crisp.
For freshness, use airtight containers. Keep the chicken and salad mix in one, and the lettuce in another. This way, your lettuce stays crunchy. You can assemble the cups right before serving.
Serving Suggestions
Pair your pesto chicken salad lettuce cups with a light side. A fresh fruit salad or veggie platter complements the meal nicely. For drinks, consider sparkling water or iced tea. Both add a refreshing touch.
For a vibrant platter, arrange the lettuce cups neatly. You can drizzle extra pesto around the plate for color and flavor. Add some fresh basil leaves on top of each cup for a pop of green. This not only looks lovely but also adds to the taste.
Pro Tips
- Use Fresh Ingredients: Always opt for fresh basil and ripe cherry tomatoes to enhance the flavor of your pesto chicken salad.
- Customize Your Pesto: If you want a unique flavor, try adding nuts like walnuts or pine nuts to your pesto for added texture and richness.
- Chill Before Serving: Let the chicken salad mixture chill in the refrigerator for about 30 minutes before serving for a refreshing taste.
- Experiment with Lettuce: While romaine and butter lettuce work well, feel free to try other leafy greens like endive or radicchio for a different flavor and presentation.

Variations
Ingredient Substitutions
You can easily make swaps in your pesto chicken salad. If you want a low-carb option, try using avocado instead of mozzarella. It adds creaminess without the carbs. For a dairy-free choice, use cashew cheese or nutritional yeast. These options keep the salad tasty and healthy.
You can also switch up the protein. If you have leftover turkey, it works great in this recipe. Just shred it like the chicken. If you prefer a plant-based option, try tofu. Press and cube the tofu, then mix it in with the other ingredients.
Flavor Variations
Want to spice things up? Add some red pepper flakes for heat. You can also mix in fresh herbs like dill or parsley. These herbs give your salad a fresh twist. If you’re feeling adventurous, add a teaspoon of curry powder for a unique flavor.
Incorporating extra veggies can also change the taste. Consider adding diced bell peppers or cucumber for crunch. Chopped spinach or kale can boost the nutrition and add more color.
Serving Style Variations
You can serve the chicken salad in many fun ways. If you don’t have lettuce, try using whole grain wraps or tortillas. These options make great handheld meals. You can also serve the chicken salad in small bowls for a dip with crackers or veggies.
For a twist, use large cabbage leaves or Swiss chard. They add a nice flavor and are sturdy enough to hold the filling. You can even layer the salad in a mason jar for a portable meal option.
Storage Info
Short-Term Storage
To store leftover chicken salad, put it in an airtight container. This keeps it fresh for 3 days. Place it in the fridge right after serving. For the lettuce, wrap the leaves in a damp paper towel. Put them in a plastic bag. This helps keep them crisp and fresh for a couple of days.
Long-Term Storage
You can freeze the chicken salad, but it may change texture when thawed. Place it in a freezer-safe container. It can last for up to 3 months in the freezer. To thaw, move it to the fridge overnight. When ready to serve, stir it well and check for seasoning.
Shelf Life
The chicken salad stays fresh for about 3 days in the fridge. Check for any changes in color or smell. If it smells off or looks slimy, it’s time to toss it. Always trust your senses; they help you avoid spoiled food.
FAQs
What are the best substitutes for chicken in this recipe?
If you want to switch up the protein, consider using canned tuna or chickpeas. Both options add great flavor and texture. You can also try shredded turkey or cooked shrimp for a twist. Each substitute will give your salad a new vibe while keeping it tasty.
Can I make the chicken salad ahead of time?
Yes, you can prepare the chicken salad a day ahead. Just mix all the ingredients and store it in the fridge. This allows the flavors to blend nicely. However, keep the lettuce separate until you are ready to serve. This keeps the leaves fresh and crisp, making your cups look great.
How long can leftover pesto chicken salad be stored?
You can keep leftover pesto chicken salad in an airtight container for up to three days. Make sure to check for freshness before eating. If the salad looks off or smells bad, it’s best to throw it away. Enjoy your tasty meal while it’s fresh!
This blog post shared a simple recipe for pesto chicken salad in lettuce cups. We covered ingredients, preparation, and serving tips. You learned to customize flavors and store leftovers wisely. With fresh basil and fun variations, you can enjoy this dish in many ways.
Get creative with your own twists and have fun in the kitchen! Enjoy making this dis

Pesto Chicken Salad Lettuce Cups
Ingredients Â
- 2 cups cooked chicken, shredded
- 0.5 cup basil pesto
- 0.5 cup cherry tomatoes, halved
- 0.25 cup red onion, finely chopped
- 0.25 cup mozzarella cheese, diced
- 1 tablespoon fresh lemon juice
- to taste salt and pepper
- 1 head romaine or butter lettuce, leaves separated
- optional fresh basil leaves for garnish
InstructionsÂ
- In a spacious mixing bowl, combine the shredded chicken, basil pesto, halved cherry tomatoes, finely chopped red onion, and diced mozzarella cheese. Gently mix these ingredients with a spatula or large spoon until they are thoroughly combined.
- Drizzle fresh lemon juice over the mixture. Season with salt and pepper to taste. Stir gently yet thoroughly to ensure that all ingredients are evenly coated in the pesto.
- Select a fresh lettuce leaf and place a generous spoonful of the pesto chicken salad mixture in the center of the leaf.
- Carefully fold the sides of the lettuce leaf over the filling to create a delightful cup shape. Continue this process with the remaining lettuce leaves and filling until all components are used.
- For an added touch of flavor and visual appeal, optionally garnish each lettuce cup with fresh basil leaves.


![To make delicious grilled veggie kabobs, gather these fresh ingredients: - 1 bell pepper (any color), cut into 1-inch pieces - 1 zucchini, sliced into rounds - 1 yellow squash, sliced into rounds - 1 red onion, cut into wedges - 8 cherry tomatoes - 1 cup mushrooms, cleaned and stems removed - 3 tablespoons olive oil - 2 cloves garlic, finely minced - 1 teaspoon smoked paprika - 1 teaspoon dried oregano - Salt and freshly ground black pepper to taste - 8 skewers (wooden or metal) Fresh vegetables make a big difference in flavor. You can swap in seasonal veggies, like asparagus or eggplant, based on what you find at the market. This keeps your kabobs fresh and exciting. If you have frozen vegetables, use those too! Just remember to thaw and drain them well. Fresh veggies often taste better but frozen can be a great backup. Using fresh ingredients ensures better taste and texture. Fresh veggies hold their shape and crunch better on the grill. When you bite into a grilled kabob, you want that satisfying crunch. Plus, fresh produce packs more nutrients and flavor. So, always try to choose fresh when you can! For the full recipe, check the section above. Cutting vegetables evenly ensures they cook at the same rate. Aim for 1-inch pieces for bell peppers and wedges for onions. Slice zucchini and yellow squash into rounds. If using wooden skewers, soak them in water for at least 30 minutes. This step prevents burning and keeps them strong. Marinating vegetables adds rich flavor. Combine olive oil, minced garlic, smoked paprika, and oregano. Toss in salt and pepper, then mix well. Add your veggies and coat them with the marinade. Let them sit for 15 minutes to soak up the flavors. Preheat your grill to medium-high heat. A hot grill helps create nice grill marks and a good sear. Place the kabobs on the grill grates. Arrange them evenly for better cooking. Cook for about 10-15 minutes. Turn them occasionally to ensure even cooking. Look for tender veggies with nice grill marks. To serve kabobs, use a rustic platter for a warm touch. Garnish with fresh herbs for added color. Serve with tzatziki or yogurt dip for a creamy contrast. Pair with a light salad or grilled protein for a complete meal. Enjoy your delicious creation! For the full recipe, check out the Grilled Veggie Kabobs details above. To boost the taste of your grilled veggie kabobs, try different marinades. Balsamic vinegar adds a sweet tang. Citrus juices like lemon or lime give a bright kick. You can also add spices or herbs. Consider rosemary, thyme, or cayenne pepper for extra flavor. Smoking the veggies adds depth too. If you have a grill with a smoker box, use it. Wood chips like hickory or mesquite can make a big difference. When you assemble your kabobs, think about color and texture. Alternate your veggies for a pretty look. Start with a bell pepper, then add a mushroom, followed by a cherry tomato. This keeps the kabob interesting. To prevent veggies from falling apart, push them snugly together on the skewer. Avoid overloading them; a little space helps. You can also add proteins like chicken or shrimp, or even cheese cubes for variety. This makes your kabobs more filling and tasty. For a twist, try marinating the protein in the same mix as the veggies. If you want to dive deeper into the recipe, check out the Full Recipe for more details! {{image_4}} You can easily customize grilled veggie kabobs by using seasonal vegetables. Here are some ideas: - Summer: Try corn on the cob, eggplant, and asparagus. - Fall: Use butternut squash, Brussels sprouts, and sweet potatoes. - Winter: Consider root veggies like carrots, turnips, and beets. You can also grill fruits alongside your veggies. Fruits add sweetness and a nice contrast. Pineapple, peaches, and bell peppers work well. Skewer them together for fun color and taste. For a great look and texture, combine different colors and shapes. Mix round cherry tomatoes with long zucchini slices. Use bright peppers with earthy mushrooms. This creates visual interest on your plate. You can make grilled veggie kabobs vegan by omitting any animal products. The recipe is already plant-based, so it’s a perfect choice. If you want a gluten-free version, ensure your marinade is gluten-free. Most spices and oils are safe, but check labels. You can enhance nutrition by adding grains or legumes. Try adding cooked quinoa or chickpeas to your kabobs. This gives extra protein and fiber. If you follow a low-carb diet, focus on non-starchy vegetables. Zucchini, bell peppers, and mushrooms are great picks. You can skip the starchy veggies like corn or potatoes. Check out the Full Recipe for more ideas on how to adapt these kabobs! To keep your leftover kabobs fresh, store them in the fridge. Place them in an airtight container. They can last up to three days. For longer storage, freeze them. Wrap each kabob in plastic wrap, then place them in a freezer bag. They can stay frozen for up to three months. When reheating kabobs, use the oven or grill. Preheat the oven to 350°F. Place the kabobs on a baking sheet. Heat them for about 10 minutes. This method keeps the veggies tender. You can also grill them for 5 minutes on medium heat. Avoid microwaving, as it makes them soggy. The freshness of your ingredients matters. Bell peppers and zucchini last well in the fridge for about a week. Tomatoes and mushrooms are best if used within three days. Always check for signs of spoilage before using leftovers. You can prep veggies ahead of time for easy grilling. Cut your bell pepper, zucchini, and onion in advance. Store them in the fridge in sealed bags. This saves time when you're ready to grill. Kabobs are great for meal plans. You can mix and match different veggies throughout the week. Pair them with grains or salads for a full meal. They also work well for lunch boxes. Just make sure to keep them cool until you eat. If you have a gathering, kabobs are a hit! You can set up a kabob station. Guests can choose their favorite veggies. This adds fun and personalization to your meal. Kabobs not only taste great but also look colorful and inviting on the table. For the complete recipe, check out the [Full Recipe]. Can I make these kabobs in the oven? Yes, you can! Set your oven to 400°F. Place the kabobs on a baking sheet. Bake for about 20 minutes, turning halfway through. This gives you a tasty option when grilling isn't possible. What are the best vegetables for grilling? The best vegetables for grilling include: - Bell peppers - Zucchini - Yellow squash - Red onion - Cherry tomatoes - Mushrooms These veggies hold up well on the grill and taste great! How to know when the vegetables are done cooking? Look for nice grill marks and tenderness. You can pierce them with a fork. If they are soft but still firm, they are ready to eat. How to make grilled veggie kabobs more flavorful? Use a good marinade with olive oil, garlic, and spices. Let the veggies soak in the marinade for at least 15 minutes. This step really boosts their taste. Why should you marinate vegetables? Marinating adds flavor and helps keep them juicy. The oil and spices soak into the veggies, making each bite delicious. What type of skewers work best for grilling? Both wooden and metal skewers work well. If using wooden skewers, soak them first. This prevents burning. Metal skewers can be reused and do not need soaking. Can I use tofu or tempeh in veggie kabobs? Yes, tofu or tempeh can add protein. Cut them into cubes and marinate like the veggies. They grill nicely and taste great with the other flavors. How do I prevent vegetables from burning on the grill? Start with a clean grill and preheat it. Keep an eye on the kabobs while grilling. Turn them often to ensure even cooking and avoid burning. What can I serve alongside grilled veggie kabobs? Serve kabobs with dips like tzatziki or hummus. They also pair well with rice, quinoa, or a fresh salad. Adding some bread can complete the meal nicely. You now have all the tools to create delicious grilled veggie kabobs. We covered essential ingredients, preparation methods, grilling tips, and serving ideas. Remember, fresh ingredients make a big difference. You can also customize with various vegetables and flavors. Don’t forget to store leftovers properly for future meals. Enjoy your grilling adventure, and get creative with your kabob variations. With practice, you'll master this fun cooking method that delights everyone!](https://dishtreats.com/wp-content/uploads/2025/06/56cc5cbd-3bee-4e7d-a92f-dff27107e6fe-768x768.webp)

