If you love peanut butter and chocolate, you’re in for a treat! This easy recipe for Peanut Butter Chocolate Overnight Oats combines rich flavors and creamy textures, making the perfect breakfast. It’s quick to prepare and packed with nutrients to fuel your day. Join me as we dive into this delicious recipe, along with tips and variations to make it just right for you! Let’s get started!
Ingredients
List of Ingredients
To make Peanut Butter Chocolate Overnight Oats, you will need the following:
– 1 cup rolled oats
– 2 cups almond milk (or your preferred milk variety)
– 2 tablespoons natural creamy peanut butter
– 2 tablespoons unsweetened cocoa powder
– 2 tablespoons maple syrup (or honey for sweetness)
– 1/2 teaspoon pure vanilla extract
– A pinch of salt
– 1 ripe banana, sliced (for topping)
– Chopped peanuts and dark chocolate shavings (for garnish)
Recommended Ingredient Substitutions
You can swap some ingredients to fit your taste. If you want a nut-free option, use sunflower seed butter instead of peanut butter. For a dairy-free choice, almond milk is great, but soy or oat milk works well too. You can replace maple syrup with agave nectar or any other sweetener you like. If cocoa powder is not your thing, try carob powder for a different flavor.
Nutritional Information
Each serving of these overnight oats has around 350 calories. They provide a good mix of protein, carbs, and healthy fats. You get about 10 grams of protein and 7 grams of fiber, which helps keep you full. The oats give you energy, while the peanut butter adds creaminess and taste. Plus, the dark chocolate shavings offer a little indulgence without too much guilt. Enjoy every spoonful knowing it’s a balanced meal!
Step-by-Step Instructions
Preparation Method
First, gather your ingredients. You need rolled oats, almond milk, peanut butter, cocoa powder, maple syrup, vanilla extract, salt, a banana, chopped peanuts, and dark chocolate shavings. Start by measuring out one cup of rolled oats and two cups of almond milk. This forms the base of your overnight oats.
Mixing and Combining Ingredients
In a medium bowl, combine the oats and almond milk. Next, add two tablespoons of peanut butter, two tablespoons of cocoa powder, and two tablespoons of maple syrup. Include half a teaspoon of vanilla extract and a pinch of salt. This mix gives your oats a rich flavor. Using a whisk, mix everything until it’s smooth and well blended. Make sure the peanut butter is fully mixed in.
Once your mixture is ready, divide it into two jars or airtight containers. Fill them to your desired level. Seal the jars tightly and place them in the fridge overnight. This helps the oats absorb the liquid and soften.
Serving Suggestions
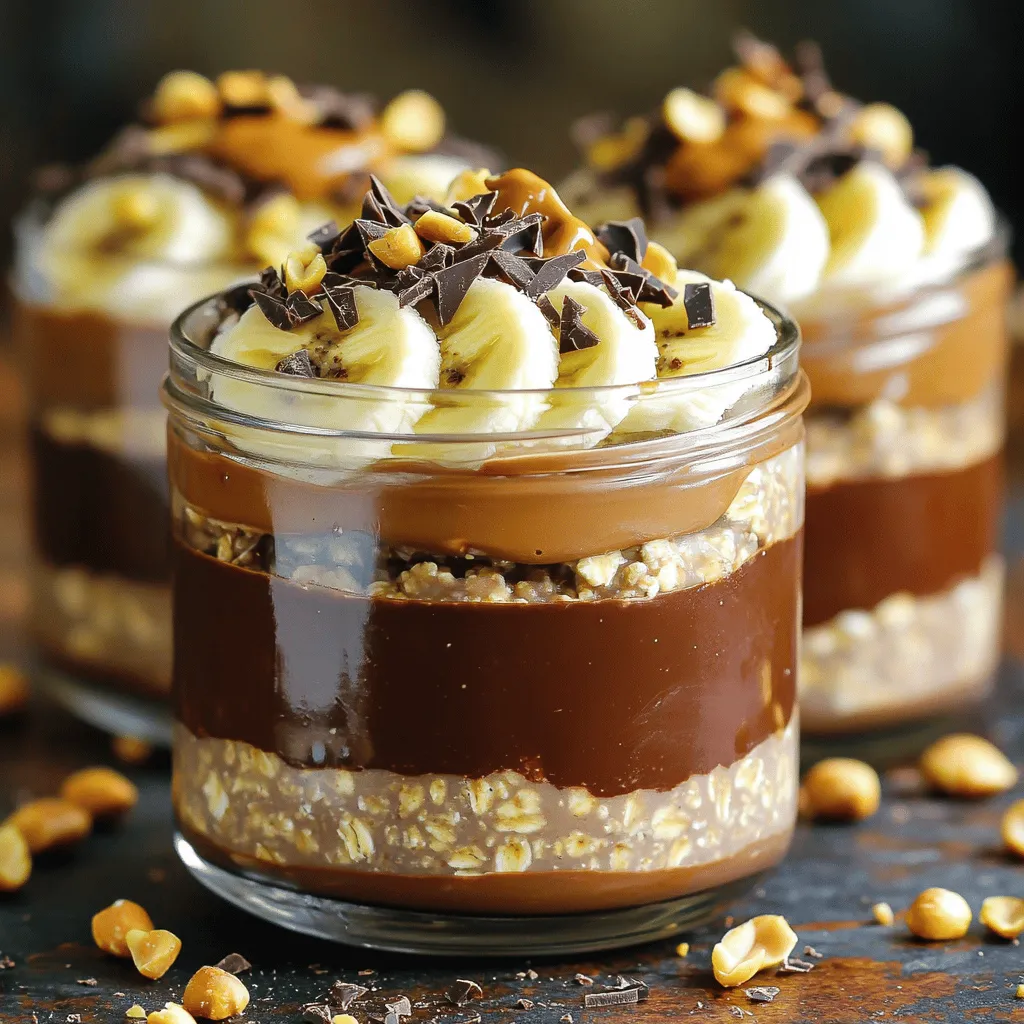
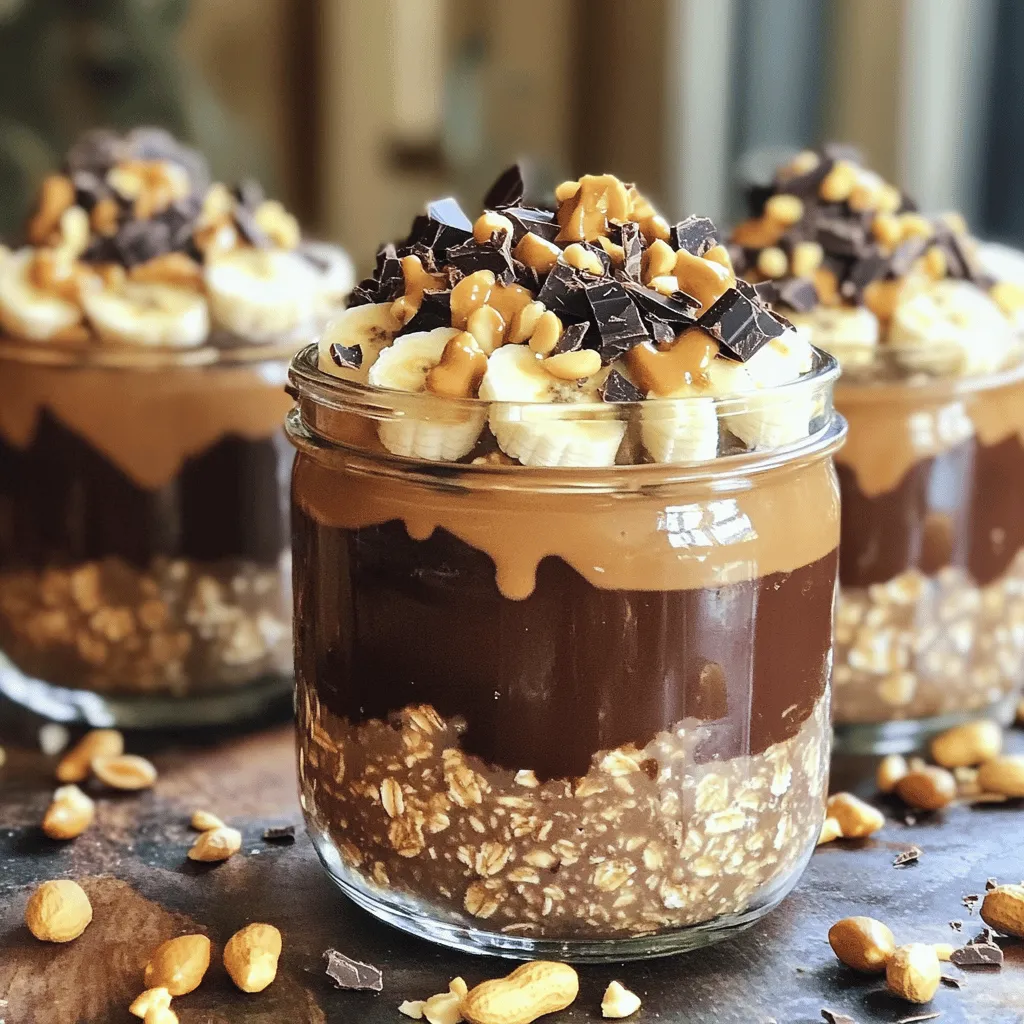
When you wake up, take the jars out of the fridge. Stir the oats to make them creamy. They should be thick and delicious. Top each jar with fresh banana slices. Add chopped peanuts and dark chocolate shavings for a tasty finish. You can enjoy your oats cold or warm them in the microwave for about one minute. For a lovely presentation, serve in clear jars to show off those yummy layers.
Tips & Tricks
How to Achieve Creamy Oats
To get creamy oats, you need to use the right ratio of oats to liquid. I recommend using 1 cup of rolled oats with 2 cups of almond milk. This balance helps the oats soak up the milk overnight. Make sure to mix your ingredients well. If you want even creamier oats, you can add a little extra milk in the morning. Stir it in before you top your oats. This makes them smooth and easy to enjoy.
Store-Bought vs. Homemade Variations
Store-bought overnight oats can be quick, but they often lack fresh taste. Making your own lets you pick the best ingredients. Plus, you can control the sweetness and flavors. If you want to save time, consider making a big batch. You can store them in jars for the week. Homemade oats taste better and you can customize them to fit your needs.
Using Different Milk Alternatives
You can use many types of milk in this recipe. Almond milk is my go-to, but feel free to try oat milk, soy milk, or even coconut milk. Each type adds a unique flavor. If you choose unsweetened milk, adjust the sweetness with more maple syrup or honey. This way, you can still enjoy that rich taste of peanut butter and chocolate.
Variations
Flavor Enhancements
You can spice up your Peanut Butter Chocolate Overnight Oats in fun ways. Try adding a dash of cinnamon for warmth. A pinch of nutmeg adds a cozy vibe, too. For a kick, add cayenne pepper. It gives a surprising twist. If you love coffee, mix in a teaspoon of instant coffee. It pairs well with chocolate. Each addition makes the flavor unique and exciting.
Topping Options
Toppings can change the whole dish. Fresh fruits are a great choice. Sliced strawberries or blueberries add color and taste. You can also use chopped nuts for crunch. They add healthy fats and protein. Try adding shredded coconut for a tropical flair. A drizzle of honey or maple syrup can sweeten things up. Get creative and mix and match!
Making it Vegan-Friendly
This recipe is easy to make vegan-friendly. Use almond milk or any plant-based milk. Choose a vegan peanut butter without added sugar. Maple syrup is already a vegan-friendly sweetener. You can skip the honey to keep it plant-based. With these simple swaps, everyone can enjoy this tasty dish.
Storage Info
Best Practices for Refrigeration
To keep your peanut butter chocolate overnight oats fresh, store them in airtight jars. This helps prevent spills and keeps the oats tasty. Always allow them to cool before sealing. If you plan to eat them later, make sure they are fully chilled.
How Long Do They Last in the Fridge?
When stored properly, these oats last for up to five days in the fridge. After that, the oats may lose their texture and flavor. For the best taste, enjoy them within three days. Check for any signs of spoilage before eating.
Freezing Options
You can freeze your oats if you want to save them for later. To do this, place the mixture in freezer-safe containers. Make sure to leave some space at the top for expansion. They can last up to three months in the freezer. When ready to eat, thaw in the fridge overnight before serving. You can also reheat them in the microwave. This is a great way to enjoy a quick breakfast any day.
FAQs
Can I make Peanut Butter Chocolate Overnight Oats in advance?
Yes, you can make Peanut Butter Chocolate Overnight Oats in advance. In fact, I recommend it! Preparing them a day ahead lets the oats soak up the flavors. This also saves time in the morning. Just mix all your ingredients, store them in jars, and refrigerate overnight. You’ll wake up to a tasty breakfast ready to enjoy.
What can I replace peanut butter with?
If you need a substitute for peanut butter, there are great options. Almond butter works well and has a nice flavor. Sunflower seed butter is also a good choice for nut-free diets. You can even use tahini for a unique twist. Choose what fits your taste and dietary needs best.
How do I modify the recipe for more servings?
To make more servings, simply double or triple the ingredients. For example, if you want four servings, use 2 cups of rolled oats and 4 cups of almond milk. Just keep the proportions the same. This way, each batch stays creamy and delicious!
Is this recipe suitable for meal prep?
Absolutely! This recipe is great for meal prep. You can make several jars at once and store them in the fridge. They last up to five days, so you can enjoy them throughout the week. Just make sure to top them with fresh fruits and nuts before serving for the best taste.
This blog post covers all you need to make delicious Peanut Butter Chocolate Overnight Oats. It details key ingredients, step-by-step methods, and handy tips for rich flavor. You learned how to customize your bowl to your taste and the best ways to store leftovers.
In the end, making these oats is simple and rewarding. Enjoy experimenting with flavors. Your mornings will feel brighter and better!


