Peanut Butter Banana Overnight Oats Easy Healthy Meal

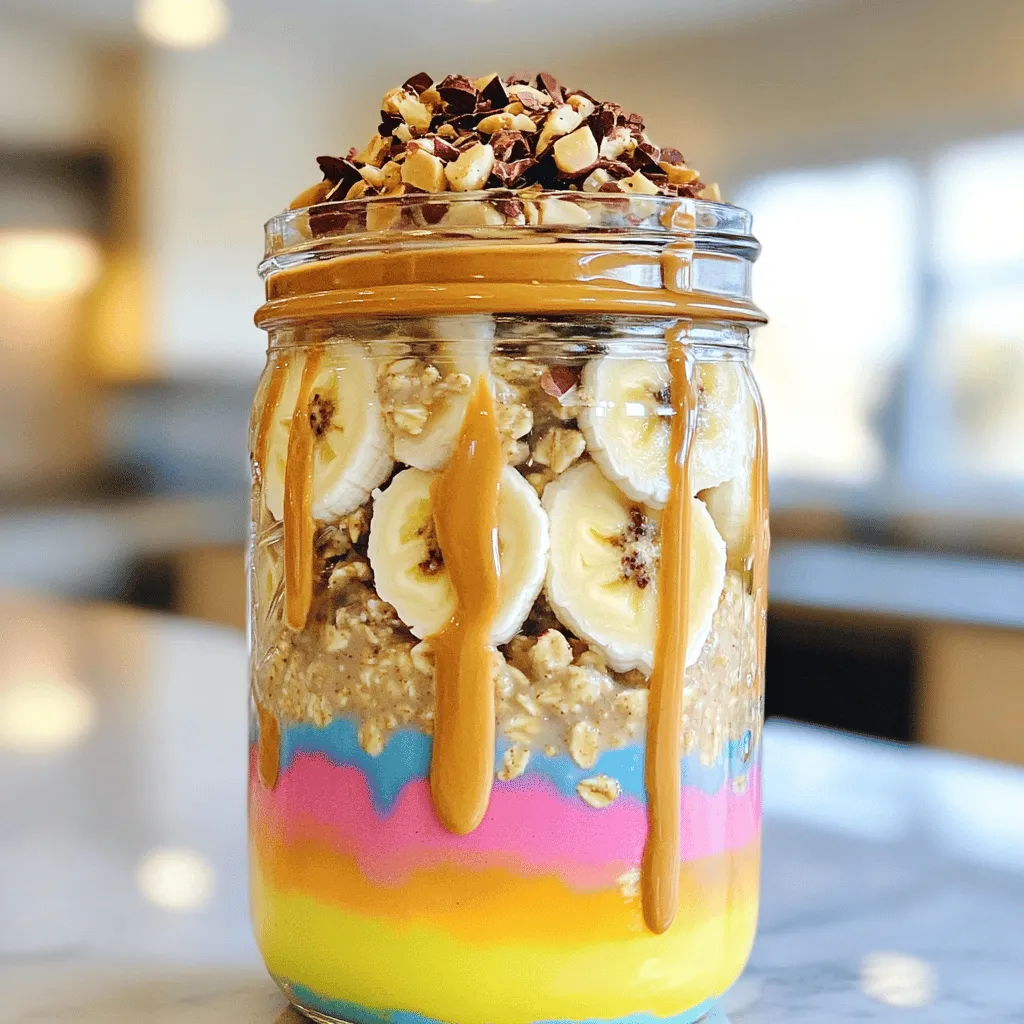
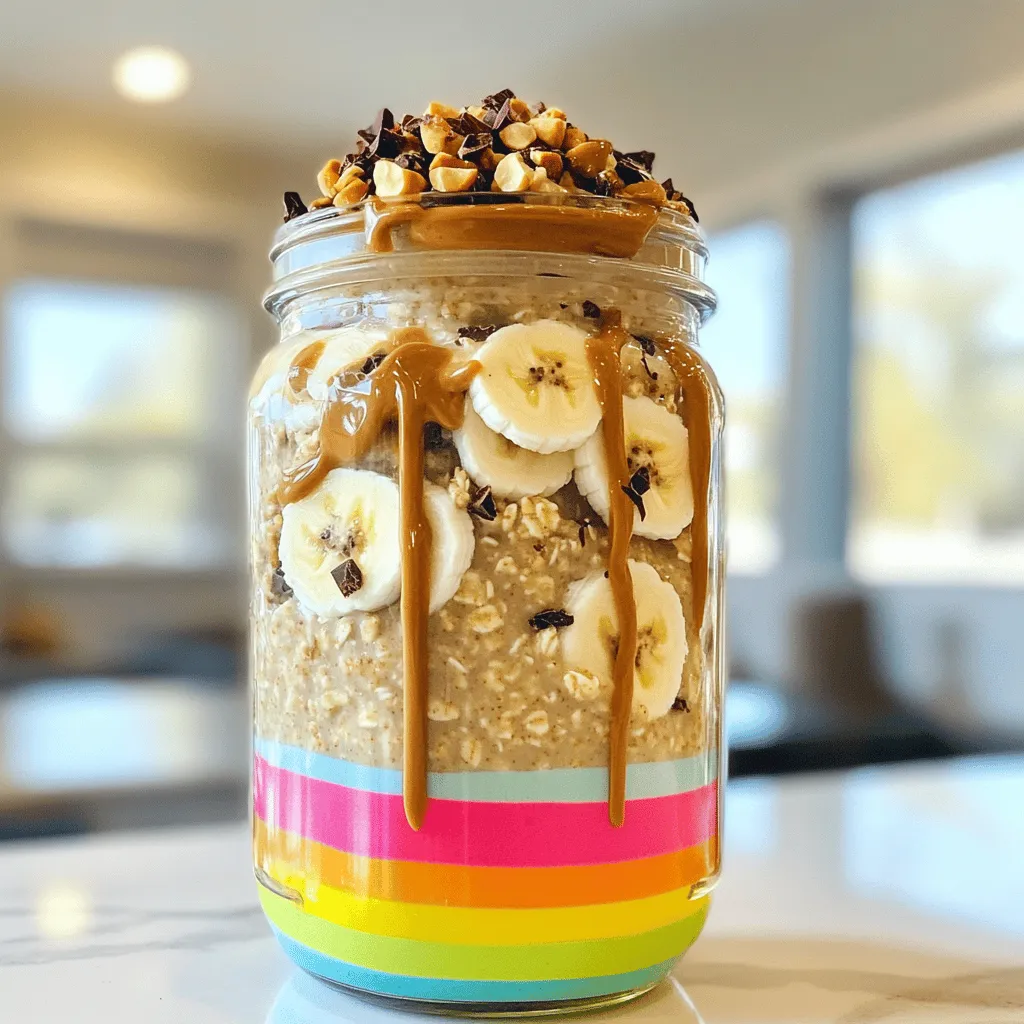
Start your day right with Peanut Butter Banana Overnight Oats! This easy, healthy meal combines creamy peanut butter and sweet bananas for a nutritious breakfast you’ll love. Plus, it’s quick to prepare and perfect for meal prep. With just a few simple ingredients, you can enjoy a delicious start to your day that fuels your body. Join me as we whip up this tasty treat that fits perfectly into your busy lifestyle!
Ingredients
Here’s what you need for Peanut Butter Banana Overnight Oats:
- 1 cup rolled oats
- 2 cups almond milk (or your preferred milk)
- 2 ripe bananas, sliced
- 3 tablespoons natural peanut butter
- 1 tablespoon chia seeds
- 1 tablespoon honey or maple syrup (optional)
- 1/2 teaspoon vanilla extract
- Pinch of salt
- Optional toppings: additional banana slices, chopped nuts, a drizzle of peanut butter, or cacao nibs
These ingredients create a tasty and healthy meal. Rolled oats form the base, soaking up the almond milk. Bananas add natural sweetness. Peanut butter gives the oats a creamy texture and rich flavor. Chia seeds boost nutrition and help thicken the mix. Honey or maple syrup can sweeten it more if you like.
You can change the toppings based on your mood. Extra banana slices give more flavor, while nuts add a nice crunch. Cacao nibs can bring a bit of chocolatey goodness.Enjoy making your breakfast!
Step-by-Step Instructions
Preparation Steps
- Combine rolled oats and almond milk in a bowl or jar.
- Mix in chia seeds, sweetener, vanilla, and a pinch of salt.
- Fold in sliced bananas and peanut butter gently.
- Refrigerate for at least 4 hours or overnight.
Making these overnight oats is quick and easy. You start by adding rolled oats and almond milk to a bowl or jar. Oats absorb the milk, making them soft and creamy. Next, mix in chia seeds, honey or maple syrup, vanilla, and a pinch of salt. These ingredients add flavor and texture.
After mixing, fold in the sliced bananas and peanut butter. This step is fun! The bananas add sweetness, and the peanut butter gives it a rich taste. After mixing everything, put the jar in the fridge. Let it chill for at least 4 hours or overnight. This waiting time is key. It allows the oats to soak up all the flavors.
Serving Suggestions
- Stir the oats well before serving.
- Add any extra toppings you like.
When you are ready to eat, take the oats out of the fridge. Give them a good stir to mix everything together. If you want a creamier texture, add a splash of milk. For fun, top with extra banana slices, a drizzle of peanut butter, or your favorite nuts. You can add a bit of crunch with cacao nibs too. The toppings make your dish look great and taste even better. Enjoy your Peanut Butter Banana Overnight Oats!
Tips & Tricks
Achieving the Perfect Consistency
To get the best texture for your Peanut Butter Banana Overnight Oats, adjust the milk. More milk gives a creamier mix. If you want it thicker, use less milk. Store any extra oats in a sealed container in the fridge. They stay fresh for up to 5 days. Before you eat, always stir the oats well. This helps spread the peanut butter and bananas evenly.
Meal Prep Tips
Make a big batch for the week. This way, you have breakfast ready each day. I love using mason jars. They are perfect for taking oats on the go. Pack them the night before and just grab them in the morning.

Variations
Flavor Enhancements
You can easily change the flavor of your Peanut Butter Banana Overnight Oats. Here are some tasty ideas:
- Adding spices: A sprinkle of cinnamon or nutmeg can make your oats warm and cozy. These spices add nice flavor without extra calories.
- Incorporating chocolate: You can mix in cocoa powder or chocolate chips. This gives a rich, sweet taste and makes mornings feel special.
Dietary Modifications
If you need to adjust your recipe for dietary needs, here are some options:
- Dairy-free alternatives: Use almond milk, coconut milk, or oat milk instead of regular milk. These options keep your oats creamy and delicious.
- Nut-free options: If you have nut allergies, replace peanut butter with sun butter. It has a similar texture and flavor, so you won’t miss out.
These variations make it easy to enjoy Peanut Butter Banana Overnight Oats in many ways.
Storage Info
Best Practices for Storing
To keep your Peanut Butter Banana Overnight Oats fresh, use airtight containers. These containers help keep moisture in and prevent the oats from drying out. Store them in the refrigerator. They stay good for up to five days. After that, the oats may lose their taste and texture.
Freezing Options
You can freeze your overnight oats if you want to save them for later. Just pour individual servings into freezer-safe containers. Leave some space at the top because the oats will expand as they freeze. To reheat, place them in the fridge overnight to thaw. In the morning, heat them in the microwave. Stir well and add a splash of milk if needed. Enjoy a quick and easy meal!
FAQs
How long do Peanut Butter Banana Overnight Oats last in the refrigerator?
Peanut Butter Banana Overnight Oats stay fresh for about five days in the fridge. Store them in an airtight container to keep them safe. After that, they may start losing flavor and texture. Always check for any off smells or changes in appearance before eating.
Can I use quick oats instead of rolled oats?
Yes, you can use quick oats. They absorb liquid faster than rolled oats. This means your oats will become creamier but may lose some texture. If you like a heartier bite, stick with rolled oats for the best results.
What is the nutritional value of Peanut Butter Banana Overnight Oats?
Peanut Butter Banana Overnight Oats are packed with nutrients. Each serving typically contains:
- Calories: About 350
- Protein: 10g
- Carbohydrates: 50g
- Fiber: 8g
- Fat: 12g
These oats deliver a great mix of energy, healthy fats, and fiber. They are perfect for a balanced breakfast.
Can I prepare overnight oats without chia seeds?
Yes, you can skip the chia seeds. They add fiber and help with texture. If you leave them out, your oats will still taste great. You might want to add a little more rolled oats or reduce the liquid slightly to keep the same thickness.
You can make tasty Peanut Butter Banana Overnight Oats with simple ingredients. We covered how to mix oats, milk, and ripe bananas to create a healthy breakfast. Tips included adjusting milk for creaminess and using mason jars for easy meal prep.
Keep these oats in airtight containers to stay fresh. You can even freeze them for later. Enjoy exploring flavor options to suit your taste. These oats are not just easy to make; they fuel your day right! Try them and see how they fit your routine.


. You now have all the tools to make savory herb roasted chicken thighs. We discussed the key ingredients, how to prepare and roast the chicken, and tips for crispy skin and flavor. You also learned about variations and storage methods to keep your meal fresh. Enjoy experimenting with flavors and techniques. Cooking should bring joy. Trust your skills, and share this tasty dish with others!](https://dishtreats.com/wp-content/uploads/2025/06/7c34b550-313c-42ec-9338-3ef305d43656-768x768.webp)
![- Rice paper wrappers - 1 ripe mango, peeled and cut into thin julienne strips - 2 ripe avocados, halved, pitted, and sliced into thin wedges - 1/2 cucumber, peeled and julienned - 1 cup shredded carrots - 1/4 cup fresh mint leaves, torn if large - 1/4 cup fresh cilantro leaves - 1 tablespoon sesame seeds (optional) - 3 tablespoons soy sauce - 1 tablespoon freshly squeezed lime juice - 1 teaspoon honey or agave syrup - 1/2 teaspoon freshly grated ginger Mango avocado summer rolls shine with fresh ingredients. You need rice paper wrappers to hold all this goodness. The key fresh items are ripe mango and creamy avocado. Their flavors blend perfectly. Crunchy cucumber and colorful carrots add texture and fun. Fresh herbs like mint and cilantro brighten the rolls. For a twist, sprinkle sesame seeds for extra crunch. Now, let's talk about the dipping sauce. It's easy to make and enhances the taste. Just mix soy sauce, lime juice, honey, and ginger. This sauce adds a tangy, sweet kick that pairs well with the rolls. You can find the full recipe with all these details. Enjoy creating your mango avocado summer rolls today! To start, you need to make the dipping sauce. In a small mixing bowl, add the soy sauce, lime juice, honey or agave syrup, and grated ginger. Whisk these ingredients together well. This sauce adds a bright, tangy flavor that pairs nicely with the fresh summer rolls. Set it aside for the flavors to blend. Next, grab a shallow dish or a large plate. Fill it with warm water. Take one rice paper wrapper and dip it in the warm water for about 10 seconds. You want it to be soft but not too mushy. Carefully lift it out and lay it flat on a damp kitchen towel or a clean surface. This makes it easier to work with. Now it’s time to layer your ingredients. In the center of the rice paper wrapper, place a few strips of mango, a couple of avocado slices, sticks of cucumber, and a handful of shredded carrots. Don’t forget the fresh mint and cilantro leaves! They add a burst of flavor. You can also sprinkle sesame seeds on top for extra crunch if you like. To roll up the summer rolls, fold the sides of the wrapper over the filling. Then, gently roll the wrapper away from you while tucking in the filling tightly. This helps keep everything secure inside. Repeat this for the rest of the wrappers and filling. You’ll soon have a beautiful platter of summer rolls! After rolling, place the summer rolls on a serving plate. Cover them with a damp cloth. This keeps them fresh and prevents them from drying out while you finish the rest. Make sure they stay moist for the best taste. When you are ready to serve, present the summer rolls with the dipping sauce on the side. This makes it fun for everyone to dip their rolls as they wish. Enjoy the fresh flavors and the crisp textures of your homemade Mango Avocado Summer Rolls! For the full recipe, check out the complete instructions above. To avoid tearing the rice paper wrappers, keep these tips in mind: - Soak each wrapper just until soft, about 10 seconds in warm water. - Work on a damp surface to prevent sticking. - Don't overfill the wrapper; less is more! - When rolling, tuck in the sides gently, but firmly. Choosing ripe ingredients makes a big difference. Here are my best practices: - Look for mangoes that yield slightly to gentle pressure. - Choose avocados that are firm but not hard. - Select cucumbers that are crisp and have a smooth skin. - Fresh herbs should be vibrant and fragrant; avoid wilting. Want to make your rolls even better? Try these ideas: - Add cooked shrimp or chicken for extra protein. - Include bell peppers or radishes for a crunchier bite. - Swap in different herbs like basil or parsley for a unique flavor. - Use quinoa or rice noodles for a heartier filling. For the complete recipe, check out the [Full Recipe]. Enjoy making your summer rolls! {{image_4}} If you want a fully plant-based dish, there are many fun swaps. You can use tofu instead of fish or shrimp. Try adding bean sprouts for a nice crunch. You can also toss in sliced bell peppers for a splash of color. These swaps keep the rolls fresh and tasty. To give your summer rolls an Asian twist, add fresh herbs like basil or dill. You can also use hoisin sauce or peanut sauce instead of the soy sauce. A drizzle of sriracha can bring some heat. These changes will make your rolls pop with flavor. For easy assembly, prep your ingredients ahead of time. Cut your mango, avocado, and cucumber in advance. Store them in airtight containers in the fridge. This way, you can whip up these rolls in just a few minutes. It makes summer roll night so much easier! For the full recipe, check out the detailed instructions provided. To keep your summer rolls fresh, wrap them in a damp cloth. Place them on a plate and cover with plastic wrap. This method helps prevent the rice paper from drying out. Store the rolls in the fridge if you plan to eat them later. Try to consume them within 24 hours for the best taste and texture. If you want to freeze unassembled summer rolls, first prepare the ingredients. Gather your mango, avocados, and veggies. Then, make the rolls but do not roll them up yet. Lay each rice paper wrapper flat on a parchment-lined tray. Fill the wrappers but leave them open. Freeze the tray for about one hour. Once frozen, place the rolls in a freezer bag. This helps you save space and keeps them fresh. When you’re ready to enjoy your summer rolls, take them out of the freezer. Place them in the fridge for a few hours or overnight to thaw. For a faster option, you can run them under warm water for a few seconds. Never use a microwave, as it can make the rice paper tough. After thawing, assemble the rolls with your favorite sauce, and enjoy a fresh and tasty meal! To make Mango Avocado Summer Rolls, follow these steps: 1. First, prepare the dipping sauce by mixing soy sauce, lime juice, honey, and ginger. 2. Next, soak rice paper wrappers in warm water for about 10 seconds. 3. Lay the softened wrapper on a damp surface. 4. Place mango strips, avocado slices, cucumber sticks, shredded carrots, and herbs in the center. 5. Optionally, add sesame seeds for crunch. 6. Fold the sides over the filling and roll tightly. 7. Repeat until all ingredients are used. Serve with dipping sauce. This process is easy and fun, perfect for summer gatherings. Yes, you can add meat or seafood to your summer rolls. Here are some great options: - Grilled chicken or shrimp adds protein and flavor. - Thinly sliced beef or pork works well too. - For a tasty twist, try crab or lobster. These additions make your rolls even more filling and delicious. You can try different dipping sauces beyond the suggested one. Here are some ideas: - Peanut sauce for a creamy texture and nutty flavor. - Sweet chili sauce adds a spicy kick. - A simple vinegar and soy sauce mix is also tasty. Feel free to experiment with flavors you love! You now know how to make delicious summer rolls with fresh ingredients and tasty dipping sauce. We covered the necessary components, step-by-step instructions, and tips for success. Remember, you can customize these rolls to fit your tastes. With the right care, you can store or even freeze them for later. Enjoy the fun of making and sharing these tasty treats. Trust me, they’re worth the effort!](https://dishtreats.com/wp-content/uploads/2025/07/e9c41e61-bd63-46cf-9640-b605cd161798-768x768.webp)


![- 8 oz. elbow macaroni - 1 lb. ground beef or ground turkey - 1 packet taco seasoning mix - 1 cup diced tomatoes (fresh or canned) - 1 cup canned black beans, drained and rinsed - 1 cup corn (can be frozen or canned) - 2 cups shredded cheddar cheese (divided) - 1 cup salsa (your choice of spiciness) - 1/2 cup sour cream - 1 tablespoon olive oil - Salt and pepper to taste - Chopped green onions and fresh cilantro for garnish Gather these ingredients before you start cooking. This will make the process smooth and fun! The elbow macaroni is the base of this dish. It holds the cheesy sauce very well. Ground beef or turkey adds a hearty touch. You can use either, depending on your taste. The taco seasoning mix gives the pasta that classic taco flavor. Diced tomatoes bring freshness and moisture, while black beans boost protein and fiber. Corn adds a nice sweetness. Cheddar cheese is key for that melty, gooey goodness. Salsa adds a kick; choose your preferred heat level. Sour cream makes the dish creamy and rich. Olive oil helps cook the meat and adds flavor. Finally, salt, pepper, and garnishes like green onions and cilantro make it all pop. When you have everything ready, the fun part starts! You’ll see how these simple ingredients blend into a delicious dish. For the complete recipe, check out the Full Recipe section. To start, cook the elbow macaroni. Follow the package instructions carefully. Aim for al dente texture, which means the pasta should be firm when bitten. This keeps it from getting mushy later. Once done, drain the pasta in a colander and set it aside in a large bowl. While the pasta cooks, heat the olive oil in a large skillet over medium heat. Add the ground beef or turkey. Cook for about 5-7 minutes, stirring often to break up the meat. Look for a nice brown color. After browning, drain any extra fat from the skillet. Next, add the taco seasoning mix, diced tomatoes, black beans, corn, and salsa. Stir well and let the mixture simmer for about 5 minutes. This helps the flavors come together. After simmering, gently fold the cooked macaroni into the skillet. Make sure the pasta gets well-coated with the tasty mixture. Lower the heat to low, then add 1 1/2 cups of shredded cheddar cheese. Stir until the cheese melts into a creamy coating. Remove the skillet from the heat and add the sour cream. Mix it well until fully blended. Taste your dish and add salt and pepper to your liking. For the full recipe, refer to the instructions above. Enjoy your cheesy taco pasta! To get the best taco flavor, use a high-quality taco seasoning mix. It gives a bold taste. I often mix in extra spices, like garlic powder or cumin, for depth. For a creamy texture, add the cheese slowly. Let it melt fully before adding sour cream. This step ensures a smooth, rich sauce. Garnish your cheesy taco pasta with fresh green onions and cilantro. They add color and freshness. You can also use sliced avocado or jalapeños for extra flair. For a complete meal, pair the pasta with a simple side salad or tortilla chips. The crunch complements the creamy pasta well. You can find the full recipe [here]. {{image_4}} You can change up the protein in this dish. Ground turkey is a lighter choice. Ground chicken also works well. If you prefer plant-based options, try meat substitutes made from soy or lentils. Each option gives a unique flavor, but they all blend well with taco spices. If you need gluten-free pasta, many brands offer great options. Just look for gluten-free elbow macaroni. For those avoiding dairy, you can find dairy-free cheese and sour cream at most stores. These alternatives melt nicely and keep the dish creamy. Don’t be afraid to play with flavors! Different salsas add unique twists. You can also add jalapeños for heat. Hot sauce can give it an extra kick, too. These simple changes can make your cheesy taco pasta even more exciting. For the full recipe, check out the Cheesy Taco Pasta Extravaganza. To store your Cheesy Taco Pasta, let it cool first. Place leftovers in an airtight container. This keeps the dish fresh and tasty. It will last in the fridge for about 3 to 4 days. Always check for smells or mold before eating. When you’re ready to eat, reheat the pasta on the stove. Pour the pasta into a skillet over low heat. Stir it often to ensure even heating. You can also add a splash of water or broth to keep it creamy. Microwave is another option. Use a microwave-safe dish and cover it. Heat in short bursts, stirring every minute until it’s hot. Freezing Cheesy Taco Pasta is a great way to enjoy it later. First, let it cool completely. Then, transfer it to a freezer-safe container. Make sure to leave some space for expansion. You can freeze it for up to 2 months. When you are ready to eat, defrost it overnight in the fridge. Reheat it on the stove, just like before, to keep the flavor and texture. Cheesy Taco Pasta can last for about 3 to 5 days in the fridge. To keep it fresh, store it in an airtight container. Look for signs of spoilage like a sour smell or mold. If you see either, it’s best to toss it out. Yes, you can make Cheesy Taco Pasta ahead of time. Cook it and let it cool. Then, store it in the fridge for up to 2 days before serving. When ready to eat, just reheat it in a pan or microwave. Add a splash of water or broth to keep it moist. If you don’t have elbow macaroni, you can use other pasta shapes. Options include rotini, penne, or even gluten-free pasta. Quinoa or rice can also work if you want a grain instead. Just adjust cooking times as needed. We explored a tasty Cheesy Taco Pasta recipe, packed with flavor and fun. You learned about the key ingredients, easy steps for cooking, and tips to nail that taco taste. We also talked about variations to fit your needs, storage tips, and answers to common questions. This dish is not just simple; it’s a crowd-pleaser. Enjoy cooking and sharing your delicious creation!](https://dishtreats.com/wp-content/uploads/2025/07/060fa6b2-3df9-47e4-b794-a1b6a0be3885-768x768.webp)