Peach Raspberry Galette Deliciously Simple Dessert

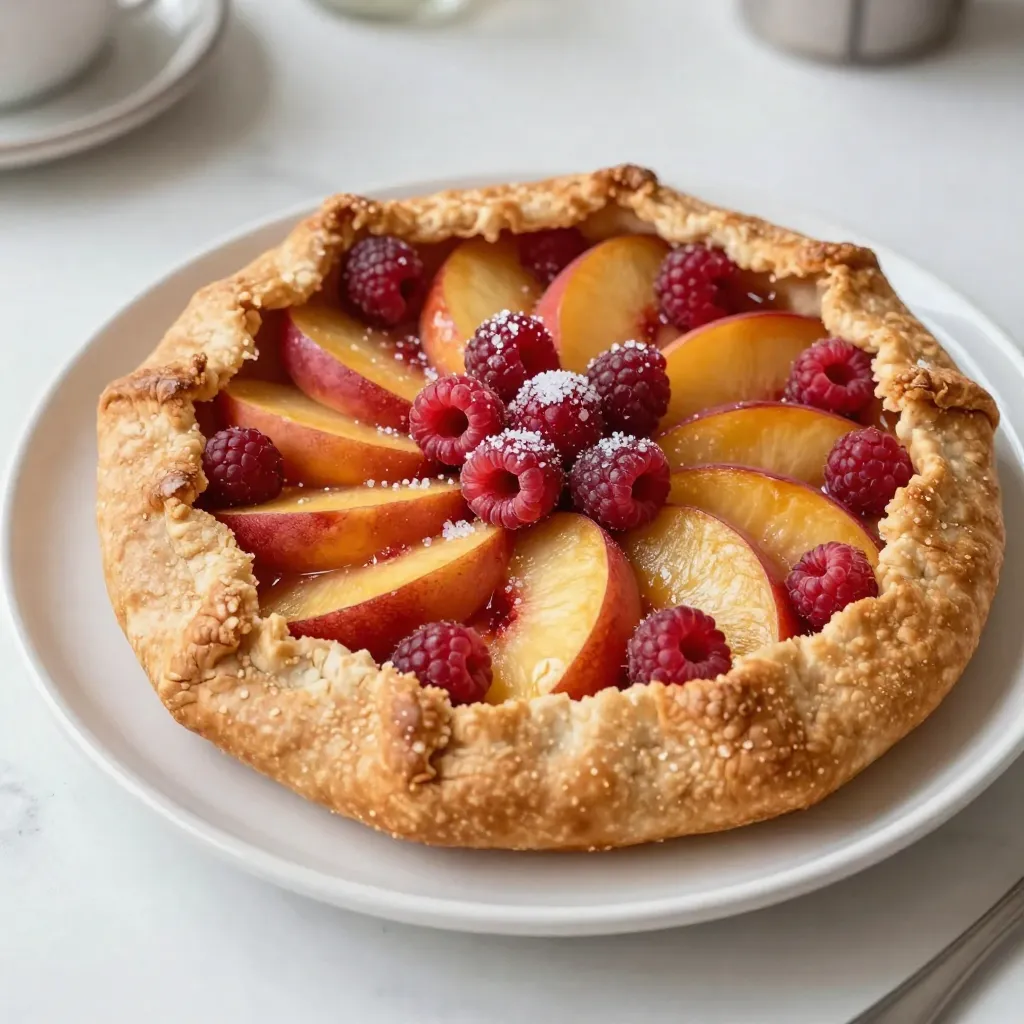
Want a dessert that’s easy and full of flavor? This Peach Raspberry Galette is the answer! Juicy peaches and tart raspberries come together in a flaky crust, creating a treat you’ll love. I’ll guide you through the simple steps, from picking the best fruit to reheat tips. Let’s dive into the delicious world of this simple dessert that impresses every time!
Why I Love This Recipe
- Fresh Flavors: The combination of juicy peaches and tart raspberries creates a refreshing balance that’s perfect for summer.
- Easy to Make: This galette requires minimal ingredients and is simple to assemble, making it a great option for bakers of all levels.
- Rustic Presentation: The free-form style of the galette gives it a charming, homemade look that impresses without the fuss.
- Versatile Dessert: Serve it warm or at room temperature, and pair it with ice cream or whipped cream for an indulgent treat.
Ingredients
Fresh Fruits Needed
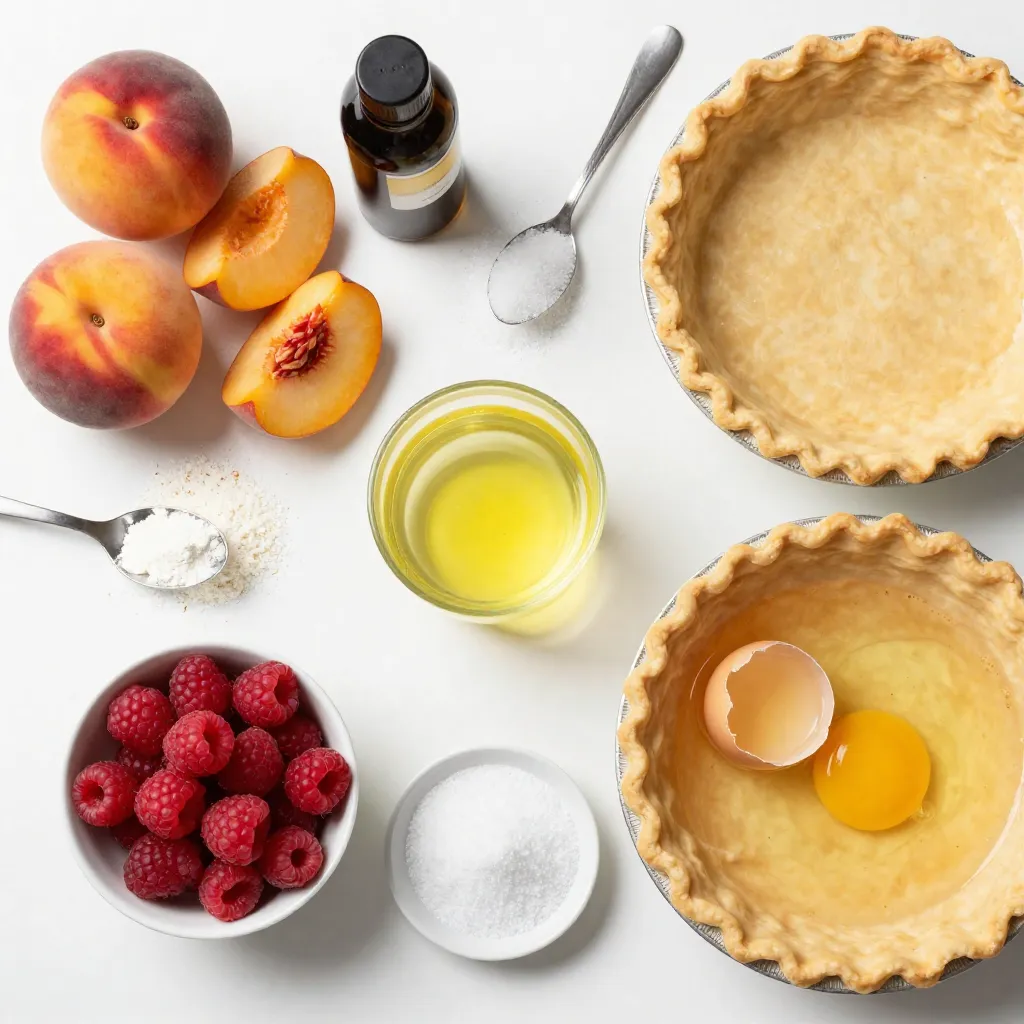
For this Peach Raspberry Galette, you will need:
- 2 ripe peaches, thinly sliced
- 1 cup fresh raspberries
Using ripe fruits is key. They add natural sweetness and vibrant flavor. Peaches should feel soft but not mushy. Raspberries should be plump and firm. Both fruits shine together in this simple dessert.
Essential Baking Ingredients
You’ll need a few basic baking ingredients:
- 1 ready-made pie crust (or your own homemade crust)
- 1 tablespoon cornstarch
- 1 egg, for egg wash
- Pinch of salt
The pie crust holds everything together. You can buy one or make it fresh. Cornstarch helps thicken the juices from the fruit. This keeps the galette from getting too soggy. The egg wash gives your crust a lovely golden color.
Additional Ingredients for Flavor
To enhance the taste, gather these ingredients:
- 1 tablespoon freshly squeezed lemon juice
- 2 tablespoons granulated sugar, divided
- 1 teaspoon pure vanilla extract
- 1 tablespoon coarse sugar, for sprinkling
Lemon juice adds a nice zing. It brightens up the sweet flavors. Granulated sugar sweetens the fruit mixture and the crust. Vanilla extract brings warmth and depth. Coarse sugar on top makes the crust extra crunchy and sweet.
With these ingredients, you set the stage for a delicious Peach Raspberry Galette.

Step-by-Step Instructions
Prepping the Oven and Baking Sheet
First, heat your oven to 400°F (200°C). While it warms, get your baking sheet ready. Line it with parchment paper. This step stops the galette from sticking and makes cleanup easy.
Preparing the Fruit Filling
Next, take a medium bowl and add the sliced peaches and raspberries. Pour in the lemon juice and one tablespoon of sugar. Add the vanilla extract, cornstarch, and a pinch of salt. Mix gently until the fruit is well coated. Set this aside to let the flavors mix.
Assembling the Galette
Now, place a lightly floured surface in front of you. Roll out your pie crust into a circle about 12 inches wide. Carefully transfer the crust to the lined baking sheet. Spoon your fruit mixture into the center. Leave about a 2-inch border around the edges. Fold the crust edges over the fruit, creating a rustic look.
Baking the Galette to Perfection
In a small bowl, crack an egg and whisk it. Use a pastry brush to spread the egg wash on the crust. This gives the galette a nice golden color. Sprinkle the remaining sugar and some coarse sugar over the crust. Now, place the galette into the oven. Bake for 25-30 minutes. You want the crust to be golden and the fruit to bubble. Once it’s done, let it cool for about 10 minutes before slicing. This helps the juices settle nicely.
Tips & Tricks
How to Choose the Best Peaches and Raspberries
To make your galette shine, select ripe peaches and fresh raspberries. Look for peaches that feel slightly soft when you press them. They should have a sweet scent and a vibrant color. Avoid ones with blemishes. For raspberries, pick ones that are plump and firm. They should be deep red and not mushy. Check for any signs of mold or decay. Fresh fruit helps create the best flavor in your galette.
Perfecting the Crust
A great crust is key to a tasty galette. If you use a ready-made pie crust, choose one that is all-butter for rich flavor. If you make your own, use cold butter and chill the dough in the fridge. Roll the dough evenly to about 12 inches wide. Keep a light hand while folding the edges. This creates a rustic look and holds the filling well. Dust the surface with flour to prevent sticking.
Achieving the Best Egg Wash Finish
An egg wash adds a lovely shine to your galette. Crack one egg in a bowl and whisk it well. Use a pastry brush to coat the crust’s edges lightly. This will turn golden brown as it bakes. For extra crunch and sweetness, sprinkle coarse sugar on top of the egg wash. This simple step enhances your galette’s appearance and makes it more inviting.
Pro Tips
- Choose Ripe Fruits: For the best flavor, select peaches that are slightly soft to the touch and fragrant. Raspberries should be plump and vibrant in color. This ensures a naturally sweet and juicy filling.
- Homemade Crust Option: If you’re feeling adventurous, try making your own pie crust from scratch. It’s easier than you might think and will elevate the overall taste and texture of your galette.
- Let It Cool: Allow the galette to cool for at least 10 minutes before slicing. This helps the juices set, making for cleaner slices and a more enjoyable presentation.
- Serve with Ice Cream: For a delightful dessert experience, serve warm slices of galette with a scoop of vanilla ice cream or a dollop of whipped cream. The contrast of temperatures will enhance your tasting experience.
Variations
Substituting Other Fruits
You can switch up the fruits in your galette. Try using apples, pears, or blueberries instead. Each fruit brings its unique flavor. Apples add a crisp bite. Pears lend a sweet softness. Blueberries burst with juice. Mix and match for fun flavor combos. Just keep the sugar amount similar, so the filling stays sweet.
Flavored Crust Options
A plain crust is great, but you can add flavor. Try mixing in some cinnamon or nutmeg into the dough. This adds warmth and depth. You can also use a store-bought crust with a touch of lemon zest. It brightens the taste. Experiment with different flavors to find your favorite.
Adding Spices for Extra Flavor
Spices can make your galette shine. Consider adding a pinch of ginger or cardamom to the fruit mixture. These spices enhance the fruit’s natural taste. You can also sprinkle some vanilla bean seeds for a rich note. If you like, add a touch of almond extract for a nutty finish. Spices open up new flavor paths, making each slice special.
Storage Info
How to Store Leftover Galette
To keep your galette fresh, let it cool to room temperature first. Then, wrap it tightly in plastic wrap or place it in an airtight container. Store it in the fridge for up to three days. This helps keep the crust from getting too soggy. If you plan to eat it later, try not to cover it too tightly.
Tips for Reheating
When you’re ready to enjoy leftover galette, preheat your oven to 350°F (175°C). Place the galette on a baking sheet lined with parchment paper. Heat it for about 10-15 minutes. This will make the crust crispy again and warm the fruit. Avoid using the microwave, as it can make the crust soft and chewy.
Freezing Options for Long-Term Storage
If you want to save your galette for longer, freezing is a great option. Wrap it tightly in plastic wrap, then place it in a freezer bag. You can freeze it for up to three months. When you’re ready, let it thaw in the fridge overnight before reheating. This keeps the flavors intact and ensures a tasty treat later on!
FAQs
Can I make the crust from scratch?
Yes, you can make the crust from scratch. A simple dough needs flour, butter, and cold water. Mix them until crumbly, then form a ball. Chill it for 30 minutes before rolling. This gives you a fresh taste and great texture. If you want ease, use a ready-made pie crust. It saves time and works well too.
How do I know when the galette is done?
Look for a golden-brown crust. The edges should be crisp and firm. You can also check the fruit. It should bubble and look juicy. If the crust is golden and the fruit is bubbling, your galette is ready to come out of the oven.
What can I serve with a peach raspberry galette?
Serve your galette warm or at room temperature. A scoop of vanilla ice cream pairs perfectly. Whipped cream adds a nice touch, too. You can also sprinkle fresh raspberries on top for color and flavor. Enjoy experimenting with toppings!
You now have all the tools to make a delicious peach raspberry galette. We explored the fresh fruits, essential baking ingredients, and flavor enhancers. You learned step-by-step instructions, tips for perfecting your bake, and ways to add your twist. I shared storage tips to keep leftovers fresh. Remember, this dish is versatile. You can swap fruits or add spices. With practice, you’ll find your favorite version. Enjoy the baking process, and share your galette with others. It’s a real trea

Peach Raspberry Galette
Ingredients
- 2 pieces ripe peaches, thinly sliced
- 1 cup fresh raspberries
- 1 tablespoon freshly squeezed lemon juice
- 2 tablespoons granulated sugar, divided
- 1 teaspoon pure vanilla extract
- 1 tablespoon cornstarch
- 1 ready-made pie crust or your own homemade crust
- 1 piece egg, for egg wash
- 1 tablespoon coarse sugar, for sprinkling
- 1 pinch salt
Instructions
- Begin by preheating your oven to 400°F (200°C). While it's warming up, prepare your baking sheet by lining it with parchment paper to prevent sticking.
- In a medium-sized mixing bowl, gently combine the sliced peaches and raspberries. Add the freshly squeezed lemon juice, 1 tablespoon of the granulated sugar, the pure vanilla extract, cornstarch, and a pinch of salt. Carefully toss the mixture until the fruit is evenly coated with the ingredients, then set it aside to allow the flavors to meld beautifully.
- On a lightly floured surface, roll out the pie crust into a rough circle, aiming for about 12 inches in diameter. Once rolled out, transfer the crust onto the prepared baking sheet, taking care to keep it centered.
- Spoon the luscious fruit mixture into the center of the crust, making sure to leave a generous 2-inch border clear around the edges to allow for folding.
- Gently fold the edges of the crust over the fruit filling, creating a rustic pleated border as you go. This not only holds the filling but also adds a delightful texture.
- In a small bowl, crack the egg and whisk it until smooth. Use a pastry brush to apply the egg wash over the exposed crust. This will give your galette a beautiful golden glaze when baked. Sprinkle the remaining tablespoon of granulated sugar and the coarse sugar evenly over the crust for a touch of sweetness and a lovely crunch.
- Place the galette in the preheated oven and bake for 25-30 minutes, or until the crust is a rich golden brown and you can see the fruit bubbling joyfully.
- Once baked, carefully remove the galette from the oven and allow it to cool for about 10 minutes before slicing. This will help the juices settle.


![To make delicious zucchini chocolate chip muffins, gather these simple ingredients: - 1 medium zucchini, grated (approximately 1 cup) - 1 cup all-purpose flour - 1/2 cup whole wheat flour - 1/2 teaspoon baking soda - 1 teaspoon baking powder - 1/2 teaspoon salt - 1/2 teaspoon ground cinnamon - 2 large eggs - 1/2 cup granulated sugar - 1/4 cup packed brown sugar - 1/3 cup vegetable oil - 1 teaspoon vanilla extract - 1/2 cup semi-sweet chocolate chips - 1/4 cup walnuts or pecans, chopped (optional for extra crunch) These ingredients blend well and create a moist muffin. The grated zucchini adds moisture while keeping the muffins healthy. The mix of flours gives a great texture. The sugars balance the chocolatey goodness. You can add nuts for crunch, or leave them out if you want a smoother bite. If you want the full details on how to put this all together, check out the Full Recipe. Start by preheating your oven to 350°F (175°C). This step is key for even baking. Prepare a muffin tin by lining it with paper liners or lightly greasing each cup. In a medium mixing bowl, whisk together the following dry ingredients: - 1 cup all-purpose flour - 1/2 cup whole wheat flour - 1/2 teaspoon baking soda - 1 teaspoon baking powder - 1/2 teaspoon salt - 1/2 teaspoon ground cinnamon Mix well to ensure they are evenly combined. This helps the muffins rise properly. In a larger bowl, crack two large eggs and beat them lightly. Add: - 1/2 cup granulated sugar - 1/4 cup packed brown sugar Mix these until smooth and slightly frothy. This gives the muffins a nice texture. Slowly add in: - 1/3 cup vegetable oil - 1 teaspoon vanilla extract Stir until fully combined. Next, gently fold in 1 cup of grated zucchini. Make sure it’s evenly distributed for great flavor. Gradually add the dry mixture to the wet ingredients. Use a spatula to fold them together gently. It’s okay if there are a few lumps. Next, divide the batter evenly among the prepared muffin cups, filling each about two-thirds full. Place the muffin tin in the preheated oven and bake for 18 to 20 minutes. To check if they are done, insert a toothpick into the center. It should come out clean or with a few moist crumbs. Once done, let the muffins cool in the pan for about 5 minutes before transferring them to a wire rack. This makes them easier to remove without breaking. For the full recipe, refer to the earlier sections. To make great muffins, follow these tips closely: - Use Fresh Ingredients: Fresh baking powder and soda give the best rise. - Room Temperature Eggs: Bring your eggs to room temperature for better mixing. - Preheat the Oven: Always preheat your oven to 350°F (175°C) before baking. - Fill Muffin Cups Evenly: Fill each cup about two-thirds full for a nice dome shape. Overmixing can lead to tough muffins, which we want to avoid. Here’s how: - Mix Dry and Wet Separately: Always mix dry and wet ingredients in separate bowls first. - Fold Gently: When combining, use a spatula to fold the mixture. Stop mixing when you see a few lumps. - Don’t Worry About Lumps: A few lumps are okay; they will bake out in the oven. Presentation is important for making your muffins look as good as they taste. Try these ideas: - Serve Warm: Serve your muffins warm from the oven for a cozy feel. - Use a Basket: Place muffins in a basket lined with a cloth napkin for a rustic touch. - Garnish: Lightly dust with powdered sugar or drizzle melted chocolate on top for flair. For the full recipe of Zucchini Chocolate Chip Muffins, check the earlier section. {{image_4}} You can make these muffins gluten-free easily. Just swap the all-purpose flour with gluten-free flour blend. Make sure it has xanthan gum to help with texture. This change keeps the muffins soft and tasty. You can also mix in other fun ingredients. Dried fruits like raisins or cranberries add sweetness. Chopped nuts like walnuts or pecans give a nice crunch. You can even add seeds for more texture. Just be sure to adjust the amount of chocolate chips if you add more. If you want a lower sugar treat, you have options. Use less granulated sugar or brown sugar. You can try sugar substitutes like stevia or monk fruit sweetener. These options can help keep the muffins sweet without the extra calories. Just remember to check the package for measurements. Check out the [Full Recipe] for more details! To keep your zucchini chocolate chip muffins fresh, store them in an airtight container. You can place them on the counter. They will stay tasty for about three days. If you want to keep them longer, consider freezing. Freezing muffins is easy and smart. First, let the muffins cool completely. Then, wrap each muffin in plastic wrap or aluminum foil. Place them in a freezer-safe bag or container. These muffins can last up to three months in the freezer. When you want one, just take it out and reheat. Reheating is quick and simple. You can use a microwave or an oven. For the microwave, heat one muffin for 15 to 20 seconds. For the oven, preheat to 350°F (175°C). Place the muffin on a baking sheet and warm it for about 5 to 10 minutes. Enjoy your warm muffin with a cup of coffee or tea! To make zucchini chocolate chip muffins from scratch, follow this simple recipe. Start by preheating your oven to 350°F (175°C). Prepare your muffin tin with liners or grease it. In one bowl, mix all-purpose flour, whole wheat flour, baking soda, baking powder, salt, and cinnamon. In another bowl, beat two eggs, then add granulated and brown sugar. Mix in vegetable oil and vanilla extract. Fold in grated zucchini, then combine the wet and dry ingredients. Lastly, add chocolate chips and any nuts if you want. Fill the muffin cups and bake them for 18 to 20 minutes. For the full recipe, check the instructions above. Yes, you can use frozen zucchini in this recipe. Just make sure to thaw it first. Drain any excess water to avoid soggy muffins. Frozen zucchini works well because it retains most of its flavor. It also provides moisture, just like fresh zucchini does. This option is great if you have leftover zucchini from last season. Zucchini offers several health benefits. It is low in calories and high in fiber. This can help keep you feeling full longer. Zucchini is also packed with vitamins like A and C. These vitamins support your immune system and skin health. Plus, adding veggies to your muffins makes them more nutritious. It’s a great way to sneak in some extra greens. Zucchini muffins can last up to a week when stored properly. Keep them in an airtight container at room temperature. If you want them to last longer, you can freeze them. Just make sure they are completely cooled before freezing. They can stay fresh in the freezer for about three months. Yes, you can substitute other types of flour in this recipe. Almond flour, oat flour, or coconut flour are all good options. Each type of flour can change the texture slightly, so keep that in mind. If you use a gluten-free flour blend, make sure it has a binding agent, like xanthan gum, for the best results. You now have a clear guide for making delicious zucchini chocolate chip muffins. We covered the ingredients and step-by-step instructions needed to bake them perfectly. Plus, I shared tips on avoiding common baking mistakes and ways to store your muffins. You can also explore tasty variations to suit your taste. Remember, these muffins are not just yummy; they bring the added health benefits of zucchini. Happy baking, and enjoy these treats!](https://dishtreats.com/wp-content/uploads/2025/06/0cde25ea-110a-42a8-bcb8-b8faa9becc28-768x768.webp)
